The following parameters are common for all masks:
Blending– Determines how multiple masks are blended together over a single correction layer:
Overwrite– Sets the current mask as it is, without blending it with the masks before it (standing on its left). Add– Adds the current mask to the result of all masks before it. This is the default mode. Subtract– Subtracts the mask from the result of all masks before it. Multiply– Multiplies the mask with the result of all masks before it. Divide – Divides the mask by the result of all masks before it.
Element– Specifies the render element from which the mask is read. Only render elements available in the rendered image and compatible with the type of the mask are listed in the drop down.
Opacity– (Mask opacity multiplier) Determines to what degree the selected layer obscures or reveals the layer beneath it. Even if there’s only one mask child, you can modify its opacity. The opacity is multiplied with the mask color.
Show preview when selected – When enabled, shows a preview of the mask if the mask is selected.
Invert mask – When enabled, inverts the mask results.
UI Text Box
type
info
Image Added – Аdds a new mask layer.
Image Added – Shows all tabs of the currently selected color correction layer
Multiple masks can be combined, e.g. an Exposure layer with two masks to it. The blending mode parameter to the first mask (the one on the left) is not considered and is always grayed out
.
UI Text Box
type
note
Note that all masks are created with Blendingmode set to Add. If there is only one mask child, the blending mode has no effect.
UI Text Box
type
note
When seeing masks in preview (i.e. the Show preview when selected option is enabled), the name of the layer/folder that contains the mask(s) is in bold in the layers tree.
Note that the preview cannot be saved
.
Image Removed – Аdds a new mask layer.
Image Removed – Shows all tabs of the currently selected color correction layer
.
UI Text Box
type
info
Multiple masks can be combined, e.g. an Exposure layer with two masks to it. The blending mode parameter to the first mask (the one on the left) is not considered and is always grayed out.
When a mask is added to a layer, the Show masks' preview option is available in the layer's Parameters tab. This options shows a preview of the masks when selected.
Column
width
5%
Column
width
35%
...
Section
Column
width
60%
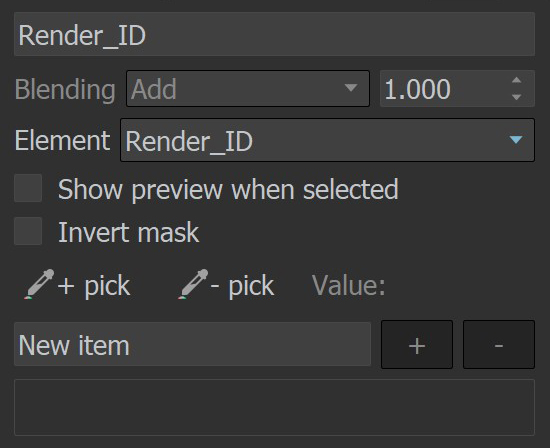
The Integer Mask is used with Render ID, Object ID, and Material ID Render Elements.
+/- Pick – Adds/removes items by picking them from the Render View. When activated and the mouse is inside the Render View, a red square indicates where the value is exactly picked.
Value– Shows the mask ID on hover over the rendered frame. If you click on a selection in the Render View, the current ID is added/removed from the list below, depending on the Pick mode.
New item – A field to type a mask ID manually and then add it to the current selection with the + button.
+ – Adds IDs to the list.
- – Removes IDs from the list.
UI Text Box
type
tip
Each item in the list has a color icon. The color corresponds to the one saved in the respective render element.
UI Text Box
type
tip
Separate items in the list can be changed by double-clicking on them and editing their names.
Column
width
5%
Column
width
35%
...
Section
Column
width
60%
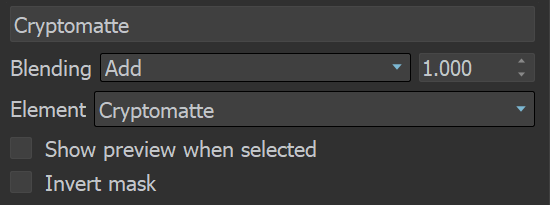
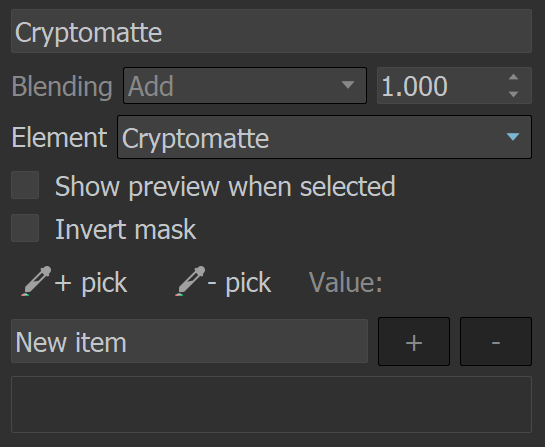
The Cryptomatte Mask is based on the V-Ray Cryptomatte Render Element.
+/- Pick – Adds/removes items by picking them from the Render View. When activated and the mouse is inside the Render View, a red square indicates where the value is exactly picked.
Value– Shows the mask ID on hover over the rendered frame. If you click on a selection in the Render View, the current ID is added to the list below.
New item – A field to type in a mask ID and add it to the current selection with the + button. The text is case insensitive.
+ – Adds IDs to the list.
- – Removes IDs from the list.
UI Text Box
type
tip
Wildcards are allowed in the New item field. The following wildcard characters are supported:
* – matches any number of any characters including none (e.g. "Law*" matches "Law", "Laws", or "Lawyer") ? – matches any single character (e.g. "?at" matches "Cat", "cat", "Bat" or "bat") [abc] – matches one character given in the bracket (e.b. "[CB]at" matches "Cat" or "Bat") [a-z] – matches one character from the range given in the bracket (e.g."Letter[0-9]" matches "Letter0", "Letter2")
UI Text Box
type
tip
Each item in the list has a color icon. The color corresponds to the one saved in the respective render element.
You can create
Separate items in the list can be changed by double-clicking on them and editing their names.
UI Text Box
type
tip
Create Exclude items via the -Pickbutton. This is possible when you have wildcard items and then try to -Pick an item that is not present in the list. For example, we can add all boxes from the scene with a wildcard Box* and then exclude only Box001 with an Exclude item. Exclude items have a minus in their icon so they can be distinguished.
 – Shows all tabs of the currently selected color correction layer