![]()
Page History
This page provides information on the New V-Ray Frame Buffer and its features.
Overview
...
| Section | |||||||||||||||||||||||||
|---|---|---|---|---|---|---|---|---|---|---|---|---|---|---|---|---|---|---|---|---|---|---|---|---|---|
|
...
| UI Expand | |||||||||||||||||
|---|---|---|---|---|---|---|---|---|---|---|---|---|---|---|---|---|---|
| |||||||||||||||||
|

VFB Menu
...
The V-Ray Frame Buffer menu holds the main frame buffer commands. Some of the options are also available in the VFB toolbar for a quick access.
...
Menu | Menu Options | ||||||||||||
|---|---|---|---|---|---|---|---|---|---|---|---|---|---|
File | Save current channel – Saves the currently loaded channel to an image file format. Note that color correction layers are not saved. Save all image channels to separate files – Saves all the render elements to separate files. Select the options ( Save all image channels to single file – Saves the image to a single multi-channel EXR or .vrimg file. Load image – Opens an image file to be previewed in the V-Ray Frame Buffer. Batch image processing – Allows processing of multiple .vrimg files with the same layer tree changes at the same time. Upload image to Chaos Collaboration – Uploads an image to Chaos Cloud Collaboration for sharing and commenting.
|
Save VFB color corrections to render elements – When enabled, all color corrections are saved to the render channels (as opposed to only the RGB and effectsResult channels). | |||||||||||
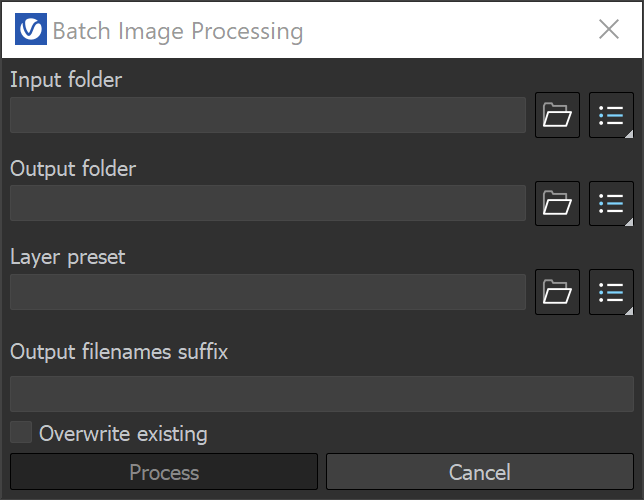
Batch Image Processing
Input folder – Specifies a path to start images. Output folder – Specifies a path for the output images. Layer preset – Specifies a layer tree corrections preset. Output filenames suffix – Specifies a suffix added to the output image filenames. Overwrite existing – Enables overwrite of existing files with the same name in the output folder. | |||||||||||||
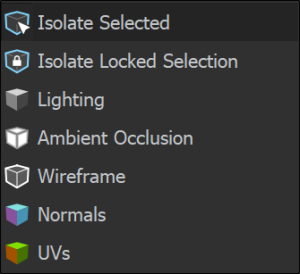
Render | Start interactive rendering – Starts IPR. Abort rendering – Stops the current rendering. Render – Starts rendering. IPR Debug Shading – Enables the Debug shading/Isolate selected options in IPR. The submenu gives access to the following modes: Isolate Selected – Renders only the selected object(s), while the rest of the scene is rendered black. You can also select material or texture nodes to isolate all objects with the assigned shader; | ||||||||||||
Image | Follow mouse – Renders the closest bucket found to the mouse pointer, when using the bucket image sampler. If the progressive sampler is used, V-Ray samples the closest pixels to the mouse pointer. Follow mouse – Drag the mouse over the VFB while rendering to change what part of the image is sampled first; Copy current channel to clipboard – Copies the current channel to the clipboard. Duplicate to host frame buffer – Creates a 3ds Max virtual frame buffer copy of the current VFB. Clear image – Clears the contents of the frame buffer. This is useful when starting a new render to prevent confusion with the previous image. | ||||||||||||
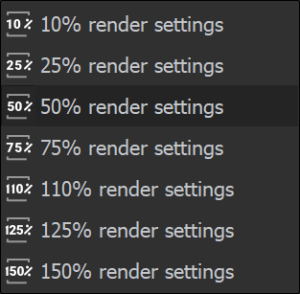
View | Display color space – Specifies the color space, in which the image is displayed. None – Does not specify a color space; Zoom VFB – Zooms in/out the rendered image in the VFB. Zoom 50% – Zooms out to 50%; Channels – Chooses which channels to see. View red channel – Displays the red channel; Test resolution – Enables test resolution in VFB. The submenu allows choosing a percentage of the render resolution to set as the test resolution. You can choose between 10%, 25%, 50%, 75%, 110%, 125% and 150%. Note: This only affects V-Ray and does not affect the native 3ds Max test resolution setting found under 3ds Max's Render Setup dialog. Color clamping – Opens the color clamping submenu options: Force color clamping – Forces color clamping; Use pixel aspect – Enables visualization of the pixel aspect ratio. Flip – Mirrors the image in the VFB. This is a view only option, the flipped image cannot be exported. This function is only active while holding the menu button or the hotkey for the corresponding type of flip. The effect does not interrupt interactive rendering. Flip horizontally– Mirrors the image horizontally. Flip vertically – Mirrors the image vertically. Panorama View – Shows the image in 360° view. Show History – Shows the History panel. Show Layers – Shows the Layers panel. | ||||||||||||
Options | VFB settings – Opens the VFB Settings window where you can adjusts settings for Render View, Render Region, History and Layers. | ||||||||||||

VFB Toolbar
...
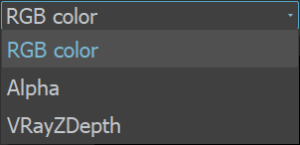
| This dropdown list gives access to render elements rendered for the scene. The selected render element is displayed in the VFB. By default, the RGB color and Alpha render elements are available. Any additional render elements that have been added to the scene also appear in the dropdown list. | |
|---|---|---|
| Displays the coordinates of the mouse pointer. | |
| Specifies the sampled area size. Click the arrow to open a context menu with the available sampled area sizes: 1x1, 3x3, 5x5, and 7x7. | |
| Signifies whether color and display corrections are applied (RGB) or not (Raw) when showing the sampled pixel values at the current mouse pointer position. | |
| Displays the RGB pixel values at the current mouse pointer position before applying any color corrections. | |
| Specifies RGB values. Click the arrow to open a context menu with the available options. None – Does not specify the RGB value. | |
| Displays the Hue, Saturation and Value of the pixel under the current mouse position when HSV is selected. | |
| Displays the HEX of the pixel under the current mouse position when Web is selected. | |
| Displays the 8bit color palette of the pixel under the current mouse position when 8bit is selected. | |


| Locks the mouse pointer coordinates and displays information for the selected pixel. | |
| Shows corrected colors. | |
| Shows the V-Ray Log which contains messages about the render process. The V-Ray Log is also available in the Log tab. | |
| Displays the red channel. | |
| Displays the green channel. | |
| Displays the blue channel. | |
| Displays the Alpha channel. | |
| Saves the image to disk. Select and hold the icon to bring up the submenu: Save current channel – Saves the current channel to an image file format; | |
| Clears the contents of the frame buffer. This is useful when starting a new render to prevent confusion with the previous image. | |
| Renders the closest bucket found to the mouse pointer, when using the bucket image sampler. If the progressive sampler is used, V-Ray samples the closest pixels to the mouse pointer. With this option enabled, you can right-click on the image and select Lock bucket starting point to lock the bucket (or sampling) starting point. | |
| Enables/disables test resolution in the VFB. Select and hold to bring up the submenu to select the percentage of the render resolution to set as the test resolution. Note: This only affects V-Ray and does not affect the native 3ds Max test resolution setting found under 3ds Max's Render Setup dialog.
|
|
| Renders regions in the VFB. See the New V-Ray Frame BufferRender Region section for more information. | |
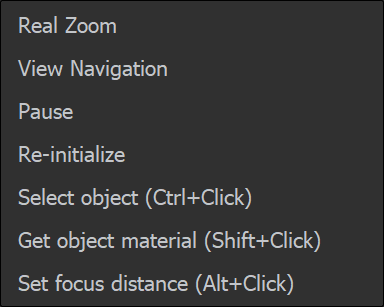
| Enables the Debug shading/Isolate selected options in IPR. Select and hold to choose between the different modes: Isolate Selected – Renders only the selected object(s), while the rest of the scene is rendered black. You can also select material or texture nodes to isolate all objects with the assigned shader; |
|
| Starts IPR. If there is more than one camera in the scene, hold left mouse button to display a list of the available cameras. | |
| Stops the current rendering. | |
| Starts rendering. If there is more than one camera in the scene, hold left mouse button to display a list of the available cameras. When pressing Shift + this button, starts Render last and the last rendered viewport/camera is rendered. | |
| Pauses interactive rendering when using V-Ray GPU. | |
| Refreshes interactive rendering. | |
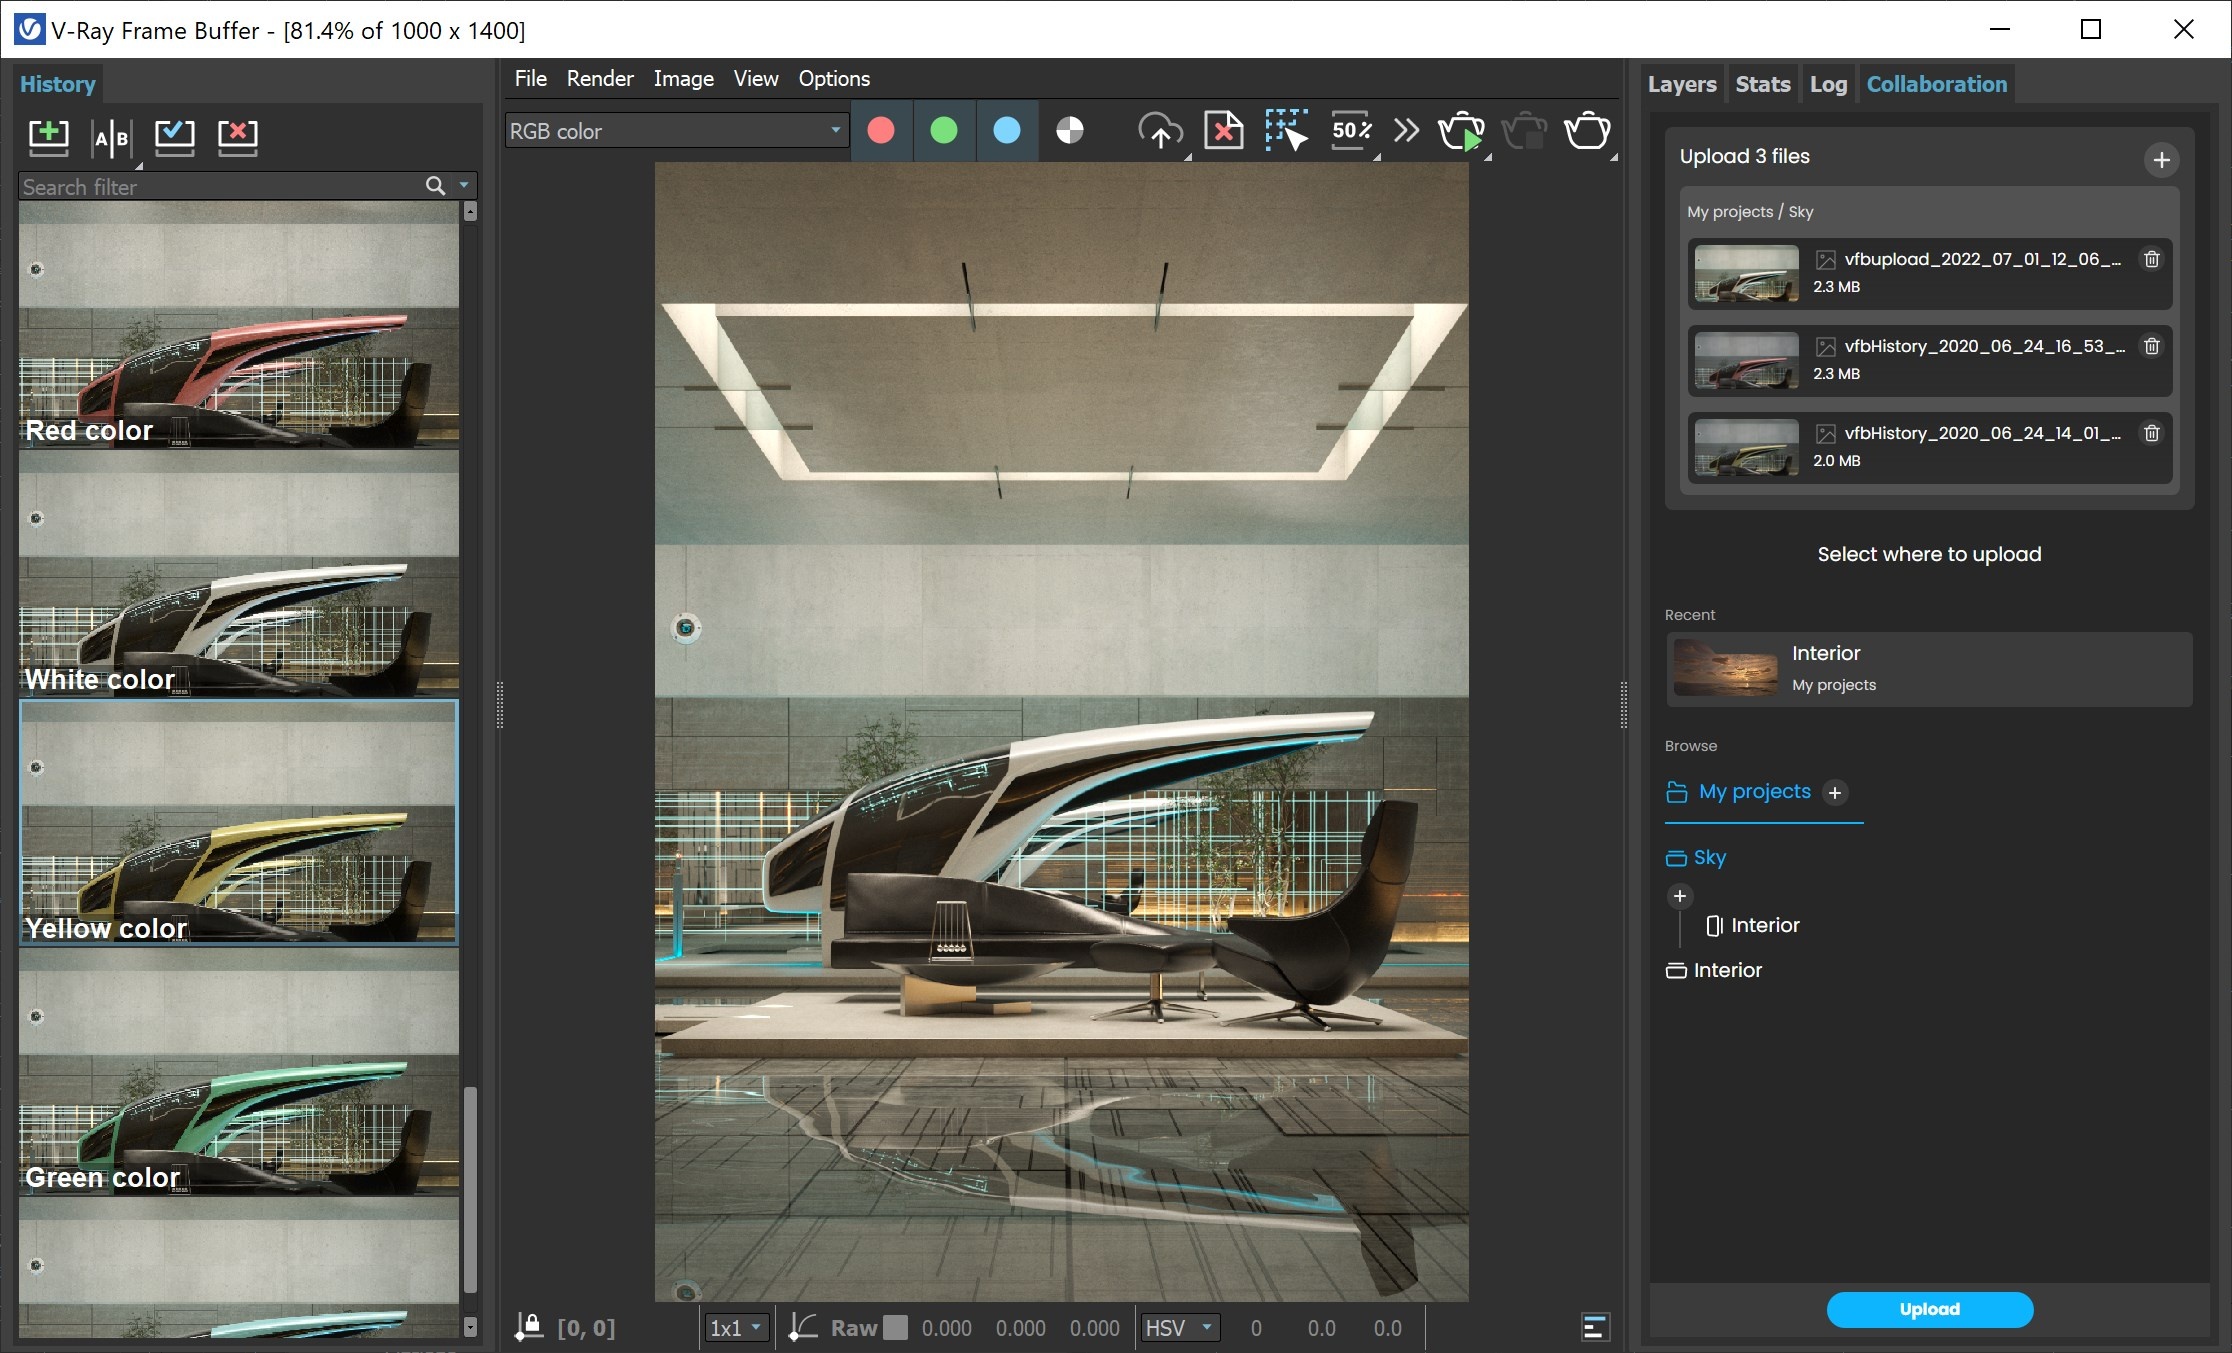
Render History
...
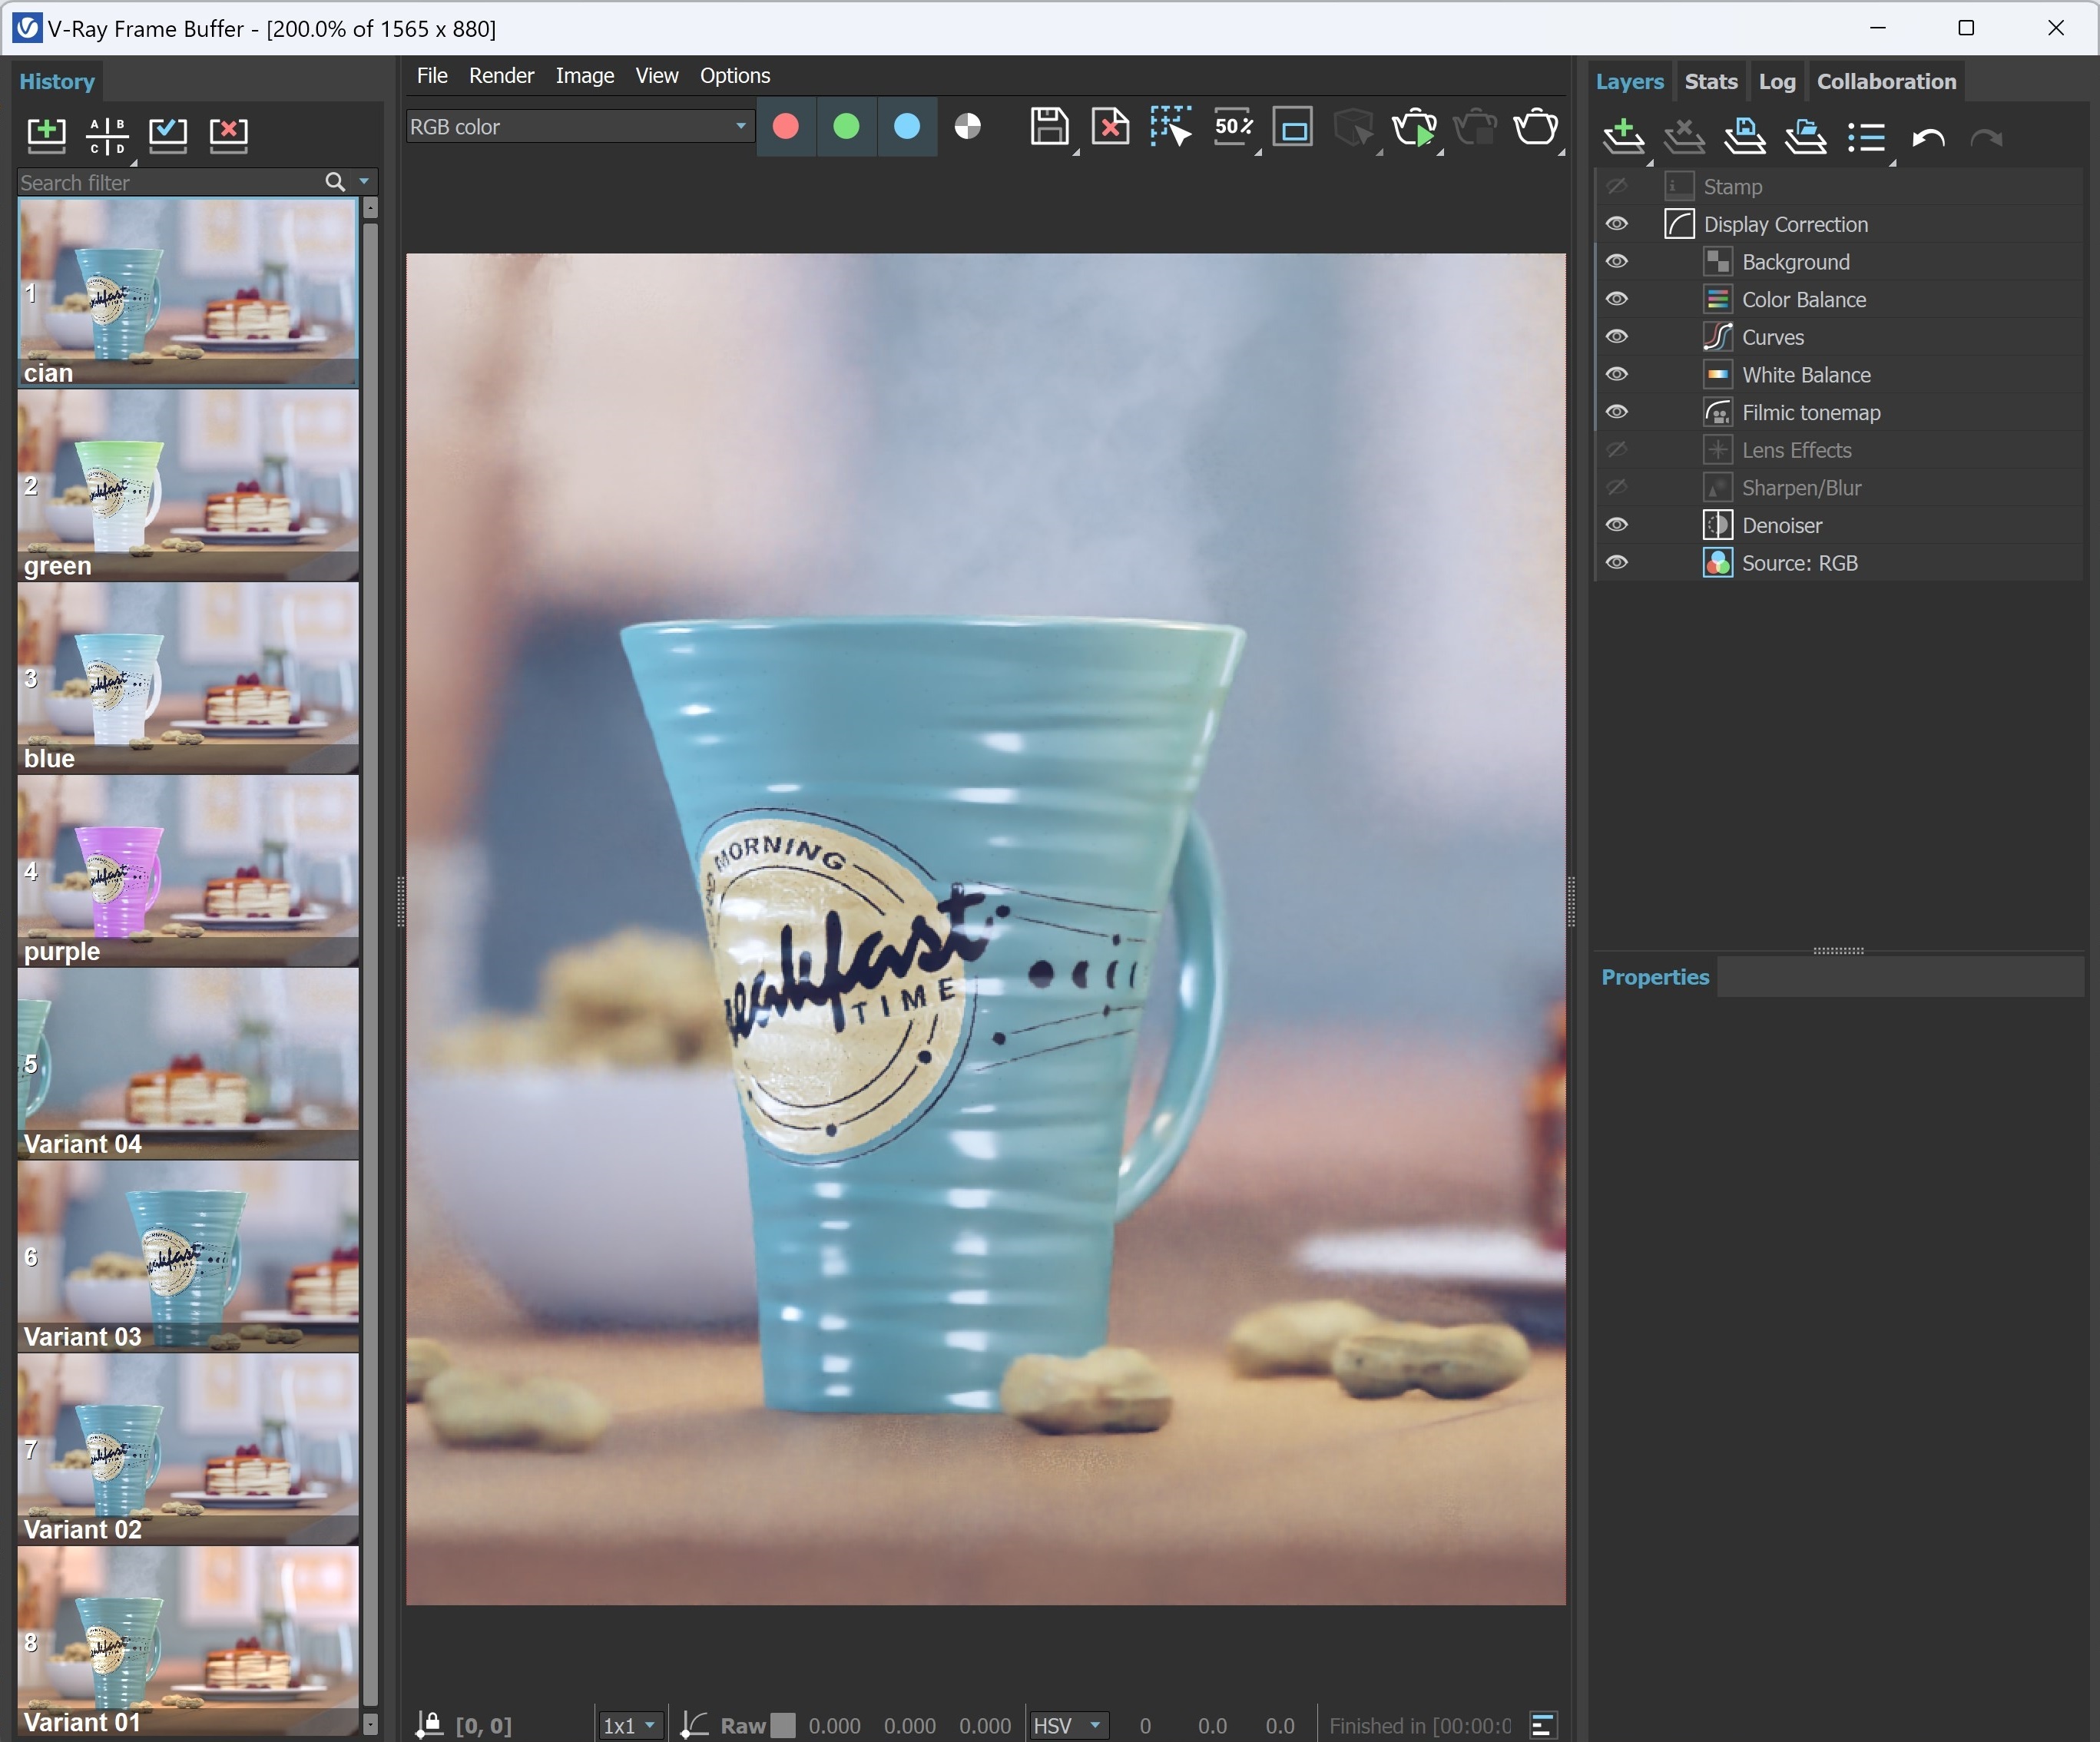
The V-Ray VFB keeps a history of previously rendered images, and lists each with a number, thumbnail, and textual details in the Render history panel. Up to four images can be called from the history to be compared in the VFB (as shown below). History files are stored as .vrimg files in a user-specified folder. Render history settings can be configured in the VFB Settings window.
...
| UI Text Box | ||
|---|---|---|
| ||
If you want to keep the layers that come with the Max scene, turn the Auto Load Layers option off from VFB > Options > History tab. If you want to load layers from an external image, enable the Auto Load Layers option and check how you save those images. |
Layers
...
The redesigned V-Ray Frame Buffer includes a suite of color corrections and tools for adjusting the image. The tools are added as layers and displayed in a layer tree. You can enable or disable a particular tool using the visibility icon (![]() ). The
). The ![]() icon indicates that a layer is disabled.
icon indicates that a layer is disabled.
...
| Command | Description |
|---|---|
| Reset | Resets all changes done to the selected layer. |
| Save | Saves the layer as a preset. |
| Load | Loads a preset for the selected layer. |
| Delete | Deletes the selected layer. |
| Save as LUT | Bakes all the color corrections to a LUT file. |
| New Layer | Creates a new layer. |
| Duplicate | Duplicates the selected layer. |
| Blend Modes | Specifies how the selected layer blends with the result from all layers below it. |
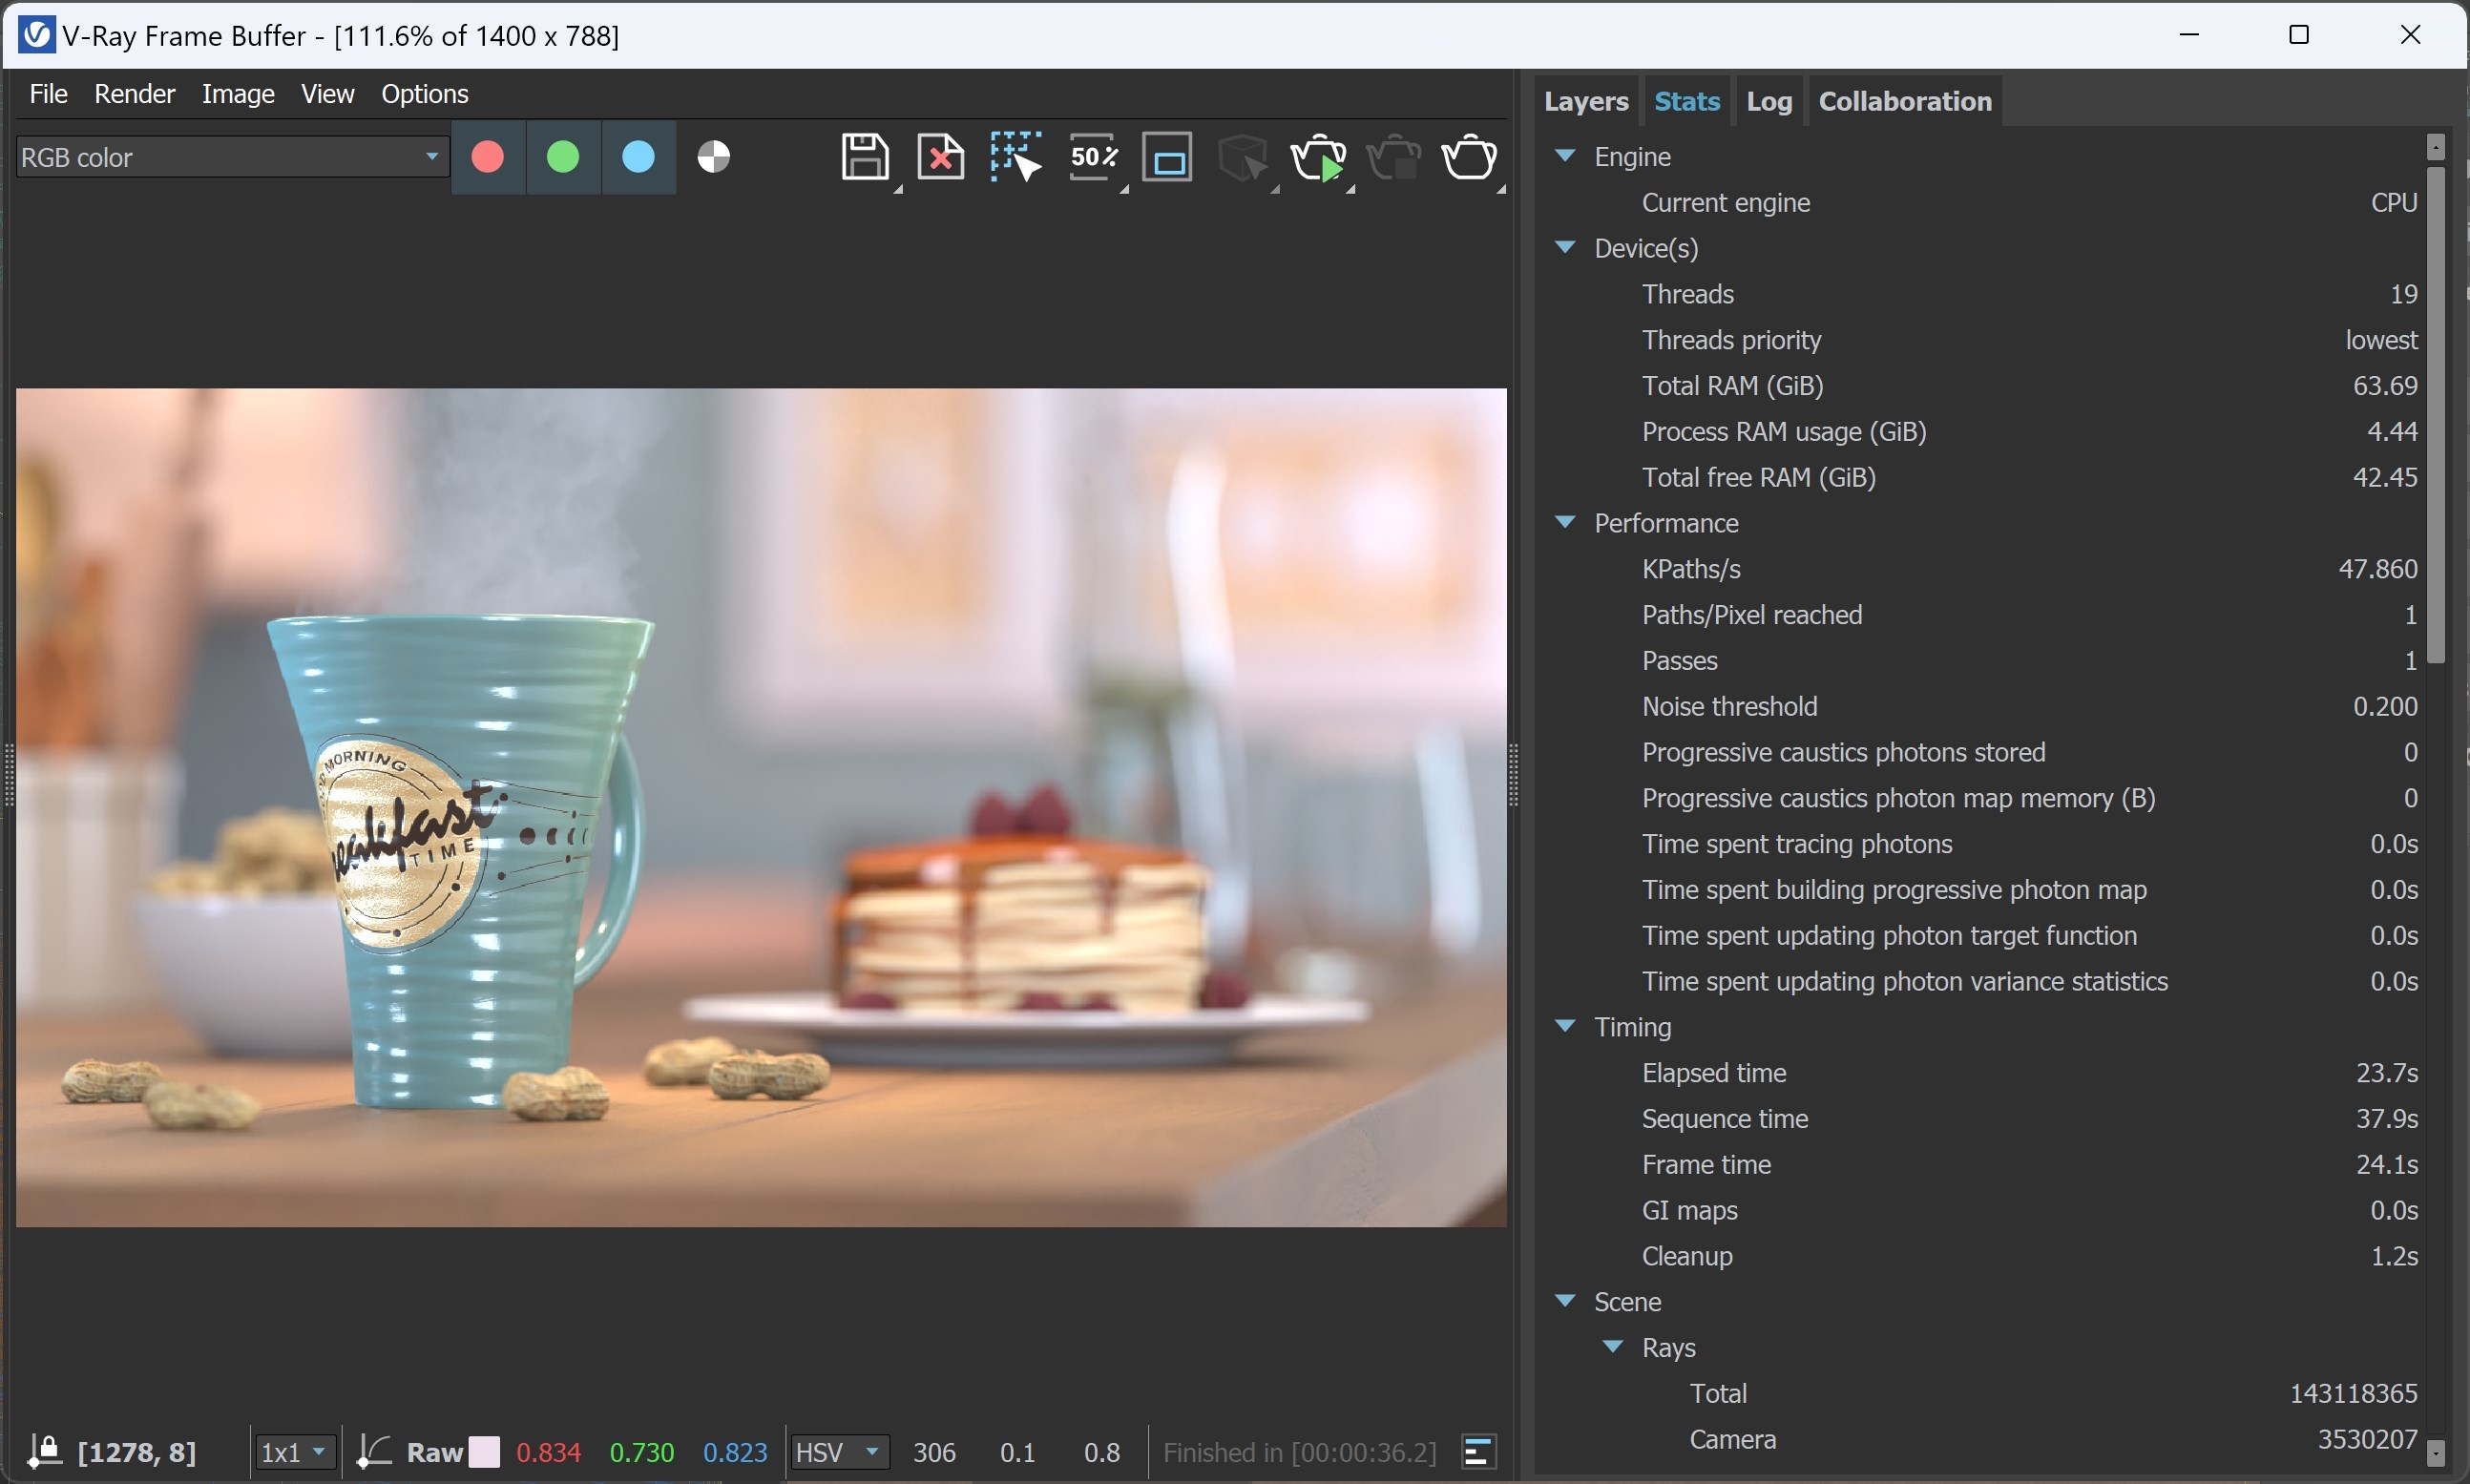
Stats
...
The V-Ray Frame Buffer allows monitoring of different statistics and information about your scene in the Stats panel. The exact contents of the Stats change depending on the scene, the rendering mode (interactive vs production, bucket vs progressive) and others.
...
| Section | |||||||||||||||
|---|---|---|---|---|---|---|---|---|---|---|---|---|---|---|---|
|
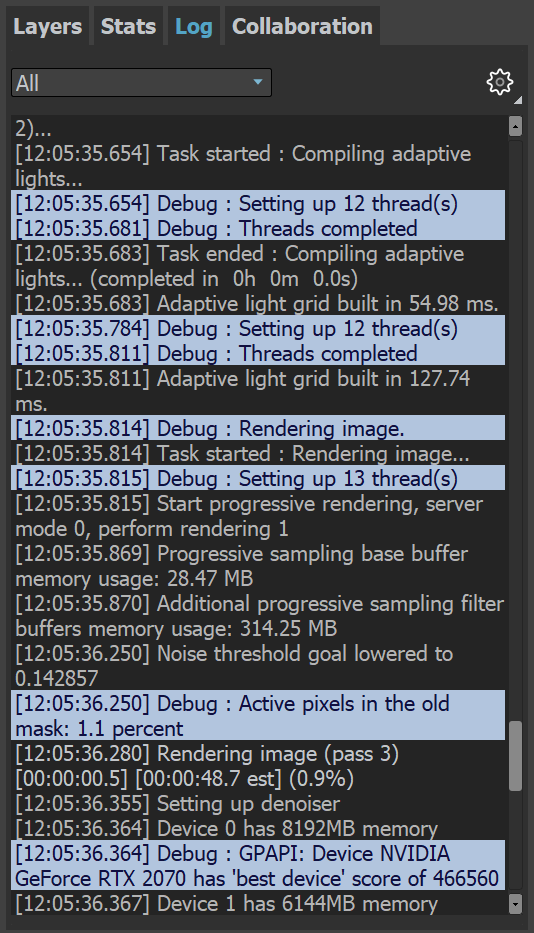
Log
...
The Log panel provides messages about the render process. Verbosity control is available and you can filter the type of messages shown in the Log: All, Error Only, Error & Warnings, or Error, Warnings & info. Additional options are available when you click the Open options ![]() button:
button:
...
| Section | |||||||||||||||
|---|---|---|---|---|---|---|---|---|---|---|---|---|---|---|---|
|
Collaboration
...
The Collaboration tab provides a collaboration tool for sharing your work with other users. You can upload images from the VFB to the Chaos Cloud Collaboration where other users can add comments and annotations.
...
| Section | |||||||||||||||
|---|---|---|---|---|---|---|---|---|---|---|---|---|---|---|---|
|
...
Example: How to use Cloud Collaboration to fast-forward design reviews in the cloud
| Align | ||
|---|---|---|
| ||
|
VFB Shortcuts
...
These shortcuts navigate through the VFB image. Please note that the VFB window must have the current focus for the shortcuts to have effect:
...
| Mouse | Description |
| Mouse wheel | Zoom in/Zoom out |
| Double-click left button | Zoom to 100% |
| Middle button dragging | Pan (hand tool) |
| Ctrl+Shift+Left click | Zoom in the rendered image |
| Ctrl+Shift+Right click | Zoom out the rendered image |
| Keyboard | Description |
| Global | |
| H | Show/hide history |
| P | Show/hide only layers tree |
| Ctrl+L | Show/hide whole right panel |
| F11 | Toggle full screen |
| S | Show/hide VFB settings |
| History/Render View | |
| E | Enable history A/B/C/D compare mode |
| Q | Enable history A/B horizontal compare mode |
| W | Enable history A/B vertical compare mode |
| N | Edit a note in VFB History panel |
| 1-9 | Load the respective image from the new VFB history |
| Layers/Property Panel | |
| Ctrl+Y | Redo various actions related to layers such as create, delete, reorder, or modify a layer. |
| Ctrl+Z | Undo various actions related to layers such as create, delete, reorder, or modify a layer. |
| Layers | |
| Del | Delete layer |
| Message Log | |
| Esc | Close search |
| Ctrl+F | Activate the Search field in Log tab |
| Return | Find next |
| Shift+Return | Find previous |
| Render View | |
| Esc | Abort render |
| Ctrl+C | Copy the VFB image to the Windows clipboard; the image is copied exactly as it appears on the screen (meaning sRGB/LUT/OCIO etc. corrections are applied). The full resolution image is copied to the clipboard, even if the VFB view is zoomed in/out. |
| Ctrl+O | Load image |
| L | Lock the mouse pointer coordinates and display information for the selected pixel, i.e. activate the Lock pixel info coordinates button. |
| Arrow keys | Pan image left, up, right, down |
| A | Switch to Alpha channel |
| B | View Blue channel |
| G | View Green channel |
| R | View Red channel |
| Page Down | View next channel |
| Page Up | View previous channel |
| * | Zoom to 100% |
| + / = | Zoom in |
| -/_ | Zoom out |
| F | Fit region or whole image in the VFB |
| M | Hold to flip image horizontally |
| Shift + M | Hold to flip image vertically |
...
| UI Text Box | ||
|---|---|---|
| ||
VFB Shortcuts are customizable in the VFB > Options > Shortcuts tab. |
VFB IPR Options
...
| Section | |||||||||||||||
|---|---|---|---|---|---|---|---|---|---|---|---|---|---|---|---|
|
...
| UI Text Box | ||
|---|---|---|
| ||
Note that the keyboard shortcuts work only within the VFB window. The Undo shortcut (Ctrl+Z) affects the layers when new VFB has focus. |
Render Region
...
Region rendering can be used in both IPR and Production modes to isolate only part of the frame for rendering. Usually, when a render region is used, you would like to save the whole frame instead of the region only.
...
Saving multi-channel .exr files writes just the render region data in the file by default but it can be set to save full frame instead. If the file output is saved through Render Setup > V-Ray tab > Frame buffer > V-Ray raw image file, in order to save the render region with the rest of the frame, add VRayOptionRE render element and set its exr data window option to Whole Image. Saving multi-channel .exr files from VFB > Save all channels to single file saves the render region when it is enabled from the VFB. This happens even if you have selected a render region on top of the already rendered frame, without an actual region used in the rendering process. To save the full frame from VFB, disable the render region.
Notes
...
| Fancy Bullets | ||
|---|---|---|
| ||
|