Versions Compared

Key

  • This line was added.
  • This line was removed.
  • Formatting was changed.

...

Section
Column
width55%

After the sun is created, its parameters appear in the Attribute Editor.


Enabled – Turns the sun light on and off.

Intensity multiplier – The brightness of the sun. Since the sun is very bright by default, you can use this parameter to reduce its effect. See the Notes section for more information. For more information, see the Intensity Multiplier example below.

Turbidity – Determines the amount of dust in the air, which in turn affects the color of the sun and sky. Smaller values produce a clear, blue sky and sun similar to what is seen in rural areas, while larger values make the sun and sky more yellow and orange as seen in a big city. For more information, see the Turbidity example below.

Ozone – Affects the color of the sun light. Available in the range between 0.0 and 1.0. Smaller values make the sunlight more yellow, while larger values make it bluer. For more information, see the Ozone example below.

Size multiplier – Controls the visible size of the sun. This affects the appearance of the sun disc as seen by the camera and reflections, as well as the blurriness of the sun shadows. For more information, see the Size Multiplier example below.

Sky Model – Determines the procedural model used to generate the VRaySky texture. See the Sky model example below for more information.

Hosek et al. – The VRaySky procedural texture is generated based on the Hosek et al. method. 
Preetham et al. – The VRaySky procedural texture is generated based on the Preetham et al. method.

CIE Clear – The VRaySky procedural texture is generated based on the CIE method for a clear sky.
CIE Overcast – The VRaySky procedural texture is generated based on the CIE method for a cloudy sky.
PRG Clear Sky – The VRaySky procedural texture is generated based on the Improved method which has enhanced sunrise and sunset sky. See the Improved Sun and Sky courseware page for more information on how to use it.

Horiz Illumination – Specifies the intensity (in lx) of the illumination on horizontal surfaces coming from the sky. This parameter is enabled when one of the CIE Sky Models are selected.

Color Mode – This mode affects the way the Filter Color hues the sun and sky light. 

Filter – Shifts the V-Ray Sun and Sky hue towards the color specified by the Filter Color.
Direct – Takes the Filter Color for the V-Ray Sun light. In this case, the light intensity is controlled by the Intensity multiplier and it does not depend on the Sun's position in the sky.
Override – Takes the Filter Color for the V-Ray Sun light, however the intensity is controlled by the position of the V-Ray Sun in the sky. 

Filter Color – Shifts the hue of the V-Ray Sun and Sky system towards the specified color.

Ground Albedo – Sets the color of the V-Ray Sun and Sky system's ground.

Blend Angle – Specifies the angle in degrees where blending will occur between the horizon line and sky. Values close to 0.0 produce a sharper horizon line, while larger values produce a softer horizon line.

Horizon Offset – Allows the user to manually lower the horizon line.

Column
width5%


Column
width40%

Image RemovedImage Added


Anchor
intensityMultiplier
intensityMultiplier

...

Section
Column
width55%

Clouds On – Enables the cloud system.

Ground Shadows – When disabled, the entire scene is covered by a single shadow or fully illuminated depending on whether the sun is blocked by a cloud at the current camera position. This is useful for smaller scenes and speeds up the rendering process. When enabled, V-Ray calculates the shadows precisely at every point of the scene. This provides a lot more definition to the shadows but may slow down the rendering process. It is helpful in larger scenes where the effect of the clouds is more visible. See the Ground Shadows example below for more information.

Density – Controls the density of the cumulus and stratus types of clouds. A value of 1 fills up the sky with clouds. See the Density example below for more information.

Density Multiplier – A multiplier to the Density parameter. The larger the value, the darker the sky becomes at the horizon. Setting a value of 0 results in no clouds, regardless of the Density value.

Variety – Controls the variety of the cumulus and stratus types of clouds. See the Variety example below for more information.

Seed – Generates a random value, based on the given number, to change the pattern of the clouds and the contrails.

Cirrus Amount – The maximum value of 1 fills the sky with cirrus clouds. Decreasing the value, lowers the presence of such clouds. When set to 0, the cirrus clouds are completely gone. See the Cirrus Amount example below for more information.

Longitude Offset (m) – Moves the cloud system along the longitude. For more information, see the Longitude and Latitude Offset example below.

Latitude Offset (m) – Moves the cloud system along the latitude. For more information, see the Longitude and Latitude Offset example below.

Height (m) – Specifies the cloud position in height. For more information, see the Height example below.

Thickness (m) – Lower values make the cumulus and stratus types of clouds thin and sheer/lucent, while higher values make them full and heavy. For more information, see the Thickness example below.

Longitude Phase (%) – Controls the phase by longitude and it can be used to fine-tweak the cumulus and stratus clouds appearance. The appearance of the clouds loops at 0, 100, 200, etc. This parameter can be animated to resemble natural clouds appearance.

Latitude Phase (%) – Controls the phase by latitude and it can be fine-tweak the cumulus and stratus clouds appearance. The appearance of the clouds loops at 0, 100, 200, etc. This parameter can be animated to resemble natural clouds appearance.

Column
width5%
 
Column
width40%

Image Removed

...

Enable Contrails – When enabled, plane contrails are simulated in the sky.

Number of Contrails – Determines the number of contrails generated. See the Number of Contrails example below for more information.

Contrails Strength – Determines the opacity of the contrails. Lower values create less opaque trails, which look older. See the Contrails Strength example below for more information.

Contrails Distortion – Determines the amount of distortion in the contrails. See the Contrails Distortion example below for more details.

Contrails Offset Long. (m) – Offsets the contrails by a given value, according to the X axis. See the Contrails Offset example below for more information.

Contrails Offset Lat. (m) – Offsets the contrails by a given value, according to the Y axis. See the Contrails Offset example below for more information.

Contrails TimeDetermines how far the contrails progress along the sky. See the Contrails time animation below for more details.

Column
width5%
 
Column
width40%

Image Added


...

Anchor
shadow
shadow

Example: Ground Shadows


The following example shows the effect of the Ground Shadows option. 

Before after
afterLabelon
beforeLabeloff
Panel
borderStylenone

Image Added

Panel
borderStylenone

Image Added


...

Anchor
density
density
Anchor
variety
variety

Section
Column
width45%

Example: Density


The Density parameter controls the amount of clouds in the sky. The higher the value, the higher the amount of clouds appearing in the render. 

Image slider
Panel
borderStylenone

Image Added

Density = 0

Panel
borderStylenone

Image Added

Density = 0.4

Panel
borderStylenone

Image Added

Density = 0.8

Column
width5%


Column
width45%

Example: Variety


This example shows how the Variety parameter affects the distribution and look of the clouds.

Image slider
Panel
borderStylenone

Image Added

Variety = 0

Panel
borderStylenone

Image Added

Variety = 0.5

Panel
borderStylenone

Image Added

Variety = 1


...

Anchor
cirrus
cirrus
Anchor
offset
offset

Section
Column
width45%

Example: Cirrus Amount


This example shows how increasing the Cirrus Amount increases the appearance of the cirrus clouds in the render.


Image slider
Panel
borderStylenone

Image Added

Cirrus Amount = 0

Panel
borderStylenone

Image Added

Cirrus Amount = 0.5

Panel
borderStylenone

Image Added

Cirrus Amount = 1

Column
width5%


Column
width45%

Example: Longitude and Latitude Offset


This example shows how changing the Longitude and Latitude offsets affects the appearance of the clouds.


Image slider
Panel
borderStylenone

Image Added

No offset

Panel
borderStylenone

Image Added

Longitude Offset = -250, Latitude Offset = 0

Panel
borderStylenone

Image Added

Longitude Offset = -250, Latitude Offset = 500


...

Anchor
height
height
Anchor
thick
thick

Section
Column
width45%

Example: Height


Notice how the clouds change their position in the sky with increasing the Height value.

Image slider
Panel
borderStylenone

Image Added

Height = 500

...

Example: Ground Shadows


The following example shows the effect of the Ground Shadows option. 

off
Before after
afterLabelon
beforeLabel

Panel
borderStylenone
Image Removed

Image Added

Height = 1000

Panel
borderStylenone
Image Removed

Image Added

...

Height = 1500

...

Column

...

width

...

5%

Example: Density


The Density parameter controls the amount of clouds in the sky. The higher the value, the higher the amount of clouds appearing in the render. 


Column
width45%
Section
Column
width25%


column
Column
width50%

Example: Thickness


The thickness parameter specifies how full the clouds are. Smaller values make them more thin and sheer, while higher values make them look heavy.

Image slider
Panel
borderStylenone
Image Removed

Image Added

Density Thickness = 0200

Panel
borderStylenone
Image Removed

Image Added

Density Thickness = 0.4500

Panel
borderStylenone
Image Removed

Image Added

Density Thickness = 0.8800


...

Anchor

...

con1

...

con1
 

Section

...

Column

...

width

...

45%

Example:

...

Number of Contrails


This example shows how the Variety parameter affects the distribution and look of the clouds. 

Note that the contrails are spread randomly across the sky. In most cases, the camera does not capture all of the contrails.

Image slider
minLabel5
startIndex1
maxLabel40
Section
Column
width25%


Column
width50%
image-slider
Panel
borderStylenone

Image Added

Number of contrails 5

Image Removed

Variety = 0

Panel
borderStylenone

Image Added

Number of contrails 20

Image Removed

Variety = 0.5

Panel
borderStylenone

Image Added

Number of contrails 40

Image Removed

Variety = 1

Column
width25%5%


...

Column

...

width

...

45%

...

Example:

...

Contrails Strength


This example shows how

...

the strength parameter makes the contrails more visible and prominent in the sky.

Image slider
minLabel0.1
startIndex1
maxLabel1.0
Section
Column
width25%


Column
width50%
image-slider
Panel
borderStylenone

Image Added

Contrails strength 0.1

Image Removed

Cirrus Amount = 0

Panel
borderStylenone

Image Added

Contrails strength

Image Removed

Cirrus Amount = 0.5

Panel
borderStylenone

Image Removed

Cirrus Amount = 1

Column
width25%


...

Image Added

Contrails strength 1.0


...

Anchor
con2
con2

Section
Column
width45%

Example: Contrails Distortion


The Contrails distortion parameter is used to achieve some variety in the trace line. Move the slider to see the example renders.

Image slider
minLabel0.1
startIndex1
maxLabel1.0

...

Example: Longitude and Latitude Offset 


This example shows how changing the Longitude and Latitude offsets affects the appearance of the clouds. 

Section
Column
width25%


Column
width50%
Image slider
Panel
borderStylenone

Image Added

Contrails distortion 0.1

Image Removed

No offset

Panel
borderStylenone

Image Added

Contrails distortion 0.5

Image Removed

Longitude Offset = -250, Latitude Offset = 0

Panel
borderStylenone

Image Added

Contrails distortion 1.0

Image Removed

Longitude Offset = -250, Latitude Offset = 500

Column
width25%10%


...

Column

...

width

...

45%

...

Example:

...

Contrails Offset


Notice how the clouds change their position in the sky with increasing the Height value. 

The Contrails offset option introduces an offset along the X (Longitude) or Y (Latitude) direction in the sky. Move the slider to see the example renders.

Image slider
startIndex1
Section
Column
width25%


Column
width50%
image-slider
Panel
borderStylenone

Image Added

Contrails offset Longitude 0, Latitude 0

Image Removed

Height = 500

Panel
borderStylenone

Image Added

Contrails offset Longitude 5000, Latitude 0

Image Removed

Height = 1000

Panel
borderStylenone

Image Removed

Height = 1500

Column
width25%


...

Image Added

Contrails offset Longitude 0, Latitude 5000


...

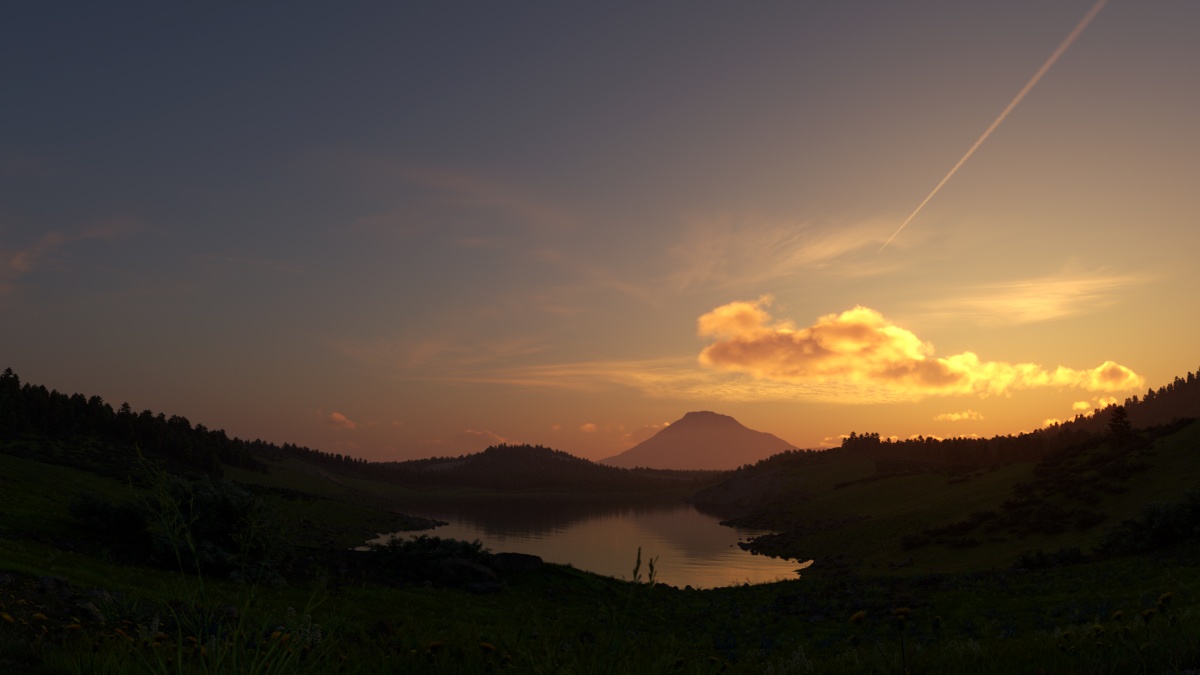
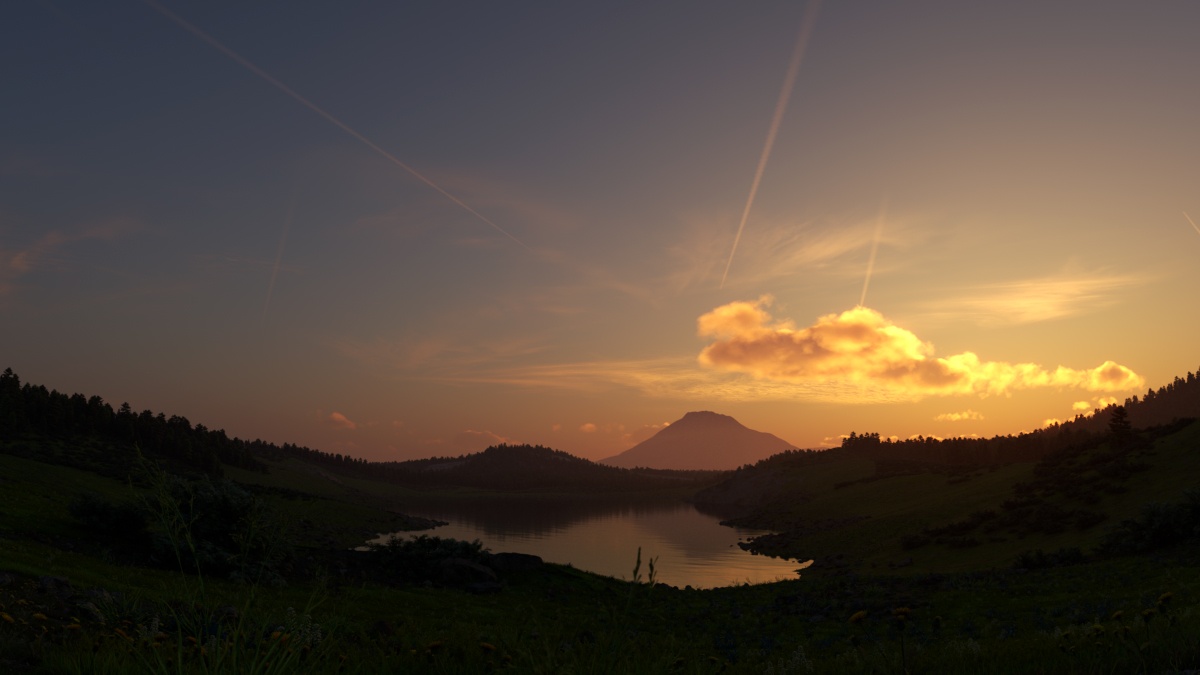
Example: Contrails Time

Anchor

...

con3
con3
 

The thickness parameter specifies how full the clouds are. Smaller values make them more thin and sheer, while higher values make them look heavy. frames in this animation show the Contrails time parameter with values ranging between 0 and 2.0, with a step of 0.2.

Section
Column
width25%


Column
width50%
image-slider

Image Added

panel
borderStylenone
Column
width
25%
Image Removed


Thickness = 200


Panel
borderStylenone

Image Removed

Thickness = 500

Panel
borderStylenone

Image Removed

Thickness = 800


...


V-Ray Sky Texture

...

For more information on the Sky portion of the V-Ray Sun and Sky System, please see the Sky Map (VRaySky) page.

...