The V-Ray Toon Effect offers a quick and easy way to add cartoonish outlines to the objects in your scene. You can apply the outlines to all or just specific objects. In this tutorial, you'll learn how to add a It works best when combined with the V-Ray Toon Effect to specific objectsmaterial.
The scene used here contains a rocky landscape with a futuristic robot housedog geometry. The lighting is done entirely with V-Ray lights - two dome – a combination of several rectangle lights and a V-Ray Sundome light. The closeup shot is rendered with a V-Ray Physical Camera set to Physical ExposureValue.Here you can download a simple test scene and try the V-Ray Toon Effect.
In ||out|| network, create a V-Ray Environment node. Dive inside it.
Create a V-Ray Toon Effect node.
Column
width
5%
Column
width
40%
...
Section
Column
width
55%
Fancy Bullets
type
circle
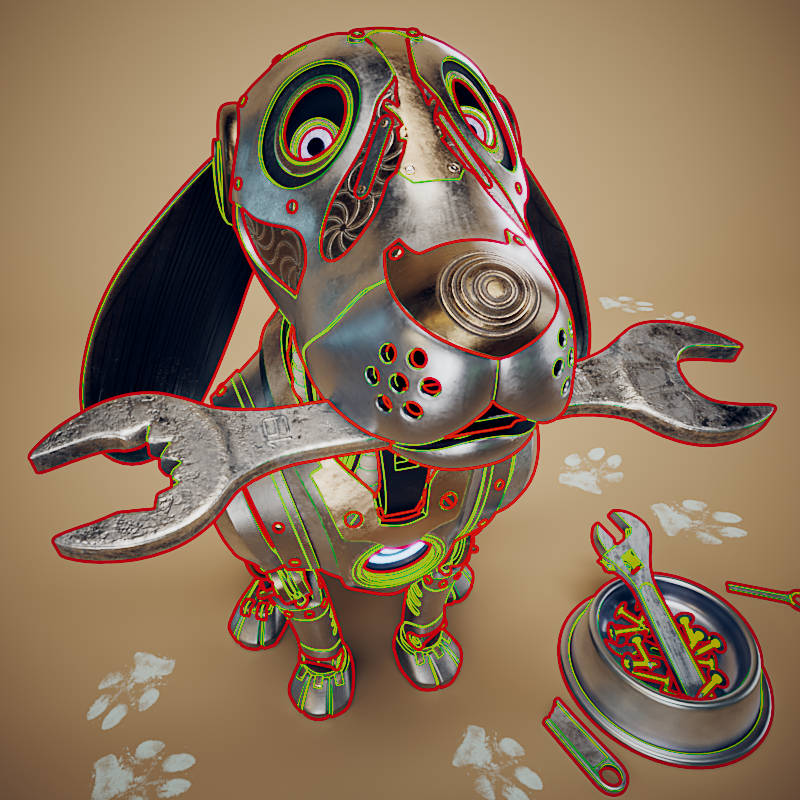
Set the Exclude Type to Include and add the geometry that must be affected by the toon effect.
Alternatively, leave the Exclude Type to its default setting and add the geometry that must not be affected by the toon effect.
Configure the rest of the parameters of the Toon effect. Here, the Line Configure the Toon effect parameters to your liking.
Here, the SilhouetteColor is set to red or RGB (1, 0, 0) and the Silhouette Width is 3 for better visual representation of the effect, while the . The Interior Edges are enabled and their Color is set to green or RGB (0, 1, 0). The Width of the interior edges is 1.5. The rest of the parameters are kept at their default values.
Render.
Column
width
5%
Column
width
40%
Image Removed
...
Image Added
...
Before after
afterLabel
Toon Effect
beforeLabel
No Effect
Panel
borderStyle
none
Image Added
Panel
borderStyle
none
Image Added
...
Section
Column
width
15%
55%
Fancy Bullets
type
circle
For best results add V-Ray Toon materials to all geometry in the scene. Set the material parameters to your liking.
Let's also change the Silhouette Color and the Interior Edges Color. Here, the Silhouette Color is set to EGB (1, 1, 1) and the Interior Edges Color is set to RGB (0.122, 0.122, 0.122).