![]()
Page History
...
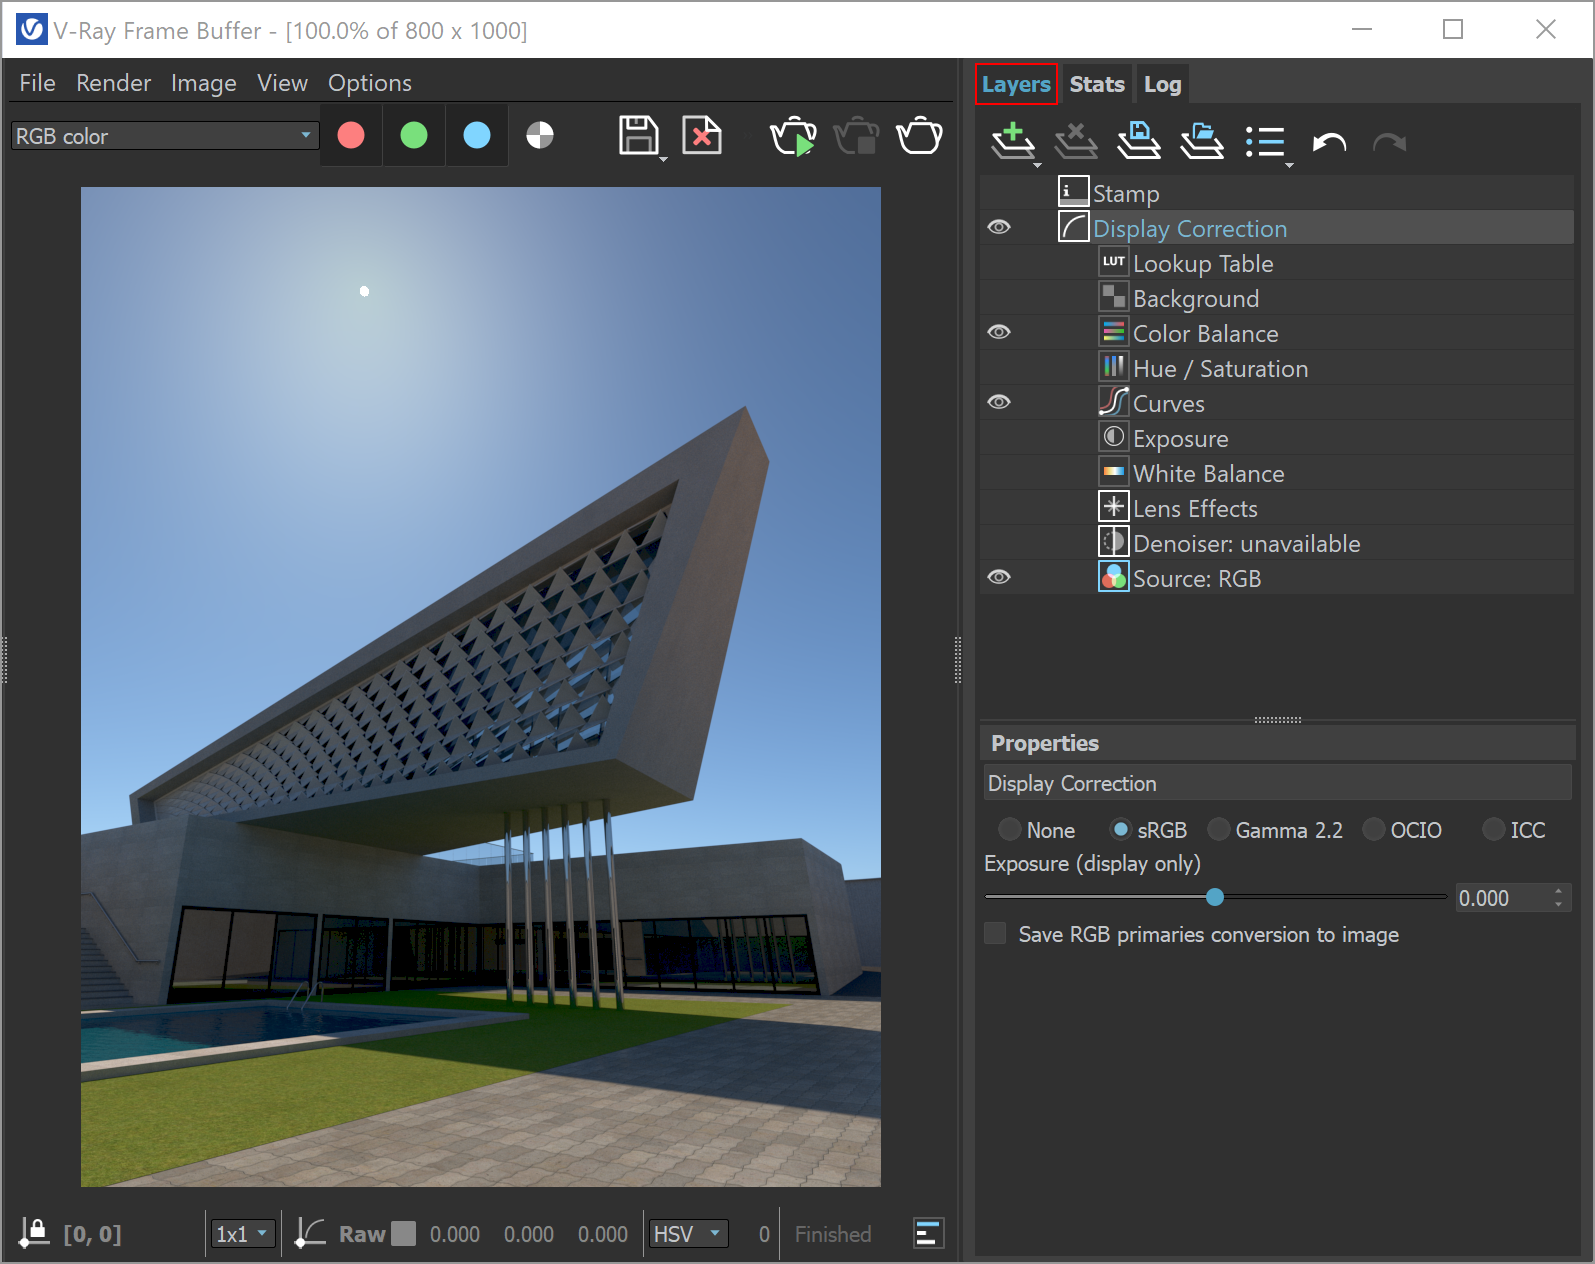
The Layers panel in V-Ray Frame Buffer provides a new powerful workflow for making adjustments to your rendered image. You can bring out render elements and compose them together with individual color corrections in the panel's Composite mode, or deconstruct light contribution in the scene and fine-tune each light individually in the completed render using the VRayLightMix mode. You can also color correct the final render just like you were able to do in the previous version of VFB.
UI Path
...
| Section | |||||||||||||||
|---|---|---|---|---|---|---|---|---|---|---|---|---|---|---|---|
|
Layers Menu
...
Commands available for the Layers panel are located at the top of the panel. Press on the icons to see the expanded list of commands for the stacked buttons.
| Section | |||||||||||||||
|---|---|---|---|---|---|---|---|---|---|---|---|---|---|---|---|
|
| Creates a layer. Multiple layers of the same type can be added. Folder - – Allows grouping multiple layers in folders. This is only available when the Source layer is set to Composite; |
| Deletes the selected layer(s). | |
| Saves a layer tree preset. | |
| Loads a layer tree preset. | |
. | |
| Deletes the selected layer(s). |
| Saves a layer tree preset. |
| Loads a layer tree preset. |
| Quick access to custom layer presets. You must set the path to it in the VFB Settings. |
| Undo various actions related to layers, such as create, delete, reorder, or modify a layer. |
| Redo various actions related to layers, such as create, delete, reorder, or modify a layer. |


...
Layers can be disabled from the visibility icon (![]() ), reordered, nested, stacked in folders, etc.
), reordered, nested, stacked in folders, etc.
...
| UI Text Box | ||
|---|---|---|
| ||
Color corrections and the denoiser channel are saved in the output image just like they are applied in the VFB. Adjustments made to the Display Correction layer are only applied for preview purposes in the VFB. Display corrections are usually saved for 8-bit image formats like JPEG and PNG and not to EXR files, which are expected to be linear. |
...
Display Correction
...
| Section | |||||||||||||||
|---|---|---|---|---|---|---|---|---|---|---|---|---|---|---|---|
|
| UI Text Box | |||
|---|---|---|---|
| |||
The Display Correction layer cannot be removed or reordered. It is always applied on top of all other layers, as it specifies the display color space of the resulting image or composite in the frame buffer When adding a new layer, it is placed on top of the stack and it is considered the foreground (FG). The result of all layers below it is considered the background (BG). Layers are applied from the bottom to the top. Where darker and lighter pixels are mentioned below, it is in relation to mid-grey. |
...
OpenColorIO (OCIO)
...
| Section | |||||||||||||||
|---|---|---|---|---|---|---|---|---|---|---|---|---|---|---|---|
|
Source
...
| Section | |||||||||||||||
|---|---|---|---|---|---|---|---|---|---|---|---|---|---|---|---|
|

LightMix Mode
...
| Section | |||||||||||||||
|---|---|---|---|---|---|---|---|---|---|---|---|---|---|---|---|
|
Composite Layer Properties
...
...
...
| Section | |||||||||||||||||||||
|---|---|---|---|---|---|---|---|---|---|---|---|---|---|---|---|---|---|---|---|---|---|
|
| UI Text Box | ||
|---|---|---|
| ||
The Display Correction layer cannot be removed or reordered. It is always applied on top of all other layers, as it specifies the display color space of the resulting image or composite in the frame buffer. |
OpenColorIO (OCIO)
|

Blend modes
...
| Section | |||||||||||||||||
|---|---|---|---|---|---|---|---|---|---|---|---|---|---|---|---|---|---|
| |||||||||||||||||
| Section | |||||||||||||||||
|
Source
| Section | |||||||||||||||
|---|---|---|---|---|---|---|---|---|---|---|---|---|---|---|---|
|
LightMix Mode
| Section | |||||||||||||||
|---|---|---|---|---|---|---|---|---|---|---|---|---|---|---|---|
|
Lens Effects
| Section | |||||||||||||||
|---|---|---|---|---|---|---|---|---|---|---|---|---|---|---|---|
|
Background
| Section | |||||||||||||||
|---|---|---|---|---|---|---|---|---|---|---|---|---|---|---|---|
|
Constant
| Section | |||||||||||||||
|---|---|---|---|---|---|---|---|---|---|---|---|---|---|---|---|
|
Exposure
| UI Text Box | ||
|---|---|---|
| ||
When adding a new layer, it is placed on top of the stack and it is considered the foreground (FG). The result of all layers below it is considered the background (BG). Layers are applied from the bottom to the top. Where darker and lighter pixels are mentioned below, it is in relation to mid-grey. |
| Blend Mode* | Description |
|---|---|
| Overwrite | Displays the current layer (FG) on top of all layers (BG) without blending. This is the default. |
| Normal | Blends the FG based on the alpha values of the BG. |
| Average | The average of the current layer (FG) and the result from the layers below it (BG). |
| Add | Adds the FG to the BG. |
| Subtract | Subtracts the FG from the BG. |
| Divide | Subtracts the BG from the FG. Dark areas of the render are brightened, while bright areas of the render are not changed significantly. Does not affect completely white areas. |
| Darken | Compares the FG to the BG and takes the darker pixel values of the two. |
| Multiply | Multiplies the FG by the BG. |
| Color Burn | The color of the FG is applied to darker pixels in the BG. |
| Linear Burn | Same as Color Burn but with less contrast. |
| Lighten | Compares the FG to the BG and takes the lighter of the two. |
| Screen | Makes both light and dark areas lighter. |
| Pin Light | Replaces the BG colors depending on the brightness of the FG color. If the FG color is lighter than mid-gray, BG colors darker than the FG color are replaced and vice versa. |
| Difference | Compares the pixels in the BG and FG and subtracts the darker pixels from the brighter ones. |
| Exclusion | Same as Difference but with less contrast. |
| Hue | Uses the hue from the FG , while the value and saturation are taken from the BG. |
| Saturation | Uses the saturation from the FG, while the value and hue are taken from the BG. |
| Color | Uses the hue and saturation from the FG, while the value is taken from the BG. |
| Value | Uses the value from the FG, while the hue and saturation are taken from the BG. |
| Hard Mix (8bit) | Adds the FG to the BG and for each color component returns a value of 255 if the result is 255 or greater, or returns 0 if the result is less than 255. |
| Color Dodge (8bit) | The color of the FG is applied to lighter pixels in the BG. |
| Linear Dodge (8bit) | Same as Color Dodge but with less contrast. |
| Spotlight (8bit) | Same as Multiply, but with twice the brightness. |
| Spotlight Blend (8bit) | Same as Spotlight, but additionally brightens the BG. |
| Overlay (8bit) | Darker pixels become darker where the BG is dark and brighter pixels become brighter where the BG is bright. |
| Soft Light (8bit) | Darker pixels become darker where the FG is dark and brighter pixels become brighter where the FG is bright. |
| Hard Light (8bit) | Spotlight is applied to pixels where the FG is dark and Screen is applied to pixels where the FG is bright. |
| Anchor | ||||
|---|---|---|---|---|
|
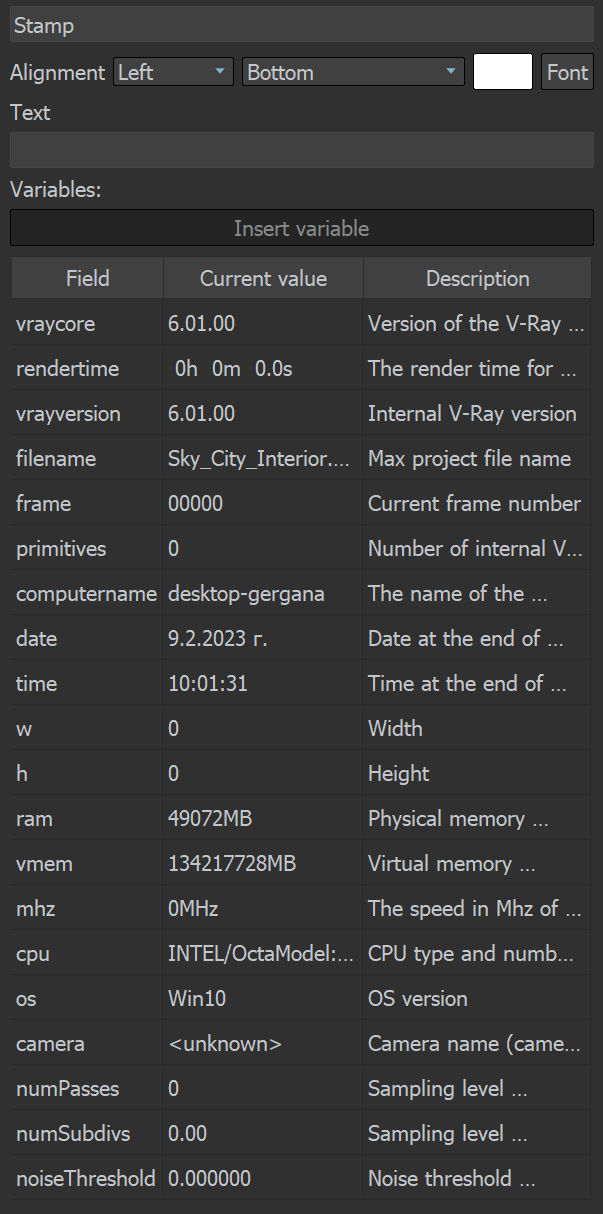
Stamp
...
| Section | |||||||||||||||||||||||||||||||||||||||||||||||||||||||||
|---|---|---|---|---|---|---|---|---|---|---|---|---|---|---|---|---|---|---|---|---|---|---|---|---|---|---|---|---|---|---|---|---|---|---|---|---|---|---|---|---|---|---|---|---|---|---|---|---|---|---|---|---|---|---|---|---|---|
|
Lens Effects
...
| Section | |||||||||||||||||
|---|---|---|---|---|---|---|---|---|---|---|---|---|---|---|---|---|---|
| |||||||||||||||||
| Section | |||||||||||||||||
|
...
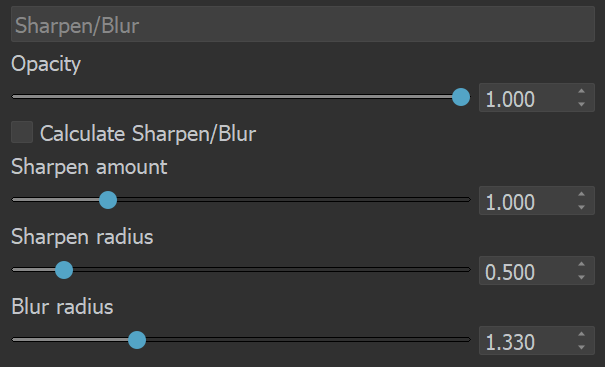
Sharpen/Blur
...
| Section | |||||||||||||||
|---|---|---|---|---|---|---|---|---|---|---|---|---|---|---|---|
|
...
|
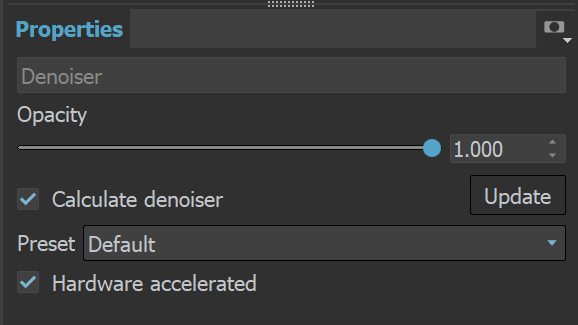
Denoise
...
| Section | ||||||||||||||||
|---|---|---|---|---|---|---|---|---|---|---|---|---|---|---|---|---|
|
...
Filmic Tonemap
...
| Section | |||||||||||||||
|---|---|---|---|---|---|---|---|---|---|---|---|---|---|---|---|
|
Curves
...
| width | 65% |
|---|
This correction allows you remap the image colors with a Bezier curve. The control also allows you to save and load .acv curve files from Adobe PhotoShop.
Controlling the View
Use the mouse wheel to zoom in and out of the curve view. Drag with the middle mouse button to pan.
Controlling the Bezier Points
|
Lookup Table
...
| Section | |||||||||||||||
|---|---|---|---|---|---|---|---|---|---|---|---|---|---|---|---|
|
Curves
...
| Section | |||||||||||||||||||||||||||||||||||||||||||||||||||||||
|---|---|---|---|---|---|---|---|---|---|---|---|---|---|---|---|---|---|---|---|---|---|---|---|---|---|---|---|---|---|---|---|---|---|---|---|---|---|---|---|---|---|---|---|---|---|---|---|---|---|---|---|---|---|---|---|
|
| UI Text Box | ||
|---|---|---|
| ||
When working with .acv files, some approximations are performed because the curves in the .acv files are described by a different mathematical formulas. |
Color Balance
...
| Section | |||||||||||||||
|---|---|---|---|---|---|---|---|---|---|---|---|---|---|---|---|
|
Hue/Saturation
...
| Section | |||||||||||||||
|---|---|---|---|---|---|---|---|---|---|---|---|---|---|---|---|
|
White Balance
...
| Section | |||||||||||||||
|---|---|---|---|---|---|---|---|---|---|---|---|---|---|---|---|
|
Exposure
...
| Section | |||||||||||||||
|---|---|---|---|---|---|---|---|---|---|---|---|---|---|---|---|
|
Constant
...
| Section | |||||||||||||||
|---|---|---|---|---|---|---|---|---|---|---|---|---|---|---|---|
|
Background
...
| Section | |||||||||||||||
|---|---|---|---|---|---|---|---|---|---|---|---|---|---|---|---|
|
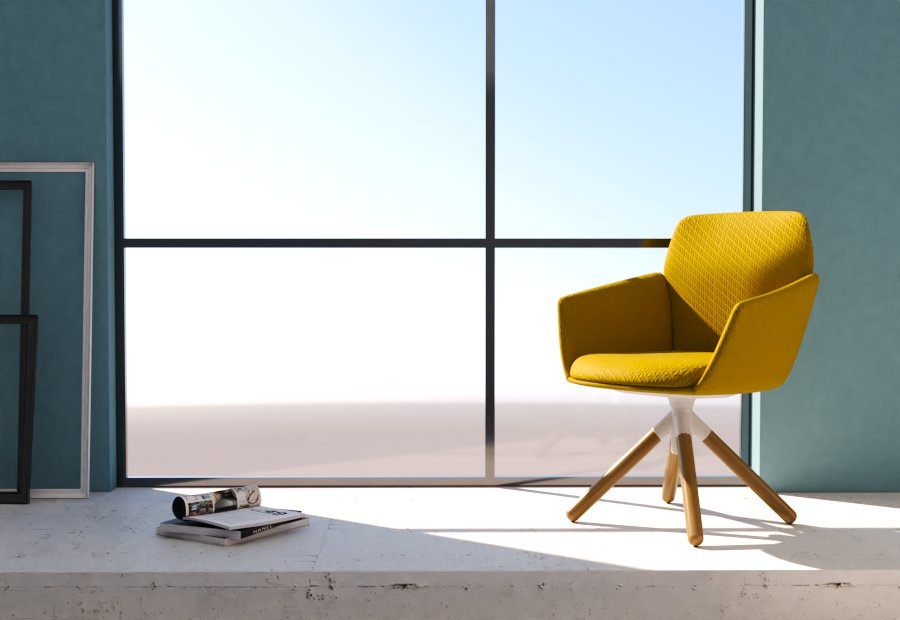
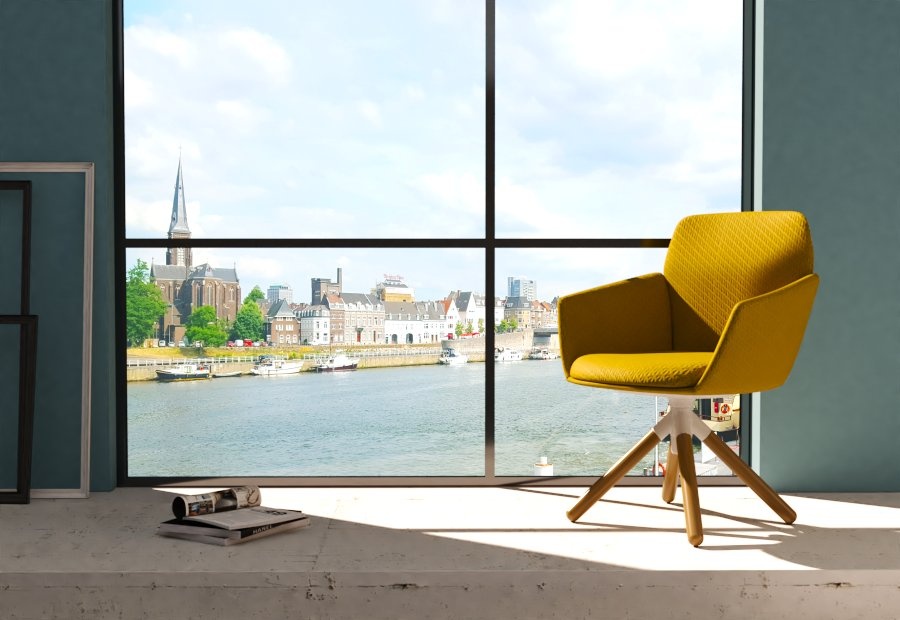
Example: Background
Save your rendering with the uploaded background in the final exported image by enabling the “Save in image” option in the Background layer properties and saving the image as a .jpg file format.
You can easily control the exposure of the background image by changing the “Environment” intensity multiplier of the Light Mix parameters. For this purpose make sure to add a Light Mix render element prior rendering and set the VFB Layers Source to Light Mix.
| Before after | ||||||||||
|---|---|---|---|---|---|---|---|---|---|---|
| ||||||||||
|
Masks
...
| Section | |||||||||||||||
|---|---|---|---|---|---|---|---|---|---|---|---|---|---|---|---|
|

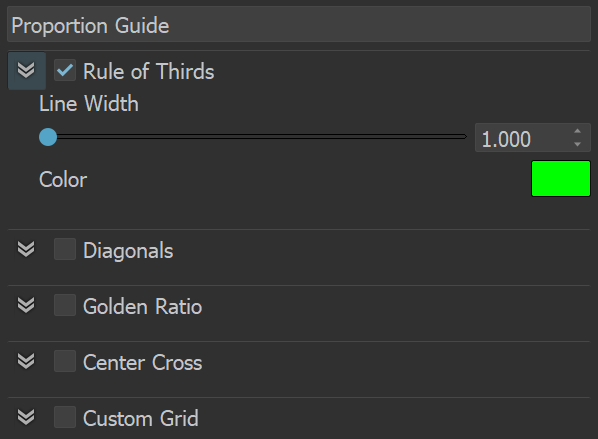
Proportion Guide
...
| Section | |||||
|---|---|---|---|---|---|
|
Click on a point to select it. Draw a rectangle to select multiple points at once. Click and drag on a selected point or its tangents to move them. To add a new point, Ctrl+click on the curve. To delete points, select them and press Del, or alternatively Shift+click on a point. Once a point is selected, you can also use the input coordinates field to modify its position. To display the input coordinates field, either press Enter or right-click on the point and then select Edit point.
Right-click on a point to bring up a context menu with additional options for that point.
| Expand | |||||||||||||||||
|---|---|---|---|---|---|---|---|---|---|---|---|---|---|---|---|---|---|
| |||||||||||||||||
|
Context Menu
Right-clicking in the curve view brings up a context menu with additional options:
...
| Column | ||
|---|---|---|
| ||
|
| Column | ||
|---|---|---|
| ||
| UI Text Box | ||
|---|---|---|
| ||
When working with .acv files, some approximations are performed because the curves in the .acv files are described by a different mathematical formulas. |
Lookup Table
| Section | |||||||||||||||
|---|---|---|---|---|---|---|---|---|---|---|---|---|---|---|---|
|
Filmic Tonemap
| Section | |||||||||||||||
|---|---|---|---|---|---|---|---|---|---|---|---|---|---|---|---|
|
Notes
...
| Fancy Bullets | ||
|---|---|---|
| ||
|