Versions Compared

Key

  • This line was added.
  • This line was removed.
  • Formatting was changed.

This page provides information on the V-Ray Proxy Scene Geometry object.


Overview

...

V-Ray Scene (.vrscene) is a file format which allows for assets, such as geometry, materials, and lights, to be shared together between all platforms that run V-Ray.

...

V-Ray Scene materials and geometry are non-editable and lights can only be toggled on and off.


UI Paths

...

Section
Column
width5%
 
Column
width40%

Importing .vrscene file:

||V-Ray Asset Editor| | Create Asset > Geometries > Proxy Scene

||V-Ray Asset Editor|| > Geometries Geometry > Proxy Scene

Image AddedImage Removed

Column
width5%


Column
width40%

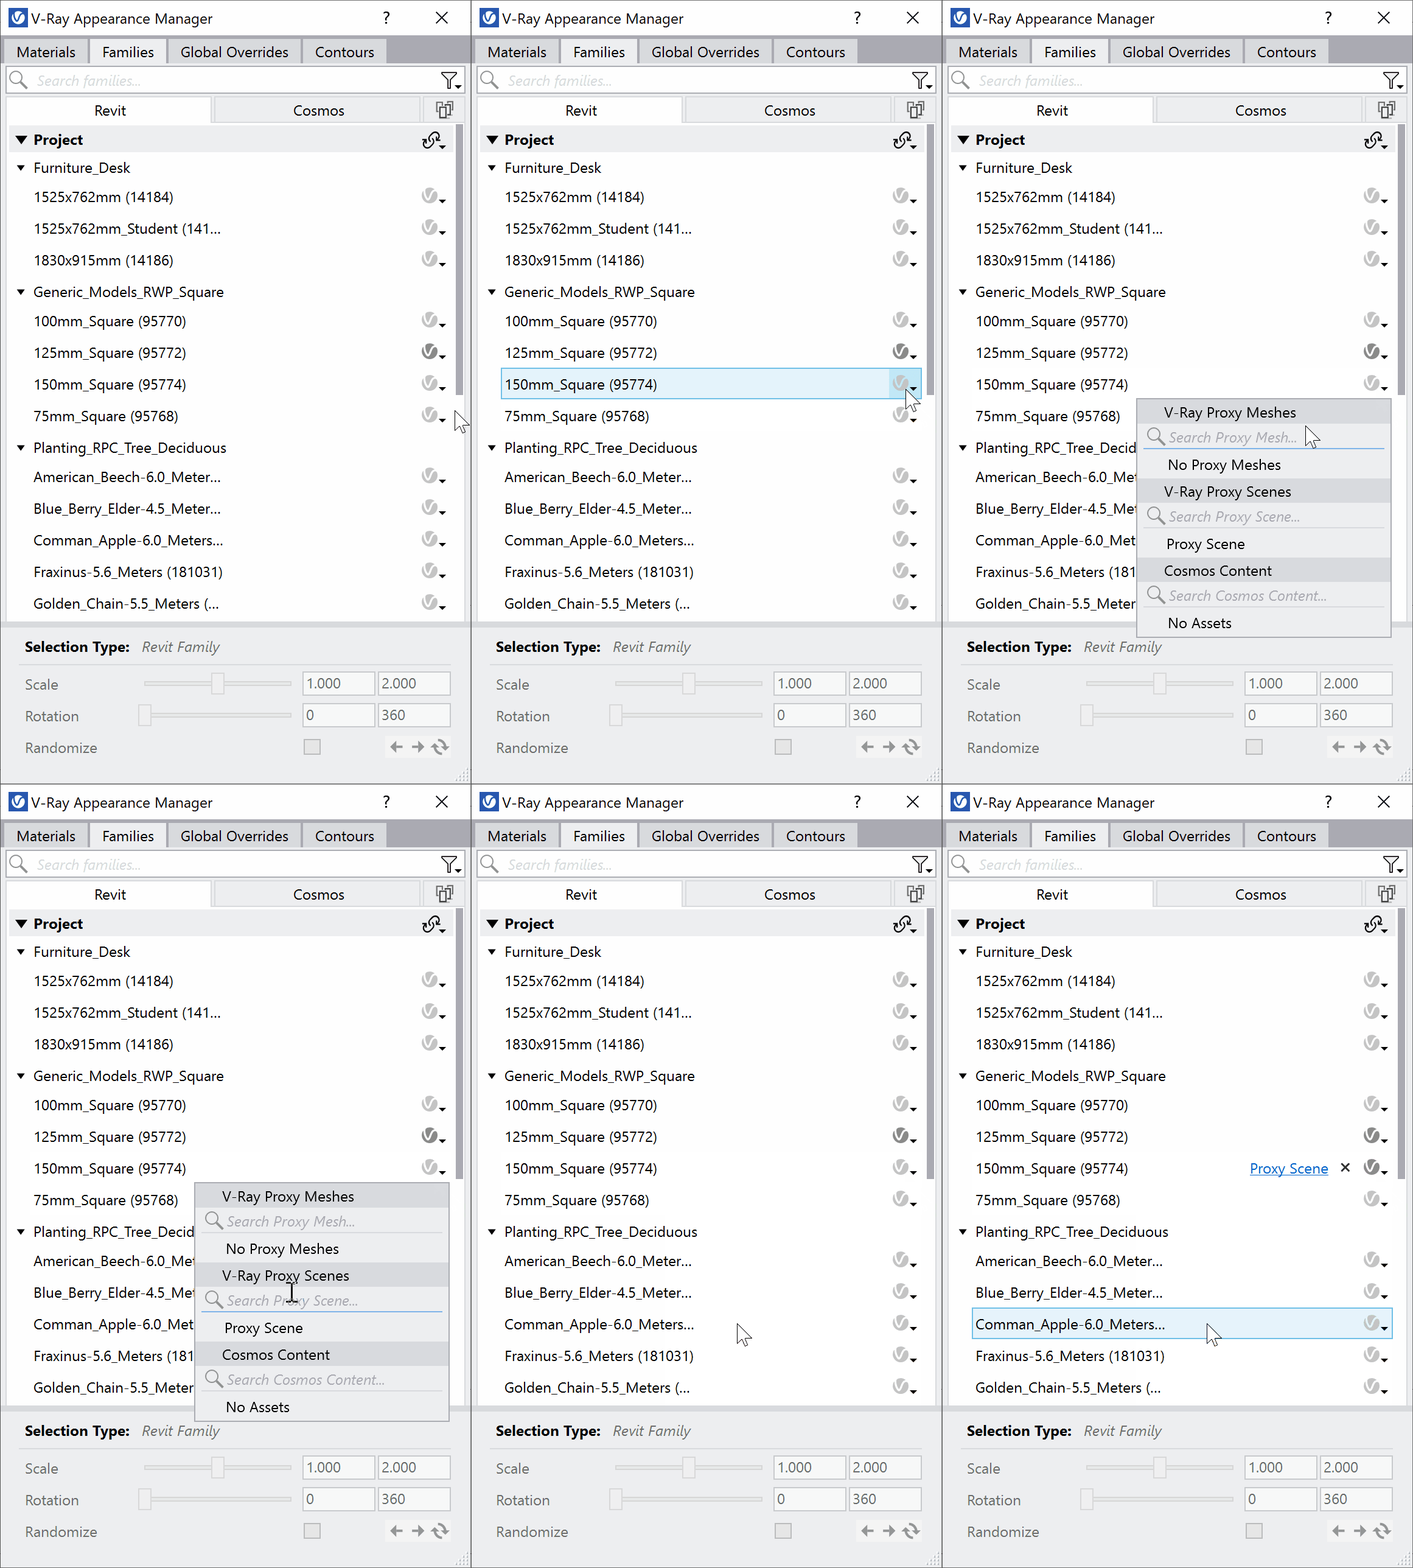
Replacing object with Proxy Scene:

||Appearance Manager|| > Objects Tab Families Tab > V-Ray icon menu > Proxy Mesh

Image AddedImage Removed

Column
width10%


UI Text Box
typetip

You can also drag-and-drop a Proxy Scene from the V-Ray Asset Editor onto any geometry listed in the Objects Families tab of V-Ray Appearance Manager. 


...

Workflow

...

Section
Column
width35%

V-Ray Scene files (.vrscene) can be imported from two places in the Asset Editor: the Create Asset button and the Geometry category icon (top). Importing a .vrscene file, however, doesn't add it to the Revit model and respectively to the V-Ray rendering yet. The V-Ray Proxy Scene then must be assigned to a selected object from the Objects Families Tab in the Appearance Manager. This can be done either by drag-and-dropping the scene onto a selected object in the Appearance Manager, or from the V-Ray menu icon.

UI Text Box
typenote

V-Ray allows you to import .vrscene files that are exported with any other V-Ray product.

Cameras and render settings are not imported from .vrscene files even if they are present in the files themselves.

UI Text Box
typenote

When rendering interactively, any actions with Proxy Scene replacements are disabled by default. Stop the interactive rendering in order to make Proxy Scene replacements or modify existing ones.

Column
width5%


Column
width60%

Image AddedImage Removed


Parameters

...

Section
Column
width60%

File Path – Specifies the VRScene file.

Lights – When enabled, lights from the imported VRScene will illuminate the current scene. 

Use Mtl Override – When enabled, the global Material Override option in the Render Settings overrides the .vrscene proxy assets. When disabled, the materials in the referenced scene are not affected by the Material Override option in the Render Settings.

Animation

UI Text Box
typenote

The Animation rollout settings are not supported yet in Revit.

Enabled () – Turns the Animation on and off.

Offset – Offsets the beginning of the animation by the given number of frames. You can use positive as well as negative values here. The default value of 0.0 starts the animation at the first available frame.

Playback Type – Determines how playback will behave. 

Loop – The animation plays to the end and loops back to the first frame once it has finished.
Once – The animation plays once.
Ping-pong – The animation is looped by playing it backwards once the last frame has been reached and then playing it forward again when the first frame is reached again.

Playback Speed  Specifies the pace at which the animation will play. The default value of 1.0 plays the animation at normal speed (i.e. the speed for which the animation was created), while 2.0 plays it at double speed and 0.5 plays it at half speed. 

Animation Frame – Specifies the frame used for the beginning of the animation. 

Animation Length – Specifies the number of frames used to play the animation. 

Column
width5%


Column
width35%

Image Modified