Versions Compared

Key

  • This line was added.
  • This line was removed.
  • Formatting was changed.

...

Section
Column
width60%

The Quality settings are only available when the Interactive Renderer is turned off. The Shading Rate option is not available when using the GPU engine.

Noise Limit – Specifies the acceptable level of noise/grain in the rendered image. The smaller the number, the higher the quality (less noisy) the image is.

Time Limit (minutes)  Specifies the maximum render time in minutes. When this number of minutes is reached, the renderer stops. This is the render time for the whole frame; it includes any GI prepasses like light cache, irradiance map, etc. If this is 0.0, the render is not limited in time.

Bucket Size  – Determines the bucket (render region division) size, measured in pixels. Buckets rendered by NVidia GPU devices are always produced with a minimum size of 32 pixels.

Min Subdivs – Determines the initial (minimum) number of samples taken for each pixel. This value rarely needs to be higher than 1, except in the case of very thin lines or fast-moving objects combined with motion blur.  The actual number of samples taken is the square of this number.  For instance, a value of 4 subdivisions produces 16 samples per pixel.

Max Subdivs – Determines the maximum number of samples taken for a pixel.  The actual number of samples taken is the square of this number.  For instance, a value of 4 subdivisions produces 16 samples per pixel.  Note that V-Ray may take less than the maximum number of samples if the difference in intensity of the neighboring pixels is small enough.

Shading Rate  – Controls how many rays will be used for calculating shading effects (e.g. glossy reflections, GI, area shadows, etc) instead of anti-aliasing. Higher values mean that less time is spent on anti-aliasing, and more effort is put in the sampling of shading effects. 

Column
width5%


Column
width35%

Interactive Off and Progressive On Advanced UI


Interactive Off and Progressive Off Advanced UI


Interactive Parameters

...

Section
Column
width60%

Interactivity – Controls the number of rays that are traced for each pixel during one image pass.

Trace Depth – Limits the reflection trace depth during interactive rendering.

Allow Interactive LC – Allows Light cache secondary GI engine to be used during interactive rendering. When disabled, Brute force will be automatically selected as both primary and secondary engine in interactive sessions.

Column
width5%


Column
width35%

 Image Added


Antialiasing Filter

...

Section
Column
width60%

Antialiasing  Filter – Enables or disables anti-aliasing.

Size / Type – Controls the strength of the anti-aliasing filter and the type of anti-aliasing filter to use. See the Antialiasing Filter example below.

Column
width5%


Column
width35%

...

UI Text Box
typeinfo

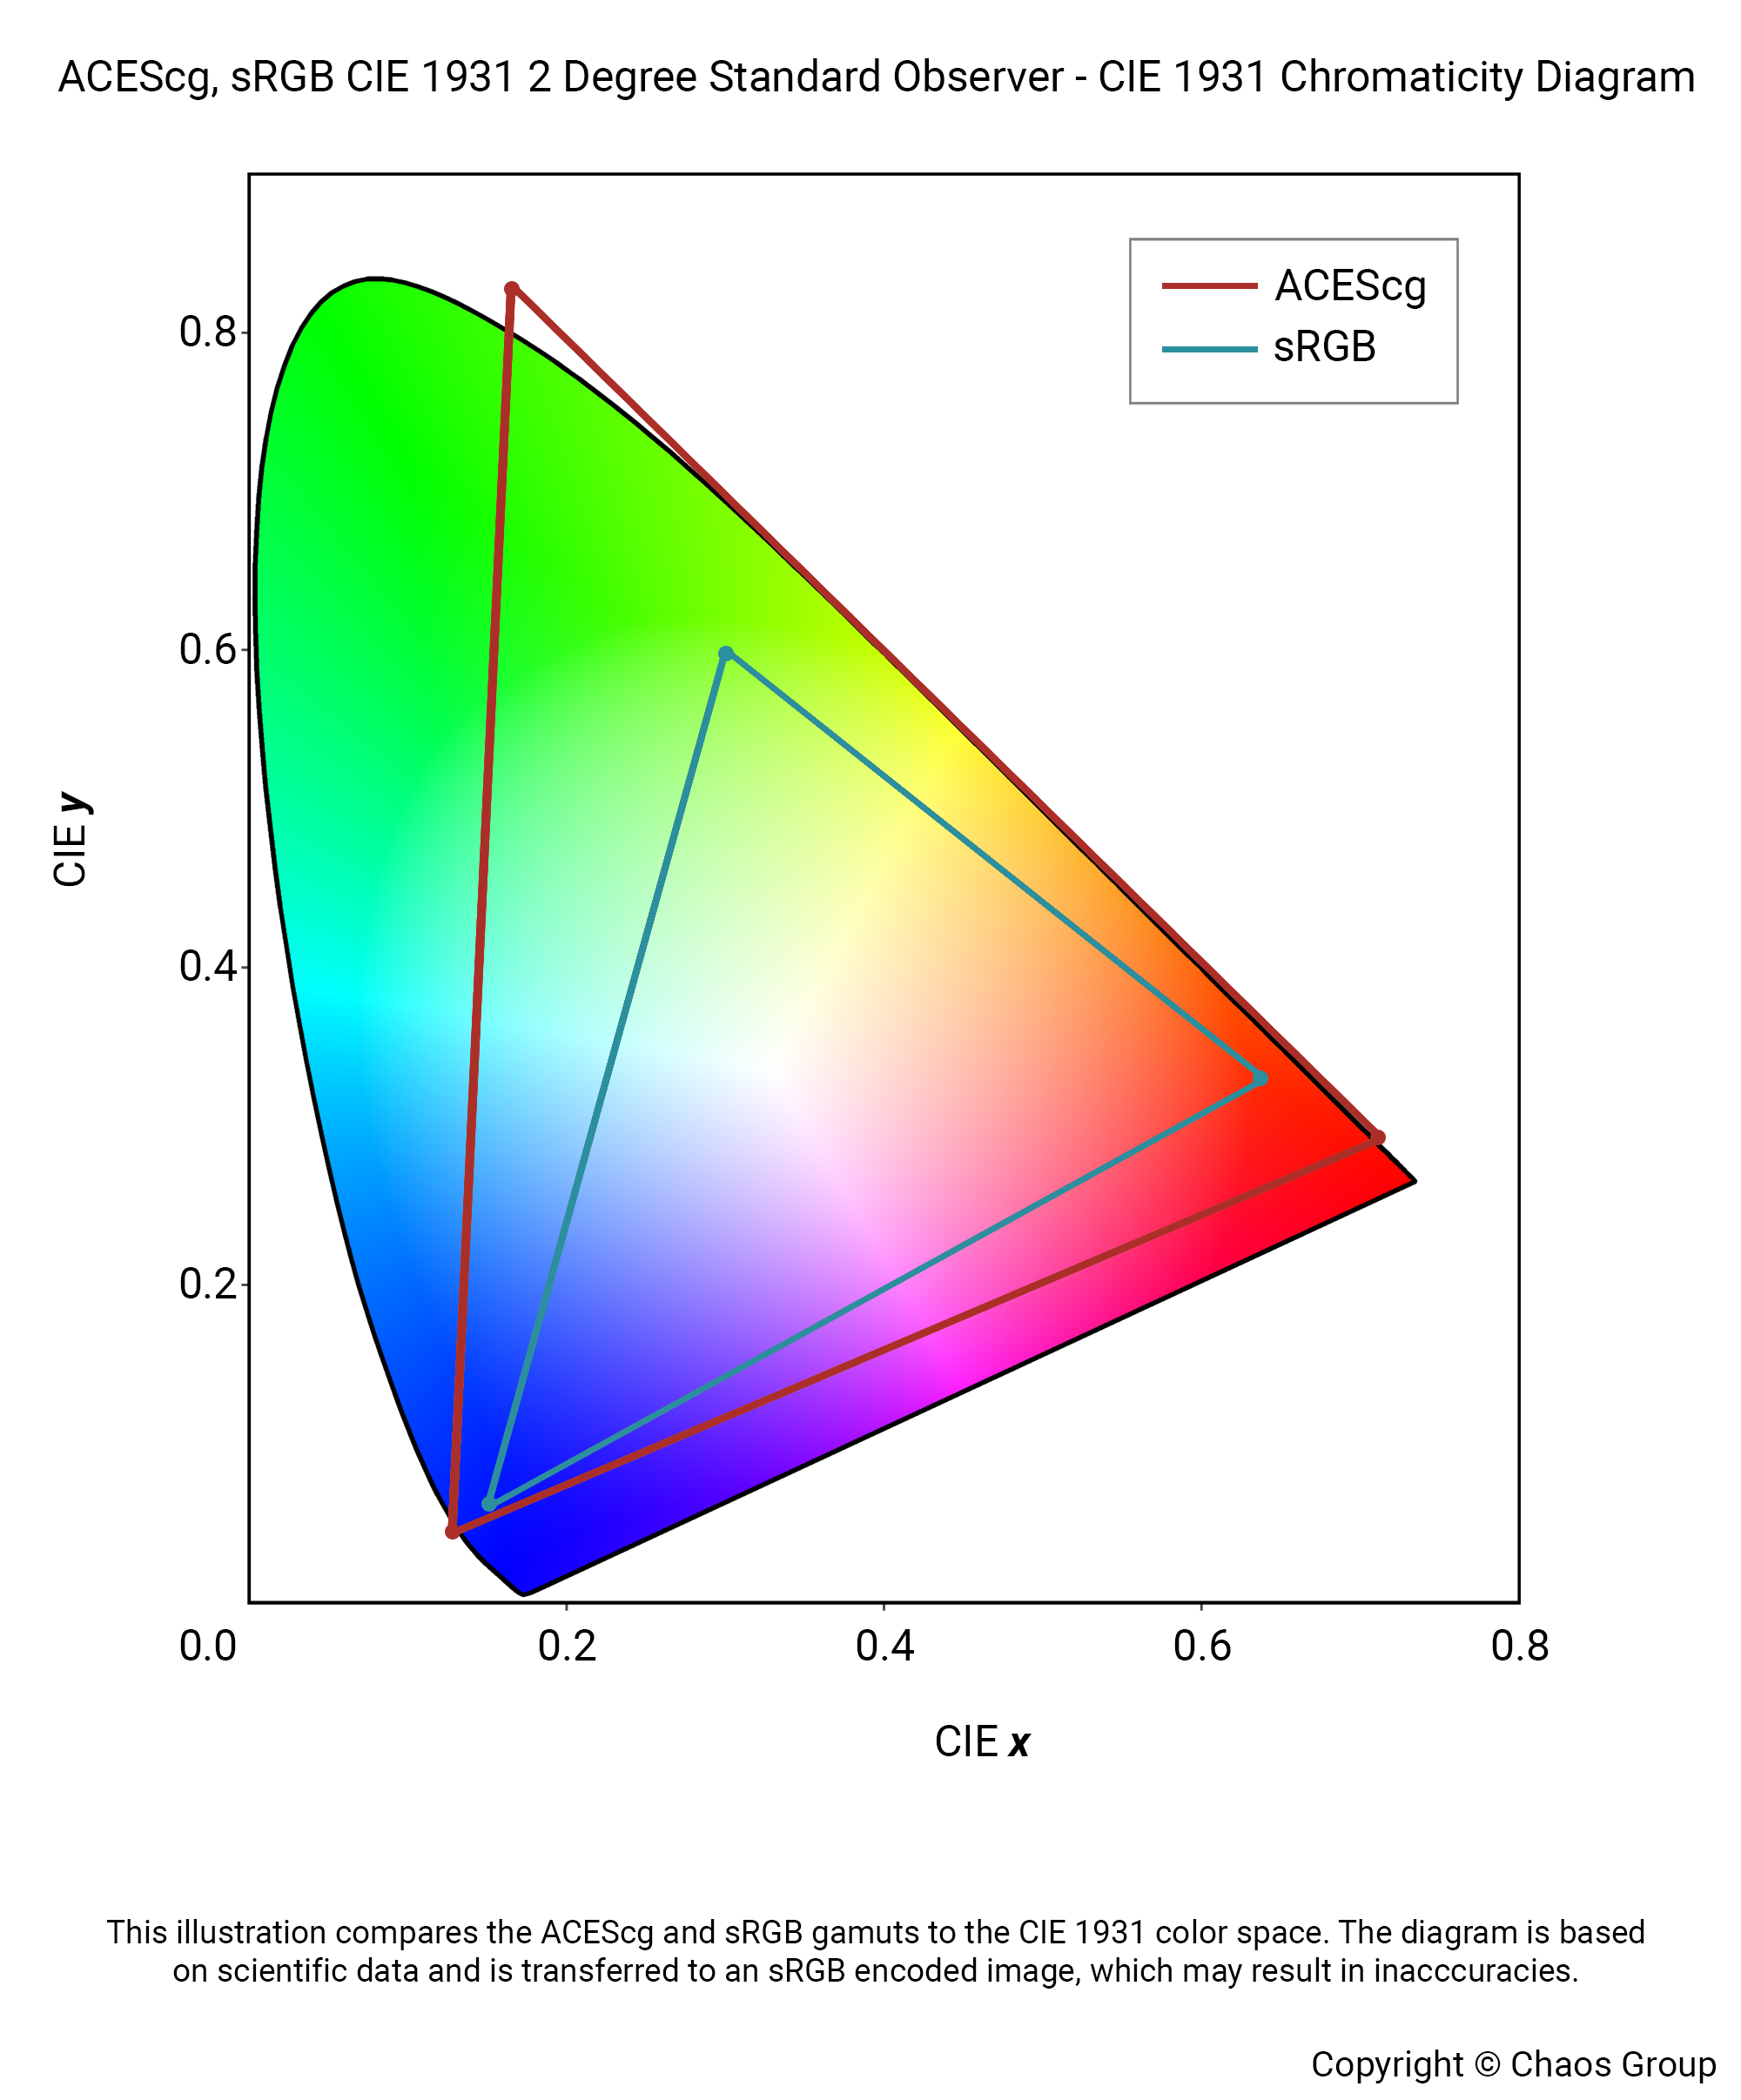
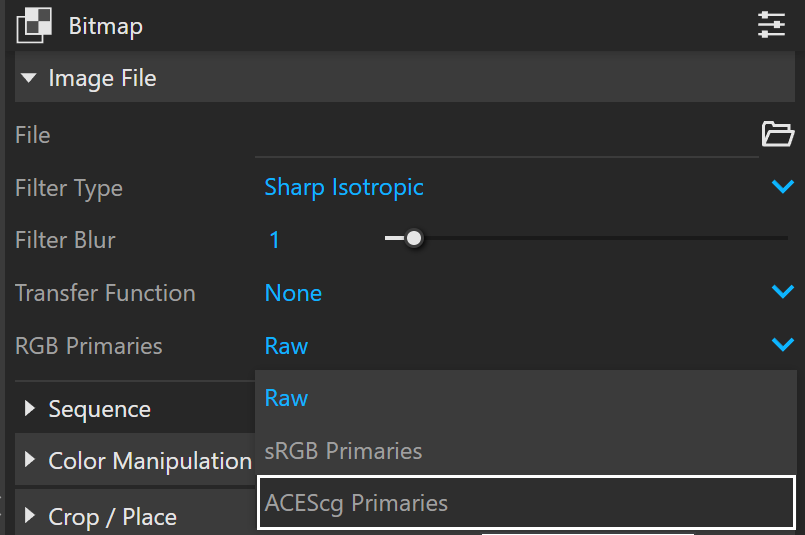
ACES is the Academy Color Encoding System and developed by the Academy of Motion Picture Arts and Sciences. ACEScg is the version of the ACES encoding system for computer graphics, widely adopted in the industry. It has become the industry standard, because compared to sRGB, ACEScg works with a lot more color information, illustrated in this gamut graph.

To see ACEScg setup in V-Ray for SketchUp, expand below.


Expand
titleClick here to expand for ACEScg workflow...
Section
Column
width60%
UI Text Box
typenote

The V-Ray ACEScg workflow does not require an active OCIO configuration. The relevant ACEScg transformations are part of V-Ray. However, if you do decide to use an OCIO configuration, the OCIO environment variable needs to be set and pointing to a suitable OCIO configuration. See the Using OCIO configuration section below for more information.

To start working in ACEScg color space, change the Color Management RGB Primaries option to ACEScg. Any 8-bit texture map should be renamed according to the color space that they are in, using “_lin_srgb”, “_srgb” or “_acescg” suffix. If neither is present, the map is assumed to be in the renderer color space as specified in the Color management rollout (in this setup, ACEScg).

Column
width5%


Column
width35%


Bitmap Setup


Section
Column
width60%

Alternatively, set the RGB color space manually for each Bitmap texture. This can also be done if there are files that are exception to the rule-based file naming system - the settings in the Bitmap texture overrides the automatic algorithm.

Column
width5%


Column
width35%


Using OCIO Configuration with VFB


Section
Column
width60%

An automated OCIO configuration can be set with the OCIO environment variable. The OCIO configuration can be specified in the V-Ray Frame Buffer.

There are а few steps you need to follow to set this up:

Download the Open Color IO configuration package from GitHub: https://github.com/colour-science/OpenColorIO-Configs

Set the OCIO environment variable and point it to the config.ocio file.

For example, to set up the OCIO configuration with aces_1.2:

Code Block
Windows: set OCIO=C:\OpenColorIO-Configs\aces_1.2\config.ocio
 
macOS: export OCIO=/home/user/OpenColorIO-Configs/aces_1.2/config.ocio


When the VFB Display Correction is switched to OCIO, V-Ray reads the OCIO variable and loads the configuration there as well. Choose ACES - ACEScg for your Input Colorspace and sRGB for your View Transform. Leave the Display Device at ACES.

Column
width5%


Column
width35%

...