This page provides a tutorial on rendering vector displacement using PTex Textures.
Overview
Rendering vector displacement is generally not a trivial task. Whlie using normal UV textures generally works fine, issues at UV seams may be hard to deal with. The advantage of using PTex textures instead of normal UVs is that these issues are avoided.
This tutorial explains how to render vector displacement using object-space PTex textures. In this particular case the object is sculpted in Mudbox and the PTex texture was also exported from there.
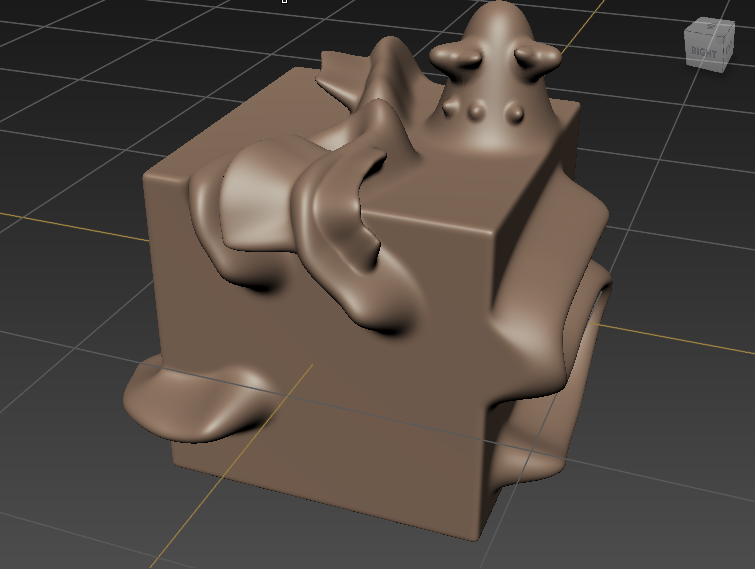
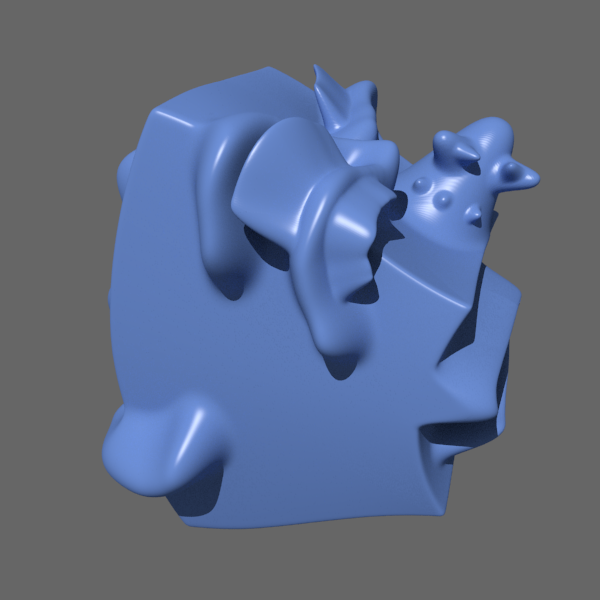
To the right is a snapshot of the object in Mudbox. The original object is a cube.
Exporting the Object from Mudbox
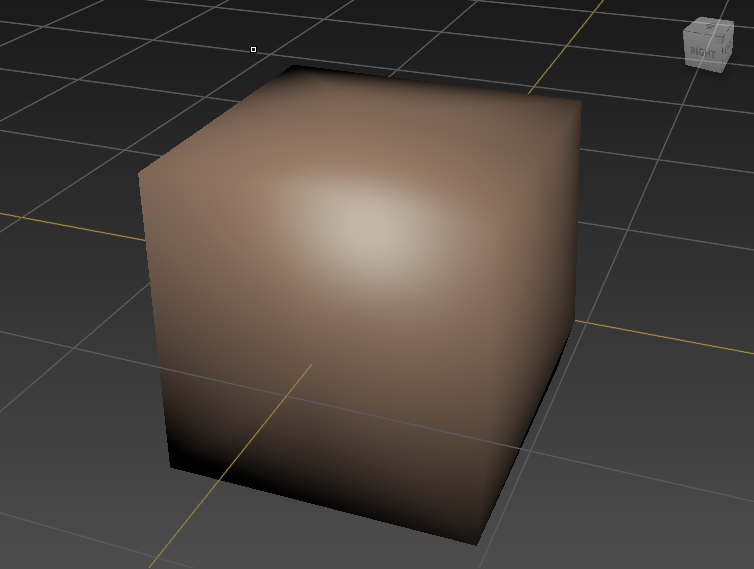
We will base the render on the subdivision level 0 of the mesh, so we need to export that. Go to level 0, select the object and then go to File > Export selection... and choose an .obj file name. Then save the .obj file.
Extracting the PTex Texture in Mudbox
Assuming that your object is already sculpted in Mudbox, first make sure that you set it up for PTex textures. To do this, in Mudbox go to the lowest subdivision level and then go to UVs & Maps > PTEX Setup... and adjust the PTex resolution as needed:

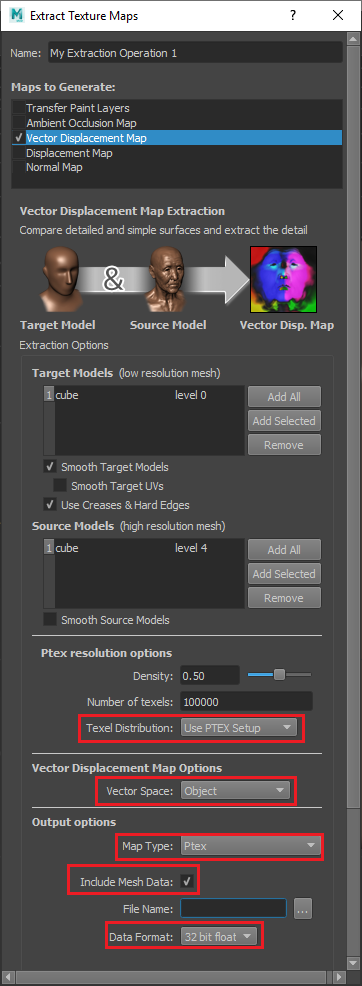
To extract the PTex texture, go to Uvs & Maps > Extract Texture Maps > New Operation... and choose Vector Displacement Map.
Set the Map Type to Ptex, set the Texel Distribution to Use PTEX Setup; set the Vector Space to Object, and make sure that Include Mesh Data is enabled. The mesh data is needed during rendering to correctly transform the vector displacement on deforming meshes.
The extract dialog should look like the picture below. Click on the Extract button to create the PTex texture.
Rendering with V-Ray
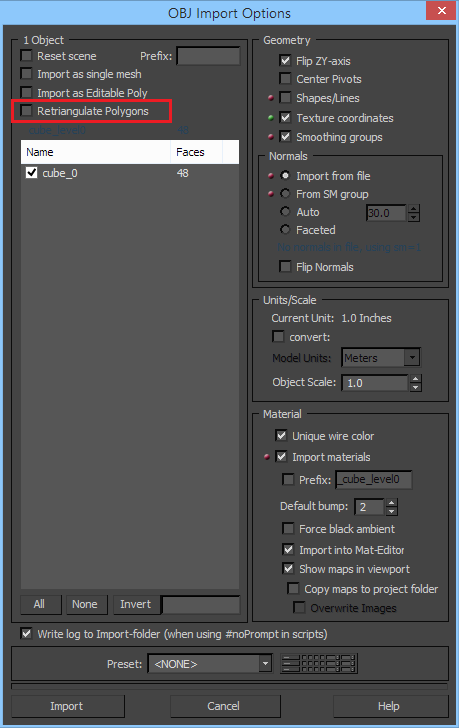
First, import the level 0 version of the object that you exported to an .obj file earlier. Go to File > Import... and select the .obj file. Make sure that the Retriangulate Polygons option is disabled. Since the PTex textures are tied to the mesh topology, it is vital that the mesh is imported in 3ds Max exactly as it was in Mudbox.
Next, apply a VRayDisplacementMod modifier to the object, set the Type to Subdivision and turn on the Classic Catmull-Clark option. Set the Vector displacement mode to Object. Click on the Texmap button and select VRayPtex texture. Instance the texture to a slot in the Material Editor, click on the filename button and select the .ptx file that you exported earlier.
If you render now, you will see that the object is smooth, but it is not displaced properly. This is because, for PTex textures, V-Ray cannot figure out the displacement bounds automatically. You will need to specify the displacement bounds explicitly. To do that, go back to the VRayDisplacementMod modifier and adjust the Texmap min and Texmap max parameters, decreasing the first and increasing the second until the displacement looks correct. For this particular scene, good values turned out to be about -60 for Texmap min and 60 for Texmap max.
If the texture displaces the surface quite far from its original position, you may need to adjust the tessellation for the subdivision surface. To do this, decrease the Edge length parameter in VRayDisplacementMod to 2.0 or even 1.0.
At this point, the displacement modifier should look like this:

You may notice slight noise or moire effect in the displacement. To fix this, go back to the VRayPtex texture and set the filter type to Bilinear or Bicubic.
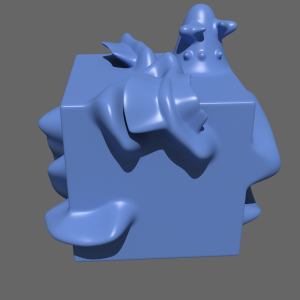
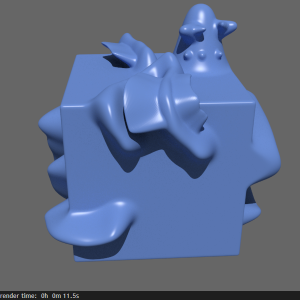
Now the object should look the same shape as in Mudbox.
 Object without displacement
 Object with displacement, but the displacement bounds are not correct
 Object with displacement and adjusted displacement bounds
 Edge length adjusted to 1.0
 PTex filter type set to Bilinear
Optimizing the Render
Depending on the settings, rendering with Ptex vector displacement might be slow. You can speed it up a lot in exchange for some additional RAM if you turn go to the VRayDisplacementMod modifier and turn on the Static Geometry and Cache Normals options. The Static Geometry option will make V-Ray pre-tessellate the object at the start of the frame and treat it like regular geometry instead of render-time displacement. This allows you to use the Embree raycaster to further speed up the rendering. The Cache Normals option causes V-Ray to pre-calculate the surface normals, giving an additional speed boost although at the expense of slight errors in the normals due to interpolation.
 Original render; the displacement is dynamic geometry and normals are recomputed at each hit point.
 Static geometry is enabled.
 Embree is enabled.
 Cache Normals is enabled.
Deforming the Object
Object-space displacement generally stores the displacement values relative to the original object mesh. If the object is deformed in some way, then the displacement values are no longer valid. However, since the PTex file can store information about the original object mesh, V-Ray is able to use the difference between that original mesh and the deformed one in order to recalculate the displacement values for the deformed state. V-Ray does this automatically; no extra effort is required from the user so long as the PTex file includes mesh information.
 Twist modifier applied to the object.
 Bend modifier applied to the object.