This tutorial covers how to create paper objects with VRay2SidedMtl.
Overview
Paper allows light to pass through it even though the actual substance it is made of is not really transparent or refractive. The light passing through the paper is described as translucency. When bright light is placed behind a sheet of paper then back side characteristics of the paper strongly affect its overall appearance. VRay2SidedMtl recreates the effect of light moving through thin objects. Therefore, it is the best choice for representation of paper and other translucent objects.
In this tutorial, we examine how to use VRay2SidedMtl to create a realistic paper material. The geometry we use is a paper lampshade which has no thickness and its print resembles a newspaper.
Step 1: Create a VRay2SidedMtl and its front material
Let's create a VRay2SidedMtl in the Material Editor and assign it to the geometry.
The VRay2SidedMtl is comprised of Front material and Back material. The Front and Back materials are applied to the shaded surface according to its polygon normals. If no Back material is used, then the Front one is applied on both sides.
To set the Front material, connect a VRayMtl node to the frontMtl slot of the VRay2SidedMtl node in the Material Editor.

Step 2: Configure the front material and link texture maps to it
We want our paper lampshade to resemble a newspaper. For this purpose, let's link a Bitmap texture to the Diffuse map slot of the Front VRayMtl node.
Usually in the real world, the paper surface is not completely smooth. Let's add a Noise texture to the Bump map slot of the Front material, in order to achieve a graininess effect.
Set the parameters of the Front material in the Basic parameters rollouts.
– set the Reflect color to gray to introduce some reflectivity;
– set the Glossiness to 0,7 to blur the reflections;
– keep the rest of the parameters at their default values.
Different types of paper or other translucent objects may require different settings for VRay2SidedMtl and the front and back sub-materials. For example, to make a magazine cover, the paper material needs to be glossier and more reflective than the one for the lampshade.
Step 3: Adjust the translucency
Translucency determines which side (front or back) relative to the camera is more visible in the render.
Select the VRay2SidedMtl node. In the Parameters rollout, set the Translucency color to the desired value. Note that darker colors make the VRay2SidedMtl look more solid, while lighter colors make it more sheer and allow more light from the back side to pass through the object.
Change the slider below the image to the right, to see a few different examples of the Translucency value in the 2-Sided material when there is only a Front material linked.
It looks good but can be further improved if the other side of the newspaper uses another print. Therefore, we use a back material.
![]()
Translucency is set to black. No light is passing through.
![]()
Translucency is mid-gray.
![]()
Translucency is set to white, allowing all the light to pass through.
Step 4: Create the back material
To set the Back material, first enable the Back material option in the VRay2SidedMtl's Parameters rollout.
Then connect the VRayMtl node to the backMtl slot of the VRay2SidedMtl node.
Keep the default parameter values of the Back material.
Note that when enabled, the Back material is applied on the back side of the surface, the opposite one of the surface normal vector.
Step 5: Link a diffuse texture to the back material
In order to produce a paper lampshade that has one print on the front side and another on the back, we need two different textures for the Front and Back materials.
Link a Bitmap texture to the Diffuse map slot of the Back material.

Change the slider below the image to the right, to see a few different examples of the Translucency value in the 2-Sided material.

Translucency is set to black. No light is passing through and the back material is not visible.
Translucency is mid-gray, allowing light from the back to pass through and making both materials visible. Thus, both materials contribute equally to the final result.

Translucency is set to white, allowing all the light to pass through. Only the back material is visible in the render.
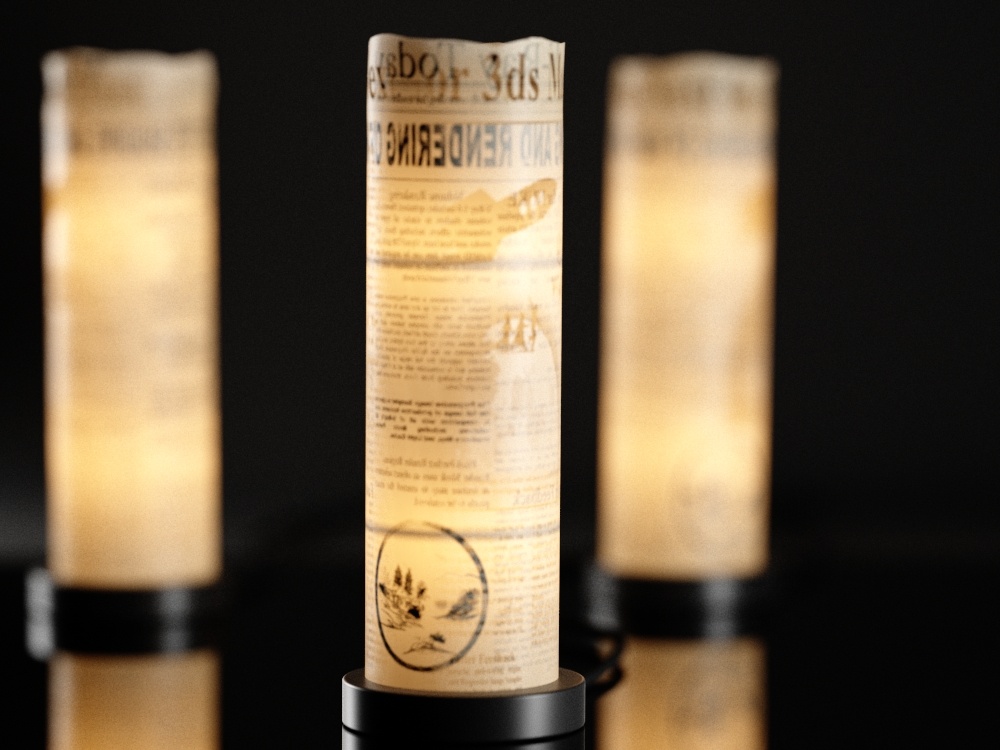
Final Image
Here's the final image with the Translucency set to mid-grey: