The Refraction rollout is part of the VRayMtl parameters.
Parameters
Refraction Color – Specifies the refraction color. Any value above zero enables refraction. Note that the actual refraction color depends on the Reflection color as well. For more information, see The Refraction Color Parameter example below.
Amount – This is the amount of the refraction color.
Refraction glossiness – Controls the sharpness of refractions. A value of 1.0 means perfect glass-like refraction; lower values produce blurry or glossy refractions. For more information, see The Refraction Glossiness Parameter example below.
Refraction IOR – Index of refraction for the material, which describes the way light bends when crossing the material surface. A value of 1.0 means the light does not change direction. For more information, see The Refraction IOR Parameter example below.
Fog Color – The attenuation of light as it passes through the material. This option helps simulate the fact that thick objects look less transparent than thin objects. Note that the effect of the fog color depends on the absolute size of the objects and is therefore scene-dependent. This parameter can be mapped with a texture. It is recommended that you use a 3D texture for the purpose. For more information, see the Fog Color Parameter example below.
Fog multiplier – The strength of the fog effect. Smaller values reduce the effect of the fog, making the material more transparent. Larger values increase the fog effect, making the material more opaque. This parameter can be mapped with a texture. It is recommended to use a 3D texture for the purpose. For more information, see The Fog Color Parameter example below.
Fog bias – Changes the way the fog color is applied. Negative values make the thin parts of the objects more transparent and the thicker parts more opaque and vice-versa (positive numbers make thinner parts more opaque and thicker parts more transparent).
Affect Shadows – This parameter causes the material to cast transparent shadows to create a simple caustic effect dependent on the refraction color and the fog color. For accurate caustic calculations, disable this parameter and instead enable Caustics in the GI tab. Simultaneous usage of both Caustics and Affects Shadows can be used for artistic purposes but does not produce a physically correct result.
Thin-walled – This option is intended for single-surface transparent materials only. When enabled and the Translucency mode is set to SSS, it simulates thin translucent surfaces such as soap bubble, leaves, curtains, etc. The SSS color defines the backside color, while the SSS amount controls the translucency effect.

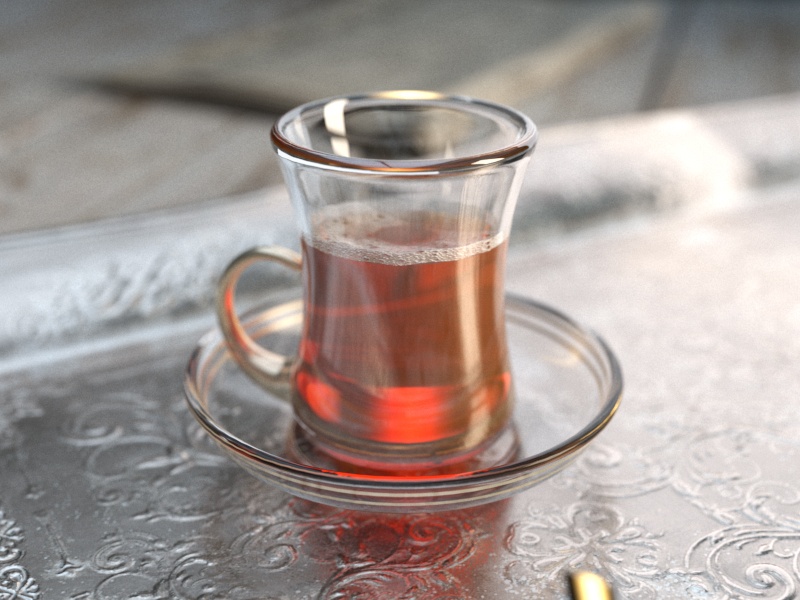
Example: Refraction Color
This example demonstrates the effect of the Refract color parameter to produce glass materials. For the images in this example, the material has a gray Diffuse color, white Reflect color, and the Fresnel Reflections option is enabled.
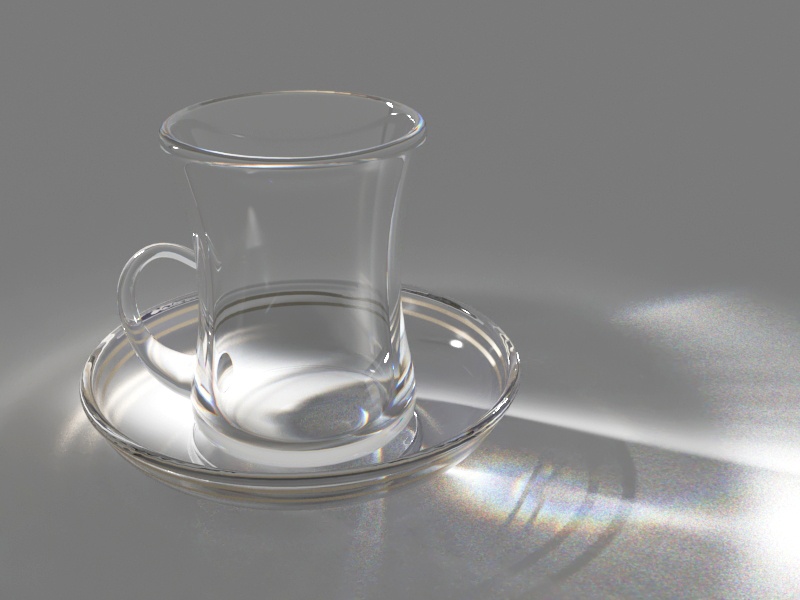
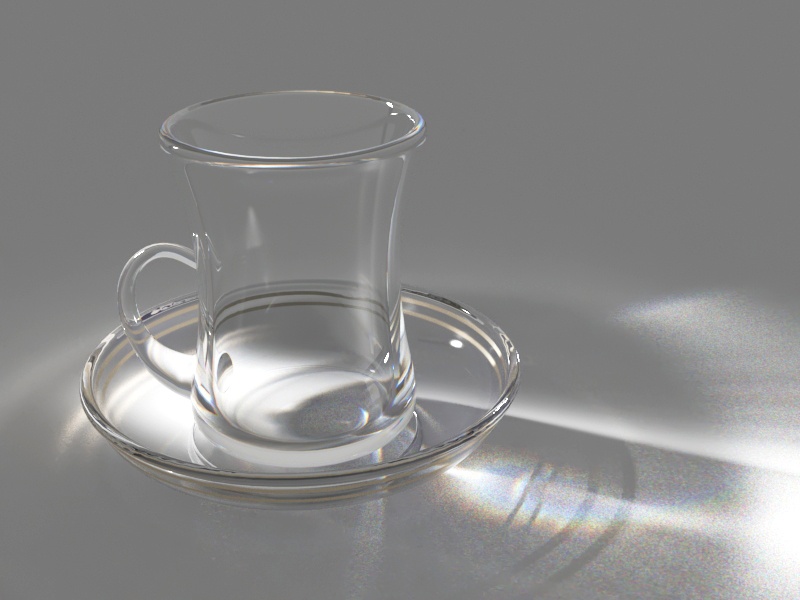
Example: Refraction IOR
This example demonstrates the effect of the Refraction IOR parameter. Note how light bends more as the IOR deviates from 1.0. When the index of refraction (IOR) is 1.0, the render produces a transparent object. Note, however, that in the case of transparent objects, it might be better to assign an opacity map to the material rather than use refraction.

Refraction Color = 0, 0, 0

Refraction Color = 26, 26, 26

Refraction Color = 51, 51, 51

Refraction Color = 77, 77, 77

Refraction Color = 102, 102, 102

Refraction Color = 128, 128, 128

Refraction Color = 153, 153, 153

Refraction Color = 179, 179, 179

Refraction Color = 204, 204, 204

Refraction Color = 230, 230, 230

Refraction Color = 255, 255, 255

Refraction IOR =0.80

Refraction IOR = 1.00

Refraction IOR = 1.20

Refraction IOR = 1.40

Refraction IOR = 1.60

Refraction IOR = 1.80

Refraction IOR = 2.00

Refraction IOR = 2.20

Refraction IOR = 2.40

Refraction IOR = 2.60
Refraction IOR = 2.80
Example: Refraction Glossiness
This example demonstrates the effect of the refraction Glossiness parameter. Note how lower refraction Glossiness values blur the refractions and cause the material to appear as frosted glass.
Example: Refraction Depth
This example demonstrates the effect of the refraction Max depth parameter. Note how too low of a refraction depth produces incorrect results. Also, in the last two examples, note how areas with total internal reflection are also affected by the Reflection Max depth.

Refraction Glossiness = 0.0

Refraction Glossiness = 0.1

Refraction Glossiness = 0.2

Refraction Glossiness = 0.3

Refraction Glossiness = 0.4

Refraction Glossiness = 0.5

Refraction Glossiness = 0.6

Refraction Glossiness = 0.7

Refraction Glossiness = 0.8

Refraction Glossiness = 0.9

Refraction Glossiness = 1.0

Refraction Max Depth = 1

Refraction Max Depth = 3

Refraction Max Depth = 5

Refraction Max Depth = 8

Refraction Max Depth = 10
Translucency
Translucency – Selects the algorithm for calculating translucency (also called sub-surface scattering). Note that refraction must be enabled for this effect to be visible.
None – When selected, the only available parameters are the Fog color and Fog depth. Together with the Refraction color, they determine the attenuation of light as it passes through the material. In this mode, there is no subsurface scattering.
A material with white refraction color and green fog color tints the rays as they pass through the material but otherwise, there is no light scattering inside.

Volumetric – Works together with the Refraction color of the material to scatter light inside the object. It is useful for liquids and other highly transparent materials. The Refraction color and Refraction glossiness determine respectively how much of the interior of the object is visible and how rays interact with the object’s surface.
In this example, you can see the same material as the one in the None mode example but with volumetric SSS enabled with a yellow Scatter color, at various SSS amounts. The Fog color is green, the Scatter color is yellow.

SSS amount = 1

SSS amount = 0.75

SSS amount = 0.5

SSS amount = 0.25

SSS amount =0
SSS – Can work with Refraction color/Glossiness and is useful for skin, wax, marble and other relatively opaque materials.
A material with no refraction (black color) and light color for the Scatter radius is used with blue SSS color, which is scattering inside the volume of the object.

SSS amount = 1

SSS amount = 0.75

SSS amount = 0.5

SSS amount = 0.25
With V-Ray 5, update 1, the translucency modes for VRayMtl are updated based on the volumetric random walk code originally developed for the VRayScatterVolume material. However, the implementation in the VRayMtl is updated and slightly more advanced compared to VRayScatterVolume. The old translucency modes are still there and will be shown if scenes with a VRayMtl that uses one of them is loaded. With newly created materials, only the new two modes are available.
As the new translucency modes perform multibounce volumetric light scattering, they require closed objects.
The new translucency modes require GI with minimum 16 bounces (brute force or light cache). They also require the Affect shadows option of the material to be enabled.

BF+LC (correct result)

GI is disabled

BF+None

BF+BF (3 bounces)
None
Fog Color – Specifies the attenuation of light as it passes through the material. This option allows you to simulate the fact that thick objects look less transparent than thin objects. Note that the effect of the fog color depends on the absolute size of the objects and is therefore scene-dependent. This parameter also determines the look of the object when using translucency. This parameter can be mapped with a texture. It is recommended that you use a 3D texture for the purpose. For more information, see the Fog Color example below.
Depth (cm) – Controls the strength of the fog effect. Higher values reduce the effect of the fog, making the material more transparent. Smaller values increase the fog effect, making the material more opaque. See the Fog Depth example below.
The Depth parameter replaces the previous Fog multiplier with an easier to control value in centimeters.
![]()
Volumetric
Illumination Method – Determines how illumination is computed for sub-surface scattering.
Uniform – Scatters light uniformly inside the material. Useful for recreating skin and such translucent materials.
Directional – Scatters more light in the direction from which a light source illuminates the surface. This method requires the Affect Shadows option to be enabled so that shadows extend below the surface. Directional Illumination Method may also produce a faceted look on low-poly objects.
SSS Amount – Blends between full scattering and pure refraction.
Scatter Color – Controls the scattering. See the Scatter Color example below.
Fog Color – Controls the absorption of the material.
Depth (cm) – Controls the strength of the fog effect. Higher values reduce the effect of the fog, making the material more transparent. Smaller values increase the fog effect, making the material more opaque. See the Fog Depth example below.
![]()
SSS
Illumination Method – Determines how illumination is computed for sub-surface scattering.
Uniform – Scatters light uniformly inside the material. Useful for recreating skin and such translucent materials.
Directional – Scatters more light in the direction from which a light source illuminates the surface. This method requires the Affect Shadows option to be enabled so that shadows extend below the surface. Directional Illumination Method may also produce a faceted look on low-poly objects.
SSS Amount – Blends between the diffuse color of the material and the SSS effect by reducing the diffuse component of the material and replacing it with the sub-surface scattering effect.
SSS Color – Determines the overall surface appearance.
Scatter Radius – Controls how far each of the red/green/components travels inside the volume.
Scale (cm) – Controls the strength of the SSS effect. See the Scale (cm) example below.
![]()
V-Ray provides several other ways to achieve sub-surface scattering, for example the VRayFastSSS2 and VRayALSurfaceMtl materials. These materials use various approximations for the sub-surface scattering effect in order to speed up the calculations. In many cases they produce a decent result. However in more complicated scenarios, the approximations may be inaccurate.


The approximation used in the VRayAlSurfaceMtl assumes a mostly flat surface, therefore in areas of high geometric detail and relatively large scattering radius it tends to produce inaccurate results that don't capture the details very well. In addition, the Directional mode of the VRayAlSurfaceMtl material may introduce unwanted color shifts.
The new translucency modes perform actual volumetric multibounce scattering inside the object, therefore they are influenced by the actual geometry quite a bit. Widely used “cheats” like smooth surface normals may not be enough for low-poly meshes, especially with small scatter radius. In this case, subdividing the mesh either using V-Ray subdivision or e.g. Maya's Smooth option improves the results. V-Ray subdivision is slower to render, but is able to tessellate the mesh in a view-dependent manner without having to guess the number of subdiv iterations.
Example: Fog Depth
This example demonstrates the effect of the Depth parameter. Translucency is set to None.
Example: Fog Color
This example demonstrates the effect of the Fog color parameter. Notice that we are changing
the hue value of the Fog color. Translucency is set to None.

Depth = 5

Depth = 2

Depth = 0.5

Depth = 0.2

Depth = 0.1

Fog color (HSV) Hue = 42

Fog color (HSV) Hue = 245

Fog color (HSV) Hue = 128

Fog color (HSV) Hue = 196

Fog color (HSV) Hue = 17
Example: Scatter Color
This example demonstrates the effect of the Scatter color parameter. Translucency is set to
Volumetric.
Example: Scale (cm)
This example demonstrates the effect of the Scale (cm) parameter. Translucency is set to SSS.

Scatter color = RGB (250, 20, 30)

Scatter color = RGB (220, 115, 22)

Scatter color = RGB (240, 202, 23)

Scatter color = RGB (250, 236, 5)

Scatter color = RGB (49, 1, 1)

Scale (cm) = 1 cm

Scale (cm) = 2 cm

Scale (cm) = 5 cm

Scale (cm) = 10 cm

Scale (cm) = 15 cm
Refraction - advanced
Trace Refractions – Enables refractions for the current material.
Max depth – The number of times a ray can be refracted. Scenes with lots of refractive and reflective surfaces may require higher values to look correct. See the Refraction Depth example above for illustration.
Affect Channels – Allows the user to specify which channels are going to be affected by the transparency of the material.
Color Only – The transparency affects only the RGB channel of the final render.
Color+alpha – This will cause the material to transmit the alpha of the refracted objects, instead of displaying an opaque alpha.
All channels – All channels and render elements are affected by the transparency of the material. This option is useful to get Matte render elements (e.g. Cryptomatte, Matte ID, etc.) in the refractions.
When selecting the Affect All channels option, be aware that the information of the respective component affects all render elements, therefore the Back to Beauty composition will not match the RGB result from the renderer.
Dispersion – Enables the calculation of true light wavelength dispersion.
Dispersion Abbe – Allows the user to increase or decrease the dispersion effect. Lowering it widens the dispersion and vice versa. See the Dispersion Abbe example below for illustration.

Example: Dispersion Abbe
This example demonstrates the dispersion capabilities of the V-Ray material and the effect of the Dispersion Abbe parameter.

Dispersion Abbe = 1

Dispersion Abbe = 2

Dispersion Abbe = 3

Dispersion Abbe = 4

Dispersion Abbe = 5

Dispersion Abbe = 6

Dispersion Abbe = 7
Dispersion Abbe = 8
Dispersion Abbe = 9

Dispersion Abbe = 10