This page provides information about Chaos Vantage's Animation Editor.
Overview
The Animation Editor allows for a easy way to create animations inside Chaos Vantage. It enables you to do:
- Place imported or stored cameras in the animation track timeline (cameras are interpreted as single frame objects)
- Two modes of the editor: Time mode and Shot mode
- Set the time display unit to seconds, frames or combined
- Control FPS of the animation
- Manipulate animation clips:
- Reorder and delete clips
- Add transition items between clips with different interpolation curves
- Add pause items between clips
- Auto add transition element with length set in Edit > Preferences > Interaction > Cam transition time
- Set duration of transitions and pause elements
- Add before/after and split transition elements to create a new or insert an existing camera(Time mode only)
- View imported animation from .vrscene in scene animation track
- View imported animation from .vrscene from chosen camera
- Trim start/end of animation timeline with trim markers
- Toggle animation and scene tracks on/off
- Set a resolution for the animation using the Force resolution option to override added cameras' aspect ratios and resolutions
UI
The Animation editor can be accessed by clicking on the Animation Editor button(![]() ) in the bottom toolbar
) in the bottom toolbar

| Button | Description |
|---|---|
| Expands the Animation Editor. |
| Sets the playback speed. |
| Plays the animation. (Shortcut: Space ) |
| When enabled loops the animation. |
| Sets start of animation sequence |
| Sets end of animation sequence |
| Opens Render setup dialog. Details |
| Quick saves high quality snapshot in the project folder from where the .vrscene file has been imported. |
You can crop your animation sequence using the Set Start and Set End markers
Animation Editor Parameters
Left Side Parameters
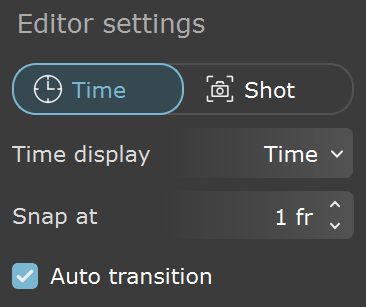
Time – Sets the animation editor in Time mode. For more details see below.
Shot – Sets the animation editor in Shot mode. For more details see below.
Time display – Sets the time display for the animation.
Time – Sets the timeline to minutes, seconds [0m:00.00s].
Frames – Sets the timeline to frames [0fr].
Combined – Sets the timeline to minutes, seconds and frames[0m:00s;0fr].
Snap at – Specifies the number of frames the camera clip automatically snaps to when moved or extended/shortened.
Auto transition – When enabled, automatically creates between the last and previously added camera. The default duration for the transition is set in Edit > Preferences > Interaction > Cam transition time
Right Side Parameters
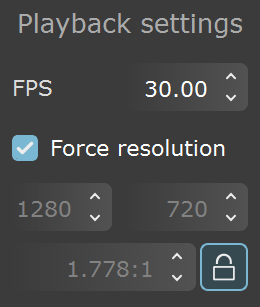
Force resolution – When enabled, sets the resolution for the animation and overrides added cameras' aspect ratios and resolutions.
Width – Sets the width of the animation sequence in pixels.
Height – Sets the height of the animation sequence in pixels.
Aspect – Sets the aspect of the render resolution.
FPS – Specifies the frames per second for the animation. Animation length in [0m:00.00s] will be preserved, only frames count will be changed.
Timeline
| Button | Description |
|---|---|
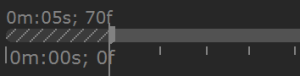
| Displays the length of the animation. On the left side is displayed the current time/length of the animation. On the right side is displayed the entire length of the animation. Length and current take into account the trim markers' position. |
| Trims the animation length. On each marker is displayed how much of the animation is trimmed. |
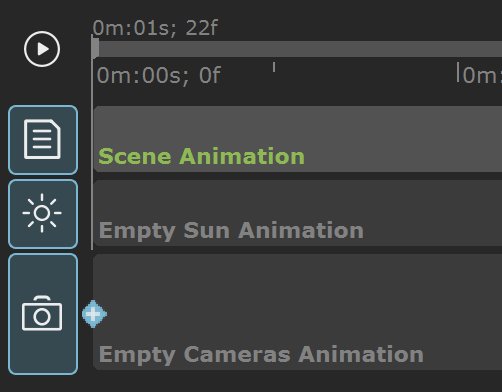
Enables/disables the Cameras Animation and Scene Animation tracks. | |
| A track where imported animation from .vrscene is placed. It is automatically populated when a .vrscene animation is present. |
| A track where Sun animation is set when the Sun position mode of a V-Ray Sun is set to Animated Geolocation. Details |
| A track where you can place your saved cameras from the Camera tab. |
| Helps navigating through the animation when zoomed in. |

The following shortcut keys are available in the Animation editor:
Mouse wheel up/down – scrolls through the timeline if it does not fit the screen
Alt+Mouse wheel up/down – zooms in and out of the timeline.
Ctrl+LMB drag – pans the timeline.
Animation Editor Modes
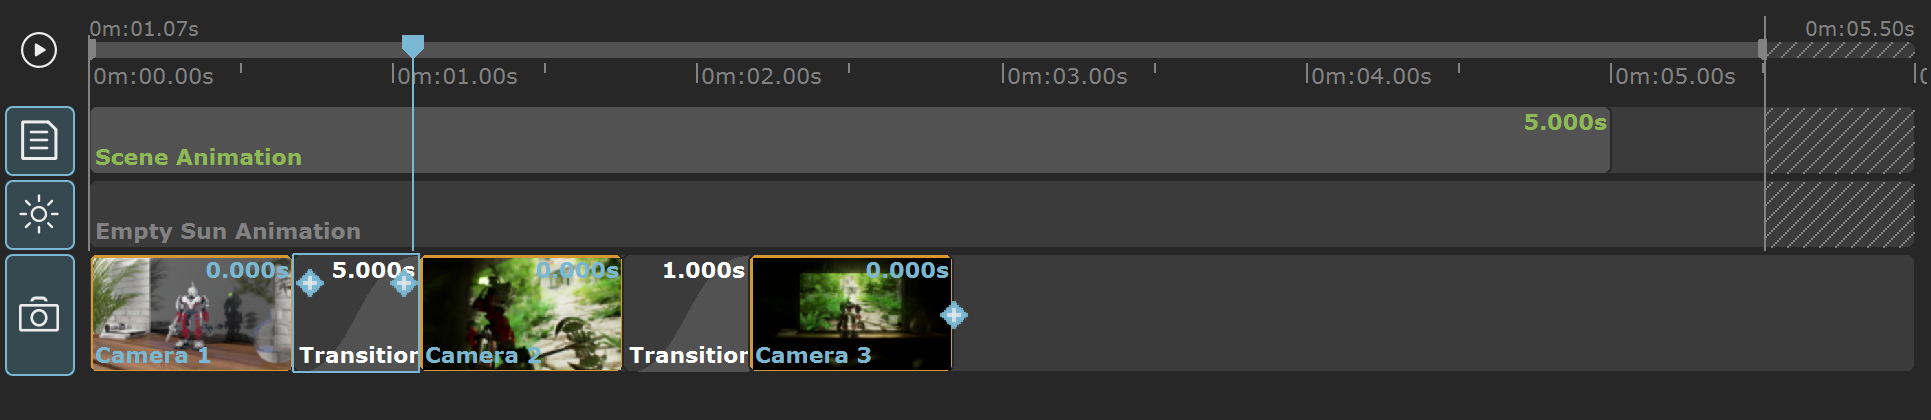
Time Mode
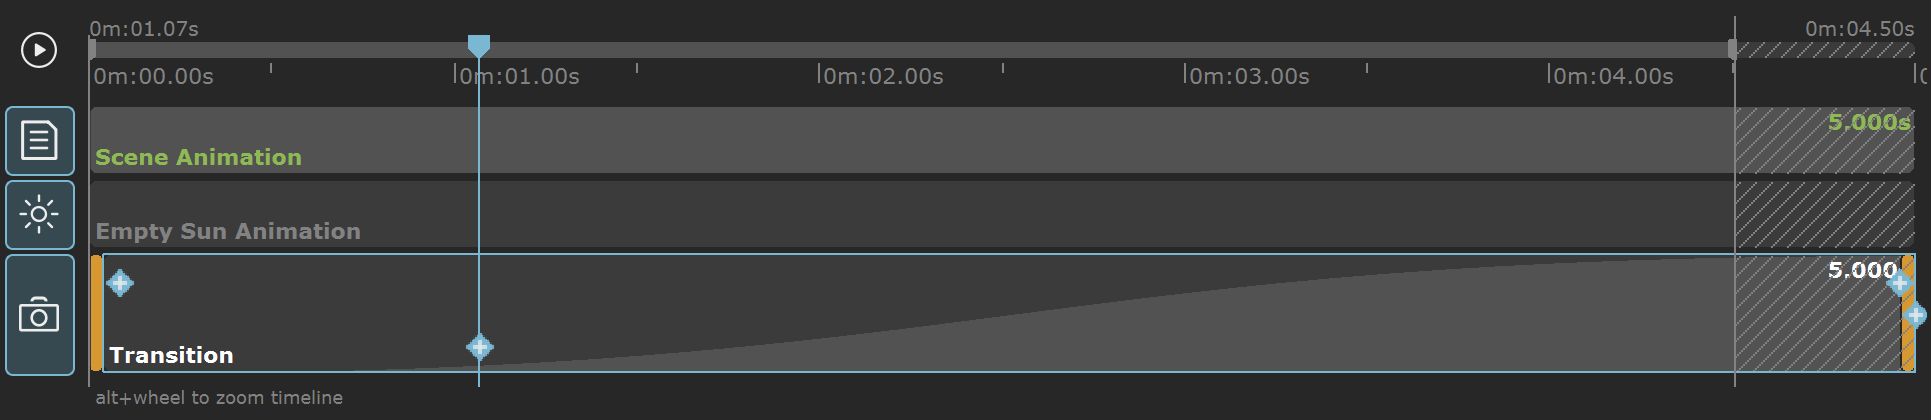
Time mode of the animation editor enables the following workflow:
- Drag-n-drop cameras in the camera track.
- Add transition element between added cameras. When Auto transition is enabled, a transition element will be automatically added between the last and previously added camera. The default duration for the transition is set in Edit > Preferences > Interaction > Cam transition time. The transition element has 4 interpolation types: Linear, In/Out Quad, In Quad, Out Quad.
- Add pause element to lengthen the duration of a static camera or to make the last frame of a recorded camera.
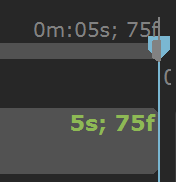
- Element's length is visible both visually on the timeline and the exact duration is marked in the upper right corner. Duration can be set with a right click > Set Duration. Time units are dependant on Time Display option.
- Elements can be added with the (+) button at the start or end of a selected element, or from a context menu with a right click
- While on a transition element, a new camera with the current view in the viewport can be created with the (+) button on the playhed. The new camera is added in the camera list and the transition is split into two which summed duration equal the original.
- Playhead and trim markers go over the scene and camera tracks. Trim markers hatch the part of an element that will not be rendered in the final sequence.
- Elements have the following visuals:
- Single Camera is represented as a frame with orange fill and a 1frame length.
- Recorded camera has length, shaded with a red fill, and camera thumbanail preview if the width allows it.
- Transition element has length, shaded with two tones of blue fill that represents the set type of interpolation.
- Pause element has length,shed with a grey fill.
Shot Mode
Shot mode of the animation editor enables the following workflow:
- Drag-n-drop cameras in the camera track.
- Add transition element between added cameras. When Auto transition is enabled, a transition element will be automatically added between the last and previously added camera. The default duration for the transition is set in Edit > Preferences > Interaction > Cam transition time .The transition element has 4 interpolation types: Linear, In/Out Quad, In Quad, Out Quad.
- Add pause element to lengthen the duration of a static camera or to make the last frame of a recorded camera.
- Element's length is visible is marked in the upper right corner. Elements' wight is constant and do not represent the exact length of the element. Duration can be set with a right click > Set Duration. Time units are dependant on Time Display option.
- Elements can be added with the (+) button at the start or end of a selected element, or from a context menu with a right click
- Cannot create a new camera with the current view in the viewport with the (+) button on the playhed like in Time mode.
- Playhead and trim markers go over the scene track and not the camera track. Trim markers only hatch the part of an element in the scene track that will not be rendered in the final sequence.
- Elements have the following visuals:
- Single Camera is represented as a thumbnail preview of the camera with an orange outline with 1 frame length. Width is constant and doesn't actually represent length of element.
- Recorded camera is represented as a thumbnail preview of the first frame of the camera with a red outline. Width is constant and doesn't actually represent length of element.
- Transition element is represented as a rectangle shaded with two tones of blue fill that represents the set type of interpolation. Width is constant and doesn't actually represent length of element.
- Pause element is represented as a rectangle shaded with a grey fill. Width is constant and doesn't actually represent length of element.
Context Menus
Additional parameters of the clips can be accessed by right-clicking on an item to display a context menu. In the camera animation track, you can have the following items with context menu options:
Right-click on camera clip:
Add Transition Before – Adds a transition item before the selected camera clip.
Add Transition After – Adds a transition item after the selected camera clip.
Add Pause Before – Adds a pause item before the selected camera clip.
Add Pause After – Adds a pause item after the selected camera clip.
Make Transient – Makes the selected camera 0 in duration length.
Set Duration – Sets how long the selected camera clip should be. This option does not apply to recorded camera using the Record Camera Movement functionality.
Go To Start – Moves the slider to the start of the selected camera clip.
Go To End – Moves the slider to the end of the selected camera clip.
Delete – Deletes the selected camera clip.

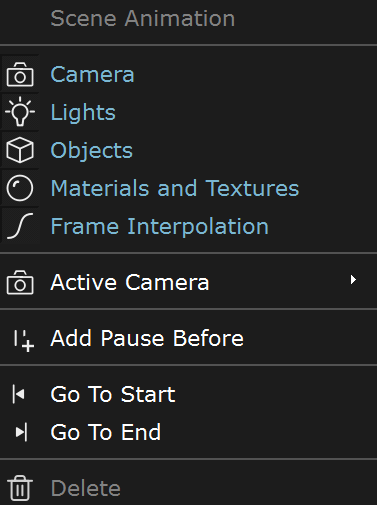
Right-click on Scene animation:
Camera – Enables transform animation for the imported camera specified in Active Camera.
Lights – Enables transform animation for the imported lights.
Objects – Enables transform animation for the imported geometry.
Frame interpolation – When enabled, interpolates values between imported frame times. When disabled, animation preview will match the .vrscene frames.
Active Camera – Specifies which camera imported from the .vrscene to use in animation. Only imported cameras from .vrscene file are available for selection. The option is ignored if the Camera Animation track is not empty. The Camera Animation track is used instead in this case.
Add Pause Before – Adds a pause item before the scene animation track.
Go To Start – Moves the slider to the start of the scene animation track.
Go To End – Moves the slider to the end of the scene animation track.
Delete – Deletes the scene animation track.
Right-click on transition item:
Different interpolations between camera clips:
Linear – Creates a uniform transition between camera clips.
In/Out Quad – Creates a smooth transition between camera clips. Creates a transition rate that is slow at the beginning and end, but fast in the middle.
In Quad – Creates a transition rate that is slow at the beginning and accelerates in the end.
Out Quad – Creates an accelerated transition rate at the beginning that gradually slows down.
Set Duration – Determines how long the transition item should be.
Go To Start – Moves the slider to the starting point of the transition item.
Go To End – Moves the slider at the end of the transition item.
Delete – Deletes the transition item.
![]()
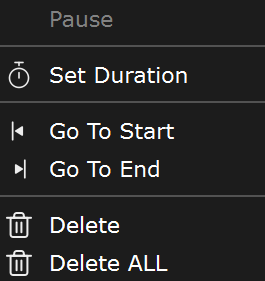
Right-click on pause item:
Set Duration – Determines how long the pause item should be.
Go To Start – Moves the slider at the start of the pause item.
Go To End – Moves the slider at the end of the pause item.
Delete – Deletes the pause item.