This page provides information on the VRayToonMtl. 

Overview


2D cel and cartoon effects can easily be achieved with the VRayToonMtl. Use this material to make your scene get that hand-drawn look. Controlling the shadows and lights received by the material in combination with material transparency, gotten from Object or Material IDs, allows for fine-tuning the result. You can take advantage from the other standard V-Ray material options such as reflection, refraction, anisotropy, subsurface scattering and bump/normal mapping to set up the render to your liking.


Basic Parameters


Diffuse – Specifies the diffuse color of the material. Note that the actual diffuse color of the surface also depends on the Reflect and Refract colors. This parameter can be mapped with a texture in the Maps rollout.

Roughness – Used to simulate rough surfaces or surfaces covered with dust (for example, skin, or the surface of the moon). This parameter can be mapped with a texture in the Maps rollout.


Diffuse Ramp


The Diffuse Ramp controls the diffuse color based on the amount of light received. Position 0.0 maps to light intensity 0.0, position 1.0 maps to light intensity 1.0 and above.

Ramp Offset – Specifies a grayscale texture used to offset the ramp position for the respective shaded point.

Output Offset – Specifies an amount used to offset the ramp position by a static value. Useful when the ramp offset texture has values in [0, 1] range but the user wants values in [-0.5, 0.5] range instead.

Reflect – If a ray has reached its maximum reflection depth, this color is returned without tracing the ray further.  

Max depth – Specifies the number of times a ray can be reflected. Scenes with lots of reflective and refractive surfaces may require higher values to look correct.

Glossiness – Controls the sharpness of refractions. A value of 1.0 means perfect glass-like refraction; lower values produce blurry or glossy refractions.

Reflect on back side – When disabled, V-Ray calculates reflections for the front side of objects only. Enable it to make V-Ray calculate the reflections for the back sides of objects too.

Fresnel reflections – When enabled, makes the reflection strength dependent on the viewing angle of the surface. Some materials in nature (glass, etc.) reflect light in this manner. Fresnel reflections calculation also interpolates glossy reflections and refractions on a "microfacet" level to ensure more natural effect with less brightening of the grazing edges as the glossiness is decreased. Note that the Fresnel effect depends on the index of refraction as well.

Fresnel IOR – Specifies the IOR to use when calculating Fresnel reflections.

Dim dist. – Enables the Dim distance parameter which allows you to stop tracing reflection rays after a certain distance.

Dim fall off – Specifies a fall off radius for the dim distance.

Affect channels – Specifies which channels are affected by the reflectivity of the material.

Color Only – The reflectivity affects only the RGB channel of the final render.
Color+Alpha – The material transmits the alpha of the reflected objects instead of displaying an opaque alpha. 
All channels – All channels and render elements are affected by the reflectivity of the material.

When selecting the Affect All channels option, be aware that the information of the respective component affects all render elements, therefore the Back to Beauty composition will not match the RGB result from the renderer.


MAXScript example on how to create new diffuse ramp in the VRayToonMtl applied to selected geometry:


.addDiffuseRampKey <texturemap>map <RGB color>color <float>position <integer>interpolation
--creates new Diffuse ramp key in the VRayToonMtl applied to selected geometry:
$.material.addDiffuseRampKey undefined (color 20 20 0) 0.7 1


MAXScript example on how to create new reflection ramp in the VRayToonMtl applied to selected geometry:


.addReflectionRampKey <texturemap>map <RGB color>color <float>position <integer>interpolation
--creates new Specular ramp key in the VRayToonMtl applied to selected geometry:
$.material.addReflectionRampKey undefined (color 20 20 0) 0.7 1


Specular Ramp


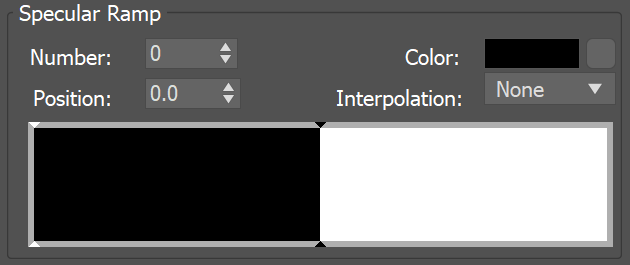
This ramp controls the specular color based on the amount of light received. Position 0.0 maps to light intensity 0.0, position 1.0 maps to light intensity 1.0 and above.


Toon anisotropy


Highlight type – Offers two modes to set the anisotropy highlight: 

Shaped – Using a curve and points to set the highlights.
Textured 
– Textured highlight allows a greater degree of control over the final look. It uses the same VRayMtl highlight anisotropy UV space to map a texture over the highlight.

Highlight mask – When the Highlight Type is set to Textured, this parameter becomes active. Select a texture to use as a mask for the highlight.

Shape preset – Presets for the curve that controls the shape of the highlight. The curve positions are mapped to points on a circle (the default highlight shape). When the Highlight Type is set to Textured, the presets of this option are ignored.

Default 
Square 
Hexagon 
Heart 
Star 


Parameters


Refract – Specifies the amount of refraction and the refraction color. Any value above zero enables refraction. Note that the actual refraction color depends on the Reflect color as well. This parameter can be mapped with a texture in the Maps rollout. 

Max depth – Specifies the number of times a ray can be refracted. Scenes with lots of refractive and reflective surfaces may require higher values to look correct.

Glossiness – Controls the sharpness of refractions. A value of 1.0 means perfect glass-like refraction; lower values produce blurry or glossy refractions. This parameter can be mapped with a texture in the Maps rollout. 

Affect shadows – When enabled, the material casts transparent shadows to create a simple caustic effect dependent on the refraction color and the fog color. For accurate caustic calculations, disable this parameter and instead enable Caustics in the GI tab. Simultaneous usage of both Caustics and Affects Shadows can be used for artistic purposes but do not produce a physically correct result. This only works with V-Ray shadows and lights.

IOR – Specifies the index of refraction for the material, which describes the way light bends when crossing the material surface. A value of 1.0 means the light does not change direction. This parameter can be mapped with a texture in the Maps rollout. 

Abbe number – Increases or decreases the dispersion effect. Enabling this option and lowering the value widens the dispersion and vice versa.

Affect channels – Specifies which channels are affected by the transparency of the material.

Color Only – The transparency affects only the RGB channel of the final render.
Color+alpha – The material transmits the alpha of the refracted objects instead of displaying an opaque alpha. Note that currently, this works only with clear (non-glossy) refractions.
All channels – All channels and render elements are affected by the transparency of the material.

Fog color – Specifies the attenuation of light as it passes through the material. This option allows you to simulate the fact that thick objects look less transparent than thin objects. Note that the effect of the fog color depends on the absolute size of the objects and is therefore scene-dependent unless the Fog system units scaling is enabled. This parameter also determines the look of the object when using translucency. This parameter can be mapped with a texture in the Maps rollout. It is recommended that you use a 3D texture for the purpose.

Fog multiplier – Controls the strength of the fog effect. Smaller values reduce the effect of the fog, making the material more transparent. Larger values increase the fog effect, making the material more opaque. In more precise terms, this is the inverse of the distance at which a ray inside the object is attenuated with an amount equal to the Fog color.

Fog bias – Changes the way the fog color is applied. Negative values make the thin parts of the objects more transparent and the thicker parts more opaque and vice-versa (positive numbers make thinner parts more opaque and thicker parts more transparent).

Self-illumination – Specifies the self-illumination color of the material. A texture map can be used for the self-illumination color by clicking on the check board box next to the color slider.

GI – When enabled, the self-illumination affects global illumination rays and allows the surface to cast light on nearby objects. Note, however, that it may be more efficient to use area lights or VRayLightMtl material for this effect.

Mult – Specifies a multiplier for the self-illumination effect. This is useful for boosting the self-illumination values so that the surface produces stronger illumination with GI.

Compensate camera exposure – When enabled, the intensity of the Self-Illumination is adjusted to compensate the exposure correction from the VRayPhysicalCamera.


Shadow control


Shadow blend – When disabled, the shadow is considered as negative light amount and used by the diffuse ramp for color selection. When enabled, the shadow is rendered separately and can be blended with the diffuse color.

Shadow color – Specifies a texture that modifies the shadow color.

Shadow opacity – Specifies the strength of the shadow when blending with the diffuse color. A value of 0 means completely transparent shadow (or no shadow), while a value of 1 gives full shadow result.


Light control


Replace light color – When enabled, the color for all lights illuminating an object with the current material is replaced by Light Color.

Light color – Specifies a replacement color for the original light color.

Light blend mode – Specifies the mode for blending the original light with the diffuse color.

Blend intensity – Specifies an amount for blending the original light and the diffuse color. A value of 0 results in no light blending, while a value of 1 results in full light blending. A texture map can be used here.


Material transparency


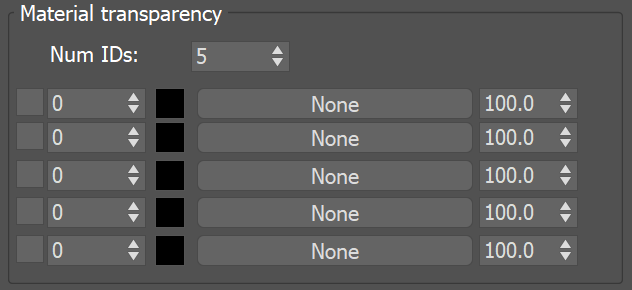
Num IDs – Specifies the number of IDs used in the material transparency list. This option works with Object IDs.


Options


Trace reflections – When disabled, reflections are not traced even if the reflection color is greater than black. This can be disabled to produce only highlights. Note that when disabling this parameter the diffuse color is not dimmed by the reflection color, as would happen normally.

Trace refractions – When disabled, refractions are not traced even if the refraction color is greater than black.

Cutoff – Specifies a threshold below which reflections/refractions are not traced. V-Ray tries to estimate the contribution of reflections/refractions to the image, and if it is below this threshold, these effects are not computed. Do not set this to 0.0 as it may cause excessively long render times in some cases.

Env. priority – Determines the environment to use if a reflected or refracted ray goes through several materials, each of which has an environment override.

Preserve energy – Determines how the diffuse, reflection, and refraction color affect each other. V-Ray tries to keep the total amount of light reflected off a surface to be less than or equal to the light falling on the surface (as this happens in the real life). For this purpose, the following rule is applied: the reflection level dims the diffuse and refraction levels (a pure white reflection will remove any diffuse and refraction effects), and the refraction level dims the diffuse level (a pure white refraction color will remove any diffuse effects). This parameter determines whether the dimming happens separately for the RGB components or is based on the intensity.

RGB – Causes dimming to be performed separately on the RGB components. For example, a pure white diffuse color and pure red reflection color give a surface with cyan diffuse color (because the red component is already taken by the reflection).
Monochrome – Causes dimming to be performed based on the intensity of the diffuse/reflection/refraction levels.

Double-sided – When enabled, V-Ray also shades the back-facing surfaces with this material. Otherwise, the lighting on the outer side of the material is always computed. This can be used to achieve a fake translucent effect for thin objects like paper.

Use irradiance map – When enabled, the irradiance map is used to approximate diffuse indirect illumination for the material. When disabled, brute force GI is used in which case the quality of the brute force GI is determined by the Subdivs parameter of the Irradiance Map. This can be used for objects in the scene which have small details and are not approximated very well by the irradiance map.

Fog system units scaling – When enabled, the fog color attenuation becomes dependent on the current system units.

Effect ID – When enabled, specifies input values for Material ID for the override material effect.

Opacity mode – Controls how the opacity map works.

Normal – The opacity map is evaluated as normal: the surface lighting is computed and the ray is continued for the transparent effect. The opacity texture is filtered as normal.
Clip – The surface is shaded as either fully opaque or fully transparent depending on the value of the opacity map (i.e. without any randomness). This mode also disables the filtering of the opacity texture. This is the fastest mode, but it might increase flickering when rendering animations. 
Stochastic
 – The surface is randomly shaded as either fully opaque or fully transparent so that on average it appears to be with the correct transparency. This mode reduces lighting calculations but might introduce some noise in areas where the opacity map has gray-scale values. The opacity texture is still filtered as normal.


Maps


The settings on the Maps rollout determine the various texture maps used by the material. Most of the parameters in this rollout pertain directly to parameters in the VRayToonMtl, and their definitions can be found in the Basic parameters and Options rollouts.


Notes