This page provides information for how best to render using V-Ray GPU for use with VR headsets like the Oculus Rift or HTC Vive.
Overview
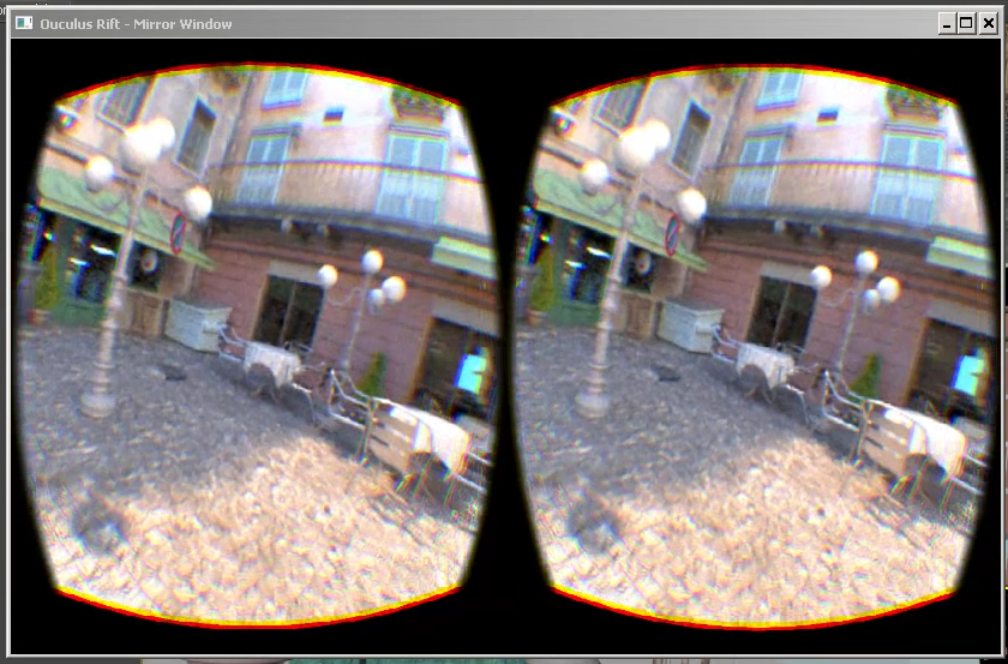
V-Ray GPU can be setup to view IPR render through VR headsets such as the Oculus Rift or HTC Vive. This way, when rendering a 6x1 stereo cube panorama, users can utilize a VR headset to view the render in proper virtual space as it renders as opposed to seeing the render as a flat image in the VFB. With the help of a MAXScript, it is possible to update the position of the camera with a game controller to move around in the virtual space while V-Ray GPU updates and refreshes the render from the new camera location. |
|
V-Ray GPU Output to Headset Setup
1. Confirm headset display is installed properly.
If using Oculus Rift then install Oculus Rift PC runtime:
https://www3.oculus.com/en-us/setup/
Direct internet connection is needed to login to Oculus Account. It seems that it does not work through a proxy. You need at least 5 GB disk space on your C: drive.
This step is not needed if using HTC Vive.
Oculus Rift only: connect headset to the default graphics adapter (it will not work if connected to other graphic adapters).
In the Oculus app, enable apps from unknown sources: turn on Oculus Settings > General > Unknown Sources
For HTC Vive support, install Steam and Steam VR:
https://support.steampowered.com/kb_article.php?ref=2001-UXCM-4439#install-steam
This is needed in order to use the OpenVR interface for HTC Vive, Oculus Rift and other VR devices. This step is optional for Oculus Rift.
2. Check that the headset is working and displays its home scene correctly.
V-Ray Production Render Settings
- Turn off Image filter
- Select Camera Type to Cube 6x1
- Render resolution width must be divisible by 6
|
V-Ray GPU IPR Settings
- Select GPU Engine type > Using GPU (CUDA/RTX) engines is recommended. Use CPU if your GPU is not suitable for rendering the scene (not enough memory or other limitations), but expect possible slower render times.
- Go to Render Settings > Settings > Stereoscopic rendering and select Stereo mode > Oculus Rift (mono), Oculus Rift (stereo), OpenVR (mono) or OpenVR (stereo)
- Select suitable image output size, for example 3000x500. You may start with a lower resolution.
- Render Device Select > exclude the default render adapter. Using the same adapter for GPU rendering and VR display will result in frame drops and poor VR experience. DR session with the local host excluded should work fine.
|
3. Start V-Ray GPU IPR render. The first render will start slowly since it takes some time to load the Oculus VR library.
MAXScript Reference
The information in this section will help explain how to use MAXScript to navigate around the VR environment with a game controller. Below is a download link to a sample MAXScript that sets the buttons and analog sticks in a general configuration to get you up and running. For more details,please see comments in the top section of the script file.

Access to VR controllers state
Access to VR controllers state is available in ActiveShade mode. Currently, the controller state is only accessible during Oculus Rift preview sessions (Stereo mode = Oculus rift).
You can refer to the current renderer and check to see if it supports VR controller interfaces from MAXScript:
renderers.current
V_Ray_GPU_Next:V_Ray_GPU_Next

ivraygpu=getinterface renderers.current "vrayrtmax_interface"
<MixinInterface:vrayrtmax_interface> |
VR controller interfaces
Assuming that variables ivrayrt and rt are initialized as stated above, you can list the VR controllers related interface properties:
showinterface ivraygpu
<MixinInterface:vrayrtmax_interface>
Interface: vrayrtmax_interface
   Properties:
    .vrControllerLTouch : Interface : Read
    .vrControllerRTouch : Interface : Read
    .vrControllerRemote : Interface : Read
    .vrControllerXBox : Interface : Read
   Methods:
   Actions:
OK |
The interfaces are also available as renderer properties:
showproperties renderers.current
  ...
  .vrControllerLTouch : Interface
  .vrControllerRTouch : Interface
  .vrControllerRemote : Interface
  .vrControllerXBox : Interface
  ...
false |
All VR controller interfaces are uniform – they contain the same methods and properties regardless of controller type. Interface information can be displayed as follows:
showinterface renderers.current.vrControllerLTouch
  Interface: VRController_LTouch
   Properties:
    .connected : boolean : Read
    .timeInSeconds : double : Read
    .indexTriggers : float by value array : Read
    .gripButtons : float by value array : Read
    .thumbSticks : point2 by value array : Read
    .buttonA : boolean : Read
    .buttonB : boolean : Read
    .buttonRThumb : boolean : Read
    .buttonRShoulder : boolean : Read
    .buttonX : boolean : Read
    .buttonY : boolean : Read
    .buttonLThumb : boolean : Read
    .buttonLShoulder : boolean : Read
    .buttonUp : boolean : Read
    .buttonDown : boolean : Read
    .buttonLeft : boolean : Read
    .buttonRight : boolean : Read
    .buttonEnter : boolean : Read
    .buttonBack : boolean : Read
    .buttonVolUp : boolean : Read
    .buttonVolDown : boolean : Read
    .buttonHome : boolean : Read
    .touchA : boolean : Read
    .touchB : boolean : Read
    .touchRThumb : boolean : Read
    .touchRThumbRest : boolean : Read
    .touchRIndexTrigger : boolean : Read
    .touchX : boolean : Read
    .touchY : boolean : Read
    .touchLThumb : boolean : Read
    .touchLThumbRest : boolean : Read
    .touchLIndexTrigger : boolean : Read
    .touchRIndexPointing : boolean : Read
    .touchRThumbUp : boolean : Read
    .touchLIndexPointing : boolean : Read
    .touchLThumbUp : boolean : Read
   Methods:
    <void>setNotifyCallback <string>callback <float>threshold
   Actions:
OK |
VR controller interface details
| Property | Description |
|---|
| connected | True if the corresponding controller is connected; otherwise false. |
| timeInSeconds | System time of last controller state update. |
indexTriggers[1]
indexTriggers[2] | Left and right finger trigger positions, in the range of 0.0 to 1.0. |
gripButtons[1]
gripButtons[2] | Left and right grip button positions, in the range of 0.0 to 1.0. |
thumbSticks[1]
thumbSticks[2] | Left and right thumb stick position coordinates in the range of -1.0 to 1.0, as point2 values.
Centered stick position is [0.0, 0.0]. |
| buttons, touches | Boolean properties that represent the state of various buttons and sensors on the controller. |
| setNotifyCallback <callback> <threshold> | Sets notification MAXScript that will be executed whenever controller state changes.
<callback> is a MAXScript code that will be executed when controller state is changed.
<threshold> amount of change on floating point input that triggers callback execute.
The callback script will be executed whenever button is pressed or released, a floating-point input value is changed beyond the specified threshold value and whenever controller is connected or disconnected. |
setNotifyCallback Sample Use
Sets notification callback which outputs left index trigger position of the XBox controller whenever its state changes:
fn myNotifyCallback = (
        format "XBox Left Trigger value: %\n" renderers.current.vrControllerXBox.indexTriggers[1]
    )

renderers.current.vrControllerXBox.setNotifyCallback "myNotifyCallback()" 0.1 |
Stop receiving notifications from the XBox controller:
renderers.current.vrControllerXBox.setNotifyCallback "" 0.1 |
Process notifications from two different controllers using a common callback:
iXBox= renderers.current.vrControllerXBox
iRemote= renderers.current.vrControllerRemote

fn myNotifyCallbackWithParam controller_interface = (
        format "controller % button UP state %\n" controller_interface controller_interface.buttonUP
    )

iXBox.setNotifyCallback "myNotifyCallbackWithParam iXBox" 0.1
iRemote.setNotifyCallback "myNotifyCallbackWithParam iRemote" 0.1 |
Scripting Focus
Focus method in VRay GPU is settable using MAXScript:
renderers.current.stereo_focus=0 |
stereo_focus can take the following values:
0 - parallel
1 - rotation
2 - shear transform
Notes
- Head orientation tracking is only supported when rendering a panorama using the Cube 6x1 camera.
- Rotation and shear use camera target distance as a "zero parallax" plane distance.
- In order to get a comfortable feel, you must set the camera target distance to a high value. Alternatively, you can change the stereo_focus method to 0 (parallel) using MAXScript.
- Shear is not supported for panorama renders.
|

