This tutorial demonstrates the flexibility of VRayProxy and VRaySwitchMtl when working with user defined attributes.


Overview


3ds Max User Defined Properties dialog allows adding custom attributes per object. These attributes can have unique values even between instanced geometry. 

In this tutorial we use this feature to link a variety of materials and vrmesh assets to VRayProxy instances.

First, we define the custom object attribute that we use as switch for both material and geometry. Then, we set the switch in a VRaySwitch material to specify the exact sub-material which is used. And finally, we instantiate the VRayProxy objects and set their custom attribute values, effectively specifying the exact vrmesh and material to use.


Step 1: Set the object property attribute


To set an object property or attribute, do the following:

1. Create a VRayProxy object and load your vrmesh in it.

2. Right click on it and go to Object Properties > User Defined. In the User Defined Properties field, enter an attribute name and a value for it. In this case it is:

dough = 0

Attributes can have any kind of value. Here we use numeric value in order to specify a number for selecting VRaySwitchMtl sub-material later on.


Step 2: VRaySwitchMtl and VRayUserScalar


In this scene, we want to use seven different cookie materials.

Create a VRaySwitchMtl in the Material Editor. Place all cookie materials in the Materials slots (here numbered from 0 to 6).

Let's see how to match each sub-material with the geometry's attribute value we specified.

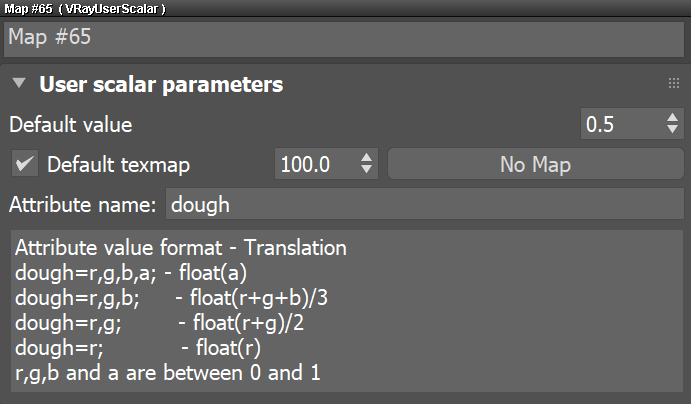
Set VRayUserScalar as a Switch map. It can read custom user attribute value and feed it to the switch.


Go to the VRayUserScalar parameters.

For Attribute name, enter the user defined property name you used for all of the objects in the scene. In this scene, we use dough.

Assign the VRaySwitchMtl to the VRayProxy object. It renders with the sub-material from slot 0.

You can edit the user defined attribute value and the change respectively affects the material choice.

Each of the materials is now available to all VRayProxy instances and picked accordingly to match the specific attribute value.


Step 3: Using Proxy Instances


Let's see how to work with proxy instances and user defined properties.

We've named the proxies Cookie_0.vrmesh, Cookie_1.vrmesh, Cookie_2.vrmesh, etc., which now comes handy, as we want to use a tag to specify the Mesh file name in each instance we make.

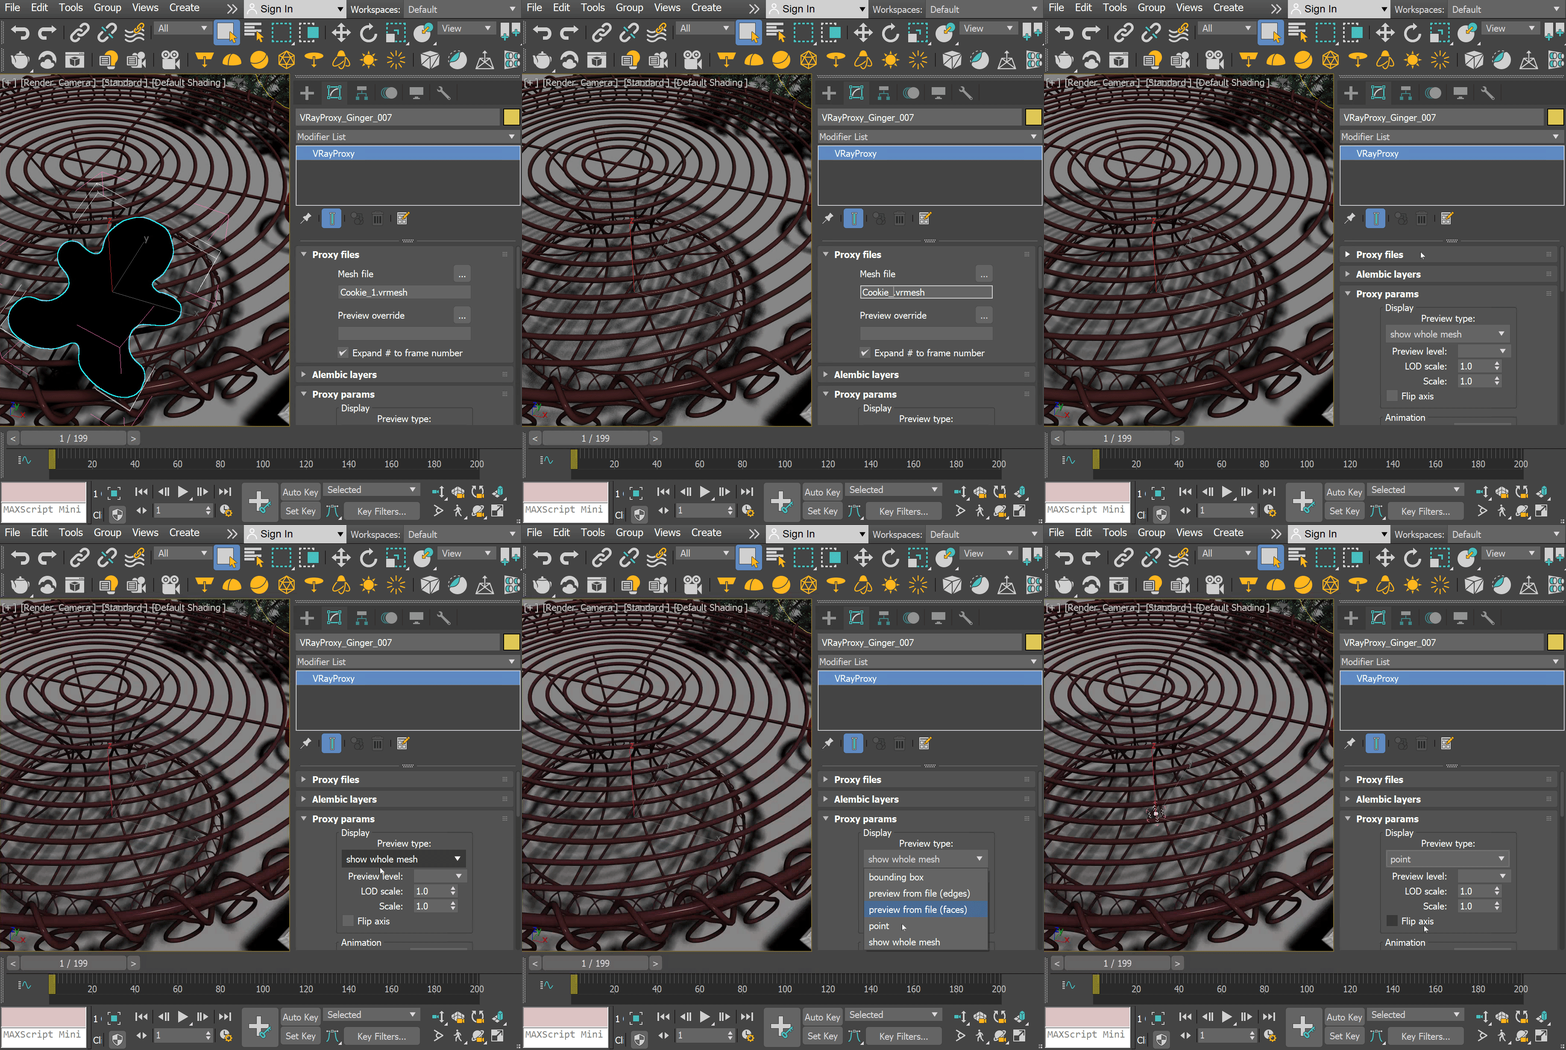
Go to the Mesh file field of each proxy instance, and in the place of the number suffix, put a tag using the <> brackets.

The tag should be the object property name (the same one we used for the Switch).

Here the Mesh file is Cookie_<dough>.vrmesh.

Now this tag serves us instead of the numerical suffix, allowing us to load whichever proxy in the place of the instance.

The mesh preview is not available with this setup, but you can render and make sure that the mesh corresponding to the custom attribute value is loaded.


Make a bunch of instances of the VRayProxy object and change their dough value using numbers from 0 to 6.

This way, the value of the attribute determines which proxy is loaded during rendering.

Also, the proxies have the VRaySwitchMtl assigned by default, so that each proxy gets its respective material based on the same attribute value.


Here is a rendered example with seven instances of one proxy, loading various proxy geometry and its respective material.


We can make multiple instances of these VRayProxy objects and tweak just the user defined attribute value where needed to pick a different mesh and automatically render it with its proper material.