
This article explains the settings and values for the Corona Triplanar shader in Cinema 4D.
Overview
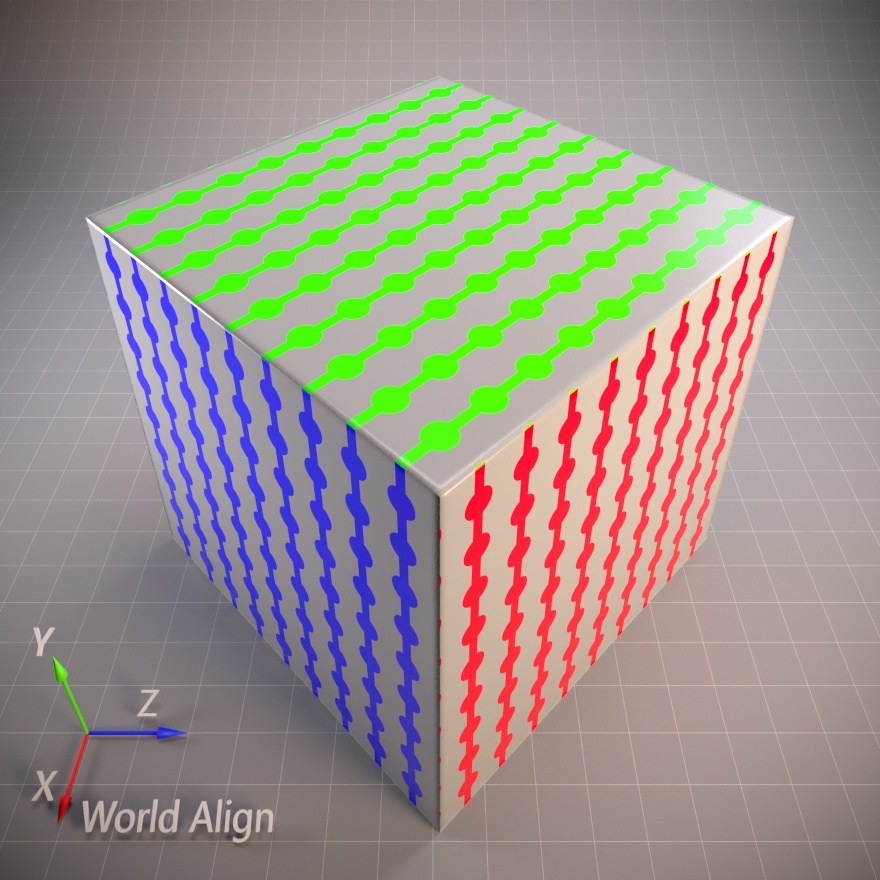
The Corona Triplanar shader overcomes the limitations of conventional texturing, such as visible seams or stretching, without having to worry about the UVW mapping of your scene objects. The way it works is based on projecting textures along the object's XYZ axes with some additional options such as scaling, rotation, offset, and blending.
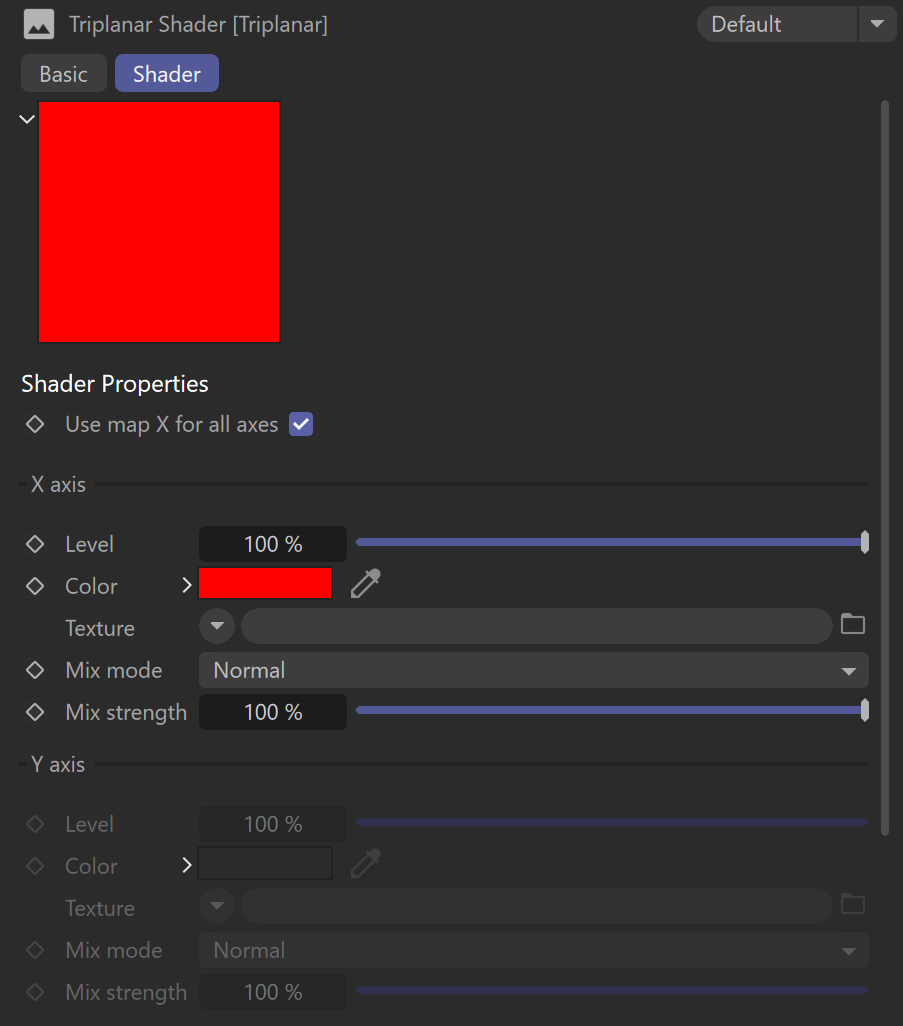
Shader Properties
Use map X for all axes – When enabled, the same texture map or shader is projected for the X, Y, and Z axes. The texture used is defined in the X-axis texture slot.

X axis
Level – This is the intensity (also considered as the visibility) of the color.
Color – This is the color that is used for the X-axis.
Texture – This slot defines the texture map or shader that replaces the defined color for the X-axis.
Mix mode – This parameter controls the blending of the texture map or shader and the selected color for the X-axis.
Mix strength – This value controls the intensity of the texture map or shader that is being used for the X-axis.
If the Mix strength is set to 100%, the texture map or shader completely overrides the color unless the Mix mode is set to a different blending mode than Normal.

Y axis
Level – This is the intensity (also considered as the visibility) of the color.
Color – This is the color that is used for the Y-axis.
Texture – This slot defines the texture map or shader that replaces the defined color for the Y-axis.
Mix mode – This parameter controls the blending of the texture map or shader and the selected color for the Y-axis.
Mix strength – This value controls the intensity of the texture map or shader that is being used for the Y-axis.
If the Mix strength is set to 100%, the texture map or shader will completely override the color unless the Mix mode is set to a different blending mode than Normal.

Z axis
Level – This is the intensity (also considered as the visibility) of the color.
Color – This is the color that is used for the Z-axis.
Texture – This slot defines the texture map or shader that replaces the defined color for the Z-axis.
Mix mode – This parameter controls the blending of the texture map or shader and the selected color for the Z-axis.
Mix strength – This value controls the intensity of the texture map or shader that is being used for the Z-axis.
If the Mix strength is set to 100%, the texture map or shader will completely override the color unless the Mix mode is set to a different blending mode than Normal.

Blending
Value – This value controls the blending between the projected texture maps or shaders. Higher values give a softer blend with a less visible seam but potential blurring, while lower values give a sharper transition between the texture maps.
Texture – This is the texture map or shader used to blend the projected texture maps defined for the X, Y, and Z axes. This texture map uses the UV mapping from the object (unless you pass it through its own Triplanar mapping node).

Corona Triplanar Shader: Blending Value


Corona Triplanar Shader: Texture


UVW transform
Mapping space – This parameter specifies how to get the X, Y, and Z axes for mapping.
Local space – This mode causes each object to use its own pivot. If an object is copied or rotated, the mapping "sticks" to each object (stays locked).
World space – This mode uses the same axes for all objects, and disregards object rotation - mapping stays locked to world coordinates and "flows" over the object surface when it is rotated.
Reference node space – This mode is similar to the Local space, but a different Reference node is used to control it. Useful with helper objects.
Reference node – This parameter is only available if the Reference node space mode is selected. Here you can define the object used to control the mapping. Rotating the reference object rotates the mapping on other objects.
Scale – This value controls the scale of the mapping. The input value is the side length of the texture in world units - larger values give fewer repeats of a texture and vice versa.
Offset – These values control the offset of the texture in world units for the X, Y, and Z axes respectively from left to right.
Rotation – These values control the rotation of the texture in degrees for the X, Y, and Z axes respectively from left to right.

Corona Triplanar Shader: Mapping space


![]()
Corona Triplanar Shader: Scale


Corona Triplanar Shader: Offset


Corona Triplanar Shader: Rotation
![]()
![]()
![]()