This page provides information about the Mix utility texture in V-Ray for Blender.
Overview
V-Ray Mix utility mixes two colors or textures using a texture map or a solid color value.

UI Path
||Node Editor|| > Add > Utility Textures > Mix
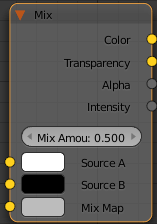
Node
Mix Amount – Controls the strength of the mix.
Source A – Specifies the first color.
Source B – Specifies the second color.
Mix Map – Controls how Source A and Source B are mixed together. This can be either via a texture map or a solid color.
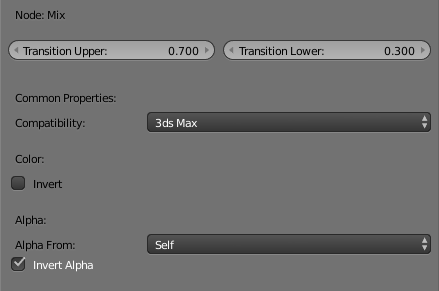
Parameters
Transition Upper – Used when a texture is applied to the Mix Map. Controls how gradual or how sharp the transition between the two colors is for the bright areas of the Mix Map. Any brightness value above this on the Mix Map will display Source A.
Transition Lower – Used when a texture is applied to the Mix Map. Controls how gradual or how sharp the transition between the two colors is for the dark areas of the Mix Map.
Compatibility – Allows you to match the result of the texture in Blender to that in either 3ds Max or Maya. If Alpha From is set to Maya:
3ds Max – The resulting alpha of the texture is the intensity of the texture.
Maya – The resulting alpha of the texture is the color luminescence.
Invert – When enabled inverts the colors in final result.
Alpha From – Determines how the alpha of the result is calculated:
Force 1.0 – Alpha is always 1.
Compatibility – Depends on the selected Compatibility option.
Self – The calculated alpha of the texture.
Invert Alpha – Inverts the alpha channel if Invert is also enabled.