This tutorial covers some easy steps for creating several iridescent materials: soap bubbles, as well as colored ceramic and pearl-like cat figurines.
Overview
VRayMtl’s Thin Film layer is perfect for recreating iridescent surfaces such as soap bubbles, oil spills, lens/glass coating, reflective car paint layering, and many more. The layer produces the effect of a thin film interference on the material’s surface, making it iridescent.
VRayMtl includes a ready-made preset with a soap bubble material that significantly speeds up the building-scene time and saves you time for tweaking the Thin Film layer. For more complex surfaces such as an iridescent pearl-like or ceramic surface, the Thin Film layer provides different approaches.
In this tutorial, you’ll learn how to use the Thin Film parameters to create soap bubbles, ceramic, and pearl-like surfaces.
The closeup shots in both scenes used here are taken with a V-Ray Physical Camera (set to Physical Exposure) that uses real-world camera settings for further realism. The assets are taken from Chaos Cosmos library.
The images are rendered on CPU with V-Ray for Maya 2023.3 and may look different when rendered with an earlier V-Ray for Maya version.
To download scene files: Download Scene Files
Want to follow along but don’t have a license?: Download Free Trial

Part I: Using Soap Bubble Preset
Open the Bubbles starting scene. Let’s first render the geometry with a simple clay material on it.

Using a soap preset is very easy - just create a VRayMtl and assign it to a sphere geometry.
Then, click the Presets button from the VRayMtl's parameters and select the Soap Bubble preset. There’s no more need for tweaking the material. The Soap Bubble preset values are perfect for recreating a realistic bubble surface and they are as follows:
- Both Reflection and Refraction Colors are set to white.
- Diffuse Color is black.
- Thin Film IOR is set to 1.35.
- Min Thickness is 500.
- Refraction IOR is set to 1.
- Thin-walled is enabled.

Here's the render. The oily rainbow look of the soap bubbles is visible.
Note that the VRayLightRectShape1 is enabled to highlight the liaison of the two frontal bubbles.
The VRayPhysicalCamera used here is set to Physical Exposure. The ISO is 100, the F-Number is 4, and the Shutter Speed is 15. Vignetting is also enabled and set to 5.
FoV is disabled and the Focal Length is 120. DoF is enabled.

Part II: Creating Iridescent Colored Ceramic Shading
In this part you’ll learn how to make а colored ceramic cat figurine by customizing the thin film layer. Keep in mind that this kind of a setup will look different in another lighting and environment scenario, as it is highly reflection dependent.
Open the Ceramic Cat starting scene and render to see the geometry with a simple clay material on it.
- Now, create a new VRayMtl and assign it to the cat figurine.
- Set the Diffuse Color to light blue. In this particular case, rgb (0, 107, 255) is used to give the object a bluish color.
- Change the Reflection Color to white to make the material more reflective.
- Lower the Reflection Glossiness to 0.7 to make the reflections blurrier.

Adjust the Coat Layer
- Keep the default white Coat Color and set the coat Amount to 1. Thus, the coat layer and the diffuse color will blend together.
- Slightly reduce the Coat Glossiness to 0.98 to make the reflections glossier and less glass-like.
- Set the coat IOR to 2 for a bigger bend angle of the light through the hard ceramic surface. The higher coat IOR makes the highlights of the ceramic glaze stronger at the periphery as well as the room windows reflections stronger.

Adjust the Thin Film Layer
- Enable the Thin Film layer from the VRayMtl parameters.
- Lower the Min Thickness to 200. This value gives a pinkish tint.
- Set the Thin Film IOR to 4. The higher the value, the bigger the color spread.

Here’s the cat figurine.
The VRayPhysicalCamera used here is also set to Physical Exposure. The ISO is 100, the F-Number is 2.8, and the Shutter Speed is 125.
FoV is used and Focal Length is disabled.

Let’s further tweak the material for a different glossy ceramic look.
- Set the Diffuse Color closer to white. In this particular case, rgb (245, 245, 245) is used.
- Copy the same color values for the Reflection Color.
- Keep the Reflection Glossiness lowered to 0.7 as in the previous example.
- Also keep the coat Amount to 1.
- Set the Coat Glossiness to 0.985.
- Give the coat IOR a value of 3.5. Higher IOR makes the highlights stronger at the side curved part where the window is reflected.
- Lower the Min Thickness to 120 to give a more bluish tint.
- Set Thin Film IOR to 3.5.

Here’s the cat figurine.
The same camera settings are used as for the previous render.

Part III: Creating Iridescent Pearl-like Shading
In this part you’ll learn how to make the cat figurine pearl-like with a pink tint by customizing the thin film layer. Keep in mind that this setup is dependent on the lighting and environment scenario.
- Create a new VRayMtl and assign it to the figurine.
- Set the Diffuse Color to pure white, i.e. rgb (255, 255, 255).
- Change the Reflection Color to white to make the material more reflective.
- Lower the Reflection Glossiness to 0.7 for blurrier reflections.

Adjust Texture and Coat Layer
- Set the Coat Color to a darker white, e.g. rgb (195, 195, 195), and then set the coat Amount to 1. This blends the coat layer and the diffuse color together.
- Slightly reduce the Coat Glossiness to 0.985 to make the reflections glossier.
- Plug a Noise texture into the Coat Bump Map slot of the VRayMtl and set the texture's parameters as shown in the screenshot. (Perlin type, the Depth Max is 5, lower the Amplitude to 0.650, raise the Ratio to 0.750, Alpha Gain is 0.850, Alpha Offset is 0.200, Default Color and Color Gain are both pure white, and set Coverage to 15 and 10). This slightly alters the coat surface and makes the highlights slightly irregular. Note that instead of a Noise texture, it is possible to add other texture such as Gradient Ramp, depending on what look you are trying to achieve.
- Don't forget to enable the Alpha is Luminance option. Otherwise, the Noise texture won't have any effect.
- The bump is too strong so let's reduce the Coat Bump Multiplier to 0.10.
- Set the coat IOR to 3.5.

Adjust the Thin Film Layer
- Enable the Thin Film layer from the VRayMtl parameters.
- Plug the same Noise map to the Thickness Blend map slot to pick values for the thickness from 120 to 230 based on the noise colors distribution.
- Set the Thin Film IOR to 3.5. The higher the value, the bigger the color spread.

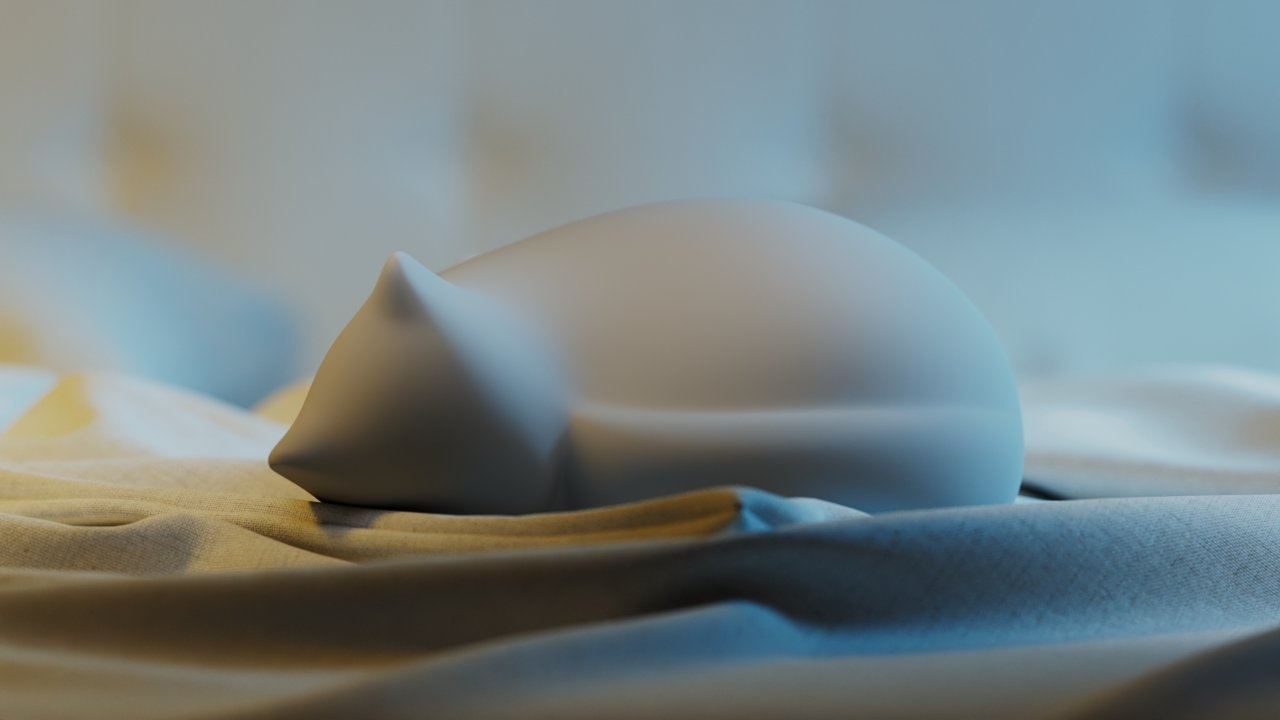
Here's how the pearl-like cat figurine turned out.
The VRayPhysicalCamera used here is again set to Physical Exposure. The ISO is 100, the F-Number is 2.8, and the Shutter Speed is 125.
FoV is used and Focal Length is disabled.

Final Results
The images are rendered on CPU with V-Ray for Maya 2023.3 and may look different when rendered with an earlier V-Ray for Maya version.
