Versions Compared

Key

  • This line was added.
  • This line was removed.
  • Formatting was changed.

...

Overview

...

Section
Column
width45%50%

The Override Material is a utility material provided with the V-Ray renderer. It allows a surface to look different depending on whether it is seen through reflections, refractions, or GI.

With this material you get fine controls over the color bleeding, reflections, refractions, and shadows of the objects.

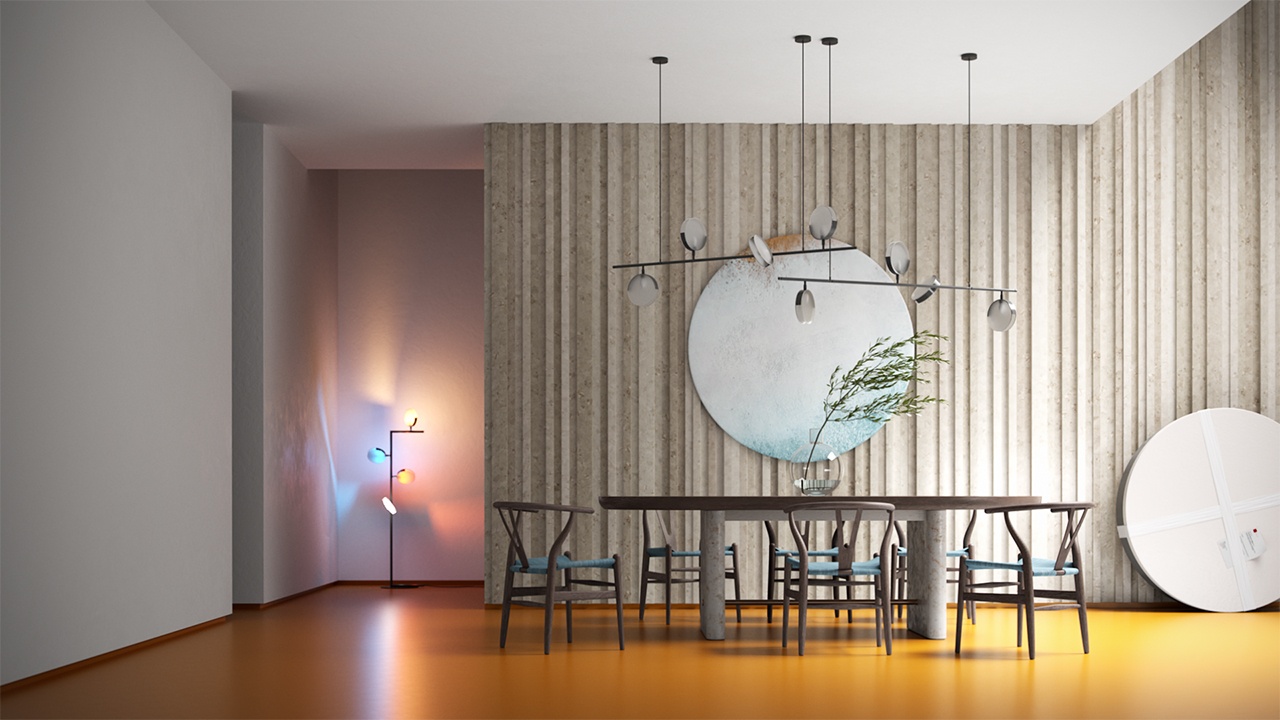
The example render here shows the use of the Override Material to create some interesting reflections and refractions of the chairs. Notice how the yellow chair changes its color when seen through a refractive material. The reflections of the colored chairs, seen in the floor, display variation of the colors as well.

Column
width5%


Column
width50%

Image_comparison_slider
AddButtonsfalse
LabelBeforeoff
LabelAfteron
AttachmentImageBeforeOverride_Material_Off_1280x720.jpg
AttachmentImageAfterOverride_Material_1280x720.jpg

45%

Image Added


UI Paths

...


Section
Column
width10%


Column
width30%

||V-Ray|| > Override Material

Column
width10%


Column
width30%

||Create|| > V-Ray > Override Material (disabled Separate menu for V-Ray materials)


Column
width20%


...

Example: Using GI Material Option

...

This example explores how the orange color coming from the vivid orange colored floor leaks through and colors the rest of the objects in the scene (walls, skirtings, etc.).

In the first image, it is visible that all walls, objects, and the ceiling are rendered in some light orange color. This is due to the color bleeding, generated by the GI calculations.

In the second image, the scene is rendered with a VRayOverride GI material assigned to the floor. The VRayOverrideMtl is set with a concrete gray V-Ray material for the GI Material and with the default orange material for Base Material.

So now V-Ray knows that while calculating the GI it has to use the GI material, and during rendering it uses the Base material. The result of that is quite different from the previous render as the color bleeding is gone.

For a much more complex scene, with lots of different geometry, shaders, textures, etc., using the

...

VRayOverride material can be very helpful.


Before after
afterLabelOn
beforeLabelOff
Panel
borderStylenone

Image Added

Panel
borderStylenone

Image Added


Outlines

...

Section
Column
width50%

Enable Outlines – When enabled, adds outlines to the object the material is applied to. This option is disabled by default.

Line Color – Determines the color of the outlines. A Texture can be applied.

Line Width – Determines the width of the outlines in pixels. The soft limit is 100. Click on the Image Added arrow to expand. A Texture can be applied.

Opacity – Determines how opaque the lines are. Click on the Image Added arrow to expand. You can attach a Texture for the opacity. The Mix Strength option determines the percentage of blending between the Opacity value and the texture.

Outer Overlap Threshold – Determines when outlines are created for overlapping parts of the object. Lower values reduce the outer overlapping lines, while higher values produce more overlapping outer lines.

Normal Threshold – Determines at what point lines are created for parts of the object with varying surface normals (for example, at the inside edges of a box). Lower values mean that only sharper normals generate an edge, while a value of 0.5 means that 90 degrees or larger angles generate internal lines. Higher values mean that smoother normals can also generate an edge. Don't set this value to pure 1.0, as this fills curved objects completely. 

Overlap Threshold – Determines when outlines are created for overlapping parts of the object. Lower values reduce the internal overlapping lines, while higher values produce more overlapping lines. Don't set this value to pure 1.0, as this fills the objects completely. 

Column
width5%


Column
width45%

Image_comparison_slider
AddButtonsfalse
LabelBeforeoff
LabelAfteron
AttachmentImageBefore01_GI_Override_Mtl_Off.jpg
AttachmentImageAfter01_GI_Override_Mtl_On.jpg

...

Image Added


Inner Line Control

...

Section
Column
width50%

Inner Line Control – When enabled, allows the inner line to be edited further. This option is disabled by default.

Inner Line Color – Determines the color of the inner lines. A Texture can be attached 

Inner Line Width – Determines the width of the inner lines in pixels. Click on the Image Added arrow to expand for theTexture option, where you can attach a texture to serve as the inner line width.

Column
width5%


Column
width45%

Image Added

...


Options

...

Section
Column
width50%

Material Id Enabled – Enables the use of Material ID.

Material ID – The color used by the Material ID render element. You can also use a shader here.

Multimatte ID – The integer ID of the material to be used by the Multi Matte render element.


Round Edges Enabled – Enables the Round Edges effect, which uses bump mapping to smooth out the edges of the geometry during render time.

Radius – Specify a radius (in world units) for the Round Edges effect. Since the actual geometry is not being changed and only the normals of the faces are affected, large values may produce undesirable effects.

Consider Same Object Only – When enabled, the rounded corners are produced only along edges that belong to the object, which has the attribute applied. When disabled, rounded corners are also produced along edges formed when the object with the attribute intersects other objects in the scene.

Corners – Choose which edges are considered in the calculation. Possible options are:

Convex and Concave – Considers all edges.
Convex Only – Only applies Round Edges effect to edges with convex angles.
Concave Only – Only applies Round Edges effect to edges with concave angles.

Column
width5%


Column
width45%

...