Page History
This page gives provides examples on using the Sampler Info node with extra V-Ray Attributes.
Overview
| Section | |||||||||||||||
|---|---|---|---|---|---|---|---|---|---|---|---|---|---|---|---|
|
Additional Outputs
| Section | |||||||||||||||
|---|---|---|---|---|---|---|---|---|---|---|---|---|---|---|---|
|
Common Uses
The SamplerInfo node extracts particular information about the scene. It then converts the gathered information into RGB data. It can be used within the Maya Hypershade or to drive a material channel to achieve various effects. This can provide more render passes with information that can allow more possibilities to editing during the compositing process.
Example: UV Coordinate Render Element
By plugging in the SamplerInfo node to the Extra Texture Render Element, several additional render passes can be created.
To create a pass that represents UV coordinate information as red, green or blue colors, create a SamplerInfo node and use the Maya Connection Editor to connect the U Coord and V Coord outputs to different Vray Texture Extratex inputs for R, G, or B. In the example shown below, the U Coord output is connected to Vray Texture Extratex R and the V Coord output is connected to Vray Texture Extratex G. This causes the U coordinate information to appear as red in the render pass, while the V coordinate information appears as green.
| Section | ||||||||||||||||||||
|---|---|---|---|---|---|---|---|---|---|---|---|---|---|---|---|---|---|---|---|---|
|
| Anchor | ||||
|---|---|---|---|---|
|
Example: Random Colors by Object ID
Using the SamplerInfo node with the V-Ray Additional outputs in Maya Hypershade, it is possible to apply a random color (or texture) over several objects based on each object's Object ID. To do this, connect the Vray Random By ID output to a ramp texture, and connect the ramp texture to any texture channel in a material. This applies a different color (or texture connected to a color slot in the ramp texture) for each ID on objects within a scene.
In the example rendering below, the switches, sliders, and buttons that appear in the bottom part of the image have been assigned various Object IDs, and objects with the same Object ID receive the same color.
| Section | ||||||||||||||||||||
|---|---|---|---|---|---|---|---|---|---|---|---|---|---|---|---|---|---|---|---|---|
|
| Section | ||||||||||||||||||||
|---|---|---|---|---|---|---|---|---|---|---|---|---|---|---|---|---|---|---|---|---|
|
Anchor RandomByPolyShell RandomByPolyShell
Example: Random Colors by Poly Shell
The SamplerInfo node, with the V-Ray Additional outputs in the Maya Hypershade, makes it possible to apply a random color (or texture) to multiple objects that have been combined into a single object. This is done by connecting the Vray Random By Poly Shell output to a ramp texture which is then connected to any texture channel in a material. This applies a different color (or texture connected to a color slot in the ramp texture) to each poly shell within a scene.
In the example rendering below, the switches, sliders, and buttons in the bottom part of the image have been combined into a single object. As such, Vray Random By Poly Shell will apply a different color randomly to each poly shell within the object.
| Section | ||||||||||||||||||||
|---|---|---|---|---|---|---|---|---|---|---|---|---|---|---|---|---|---|---|---|---|
|
Example: Control Shadows with Switch Material and Object IDs
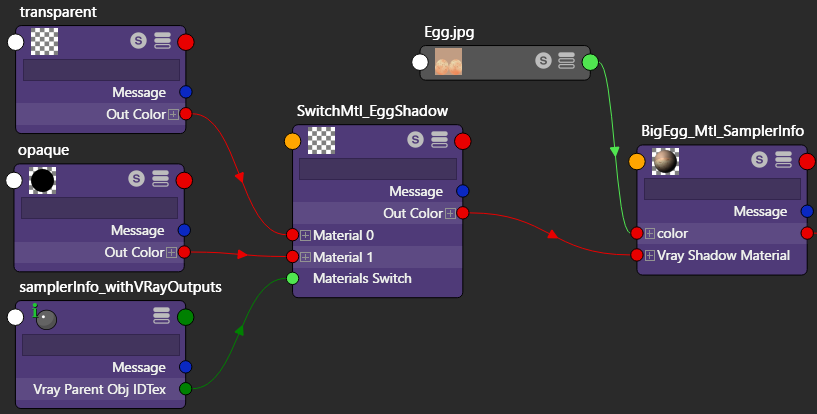
The Maya SamplerInfo node, with the V-Ray Additional outputs in the Hypershade, makes it possible to control which geometry casts shadows on other geometry within a scene. With this method, you control the casting and receiving of shadows via the VRaySwitchMtl material and Object IDs for the various objects.
For the object that is casting shadows on other objects:
| Fancy Bullets | ||
|---|---|---|
| ||
|
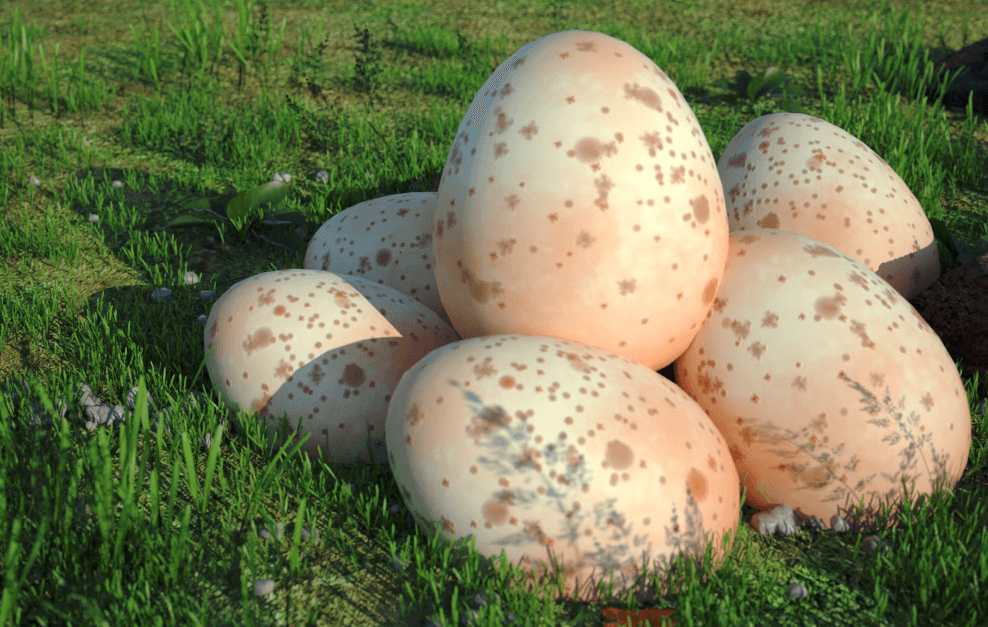
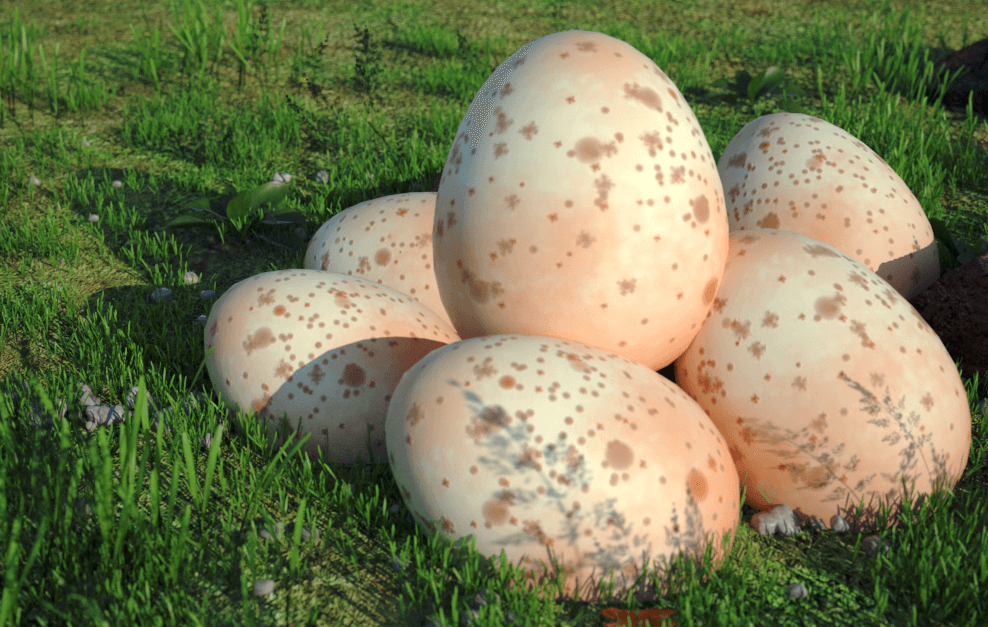
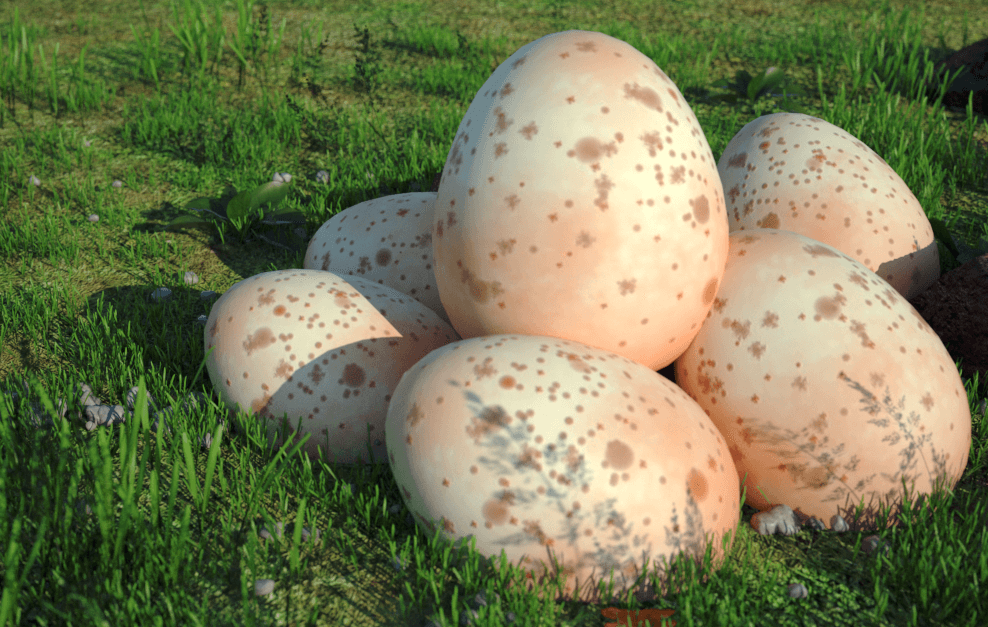
For objects that could potentially receive shadows from the shadow-casting object in the scene, assign an Object ID of 1 to geometry objects that you want to receive shadows, and an Object ID of 0 to geometry objects that you do not want to receive shadows. No special material is required for these objects.
In the example below, the V-Ray Switch material set up for shadow control is assigned to the topmost egg. By setting different Object IDs for other objects in the scene, shadows cast by the topmost egg can be limited to certain objects.
For more details, see the Controlling Shadows Using the Sampler Info Node page for a step-by-step tutorial.
| Section | |||||||||||||||||||||||||
|---|---|---|---|---|---|---|---|---|---|---|---|---|---|---|---|---|---|---|---|---|---|---|---|---|---|
|
Example: Random Colors with Switch Material
The SamplerInfo node with the V-Ray Additional outputs, in Maya Hypershade, makes it possible to apply a random color (or texture) by connecting the Vray Obj IDTex output to the Material Switch channel on a VRaySwitchMtl.
| Section | ||||||||||||||||||||
|---|---|---|---|---|---|---|---|---|---|---|---|---|---|---|---|---|---|---|---|---|
|
| Section | ||||||||||||||||||||
|---|---|---|---|---|---|---|---|---|---|---|---|---|---|---|---|---|---|---|---|---|
|


