![]()
Page History
This page provides a step-by-step guide for understanding solid and non-solid bodies in Chaos Phoenix FD for Maya.
Overview
...
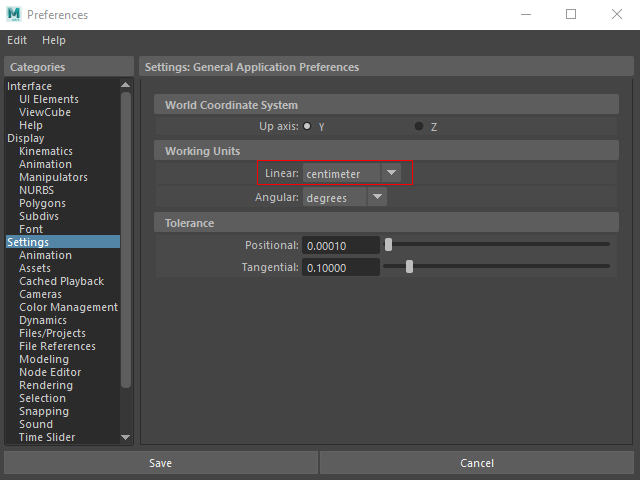
| UI Text Box | size | medium|
|---|---|---|
| ||
This is an Entry Level tutorial which requires no previous knowledge of Phoenix FD. A basic understanding of Maya would be helpful but is not a prerequisite for being able to follow along. |
| Section | ||||||||||||||||||||||
|---|---|---|---|---|---|---|---|---|---|---|---|---|---|---|---|---|---|---|---|---|---|---|
|
| UI Text Box | |||
|---|---|---|---|
| |||
The video is created using Phoenix FD 3.0, but the text version of the tutorial is updated and uses Phoenix FD 4.30 Official. In any case of doubt you may refer to the text. |
...
| Section | ||||||||||
|---|---|---|---|---|---|---|---|---|---|---|
|
...
| Section | ||||||||||
|---|---|---|---|---|---|---|---|---|---|---|
|
...
| Section | ||||||||||
|---|---|---|---|---|---|---|---|---|---|---|
|

...
| Section | ||||||||||
|---|---|---|---|---|---|---|---|---|---|---|
|

...
| Section | |||||||||||||||||
|---|---|---|---|---|---|---|---|---|---|---|---|---|---|---|---|---|---|
|

...
| Section | |||||||||||||||||
|---|---|---|---|---|---|---|---|---|---|---|---|---|---|---|---|---|---|
|
...
| Section | ||||||||||
|---|---|---|---|---|---|---|---|---|---|---|
|

| Section | ||||||||||
|---|---|---|---|---|---|---|---|---|---|---|
|
| Section | ||||||||||
|---|---|---|---|---|---|---|---|---|---|---|
|
| Section | ||||||||||
|---|---|---|---|---|---|---|---|---|---|---|
|

| Section | ||||||||||
|---|---|---|---|---|---|---|---|---|---|---|
|

| Section | ||||||||||
|---|---|---|---|---|---|---|---|---|---|---|
|
| Section | ||||||||||
|---|---|---|---|---|---|---|---|---|---|---|
|

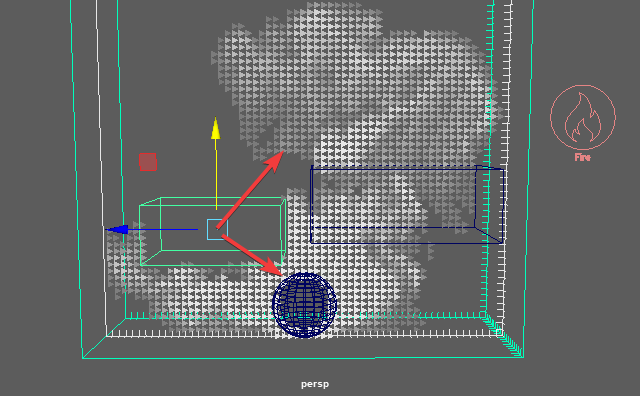
Example Scene
...
| Section | ||||||||||
|---|---|---|---|---|---|---|---|---|---|---|
|

...
| Section | ||||||||||
|---|---|---|---|---|---|---|---|---|---|---|
|
...
| Section | ||||||||||
|---|---|---|---|---|---|---|---|---|---|---|
|

...