Versions Compared

Key

  • This line was added.
  • This line was removed.
  • Formatting was changed.

...

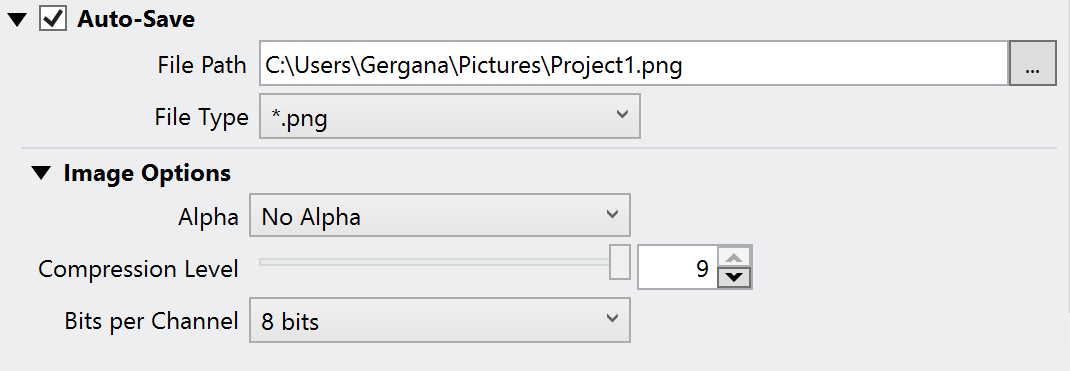
The Renderer tab provides convenient access to common Rendering functions such as choosing the render devices or sampler. You are also able to choose from several Quality presets of the Geometry Tessellation, the GI primary and secondary engine and adjust the Interactive renderer's settings, as well as choose the auto-save file path for your renders.

UI Text Box
typetip

When rendering in Interactive mode in some specific cases and using the native Revit Undo/Redo command, the rendering stops and the Undo/Redo command has a priority.

Parameters

...

Section
Column
width55%

Engine Engine – Switches between the CPU, CUDA(GPU), and RTX(GPU) rendering engine.

The devices used by the GPU engine to perform the raytracing calculations, can be specified via the arrow on the right Image Modified.

UI Text Box
typenote

If V-Ray GPU cannot find a supported CUDA device on the system, it silently falls back to CPU code.

If V-Ray GPU cannot find a supported RTX device on the system, the process stops.

The Computer CPU is also listed as "C++/CPU" in the CUDA device list and can participate in rendering (Hybrid rendering). For more information, see the Hybrid Rendering section below.

Sampler – Selects the image sampler type. For more information on how the Sampler works, see the Sampler page. 

Progressive – This is the default image sampler set in V-Ray for Revit. It renders the entire image progressively in passes.

Bucket – This sampler takes a variable number of samples per pixel based on the difference in intensity between the pixel and its neighbors.

Post-effects Rate – Controls the regularity of post-effects updates, such as Denoiser, Lens Effects and Lighting Analysis, during progressive rendering. Larger values cause the effects to be updated more often, whereas a value of 0 applies the effects after the render process is finished. Values between 5 and 10 are usually sufficient. 

Column
width5%


Column
width40%

...

Section
Column
width55%

 When Auto-Save is Enabled V-Ray saves automatically completed renderings to a specified location. 

UI Text Box
typenote

All selected render elements are also saved.

UI Text Box
typenote

Auto-Save is required for features that output multiple images to work, such as Batch Rendering and Solar Study. 

File Path – Browse for a folder where completed renderings will be saved.

File Type – Select the file format of the auto-saved images.

Image Options

Alpha – Determines how the Alpha channel is handled. This option is available for the following formats: .png, .tga, .sgi, .exr, .pic, and .tif. 

No Alpha – No Alpha channel is saved. The background is visible even if the output image format supports transparency. 
Include Alpha – The Alpha channel is saved as image Alpha or Transparency depending on the file format. 
Separate Alpha 
– The Alpha channel is saved as a separate file.

Compression Level – Specifies the image compression level for the .png file type.

Bits per Channel – Specifies the amount of data per channel for the .png, .sgi, .exr, and .tif file types. The following options are possible depending on the file type:

8 bits
16 bits

Column
width5%


Column
width40%

...

Anchor
HybridRendering
HybridRendering
Hybrid Rendering with CPUs and the CUDA Engine

...