Versions Compared

Key

  • This line was added.
  • This line was removed.
  • Formatting was changed.

This page provides a tutorial for rendering, using the Environment Priority settings.


Overview

...

In this tutorial, we will examine ways to efficiently render a scene with several objects whose environment maps have different environment priorities.

...

Second, we will assign environment maps to the objects to demonstrate how their reflections change, compared to the first render when they reflect the global environment map. Then, we will analyse analyze how the objects appear in the rendered image based on the environment priority they are assigned. We want to efficiently render several views of the scene, using the Environment Override and Environment Priority.

The Environment Priority is just the precedent of one override over another when one overridden material is reflected in another overridden material, then in another and so on. The priority number starts from 0 for the lowest priority and increases, where >1 stands for higher priority. For further information on the concept of environment priority, see the Environment Priority page. 

Want to follow along but don’t have a license?


UI Button
colorblue
newWindowtrue
icondownload
titleDownload Free Trial
urlhttps://www.chaos.com/free-trial?utm_campaign=docs-tutorials&utm_medium=website&utm_source=docs.chaos.com


Step 1: Set the Global Environment Map

...

Section
Column
width55%

Let's start by selecting a map. Assign it as an Environment Map for the whole scene.

This could can be done by drag-and-dropping the map from the || Material Editor || to the Environment Map slot in the Environment and Effects dialogue.

To open the dialogue, go to Rendering > Environment.

Column
width5%
 

Column
width40%

Image RemovedImage Added


...


Section
Column
width55%

Here is the rendered image of the scene, where we use a Gradient map as a global environment map. No environment override/priority is assigned and all the objects reflect the Gradient map.

Notice how the reflections from the global environment seen in the three objects are not very appealing. They are very bright and merge with the background.

We can change the reflections by assigning environment maps to each object, thus overriding the global environment.

Column
width5%


Column
width40%


Step 2: Set the Objects Environment Maps

...

Section
Column
width55%

Let's assign different texture maps to the environment override materials of the teapot and the two trays. This could be is done in the ||Material Editor || > Material/Map Browser > Maps > V-Ray > V-Ray Bitmap.

Connect the texture maps to the Environment slots of the respective materials.

 
Column
width5%

Column
width40%

Image Removed

...

Image Added


...


Section
Column
width55%

First, we assign a texture map only to the teapot.

This way we override the global environment in the reflection of the teapot.

The teapot now stands out in the background. However, the reflections from the teapot's environment in the trays are too distinctive. In addition, the trays are not visible in the background, so this is not the result we are after.

Column
width5%


Column
width40%


...


Section
Column
width55%

Let's tackle that by assigning an environment map to the horizontal tray.

Now the reflection of the tray is more distinctive. However, the reflection from the environment of the teapot in the horizontal tray still does not look good. We want to soften its reflections.

To achieve a softer reflection, the environment priority option comes very handy. However, before moving to step 3, let's improve the reflection of the vertical tray as well.

 
Column
width5%


Column
width40%


...


Section
Column
width55%

In the image above, the environment reflected in the vertical tray was too light. So, we assign an environment override to the vertical tray as well.

Currently, each object uses the environment map that was assigned to its material for all reflections.

Let's examine the result. Although, the reflections of both trays are distinctive now, the reflection of the teapot environment in them still attracts too much attention. We need to soften the look. This can be corrected by assigning environment priorities to the environment textures of the trays.

 
Column
width5%


Column
width40%


Step 3: Setting Environment Priority


Section
Column
width55%

Once the environment maps are set, assign an environment priority to each object's environment map.

To do so, select the object's material and go to the Options rollout in the Parameters. Set the environment priority for each object.

Set a higher priority to the environment that you want to prevail over another.


UI Text Box
typenote

Note that the global Environment Map is always considered with lowest priority. You can override it in the reflection of the scene's objects by assigning environment maps with higher priorities to their materials.

Column
width5%


Column
width40%

Image RemovedImage Added


...


Result Render


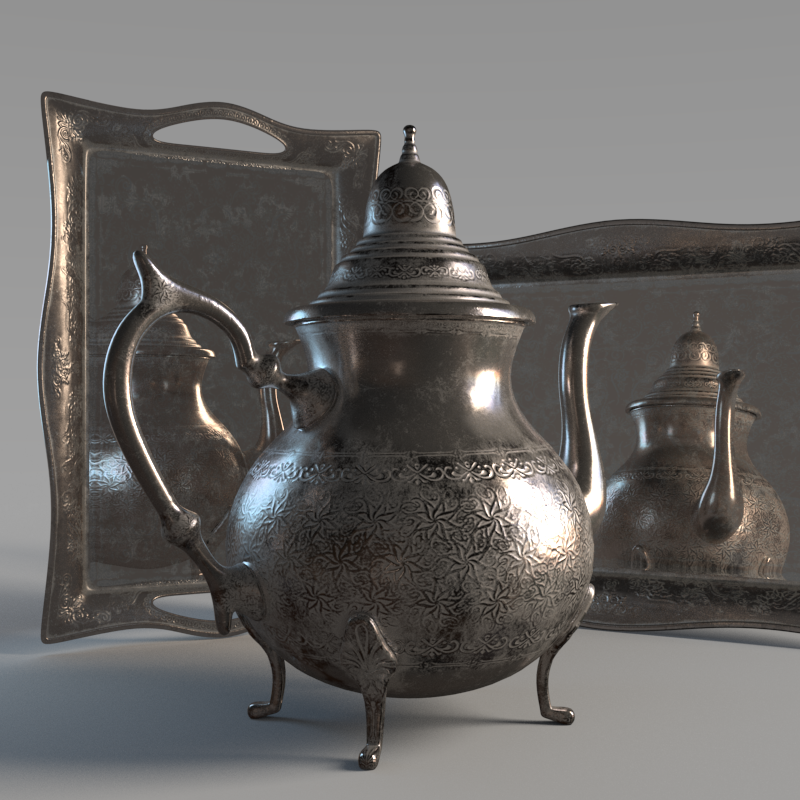
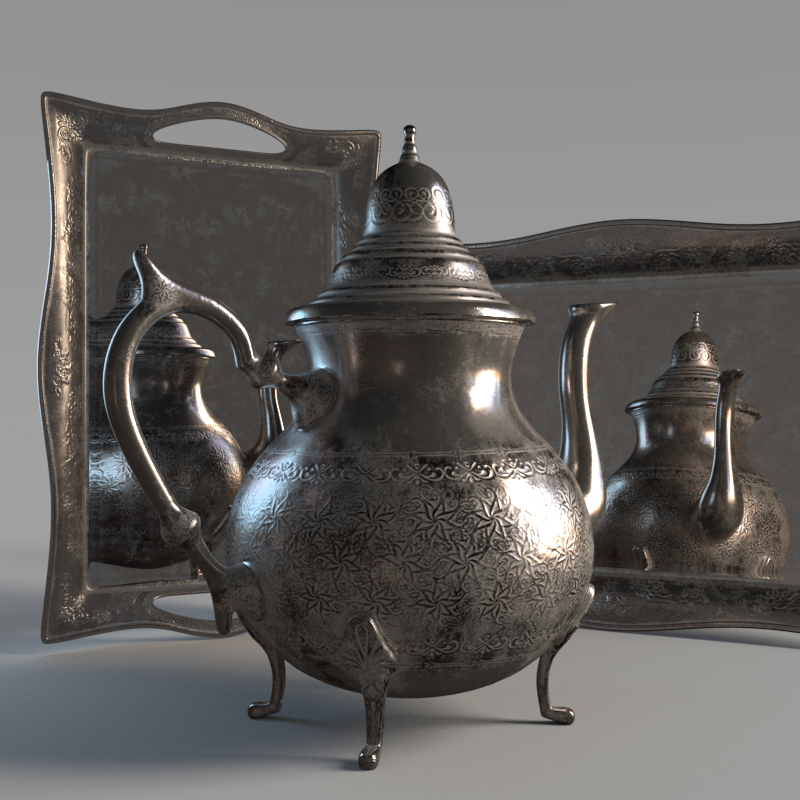
The renders below show changes in the reflection of the teapot and the trays, depending on the environment priority value we set. The texture map with the highest priority (2) overrides the global Environment map (which is a Gradient map in this case) as well as the Environment maps of the objects with lower environment priorities 1 and 0. This can be seen in the reflections of the objects with lower environment priorities. 

Section
 
Column
width10%


Column
width80%
Image slider
Panel
borderStylenone

Horizontal Tray = 1, Vertical Tray = 0, Teapot = 0

Panel
borderStylenone

Vertical Tray = 2, Horizontal Tray = 1, Teapot = 0

Panel
borderStylenone

Teapot = 2, Horizontal Tray = 1, Vertical Tray = 0

 
Column
width10%