Versions Compared

Key

  • This line was added.
  • This line was removed.
  • Formatting was changed.

...

Section
Column
width45%

In this tutorial we show how Phoenix works together with tyFlow.

We generate particles using tyFlow. When bombs hit the ground, bounced particles are procedurally created.

tyFlow's particles contain velocity data and Phoenix can use this data as a source for fire and smoke to produce realistic explosion plumes.

The structure of this tutorial is very similar to another tutorial - Artillery Explosion. However, in this article, we put more attention on the pyro shader and add more details to the fire components. The explosion and rising dust are set to different RGB colors. Together with the color gradient in the volumetric shading, we get colorful and rich result in the final shading.

We take advantage of the Time Base - Particle Age, a powerful feature of the Fire/Smoke Source. It allows you to animate the emission of fluid based on the age of each individual particle.

This simulation requires tyFlow v0.16089 (Beta), Phoenix 4.10 Official Release and V-Ray Next Official Release for 3ds Max 2015 at least. You can download official Phoenix and V-Ray from https://download.chaos.com. If you notice a major difference between the results shown here and the behavior of your setup, please reach us using the Support Form.


Press the Download button below to get an archive with the start and end scenes.

This download package does not contain the HDRI maps used in the scene. However, you can download the HDRI maps (quarry_02, made by Sergej Majboroda) from the HDRIHeaven website.


UI Button
sizelarge
icondownload
titleDownload Project Files
urlhttps://drive.google.com/uc?export=download&id=1o89jFgn0RX7GB3U_HQGQrtNKqjl_Ffmo

Column
width55%
Align
aligncenter
HTML
<iframe width="800" height="450" src="https://www.youtube.com/embed/pxnFMhTwnhs?version=3&loop=1&playlist=pxnFMhTwnhs" frameborder="0" allowfullscreen></iframe> 

...

UI Text Box
typetip

In this tutorial we have many fire/smoke Sources that need to be added and the steps can get rather complicated. So let's focus only on the Phoenix related steps and feel free to use the camera and light settings in the provided sample scene.

For your reference, below you can find the camera and light settings.


Expand
titleClick here to see the Camera and Light Settings...


Camera Setting


Section
Column
width40%

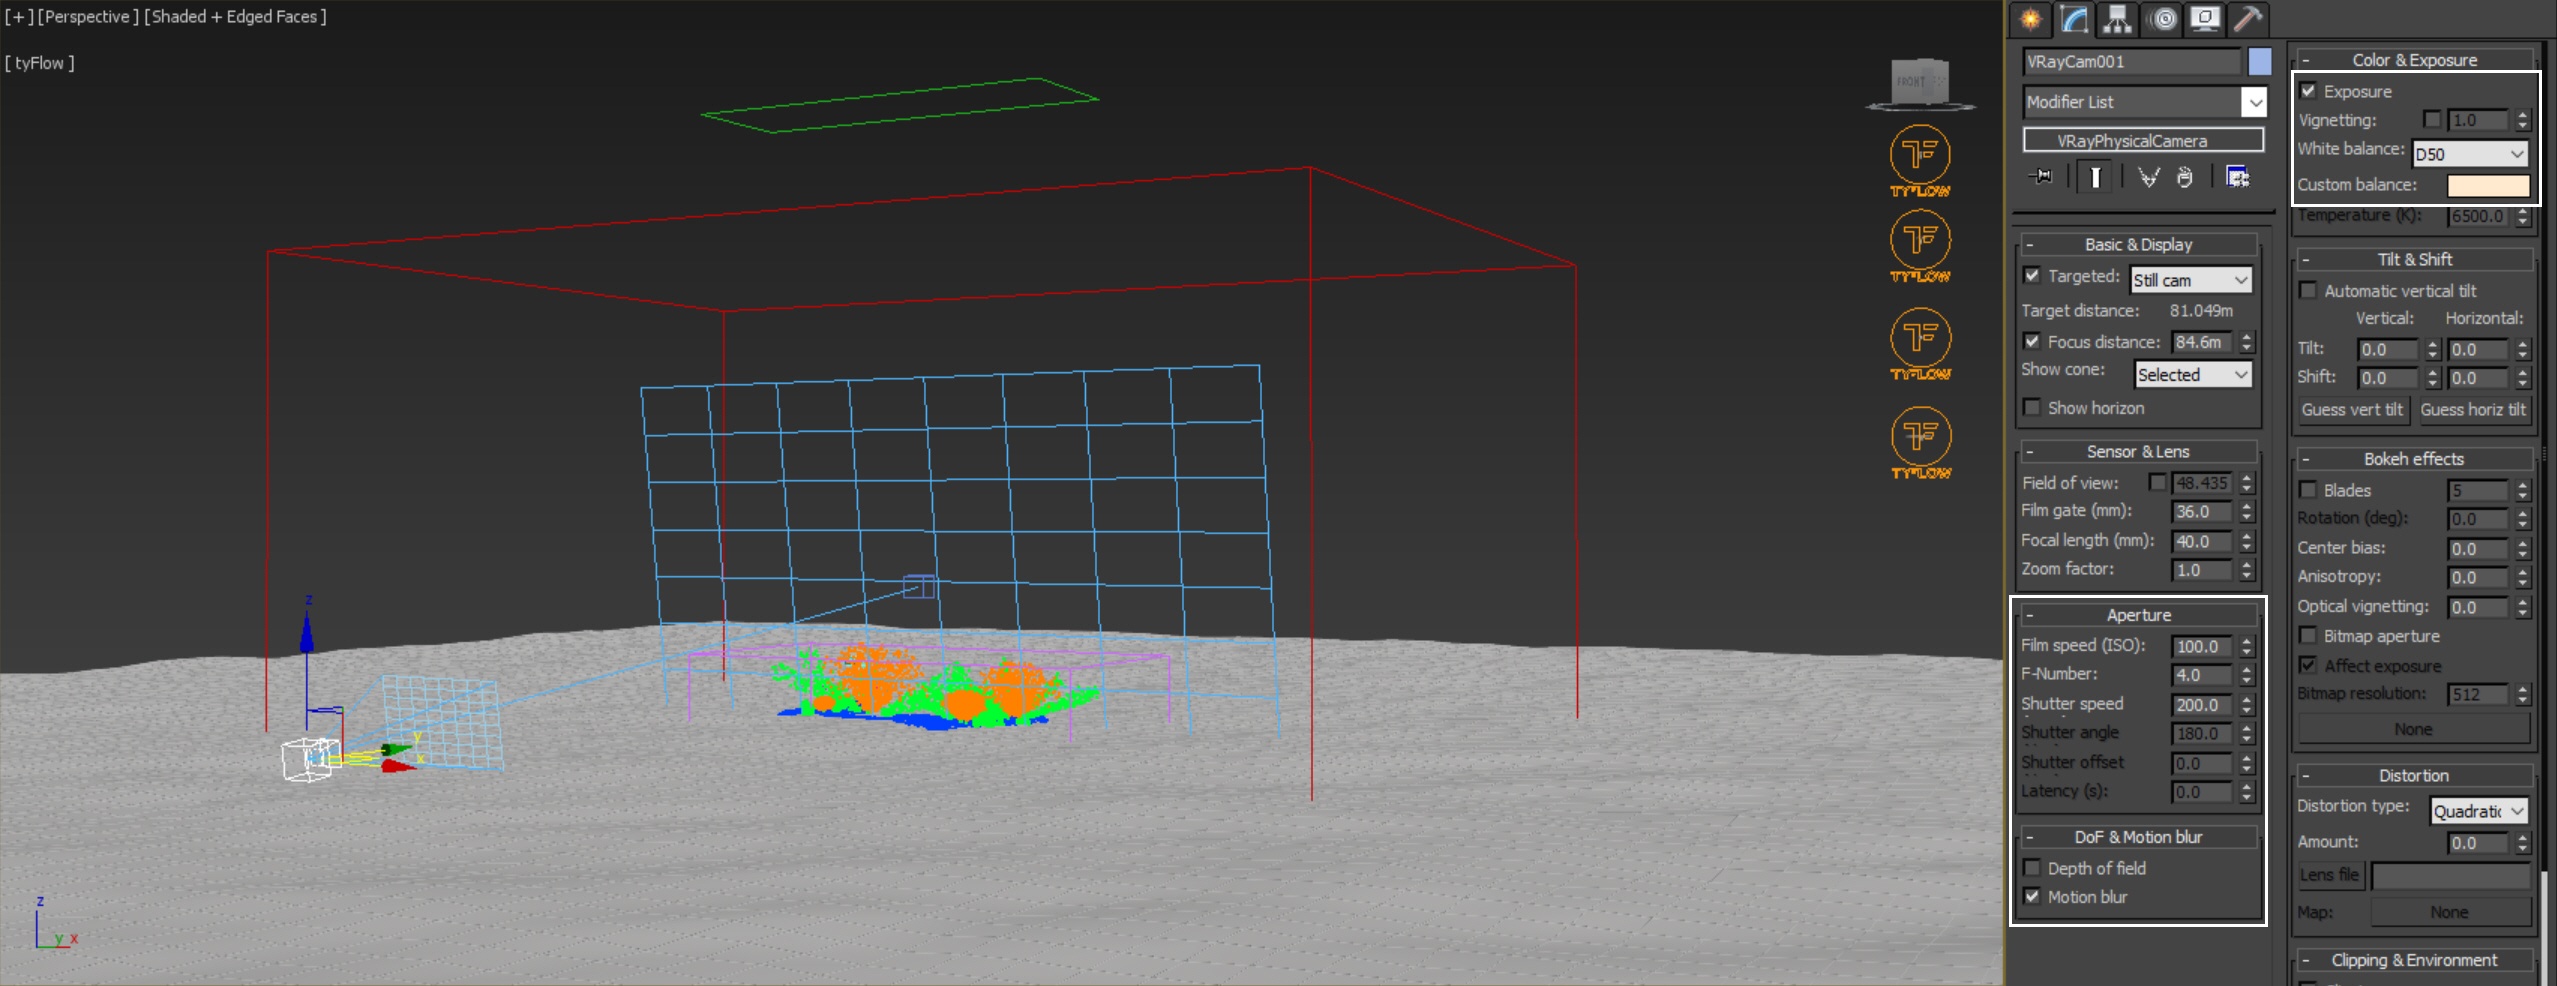
Add a Command Panel → Cameras → V-Ray → VRayPhysicalCamera.

The exact position of the Camera is XYZ: [ -2.54, -82.2, 4.48 ].

The exact position of the Camera Target is XYZ: [ 0.66, -3.13, 14.89 ].

Aperture → F-Number is set to 4.0.

Aperture → Shutter Speed is set to 200.

Motion Blur is Enabled.

Color & Exposure → White Balance is set to D50.

Column
width60%


Section
Column
width40%

The camera target is linked to a Point helper. The Point has a Noise controller and Ease Curve applied. This way we can have a camera shake effect.

Column
width60%


Lighting


Section
Column
width40%

Add a Command Panel → Light → V-Ray → VRayLight, create a V-Ray Light in the scene.

The exact position of the V-Ray Light is XYZ: [ 35.6, 0.3, 0.0 ].

Plug a VRayHDRI map to the map slot. Here we use a map called quarry_02_2k.hdr for the HDRI. You can download this map from HDRIHeaven website.

Increase both Overall multi and Render multi to 1.5.

Check the Ground project option, set the Radius to 50.0.

Column
width60%

...

Section
Column
width40%

We are going to create four different Fire/Smoke Sources. As an overview, we list them here first. Among those sources, only major_explo emits fuel and explodes, as the name implies.

The other sources are:

  • Ground_fire emits the fire on the ground;
  • falling_fire creates the fire trail, coming out of the big explosion;
  • V_dust is created when the bomb hits the ground and rises up in a V-shape. 

Let's create the sources.

Column
width60%

Fire / Smoke Source

Emit Mode

Inject Power

Noise

Temperature

Smoke

Fuel

RGB

Motion Velocity

Prt Size

Major Explo

Volume Inject

Frame 17 – 22

1 → 0

0

2200

0.9


1

10, 10, 10

1

0.15m

V_Dust

Volume Inject

Frame 17 – 24

1.5 → 1

0.4

-

0.2

-

223, 199, 184

1

0.15m

Falling Fire

Surface Force

Animated over the entire timeline

3

1800

0.03

-

49, 49, 49

1


0.4m

Ground Fire

Surface Force

Animated over the entire timeline


3

16001545

0.2

-

49, 49, 49

1

0.3m

...

Section
Column
width40%

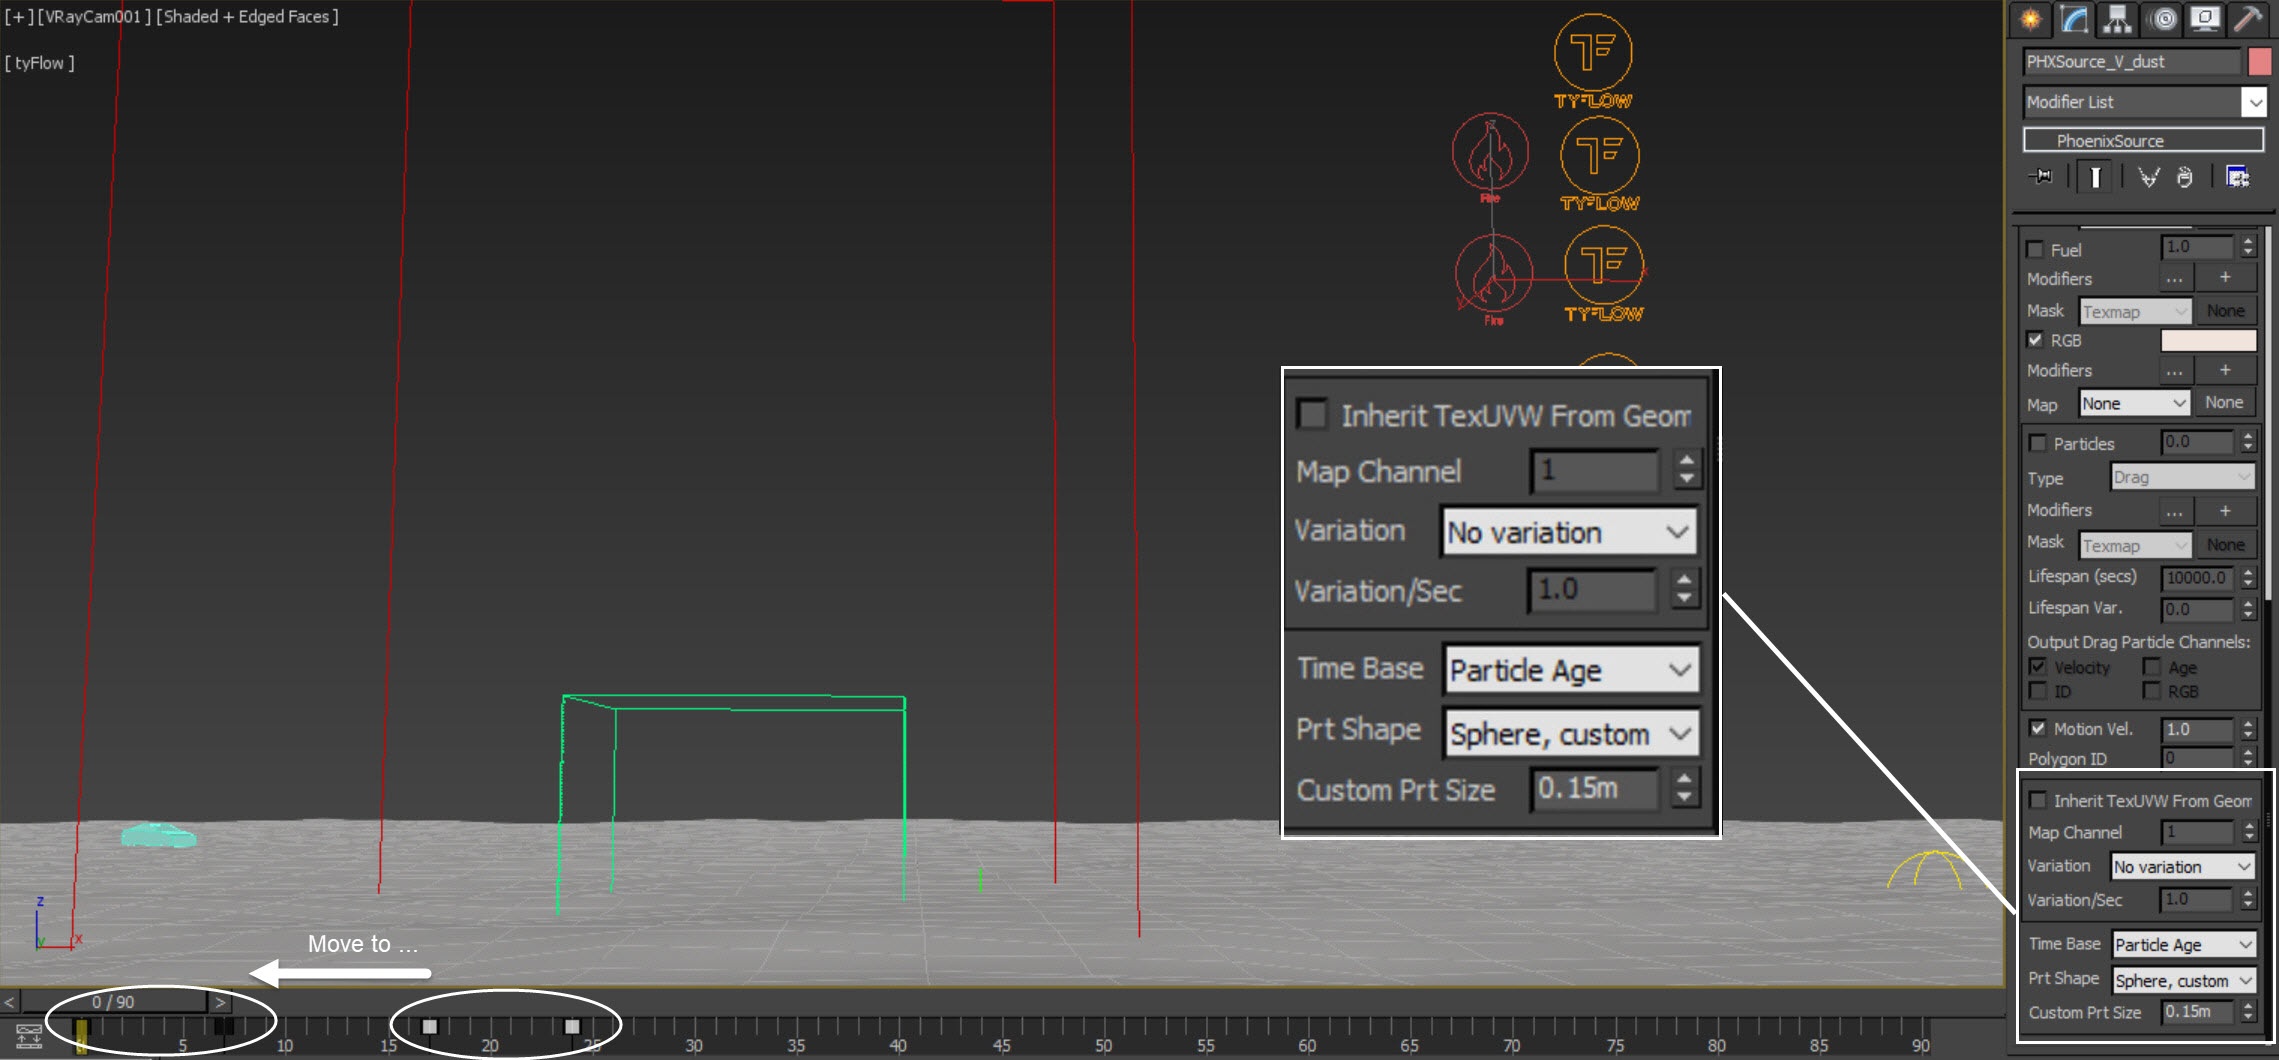
Thanks to the Time Base option in the Fire/Smoke Source, we can do it in a smarter way.

Set the Time Base to Particle Age instead of Absolute. We simply shift-move the keyframes to begin at frame 0. The Fire/Smoke Source reads the particle age information from tyFlow, so we can have sources emitting fluid with animated strength procedurally.


UI Text Box
typenote

Time Base Particle Age is used when emitting from particle systems. It allows you to animate the parameters using the age of the particle instead of the timeline frame time. It is a very powerful feature of the procedural pyro effect.

This is one of the most important steps for this tutorial. Make sure to change the Time Base to Particle Age, and shift-move the keyframes for every source so they begin at frame 0. In Particle Age Time Base mode, the frames on the timeline denote the age of the particles, so any Source animation at frame 0 is applied to each individual particle at the time of its birth, and then the following animation unfolds throughout the lifetime of the particle. This way particles born at different frames each go though their own emit animation starting from their birth.

UI Text Box
typewarning

Here we show only one example for the V_dust Fire/Smoke Source. Be sure to do the same for the Major_explo Fire/Smoke Source too.

Column
width60%

...