
This page provides information on the Corona Mapping Randomizer Map.
Overview
Textured objects often show obvious repetitions, which instantly give away that the scene is computer-generated. You can use the Corona Mapping Randomizer to quickly randomize textures on multiple objects or object parts, making the image appear more realistic.
The Corona Mapping Randomizer allows you to apply random offset, rotation, and scaling to textures and procedural maps assigned to different objects, or even to a single object. The way it works is similar to the Corona Multimap. For example, you can randomize a wood texture applied to a set of planks so that each plank has a different look in your final render. You can also apply a blending effect to the randomized texture tiles, which makes them appear even more natural.
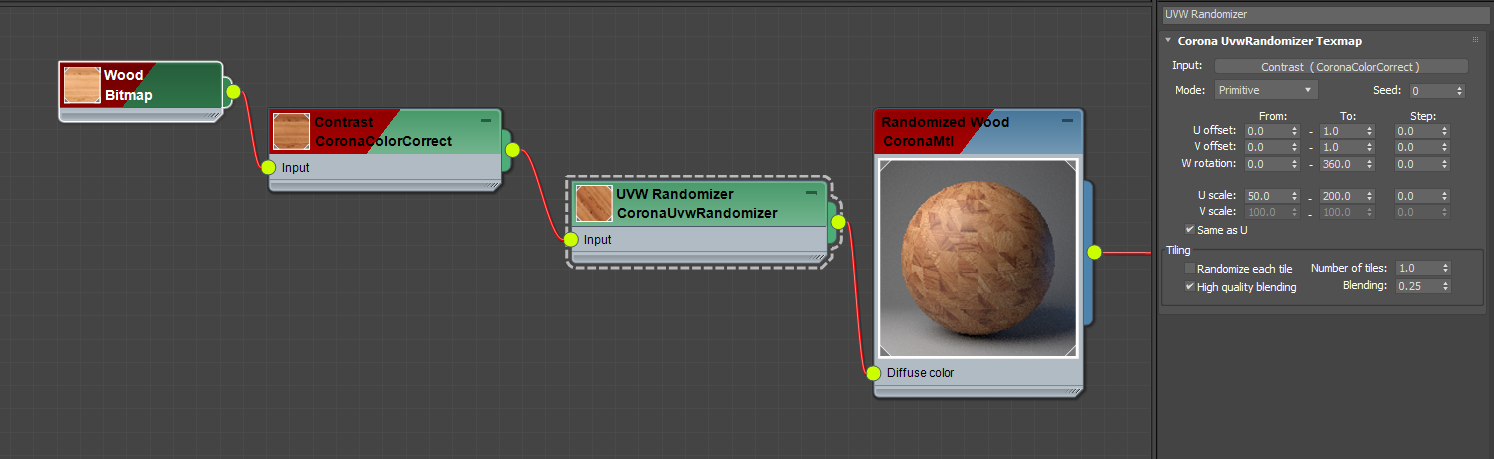
To enable the mapping randomization, plug any texture (be it a bitmap or a procedural map) into the Corona Mapping Randomizer input slot and then plug its output into any material property. You can then adjust the texture transformations and other options to the desired values. You can use the Corona Mapping Randomizer with any material property, including grayscale bump maps, RGB normal maps, and displacement.
The effect of the Corona Mapping Randomizer is not visible in the viewport preview.
In Corona 9 and older, this map is called Corona UVW Randomizer.

Properties
Randomize by
Primitive – Randomizes by different primitives which are triangles, hair strands, particles, etc.
Sub-primitive – Randomizes by different sub-primitives, which are displacement microtriangles or hair segments.
Polygon – Randomizes by different polygons, which are groups of triangles (e.g. quads).
Mesh Element – Randomizes by different connected mesh elements, which are groups of triangles connected by edges.
Decal – Randomizes by different distinct decal objects. This randomizes only the decal layer, not the object it is projected onto. Note that this tracks decals by their names, so the result changes if a decal is renamed.
Tile ID – Randomizes by different tiles if Corona Tile Map is used.
Instance – Randomizes by different scene objects (or instances in a scatter object). This tracks objects by their names, so the results change if an object is renamed.
Material GBuffer ID – Selects map with index equal to the hit material G-Buffer ID.
Object GBuffer ID – Selects map with index equal to the hit object G-Buffer ID.
Material name – Randomizes by different assigned materials.
This tracks objects by their names, so the results change if an object is renamed.
Face Material ID – Selects map with index equal to the hit face material ID.
You can select more than one randomization option. In such case, both are considered.

Input
Input – The input map to perform the mapping randomization on.
Seed – The value that makes random permutations of the mapping randomization results.

Offset
U|X – Specifies the minimum (From) and maximum (To) allowed texture offset in the U coordinate with a custom increment (Step).
V|Y – Specifies the minimum (From) and maximum (To) allowed texture offset in the V coordinate with a custom increment (Step).
Z – Specifies the minimum (From) and maximum (To) allowed texture offset in the Z coordinate with a custom increment (Step).

Rotate
X – Specifies the minimum (From) and maximum (To) allowed texture rotation in the X coordinate with a custom increment (Step).
Y – Specifies the minimum (From) and maximum (To) allowed texture rotation in the Y coordinate with a custom increment (Step).
W|Z – Specifies the minimum (From) and maximum (To) allowed texture rotation in the Z coordinate with a custom increment (Step).

Scale
U|X – Specifies the minimum (From) and maximum (To) allowed texture scale in the U coordinate with a custom increment (Step).
V|Y – Specifies the minimum (From) and maximum (To) allowed texture scale in the V coordinate with a custom increment (Step).
Z – When enabled, uses the values specified under "U scale" for both the U and V scaling.

Tiling
Randomize each tile – When enabled, each tile has a different transformation based on the offset, rotation, and scaling settings.
High quality blending – Enables high-quality blending, which is much better at removing visible seams between the tiles, however it is computationally more expensive (the rendering time can be doubled in the worst case).
Number of tiles – Determines the number of tiles along the U and V texture coordinates. Note that the number of tiles is also influenced by the UV scaling set in the input map (e.g. if the input map is a Corona Bitmap and UV scale is set to 2, there are 2 times more tiles along each dimension).
Blending – Determines the strength of the blending between two neighboring tiles. The value of 0 results in no blending and in possible discontinuities among neighboring tiles. The value of 1 results in maximum blending and possibly leads to excessive blurring of the tiles.

Additional Outputs
Additional Outputs – If set to higher value than 0, the texture will have this many additional inputs and outputs. The inputs marked with number 'X' will be used for 'Additional Output X'.
To learn more about using the Additional Outputs, please check Multiple Output Maps at the Chaos Help Center.

Example: Randomization Modes
Primitive
The Mapping Randomizer is randomized per each mesh primitive (triangle)
Material
Different mapping randomization is applied to different materials where the Corona Mapping Randomizer is assigned. In this example, different materials are applied to different cube objects.


Instance
Mapping Randomizer is randomized per each instance (object).
Material ID
Mapping Randomizer is randomized based on the object's material ID. In this example, every floorboard has a different, randomly assigned material ID.


Material GBuffer ID
Mapping Randomizer is randomized based on the material's GBuffer ID. In this example, each cube has a different material assigned, and each of those materials has a different Material GBuffer ID assigned.
Object GBuffer ID
Mapping Randomizer is randomized based on the object's GBuffer ID. In this example, each cube object has a different GBuffer ID assigned (select object > right-click > object properties > GBuffer ID).


Mesh Element
Mapping Randomizer is randomized per each mesh element. In this example, each floorboard is a separate mesh element.
Polygon
Mapping Randomizer is randomized per mesh face. In this example, each floorboard is a single mesh element.


Tile ID
Mapping Randomizer is randomized based on the Tile ID. In this example, each Tile has the same wood texture.


Example: Texturing a Simple Stairs Object
Without the Corona Mapping Randomizer, the textures are repeated on each of the steps in a very obvious way.
We can easily fix that: the first step is plugging the diffuse texture into the Corona Mapping Randomizer map and setting its U and V offset values to 0 - 1. This enables the randomization of the texture's maximum offset in both axes by its full width and height.


The remaining issue is that the textures are aligned in the wrong direction. Since the Corona Mapping Randomizer relies on mapping randomizing (as the name implies), to fix that, we can use any preferred method of rotating the textures - for example, the UVW Xform modifier or changing the rotation directly in the Bitmap texture's properties. In this case, a UVW Xform modifier was applied to rotate the texture by 90 degrees.

Example: Randomizing a Brick Wall
We can start with a few objects using a brick wall texture with no randomization whatsoever.
In this case, we want to randomize the U and V positions per object, but we also want to have them tiled on every single object in a random way. This can be easily done with the Corona Mapping Randomizer.


Note that in addition to U and V offset variation, we also enabled the Randomize each tile option and set Number of tiles to 4. This tiles the texture on each surface it is applied to, and the tiling is then randomized using the offset, rotation, and scale values.
The remaining issue here is that while the randomization works excellent, the bricks are not aligned in straight horizontal rows anymore because of the full V offset randomization.
We can fix that by enabling the Step option next to the V Offset. The Step value decides about the interval at which the texture is moved. Leaving it at 0 results in unrestricted, random movement. Setting it to 1 means that we only allow the offset to be 1, 2, 3, and so on, resulting in no visible randomization whatsoever. Setting the value to 0.5 allows offsetting the texture by half its height, and so on. In this case, a single segment of our brick wall texture consists of 7 rows of bricks. To calculate the desired Step value, we need to divide 1 by the number of rows or columns. In case of our brick wall 1 / 7 = 0.143, so let's use this value.


As you can see in the above image, the bricks are still randomized, but at the same time they are always arranged in horizontal rows thanks to the 0.143 Step value.
The last thing left to do in our brick material would be adding displacement to it since that is also possible with the Corona Mapping Randomizer. Clone the Corona Mapping Randomizer map, so that the diffuse texture and displacement texture randomization is the same, plug the grayscale displacement map into it, and plug the result into the material's displacement slot.


Example: Using the Corona Mapping Randomizer with the Multimap
The Corona Mapping Randomizer can be combined with a Corona Multimap to create materials that are random in terms of both their coloring (or texturing) and their UVW mapping.
In this case, we are using the Corona Mapping Randomizer to randomize the wood texture per floorboard, and every floorboard also has a different color thanks to the Corona Multimap which are then mixed together using the Corona Mix map.


Example: Using the Corona Mapping Randomizer with Triplanar Mapping
In the previous examples, we always used the Corona Mapping Randomizer with some sort of defined UVW mapping (e.g. the object was created with its own mapping, or we used the UVW Map modifier). In case of objects with no UVW mapping, or ones which are hard to properly unwrap (such as complex organic forms), an ideal solution is to combine the Mapping Randomizer with the Corona Triplanar Map.
Here we can see a sculpture painted with a checker patterned bitmap using Corona Mapping Randomizer. Since the Mapping Randomizer relies on UVW mapping, in case of incorrect UVW mapping (like in this case), we can see artifacts such as texture stretching and seams.
To fix that, we can connect the Corona Mapping Randomizer map to a Corona Triplanar map (not the other way around, as Triplanar map overrides all mapping data coming after it!) and connect the result to the desired slot (in this case diffuse color). This lets us take advantage of the superpowers of both the Mapping Randomizer and the Triplanar map. Thanks to the Mapping Randomizer, the texture is randomized in terms of offset, scaling, and rotation, and it is using random tiling. Thanks to the Corona Triplanar map, there is no stretching or seams, and the texture is uniformly distributed over the object's surface.


Example: Randomizing Procedural Textures
In all previous examples, we were using bitmap textures. Corona Mapping Randomizer can, however, randomize procedural textures as well, allowing for further creativity.
In this example, a procedural noise map is stretched in one direction ("U Tiling" set to 0) and then randomly distributed on the object's surface using the Corona Mapping Randomizer and the Triplanar map. Note that to get more predictable results, it is best to set the procedural map's mapping ("Source") to Explicit Map Channel. This applies the texture in a similar way as when using regular UVW mapping, which makes it easier to control (however, in this case, we do not have to worry about it that much because we are using the Corona Triplanar map anyway).


Example: Working with Real-World Scale
The Mapping Randomizer can be used with the Real-World Scale option without any problems. Plug a texture using the Real-World Scale option into it, and also make sure that the object has the Real-World Scale checkbox enabled in its settings or in the UVW mapping modifier applied to it, just as you would normally do without the mapping randomization.
Randomized texture, Real-World Scale set to 1 cm.
Randomized texture, Real-World Scale set to 5 cm.


Randomized texture, Real-World Scale set to 10 cm.


Example: Blending
The Blending parameter found in the Corona Mapping Randomizer controls how the individual tiles of the randomized texture are blended with each other. Higher blending further blends the tiles together and makes the texture appear slightly more blurry and uniform. Lower blending reduces the areas where the tiles are blended together and makes the texture sharper. Usually, the best value has to be determined by trial and error.


Example: High Quality Blending
High quality blending - this option is enabled by default and results in a better quality of the random tile blending at some performance cost. The specific performance impact depends on the material's complexity. In case of visible rendering slowdown, it is advised to disable this option.


Example: W Rotation and Step
The Step value can be used to decide about the allowed interval for the random texture offset. The same can be done with rotation and scaling. This example visualizes how the W Rotation Step affects texture randomization.
Step 0 - no interval, full, unrestricted rotation randomization allowed:

Step 45 - rotation randomization is restricted to 0, 45, 90, 135, 180, 225, 270, 315, 360 degrees resulting in the pattern following only horizontal, vertical, or diagonal directions:

Step 90 - rotation randomization is restricted to 0, 90, 180, 270, 360 degrees resulting in the pattern following only vertical and horizontal directions:

