This tutorial explains the steps of creating a glass material with V-Ray.
Overview
In this tutorial, we show how to make glass material using the versatile VRayMtl material.
Three types of glass material are examined here - standard transparent glass, tinted glass, and frosted glass. All are achievable effects only by changing few parameters in the V-Ray material.
With V-Ray 5 Update 1, use Fog Depth instead of Fog Multiplier. Note that reducing the Fog Depth parameter makes the glass more tinted, while increasing the parameter weakens the tinted effect.
Want to follow along but don’t have a license?
Setting Basic Glass Material
Let's start by creating a VRayMtl material.
In the real world, glass is usually transparent and somewhat glossy. By default, it does not have diffuse color.
To achieve that here, let's set the Diffuse color to black. This eliminates the color from the material.
Then, increase the Reflect option by changing it to something like mid-gray or a bit lighter. This way, we make the material reflective.
To make the material transparent, set the Refract option very close to white. The white color indicates that this material is fully refractive.
In the real world no glass material is fully reflective or fully refractive, and the same goes for glossiness. To break the "perfection", let's reduce the Reflection Glossiness to about 0.95 and the Refraction Glossiness to 0.99.
Standard glass has Index of Refraction(IOR)1 of 1.51714. The IOR stands for how the material refracts the transmitted light. Air has IOR of 1 by definition, which means it is no obstacle for light transmission.
So, let's set the IOR of this material to 1.517.
Since glass is a highly reflective and refractive material, it is recommended to trace the respective rays further than default. Make sure Max depth (both Reflect and Refract) is set to 8.
Leave the Fresnel reflections and the Fog system units scaling enabled as they are by default.
Fresnel reflections ensure proper reflection of the object based on the view angle. If you disable them, the whole object will get uniform reflections all over making it look fake. For a physically accurate result, it is recommended to leave this option enabled.
Fog system units scaling option ensures proper calculation of the fog multiplier in the scene according to the system units.
Assign the material to the tea glass.
Now, let's render and see how the basic glass material looks like.

And voila! We have glass.

Tinted Glass
Often glass can be tinted with color. Let's see how to achieve that.
VRayMtl has an option called Fog color. We can use it to introduce some tint to the glass.
Change the Fog color to blue. For the purpose of this tutorial, we make it [10,10, 255].
Now, do a test render. The tint is very well pronounced.
We can make the tint effect weaker, reducing the Fog multiplier amount. By default, its value is set to 1.
Since the blue color we use is very rich, let's set the multiplier to some small value - 0.05 and render.

Now the tint is less visible and it shows mainly in the thicker parts of the objects.
Additionally, we can control the intensity of the tint based on object thickness - by using the Fog bias parameter.
For the purpose of this tutorial, let's increase the Fog multiplier to 0.5 to get more distinguishable results.

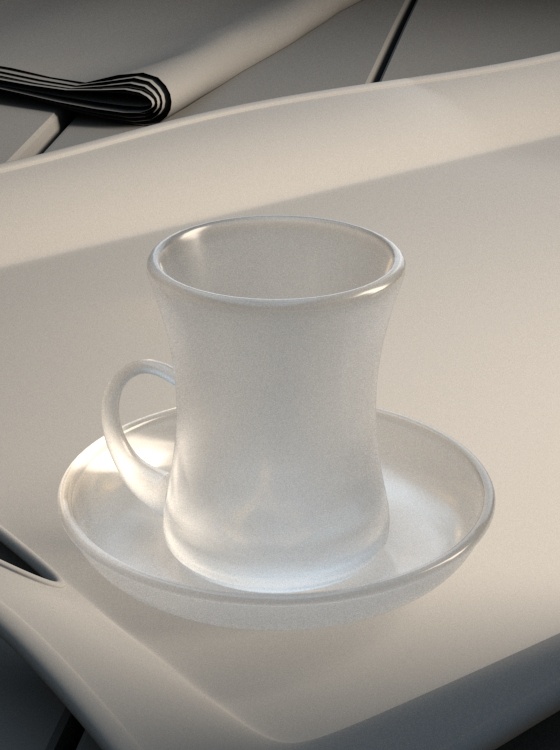
Frosted Glass
Another common type of glass is the so called "frosted" glass. That is, finely deformed surface of the glass, so it looks blurry.
We can achieve this easily by manipulating the Glossiness parameter.
Let's reduce the Reflection Glossiness to 0.8, making the reflections blurrier.
Set the Refraction Glossiness to 0.8 - this makes the actual "frosty" effect of the material. You can play with this amount to reach the desired look. Here we show also an example rendered with Glossiness of 0.5 in order to compare the effects.
We have now frosted glass.

Footnotes
1 – Please note that the IOR indices pointed in this tutorial are physically based and measured in real world.