This page provides information on how to perform texture baking in V-Ray for Maya.
Overview
Rendering to texture, or "texture baking,” creates texture maps based on an object's appearance in the rendered scene. The textures are then “baked” into the object that is, they become part of the object via mapping, and can be used to display the textured object rapidly on graphics cards using hardware-accelerated APIs such as OpenGL and DirectX.
Options for texture baking in V-Ray can be found in a few places:
- the V-Ray Bake Options button in the V-Ray Shelf, and in the V-Ray menu, see V-Ray Baking Options,
- in the Lighting/Shading menu, see VRayBakeOptions Node
- the V-Ray Common tab in the Render Settings window, see Workflow: Using the Render Settings.
The V-Ray Bake options and the VRayBakeOptions node offer the same workflow for baking textures. For more information on their options, see the Texture and Projection Baking sections below.
The V-Ray Common tab offers a different workflow, available in the Workflow: Using the Render Settings section.

V-Ray Baking Options
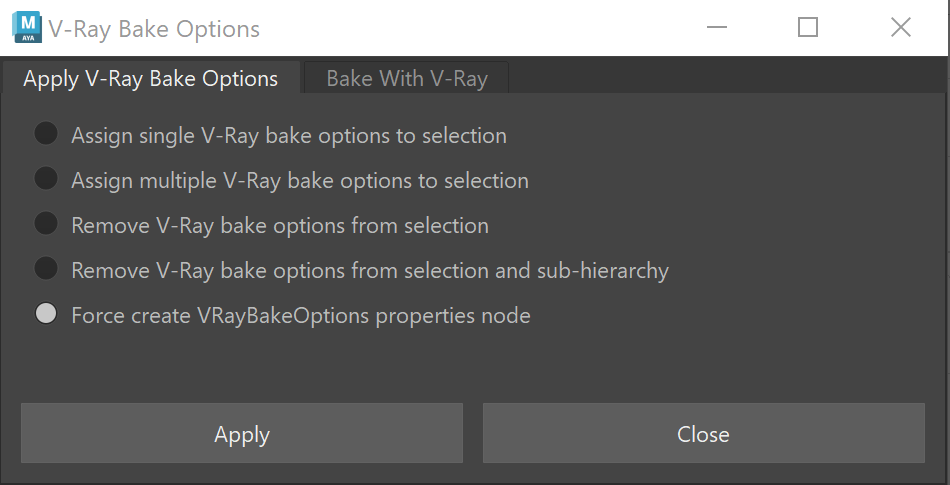
The texture baking options are in the rendering menu Lighting/Shading > Bake with V-Ray, alternatively on the V-Ray Shelf in the V-Ray Bake Options > Show V-Ray bake options.
Objects to bake – V-Ray can either bake all objects in the scene or just the objects selected in the viewport.
Skip objects with no VRayBakeOptions assigned – When enabled, objects that do not have the VRayBakeOptions node assigned will not be baked.
Assign baked textures – Enabling will automatically assign baked textures to their respective objects.
Output texture path – Specifies a global output path for the baked textures. If empty, the standard image path will be used.
Projection Baking – V-Ray will not bake to the specified object itself, but will trace an offset ray from the object down the normal and shade whatever surface is hit underneath it.
VRayBakeOptions Node
The VRayBakeOptions node can be added to any object from the Lighting/Shading > Assign V-Ray bake options to selection or from the V-Ray shelf in the V-Ray Bake Options > Assign V-Ray bake options to Selection. The VRayBakeOptions node controls the texture baking options on a per object level.

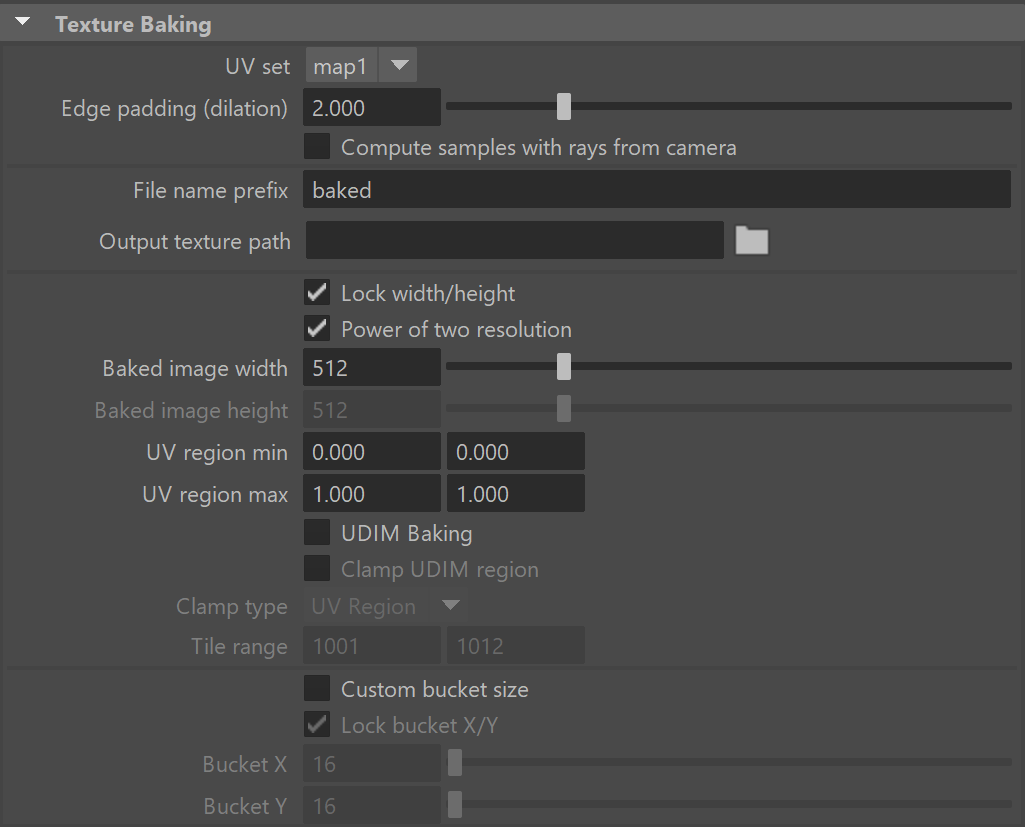
Texture Baking
UV set – Specifies the UV set that is going to be used for the texture baking.
Edge padding (dilation) – The number of pixels to expand around geometry.
Compute samples with rays from camera – When this option is enabled, V-Ray shoots rays from the camera per-object to bake them.
File name prefix – Specifies a prefix to be used when saving to file.
Output texture path –Overrides the output path for the baked textures. If empty, the global baking texture path will be used.
Lock width/height – Locks the width/height ratio of the exported texture.
Power of two resolution – When this option is off the user can set any values for the resolution. Otherwise the resolution will automatically be set to the closest power of two value.
Baked image width – The width of the baked texture.
Baked image height – The height of the baked texture.
UV region min/UV region max – These attributes specify the UV domain to bake.
UDIM baking – Enables baking to UDIM textures. If this option is enabled, V-Ray will produce one texture for each UV tile.
Clamp UDIM region – Bakes only a part of the UV space to UDIM textures.
Clamp type – Specifies how to determine which part of the UV space to bake to UDIM textures. Possible values are:
UV Region – The UV region min and UV region max attributes are used to specify the portion of the UV space to bake.
Tile range – Specifies the UDIM tiles to bake as a numeric range.
Custom bucket size – Specifies a custom bucket size for the baking. Otherwise a default bucket size is used.
Lock bucket X/Y – Locks the Y Bucket size to the X Bucket size.
Bucket X/Bucket Y – Specifies the bucket size when Custom bucket size is enabled.
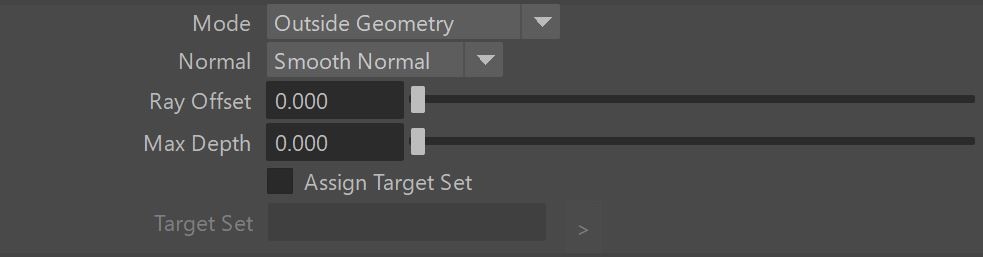
Projections Baking
Projection baking allows to bake the properties of a set of dense high-resolution meshes onto the UV space of a lower resolution and simpler mesh. This is done by "projecting" the bake points from the low-resolution mesh onto the high-resolution mesh and using the high-resolution mesh for shading.
Mode – Specifies the direction of the traced ray:
Outside Geometry – The ray will be traced along the normal vector.
Inside Geometry – The ray will be traced in the opposite direction of the normal vector.
Outside first, then inside – The ray will first be traced along the normal vector. If no intersection occurs, then a second ray will be traced in the opposite direction of the normal vector.
Inside first, then outside – Same as "Outside first, then inside" but in reversed order.
Closest – Two rays are traced in both directions and the intersection that occurs closest to the surface is chosen.
Normal – Specifies whether to project the points of the low-resolution mesh onto the high-resolution mesh using smooth normals or geometric face normals.
Ray offset – Start looking for high-resolution points at some distance along the chosen normal. This might prevent artifacts in certain cases, although the default value of 0.0 should work fine for the majority of situations.
Max depth – The maximum distance from the low-resolution point at which to look for a point on the high-resolution mesh.
Target Set – A set of high-resolution target objects.
Workflow: Using Render Settings
Texture baking is also possible using the Render settings. Note that this is a different workflow than using the nodes! The settings exposed here do not work with the node settings and vice versa.
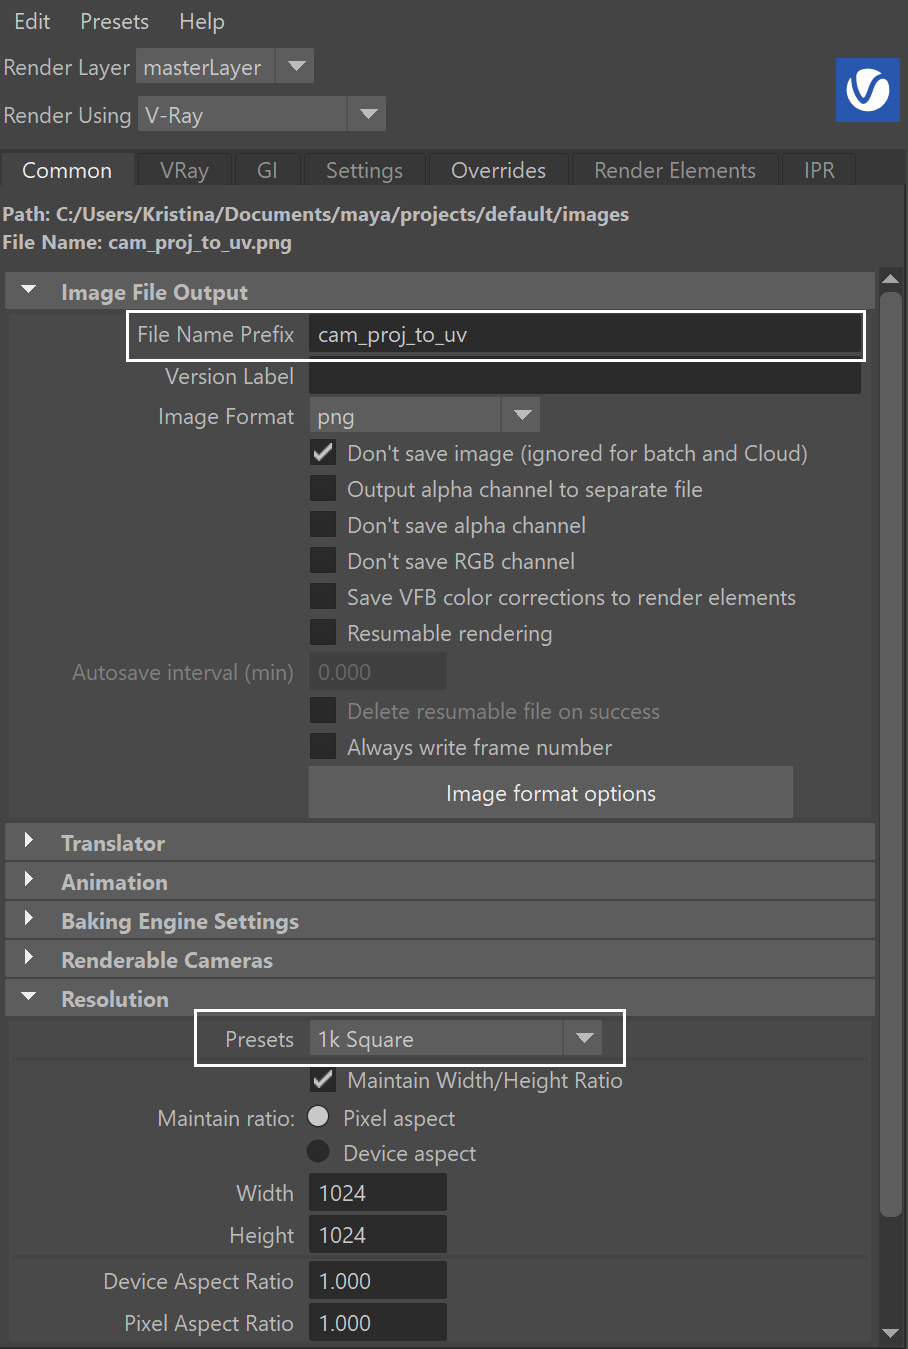
Go to Render Settings > Common tab > Baking Engine Settings rollout.
Set the options for your texture accordingly. For more information on the available options, see the Common tab page.

Set a File Name Prefix from the Image File Output rollout, which serves as the name of the exported texture file.
Make sure the resolution of the baked texture is set to a square resolution. The resolution is controlled through the Resolution rollout.
Select the object in the scene whose texture is to be baked.
You can use a MEL script provided you want to batch render.

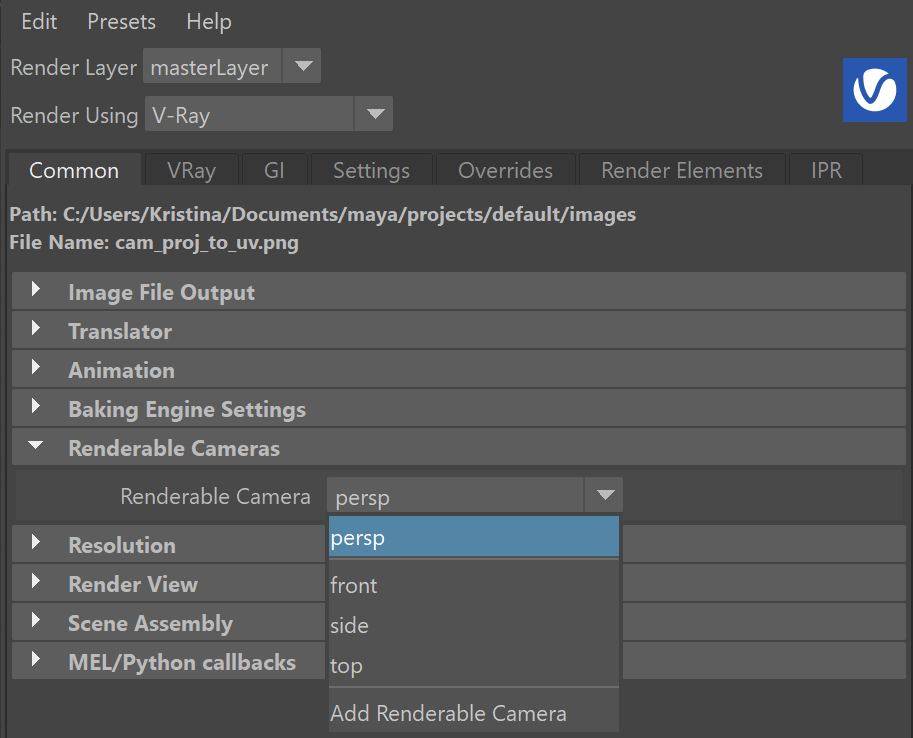
Select the renderable camera (for batch render) or view from the Render Settings. Then render.
Alternatively, you can use the same steps and export a .vrscene instead of rendering. Then render with V-Ray Standalone.