This page provides information about the V-Ray Procedural Fur plugin.
Overview
VRayFur is a very simple procedural fur plugin. The fur is generated only during render time and is not actually present in the scene.
It is strongly recommended to use hair materials for hair-based objects used for simulating hairs.

||Select mesh|| > V-Ray Shelf > V-Ray Fur button

||V-Ray Menu|| > V-Ray Fur

||Select mesh|| > Create > V-Ray > Add VRayFur to selection

Basic Parameters
Length – The length of the fur strands.
Thickness – The thickness of the strands.
Gravity – Controls the force that pulls fur strands down along the Z-direction.
Bend – Controls the elasticity of the fur strands. When it is 0.0, the strands are hard and are all straight lines. Greater values cause the strands to bend (e.g. under the influence of gravity).
Taper – Adds a taper to the individual strands of fur. Increasing this value will make the each strand thinner in its upper end and wider in its base.
Fur Scale – Globally increases the fur.

Example: Length
Using this parameter you can specify the Length of the strands.
Example: Thickness
Using this parameter you can specify the Thickness of the strands.

Length = 5.00 cm

Length = 7.50 cm

Length = 10.0 cm

Length = 12.5 cm

Length = 15.0 cm

Length = 17.5 cm

Length = 20.0 cm

Length = 22.5 cm

Length = 25.0 cm

Thickness = 0.05 cm
Thickness = 0.10 cm

Thickness = 0.15 cm

Thickness = 0.20 cm

Thickness = 0.25 cm
Thickness = 0.30 cm

Thickness = 0.35 cm

Thickness = 0.40 cm

Thickness = 0.45 cm
Example: Gravity
Using this parameter you can control the force that pulls the fur strands down along the Z-direction.
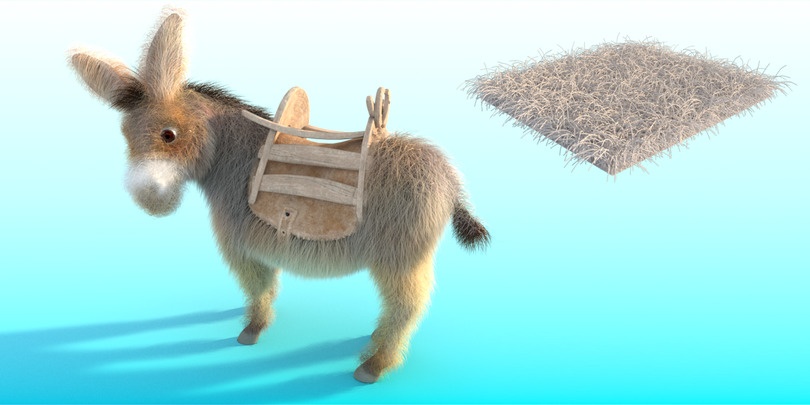
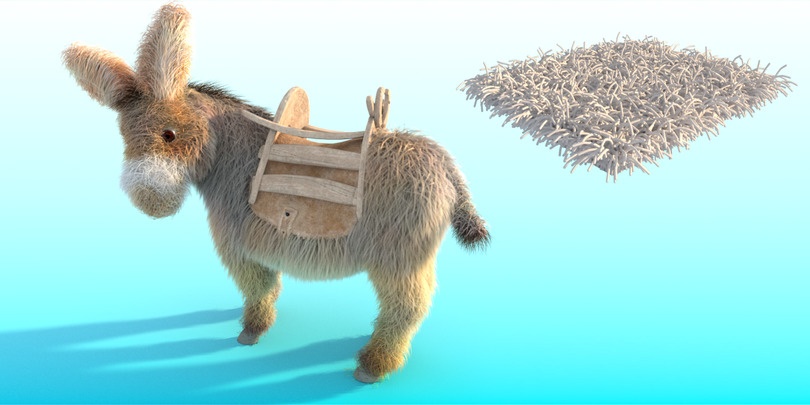
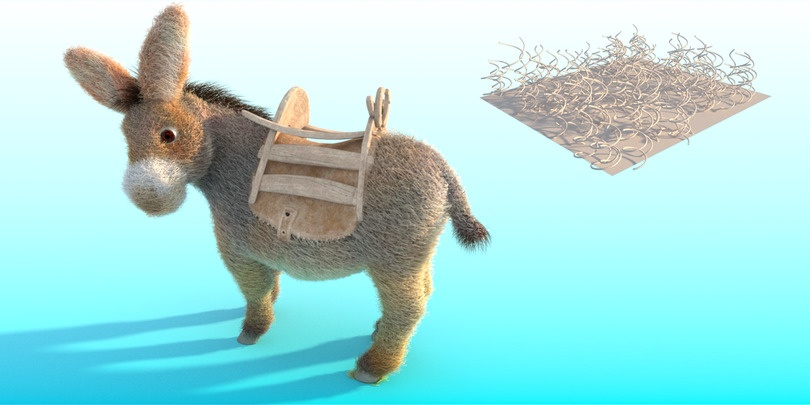
Example: Bend
Using this parameter you can control the elasticity of the fur strands. When set to 0.0, the strands are hard and all straight lines.

Gravity = -3.0 cm

Gravity = -2.5 cm

Gravity = -2.0 cm

Gravity = -1.5 cm

Gravity = -1.0 cm

Gravity = -0.5 cm

Gravity = 0.0 cm

Gravity = 0.5 cm

Gravity = 1.0 cm

Gravity = 1.5 cm

Gravity = 2.0 cm

Gravity = 2.5 cm

Gravity = 3.0 cm

Bend = 0.1

Bend = 0.2

Bend = 0.3

Bend = 0.4

Bend = 0.5

Bend = 0.6

Bend = 0.7

Bend = 0.8

Bend = 0.9

Bend = 1.0
Example: Taper
When this parameter is set to 0.0, no taper is applied to the strands and they have the same thickness from root to tip. Higher values make the root wider and the tip thinner.

Taper = 0.1

Taper = 0.2

Taper = 0.3

Taper = 0.4

Taper = 0.5

Taper = 0.6

Taper = 0.7

Taper = 0.8

Taper = 0.9

Taper = 1
Curl
Curl – When enabled, adds curls to the fur.
Curl Radius – The radius of the individual curl.
Curl Angle – The number of curls on a strand.

Example: Curl radius
Using this parameter you can specify the radius of the individual curl.
Example: Curl Angle
Using this parameter you can specify the number of curls on a strand.

Curl radius = 1

Curl radius = 1.25

Curl radius = 1.5

Curl radius = 1.75

Curl radius = 2

Curl radius = 2.25

Curl radius = 2.5

Curl radius = 2.75

Curl radius = 3

Curl radius = 3.25

Curl radius = 3.5

Curl radius = 3.75
Curl radius = 4

Curl Angle = 2

Curl Angle = 3

Curl Angle = 4

Curl Angle = 5

Curl Angle = 6

Curl Angle = 7

Curl Angle = 8
Level of Detail
Level of detail – When enabled, V-Ray will generate less fur geometry for parts of the scene which are far away from the camera. This is done by decreasing the density of the fur strands and increasing their thickness. The level of detail function helps for two things. One, it conserves memory by decreasing the detail where it is too far to be visible, and two - it helps to reduce animation flickering of very fine fur strands when they are far from the camera.
Start distance – The distance from the camera at which V-Ray is going to start implementing the level of detail adjustment. Up to this distance the fur will be generated as specified by the user, after that V-Ray is going to decrease the density and increase the thickness of the strand by a factor of two for every n units of space specified by the Rate parameter.
Rate – The rate at which the the detail adjustment is applied. Starting from the distance specified in the Start distance parameter V-Ray is going to decrease the density and increase the thickness of the strands by a factor of two for every n units of space specified by the Rate parameter.

Example: Start distance
Determines the distance from the camera, up to which the Level of detail is applied. The Rate is set to 16.
Example: Rate
The rate of detail adjustment. The Start distance is set to 200.

Start distance = 160

Start distance = 180

Start distance = 200

Start distance = 220

Start distance = 240

Start distance = 260

Start distance = 280

Rate = 2

Rate = 4

Rate = 8
Rate = 16

Rate = 32

Rate = 64

Rate = 128

Rate = 256

Rate = 512
Tessellation
Tessellation On – When enabled, instructs V-Ray to subdivide and smooth the fur strands before rendering. Strands closer to the camera are tessellated into finer segments so that they render smooth, while strands away from camera are simplified to reduce memory usage and speed up rendering.
Edge length (px) – Specifies the desired edge length, in pixels, of each final segment of the fur strands when Tessellation On is enabled. Smaller values produce smoother strands but take more memory and are slower to render. Larger values are faster to render and take less RAM, but may cause the fur strands to appear jagged.

Variance
These add variation to their corresponding parameters. Values are from 0.0 (no variation) to 1.0.

Distribution
Distribution – Determines the density of strands over the source object:
Per face – Specifies the number of fur strands per face of the source object. Every face will generate the specified number of fur strands.
Per area – The number of strands for a given face is based on the size of that face. Smaller faces have fewer strands, larger faces have more strands. Every face has at least one strand.
Fixed areas– Enables the size of the faces is taken at a specified frame as specified by the Fix at Time parameter. This parameter is used in the case of deforming meshes.
Fix at time– Specifies the frame to sample for per area distribution.

Example: Distribution
Using Distribution per face parameter you can specify the number of fur strands per triangular face of the source object.
Using Distribution per area parameter you can specify the number of strands per squared scene unit.

Distribution per face = 1

Distribution per face = 2

Distribution per face = 4

Distribution per face = 8

Distribution per face = 16

Distribution per face = 32

Distribution per area = 0.02

Distribution per area = 0.03

Distribution per area = 0.04

Distribution per area = 0.05

Distribution per area = 0.06

Distribution per area = 0.07

Distribution per area = 0.08

Distribution per area = 0.09

Distribution per area = 0.1
Options
Manual gravity direction – When enabled, manually specifies the gravity vector.
Knots – Controls the number of connect straight segments the fur strands are rendered in.
Ignore parent mesh displacement – When enabled, ignore the displacement and generate the fur based on the original undisplaced object, which by default, VRayFur will follow the displaced object's geometry.

Example: Knots
Setting a low Knots value creates less segments in the fur and this does not allow the hair to bend properly. Higher values allow for a more natural curve of the fur.

Knots = 3

Knots = 4

Knots = 5

Knots = 6

Knots = 7

Knots = 8
Textures
You can control some aspects of VRayFur with texture maps. These can be either bitmaps, or vertex color maps painted directly on the source object. Some of these texture maps (like Bend and Initial direction) represent vectors in texture space, where the X and Y directions are derived from the U and V directions of a texture UV set.
UV bases set – Specifies which UV mapping channel is used.
Bend direction texture – A RGB map which specifies a bend direction of the fur strands, in texture space (according to the specified Base map channel). This is the direction in which the fur strands curve to (the amount of curvature is also controlled by the Bend parameter). The red component is offset along the u texture direction, the green component is the offset along the v texture direction, and the blue component is the offset along the surface normal.
Initial direction texture – A RGB map which specifies the initial direction of the fur strands, in texture space (according to the specified Base map channel). The red component is offset along the u texture direction, the green component is the offset along the v texture direction, and the blue component is the offset along the surface normal.
Length/Thickness/Gravity/Bend texture – These maps are multipliers for the corresponding parameters, where black is a multiplier of 0.0, and white is a multiplier of 1.0.
Note: the alpha output of the textures is used, so you may need to enable the Alpha Is Luminance attribute for the textures.
Density texture – This map is a multiplier for the strand density. Black portions of the map correspond to zero density (effectively no fur will be generated in these areas), and white represents the normal strand density, as specified by the distribution parameters. Note that the alpha output of the texture is used, so you may need to enable its Alpha Is Luminance option.

Example: Textures
These examples demonstrate the effect of using a texture in the VRayFur texture slots. The texture used for each example is seen facing the camera. The same texture is applied to a different slot of the VRayFur and the effect can be observed on the larger plane with VRayFur applied. Note that some of the examples use normal maps. Color maps can be used instead, both procedural and bitmaps, where RGB would equal XYZ respectively.
Color or normal maps can be used for Bend direction and Initial direction, as those require a direction vector of three components.
The rest of the examples use simple black and white gradients, since the respective parameters require a single float value.

Bend direction map (XYZ or RGB)

Initial direction map (XYZ or RGB)

Length map (mono)

Thickness map (mono)

Gravity map (mono)

Bend map (mono)
Notes
- VRayFur does not follow smoothed geometry, when Smooth mesh preview or V-Ray Subdivision is used. Instead, use the OpenSubdiv Extra Attribute while rendering, but note that the result is not visible in the viewport.
- To render infinite number of hair strands with GPU, disable the Use global hair tree option. If the Use global hair tree is enabled, the maximum number of hair strands that can be rendered with GPU is 128.