Square Enix © Goodbye Kansas

This page provides information on the V-Ray Hair Next Material.


Overview


VRayHairNextMtl is specifically designed for rendering hair and fur and provides settings for a workflow based on the physiology of real hair. Instead of tweaking arbitrary colors that mix together, the new Hair Next material uses a simple melanin slider that determines the hair color just like in the real world. The material is the product of research based on the paper A Practical and Controllable Hair and Fur Model for Production Path Tracing.


UI Path: ||Right-click on the geometry|| > Assign New Material...

||Right-click on the geometry|| > Assign New Material... > VRay section > VRay Hair Next Mtl


||V-Ray Shelf|| > Right-click to Create V-Ray Materials button > VRay Mtl 2Sided


||Hypershade|| > Window tab > Create... > VRay section > VRay Hair Next Mtl


Presets


Presets – Offers some commonly used hair settings as presets. You can choose between White, White (Fur), Sandy Blond, Golden Blond, Light Brown, Dark Brown, Aged Dark Brown, Ginger Red, Auburn, Scarlet Red(Dyed), Atlantic Blue (Dyed), Lagoon Blue (Dyed), Black presets. See the Presets example below for comparison.


Example: Presets


White

White (Fur)

Sandy Blond

Golden Blond

Light Brown

Dark Brown

Aged Dark Brown

Ginger Red

Auburn

Scarlet Red (Dyed)

Atlantic Blue (Dyed)

Lagoon Blue (Dyed)

Black


General Parameters


Melanin – The pigmentation component that gives the hair strand its main color. The higher the value assigned, the higher the concentration of melanin and the darker the hair strands are. See the Melanin example below to understand how different values work.

Pheomelanin – The redness (pheomelanin content) of the hair strand as fraction of all melanin. 1.0 makes the hair redder. The ratio of melanin to pheomelanin determines how red the hair is. The pheomelanin amount will have no effect if the melanin is set to 0. See the Pheomelanin example below.

Dye Color – Applies a color tint to the hair. For a dyed hair look, set the melanin to 0, otherwise the melanin will darken the dye color and pheomelanin will introduce redness to it. White means no hair dye. See the Dye color example below.

Transparency – Controls the transparency of the hair. White is fully opaque, while black is fully transparent.

Diffuse Color – Controls the diffuse component of the shader. Use this for materials made out of cloth threads or other non-translucent fibers, as well as for dirty hair. 

Diffuse Amount – Specifies the amount for the diffuse component of the material.

Note that real-world hair or fur does not have a diffuse component. Although the diffuse parameter allows for some artistic control, for realistic results it is best to disable it by leaving Diffuse Amount at 0.

Glossiness – Controls the glossiness along the hair strand. It primarily controls the width of the highlight, essentially how shiny the hair appears.

Primary Glossiness Boost – Additional scaling factor to boost the primary reflection glossiness. This can be useful for reproducing the effect of shiny coating on rough looking fur.

Softness – Controls the overall softness of the hair by how much the highlights are wrapped around the individual hair strands. Higher values make the highlights wrap almost completely around the strands giving the hair a smoother look, while lower values make it look crisper. See the Softness example below.

Highlight Shift– Shifts the highlights along the hair strand. Positive values shift the highlight away from the root of the hair, while negative values move the highlight closer to the root. Values in the range 2-4 are typical for human hair. See the Highlight shift example below.

Ior – Hair index of refration. The typical value for human hair is 1.55. The higher the value, the more reflective the hair strands. See the IOR example below.


Example: Melanin


The pigmentation component that gives the hair strand its main color. The higher the value assigned, the higher the concentration of melanin, the darker the hair strands are. In the example below, pheomelanin is set to 0.


Example: Pheomelanin 


The redness (pheomelanin content) of the hair strand as fraction of all melanin. 1.0 makes the hair redder. The ratio of melanin to pheomelanin determines how red your hair is. The pheomelanin amount will have no effect if melanin is set to 0. In the example below, melanin is set to 0.4.


Melanin = 0.1


Melanin = 0.2


Melanin = 0.3


Melanin = 0.4


Melanin = 0.5


Melanin = 0.6


Melanin = 0.7


Melanin = 0.8


Melanin = 0.9


Melanin = 1.0

0.1
1.0


Pheomelanin = 0.1


Pheomelanin = 0.2


Pheomelanin = 0.3


Pheomelanin = 0.4


Pheomelanin = 0.5


Pheomelanin = 0.6


Pheomelanin = 0.7


Pheomelanin = 0.8


Pheomelanin = 0.9


Pheomelanin = 1.0

0.1
1.0


Example: Dye color


Applies a color tint to the hair. For a dyed hair look, set the melanin to 0, otherwise the melanin will darken the dye color and pheomelanin will introduce redness to it. White means no hair dye. In the example below, the Dye color is set to pink (H=0,S=250,V=104) and the hue value is adjusted. Melanin is set to 0.4.


Example: Softness


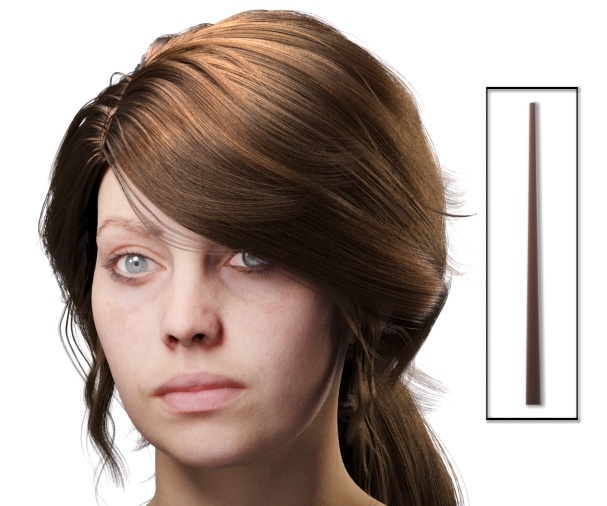
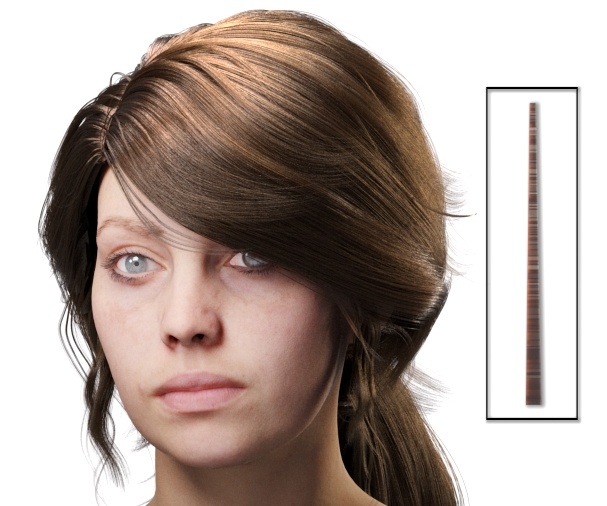
Controls the overall softness of the hair by how much the highlights are wrapped around the individual hair strands. Higher values make the highlights wrap almost completely around the strands giving the hair a smoother look, while lower values make it look crisper. In the example below, the effect is also shown on a single hair strand. Melanin is set to 0.4.


Dye color (hue) = 0


Dye color (hue) = 26


Dye color (hue) = 51


Dye color (hue) = 77


Dye color (hue) = 102


Dye color (hue) = 128


Dye color (hue) = 153


Dye color (hue) = 179


Dye color (hue) = 204


Dye color (hue) = 230


Dye color (hue) = 255

0
255


Softness = 0.1


Softness = 0.2


Softness = 0.3


Softness = 0.4


Softness = 0.5


Softness = 0.6


Softness = 0.7


Softness = 0.8


Softness = 0.9


Softness = 1.0

0.1
1.0


Example: Highlight shift


Shifts the highlights along the hair strand. Positive values shift the highlight away from the root of the hair, while negative values move the highlight closer to the root. In the example below, melanin is set to 0.6.


Example: IOR


Hair index of refration. The typical value for human hair is 1.55. The higher the value, the more reflective the hair strands. In the example below, melanin is set to 0.6.


Highlight shift = 1


Highlight shift = 2


Highlight shift = 3


Highlight shift = 4


Highlight shift = 5


Highlight shift = 6


Highlight shift = 7


Highlight shift = 8


Highlight shift = 9


Highlight shift = 10


Highlight shift = 11

1
11


IOR = 1.55


IOR = 1.80


IOR = 2.05


IOR = 2.30


IOR = 2.55


IOR = 2.80


IOR = 3.05


IOR = 3.30


IOR = 3.55

1.55
3.55

Glint


The Glint rollout provides control over the Glint (focused highlight) and the Glitter (focused colorless highlight) parameters.


Glint Strength – Controls the strength of the colored highlights across and along the strand.

Glint Variation – Adds a random glint variation along the strand. It affects the glint strength and orientation; the original secondary highlight strength and orientation; the softness, glossiness and highlight shift.

Glitter Strength – Controls the glitter strength. Glitter is the additional more focused colorless highlight, which is randomly scattered along the strand. It is more pronounced with hard lighting produced by small or collimated light sources.

Glitter Size – This parameter controls the size of the randomization pattern applied. Increasing the value increases the size of the pattern.

Scale – Internally, the variation along the strand is set in real world units. This parameter allows correction of the appearance of hair not modeled in real world scale. Values below 1.0 shrink the variation pattern, while values above 1.0 elongate it.


Example: Glint Strength


Controls the strength of the highlights along and across the hair strand. All other parameters are set to their default values.


Example: Glint Variation


The Glint Variation randomizes the glint effect along the strand. All other parameters are set to their default values.


Glint Strength = 0.0

Glint Strength = 0.1

Glint Strength = 0.2

Glint Strength = 0.3

Glint Strength = 0.4

Glint Strength = 0.5

Glint Strength = 0.6

Glint Strength = 0.7

Glint Strength = 0.8

Glint Strength = 0.9

Glint Strength = 1.0

0.0
1.0

Glint Variation = 0.0

Glint Variation = 0.1

Glint Variation = 0.2

Glint Variation = 0.3

Glint Variation = 0.4

Glint Variation = 0.5

Glint Variation = 0.6

Glint Variation = 0.7

Glint Variation = 0.8

Glint Variation = 0.9

Glint Variation = 1.0

0.0
1.0


Example: Glitter Size


The Glitter Size controls the size of the randomization pattern applied. The higher the value, the more variation. All other parameters are set to their default values.


Example: Glitter Strength


Controls the strength of the glitter highlights. The higher the value, the more pronounced the effect. All other parameters are set to their default values.


Glitter Size=0.01

Glitter Size = 0.1

Glitter Size = 1.0

Glitter Size = 10

Glitter Size = 100

Glitter Size = 1000

0.01
1000

Glitter Strength = 0.0

Glitter Strength = 0.1

Glitter Strength = 0.2

Glitter Strength = 0.3

Glitter Strength = 0.4

Glitter Strength = 0.5

Glitter Strength = 0.6

Glitter Strength = 0.7

Glitter Strength = 0.8

Glitter Strength = 0.9

Glitter Strength = 1.0

0.0
1.0


Example: Scale


Values below 1.0 shrink the variation pattern; values above 1.0 elongate it, so the effect is spread out.


Scale = 0.01

Scale = 0.1

Scale = 1.0

Scale = 10

Scale = 100

Scale = 1000

0.01
1000


Randomization


The Randomization parameters can be used to introduce variation of the general parameter values. When using randomization, different hair strands will receive slightly different values for the below parameters, so in fact the randomization works on a per strand basis.


Random Melanin – Adds variation to the amount of melanin in each hair strand.

Random Dye Hue – Adds variation to the hue component of the dye color. This makes each strand appear with a different dye color. This parameter has no effect, when the dye color is not used, i.e. when the dye color is pure white.

Random Dye Saturation – Randomizes the saturation of the dye color between hair strands. This makes each strand appear with a more or less saturated dye color. This parameter has no effect, when the dye color is not used, i.e. when the dye color is pure white.

Random Dye Value – Adds variation to the value component of the dye color. This makes each strand appear with a brighter or darker dye color. This parameter has no effect, when the dye color is not used, i.e. when the dye color is pure white.

Random Gray Hair Density – Adds variation to the number of gray hair strands. You can also assign a texture map to this parameter to specify areas where the density is higher.

Random Glossiness – Randomizes the glossiness of each hair strand.

Random Softness – Assigns a random value for the softness parameter for each strand. This makes some hair strands appear crisper, while other appear softer.

Random Highlight Shift – Adds variation to the highlight shift for each strand. This offsets the highlights closer or further away from the root of the hair on a per strand basis.

Random IOR – Randomizes the ior value for each hair strand. This makes some strands more reflective, and others - less reflective.

Random Tangent – Adds a random offset to the hair tangent. This makes the hair stands receive light from slightly different directions, which also means that the highlights will be placed in slightly different places for each strand. Note that this parameter is depends on the scene scale.


Tint


Primary Tint  The color tint for the primary component. Corresponds to the light reflected off of the outer surface of a hair strand. See the Primary tint example below.

Secondary Tint – The color tint for the secondary component. Corresponds to the light piercing through and reflecting off of the back surface of a hair strand.

Transmission Tint – The color tint for the transmission component. Corresponds to the light going through the hair strands.


Example: Primary tint


The color tint for the primary component. Corresponds to the light reflected off of the outer surface of a hair strand. In the example below the Primary tint color is set to pink (H=0,S=172,V=132) and we adjust the hue value and the melanin to 0.6.


Primary tint (hue) = 0


Primary tint (hue) = 26


Primary tint (hue) = 51


Primary tint (hue) = 77


Primary tint (hue) = 102


Primary tint (hue) = 128


Primary tint (hue) = 153


Primary tint (hue) = 179


Primary tint (hue) = 204


Primary tint (hue) = 230


Primary tint (hue) = 255

0
255


Advanced


Bounces – The number of indirect bounces used to compute the effect of the multiple scattering. It can significantly affect the hair appearance, especially for light colored hairs. The number of bounces necessary can vary from 5 for dark colored hairs, to 30 and more for light colored ones.

Compensate Energy – When enabled, it improves the render realism of white or bright colored hair or fur. For more information, see the How we perfect white and light hair colors in V-Ray blog post. See also the Compensate Energy example below.


Example: Compensate Energy


This example shows the difference when Compensate energy option is disabled and enabled. 

off
on


Notes


  • Proper gamma workflow is essential for realistic rendering of hair.


References


Here is a list of references used when building the VRayHairNextMtl material.