Versions Compared

Key

  • This line was added.
  • This line was removed.
  • Formatting was changed.

...

UI Path

...

:

||Select camera|| > V-Ray Shelf > Physical Camera button

...

Section
Column
width10%


Column
width80%

Column
width10%


Parameters

...


Section
Column
width50%

Enable – Enables the V-Ray Physical Camera parameters.

Column
width5%


Column
width45%

Image Added


Main

...

Section
Column
width50%

Camera Type – Determines the type of the physical camera to simulate. This mostly has an effect on the motion blur effect produced by the camera:

Still – Simulates a still photo camera with a regular shutter.
Cinematic – Simulates a motion-picture camera with a circular shutter.
Video – Simulates a shutter-less video camera with a CCD matrix. 

Shutter Angle – Shutter angle (in degrees) for the cinematic camera.

Shutter Offset – Shutter offset (in degrees) for the cinematic camera.

Latency – CCD matrix latency, in seconds, for the video camera

Specify Field of View – Specifies the source for the camera's field of view setting. When enabled, the FOV parameter is manually set. When disabled, FOV is determined by the Focal Length parameter.

Field of View – Specifies a value for the camera's field of view when Specify Field of View is enabled.

Film Width – Specifies the horizontal size of the film gate in millimeters. Note that this setting takes into account the system units configuration to produce the correct result.

Focal Length – Specifies the equivalent focal length of the camera lens. This setting takes into account the system units configuration to produce the correct result. Vertical film gate size is calculated by taking image aspect ratio into account (vertical film size = horizontal film size / aspect ratio).

Exposure When enabled, the Specifies how the F-Number, Shutter Speed, and ISO settings affect  and Film Speed (ISO) settings affect the image brightness.

DisableShutter SpeedF-Number and ISO settings do not affect the image brightness;
Physical Exposure – Image brightness is controlled by the Shutter SpeedF-Number and ISO;
Exposure Value – Uses the Exposure Value to control image brightness. Grays out the ISO parameter and uses Shutter Speed and F-Number values only for Motion Blur and Depth of field respectively.

F-Number – Determines the width of the camera aperture. For more information, see the Exposure Control: F-Stop (fF-numberNumber) example below.

ISO – Determines the film power (i.e. sensitivity). Smaller values make the image darker, while larger values make it brighter. For more information, see the Exposure Control: Film Speed (ISO) example belowISO (Film Speed) example below.

Exposure ValueControls the exposure value when the Exposure Value option is selected. Higher values make the render darker, whereas lower values make the render brighter.

Shutter Speed – Specifies the shutter speed, in inverse seconds, for the still photographic camera. For example, a shutter speed of 1/30 of a second corresponds to a value of 30 for this parameter. For more information, see the Exposure Control: Shutter Speed example below.

White Balance – A color that can be used to alter the image output. Objects in the scene that have the specified color appear white in the image. Note that only the color hue is taken into consideration; the brightness of the color is ignored. For more information, see the White Balance example below.

Transfer ROP Auto Corrections – This option is available only if Auto Exposure/Auto white balance in the ROP are enabled. It lets you transfer the calculations to a camera as an ISO correction, keeping the options affecting Depth of Field and Motion Blur unchanged (e.g. shutter speed, f-number).

Use Vignetting – When enabled, the optical vignetting effect of real-world cameras is simulated.

Vignetting – Specifies the amount of the vignetting effect, where 0.0 is no vignetting and 1.0  is normal vignetting. For more information, see the Vignetting example below.

Optical Vignetting – Controls the strength of the optical vignetting, also known as "cat's eye" vignetting. This effect is due to the fact that the shape of the bokeh highlights resembles the shape of the aperture. As the distance to the optical axis increases, the bokeh highlights are progressively narrowed and begin to resemble the shape of a cat's eye. The larger the distance from the image center, the narrower the cat's eye becomes. Optical vignetting tends to be stronger in wide angle lenses and large aperture lenses, but the effect can be noticed with most photographic lenses.

Auto Vertical Lens Shift – When enabled, automatically sets the Lens Shift parameter to achieve 2-point perspective.

Horizontal/Vertical Lens Shift  – Values other than 0 tilt the lenses to simulate 2-point perspective.

Horizontal/Vertical Offset – Shutter offset (in degrees) for the cinematic camera.

UI Text Box
typeinfo

The following parameters of the physical camera are linked to some of Houdini's channels as part of the integration of V-Ray for Houdini:

  • Film Width is linked to Aperture
  • Focal Length is linked to Focal Length
  • F-Number is linked to F-Stop
  • Horizontal/Vertical Offset are linked to Screen Window X/Y
Column
width5%


Column
width45%

Image Modified


Depth of Field

...

Section
Column
width50%

Enable – Turns on depth of field sampling. For more information, see the Depth Of Field (DOF) example below.

Focus Distance – Sets the focus distance of the camera.

Bokeh

Enable – When enabled, simulates a polygonal aperture.

Number of Blades – Specifies the number of blades of the polygonal aperture.

Blades Rotation – Defines the rotation of the blades in radians.

Center Bias – Defines a bias shape for the bokeh effects. Positive values make the outer edge of the bokeh effects brighter; negative values make the center of the effect brighter.

Bokeh Anisotropy – Allows stretching of the bokeh effect horizontally or vertically to simulate anamorphic lenses. Values other than 0.0 stretch the bokeh effect horizontally or vertically. If you want the ratio of height to width of the bokeh to be k:1,  then the value for anisotropy should be sqrt(1/k)-1For example, for anamorphic bokeh, which is 2.39:1, the anisotropy value should be -0.353.

Bitmap Apperture

Enable – Enables a texture file to define the shape of the aperture.

Affect Exposure – When enabled, the texture affects the camera's exposure in addition to the shape of the aperture.

Texture –  Specifies the texture file that will determine the shape of the aperture.

Resolution – Specifies the resolution of the texture file.

Column
width5%


Column
width45%

Image Modified


Motion Blur

...

Section
Column
width50%

Enable – Turns on motion blur sampling. For more information, see the Motion Blur (MB) example below.

Rolling Shutter  Specifies whether the rolling shutter effect is enabled and the direction of the shutter.

Disabled – The rolling shutter effect is disabled.
Top to bottom – 
The direction is vertical from top to bottom.
Bottom to top – 
The direction is vertical from bottom to top.
Left to right
 – The direction is horizontal from left to right.
Right to left – The direction is horizontal from right to left.

Rolling Shutter Duration – The time for the shutter to pass through the image in 1/seconds.

Column
width5%


Column
width45%

Image Modified


Distortion

...

Section
Column
width50%

Enable – Enables distortion sampling for the V-Ray Physical Camera.

Distortion Type – Determines the formula used to calculate the distortion for the camera

Quadratic – This is the default distortion type. It uses a simplified formula that is easier to calculate than the Cubic method.
Cubic
 – This is the distortion type used in some camera tracking programs like SynthEyes and Boujou. If you plan on using one of these programs, use this distortion type.
Lens File – An external .lens file is used to determine the distortion for the camera.
Texture – A displacement map from third party application (i.e. Nuke) can be used to determine the camera distortion.

Distortion – Specifies the distortion coefficient for the camera lens. A value of 0.0 means no distortion; positive values produce "barrel" distortion, while negative values produce "pillow" distortion. This parameter has an effect only when Quadratic or Cubic is selected as the Distortion TypeFor more information, see the Distortion example below.

Distortion Texture – The texture to be used to determine the camera distortion when Distortion Type is set to Texture.

Lens File – Specifies the file for calculating the camera distortion when the Distortion Type is set to Lens File.

Column
width5%


Column
width45%

Image Modified


Anchor
distortion
distortion


Example: Distortion


The difference between the two types of distortion is slightly visible. The Cubic type should be used in some camera tracking programs like SynthEyes, Boujou, etc.

Section
Column
width20%


Column
width60%
Image slider
Panel
borderStylenone

Distortion Amount is 1.0, Distortion Type is Quadratic

Panel
borderStylenone

Distortion Amount is -1.0, Distortion Type is Quadratic

Panel
borderStylenone

Distortion Amount is 1.0, Distortion Type is Cubic

Panel
borderStylenone

Distortion Amount is -1.0, Distortion Type is Cubic

Column
width20%


Anchor
FNumber
FNumber


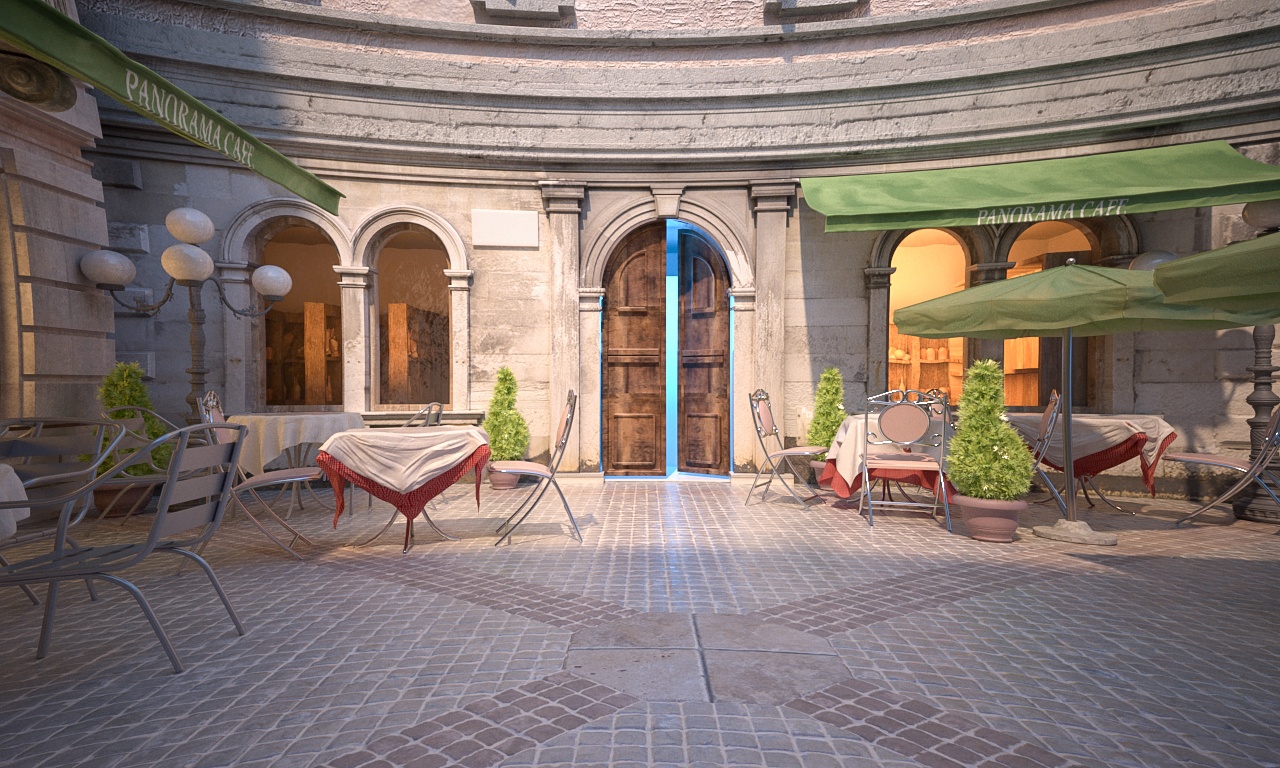
Example: F-Stop (F-Number)


Note: All the images from the following examples are rendered using the V-Ray Sun and Sky set with their default parameters.

The F-Number parameter controls the aperture size of the virtual camera. Lowering the F-Number value increases the aperture size and so makes the image brighter since more light enters the camera. In reverse, increasing the F-Number makes the image darker, as the aperture is closed. This parameter also determines the amount of the Depth of Field (DOF) effect. 

The images in this example show the effect of changing the F-Number. The following constant settings were used for some parameters: Exposure is on, Shutter Speed is 60.0, ISO is 200, Vignetting is on, White Balance is white.

Section
Column
width20%


Column
width60%
Image slider
minLabel4.0
maxLabel8.0
Panel
borderStylenone

F-Number = 4.0

Panel
borderStylenone

F-Number = 5.6

Panel
borderStylenone

 F-Number = 8

Column
width20%


Anchor
shutterSpeed
shutterSpeed


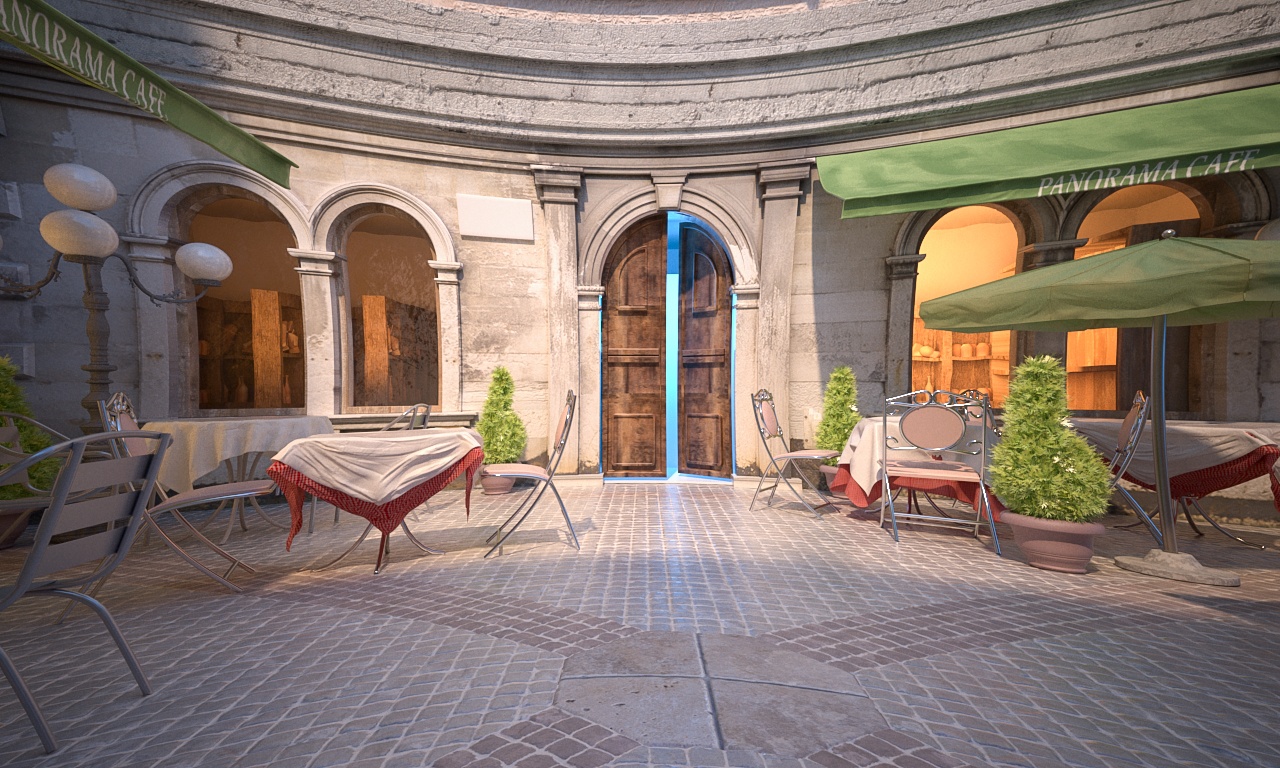
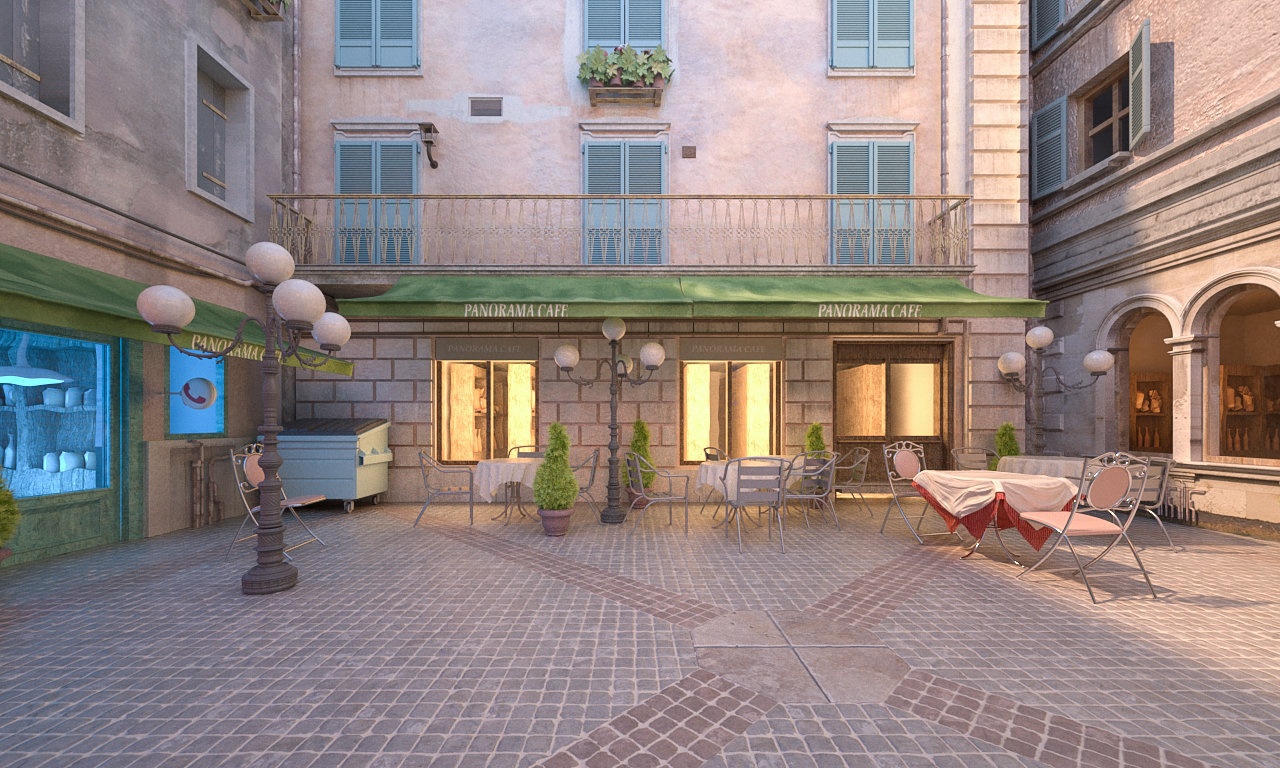
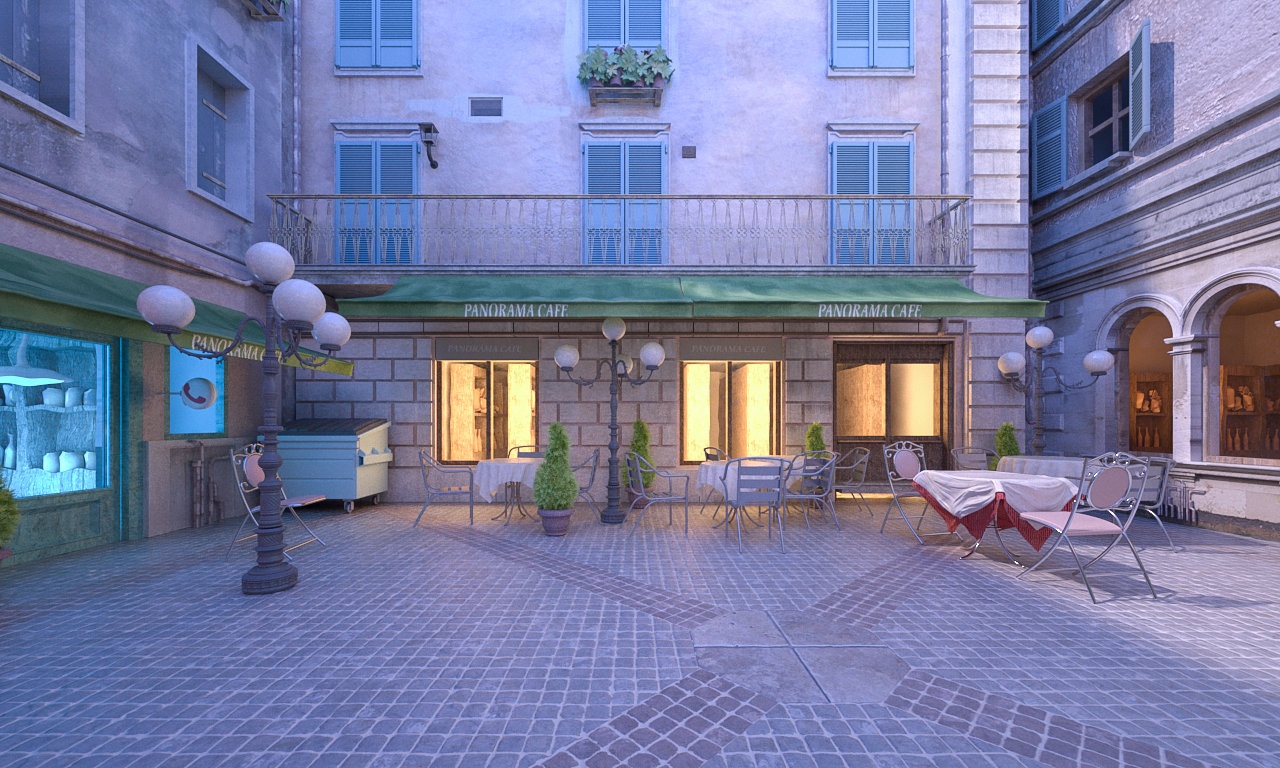
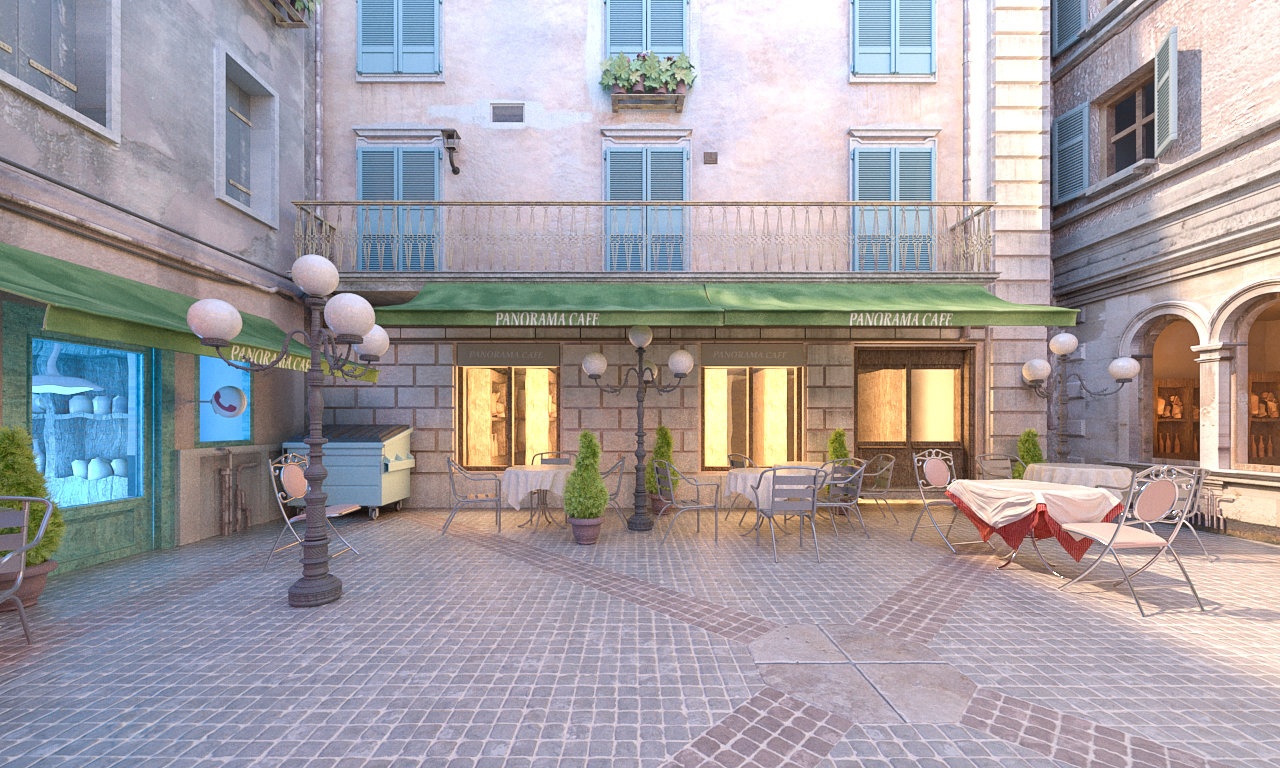
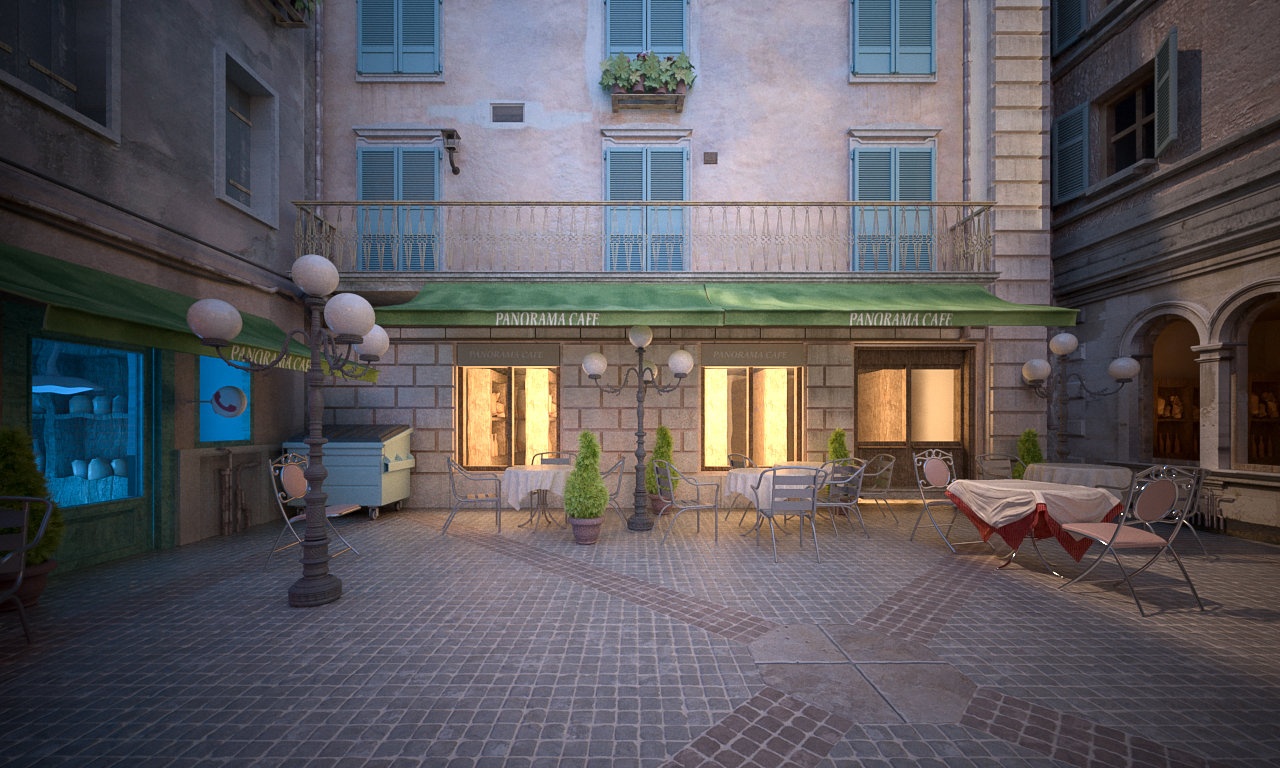
Example: Shutter Speed


The Shutter Speed parameter determines the exposure time for the virtual camera. The longer this time is (small shutter speed values), the brighter the image would be. In reverse - if the exposure time is shorter (high shutter speed value), the image would get darker. This parameter also affects the motion blur effect, see the Motion Blur Example.

The images in this example show the effect of changing the Shutter Speed. The following constant settings were used for some parameters: Exposure is on, F-Number is 8.0, ISO is 200, Vignetting is on, and White Balance is white.

Section
Column
width20%


Column
width60%
Image slider
minLabel30.0
maxLabel125.0
Panel
borderStylenone

Shutter Speed is 30.0

Panel
borderStylenone

Shutter Speed is 60.0

Panel
borderStylenone

Shutter Speed is 125.0

Column
width20%


Anchor
ISO
ISO


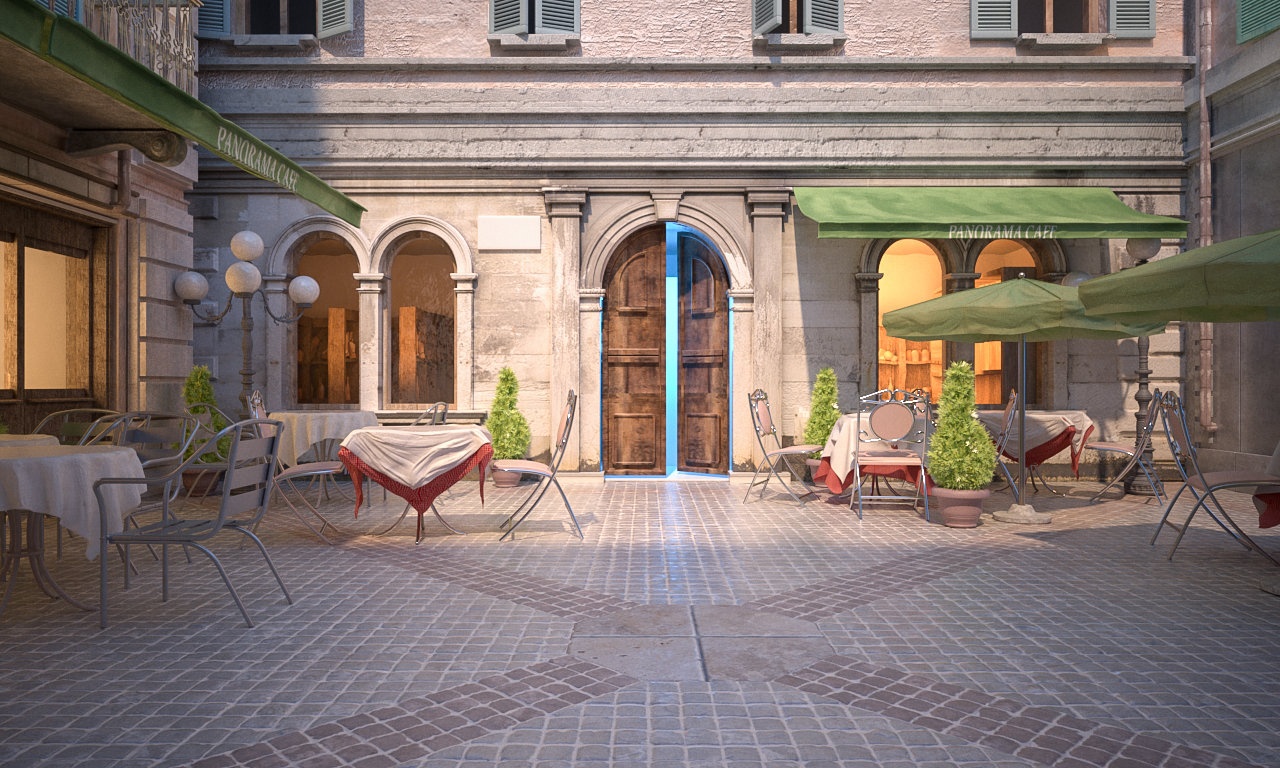
Example: ISO (Film Speed

(ISO

)


The ISO parameter determines the sensitivity of the film and consequently the brightness of the image. If the ISO value is high (film is more sensitive to light), the image is brighter. Lower ISO values mean that the film is less sensitive and produces a darker image.

The images in this example show the effect of changing the ISO. The following constant settings were used for some parameters: Exposure is on, Shutter Speed is 60.0, F-Number is 8.0, Vignetting is on, and White Balance is white.

Section
Column
width20%


Column
width60%
Image slider
minLabel200
maxLabel800
Panel
borderStylenone

ISO is 200 is 200

Panel
borderStylenone

ISO is 400 

Panel
borderStylenone

ISO is 800 

Column
width20%


Anchor
WhiteBalance
WhiteBalance


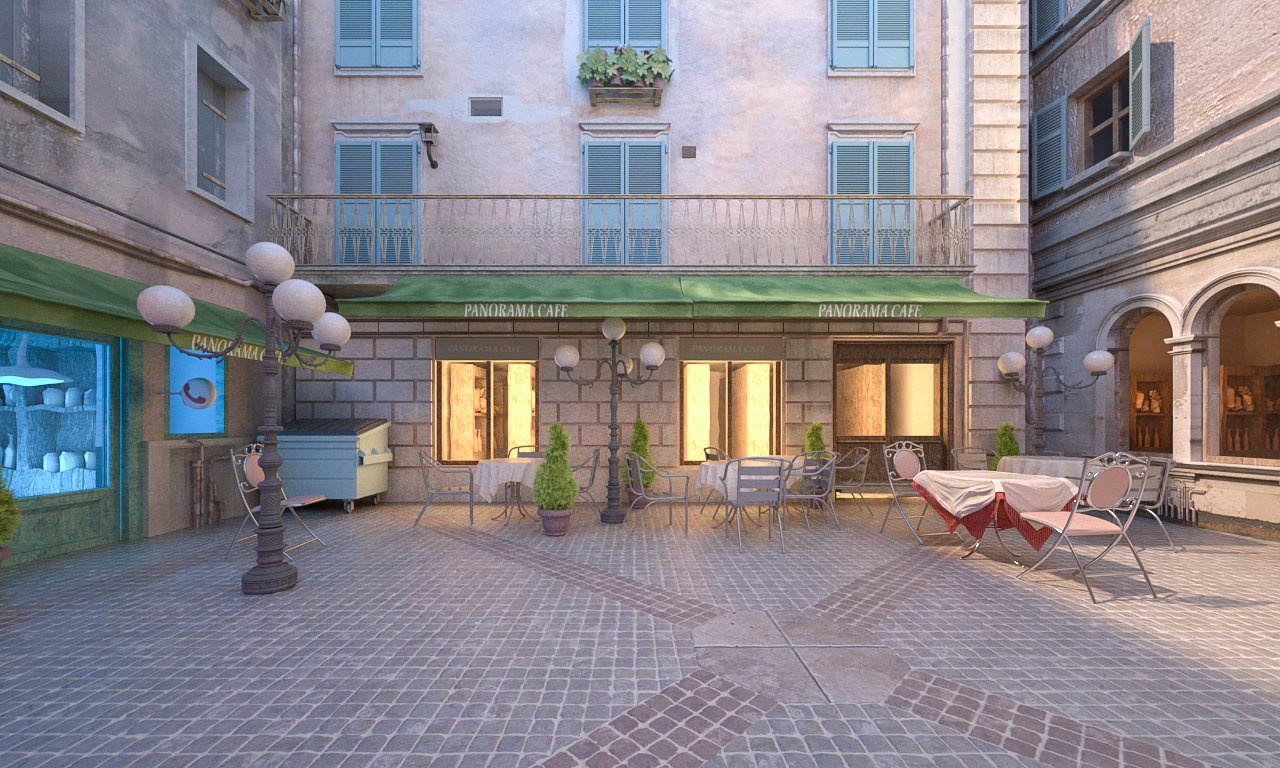
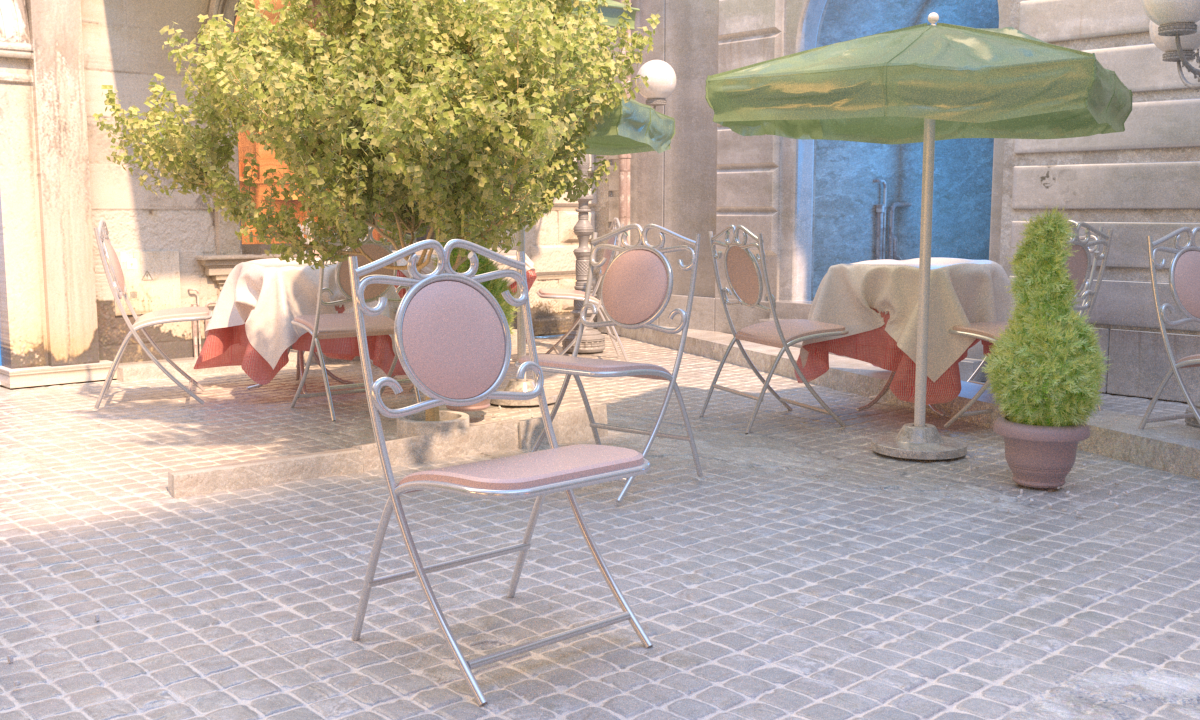
Example: White Balance


Using the White Balance color allows additional modification of the image output. Objects in the scene that have the specified color will appear white in the image. E.g. for daylight scenes this should be peach color to compensate for the color of the sun light etc.

The images in this example show the effect of changing the White Balance. The following constant settings were used for some parameters: Exposure is on, F-Number is 8.0, Shutter Speed is 200.0,   ISO is 200.0, and Vignetting is off.

Section
Column
width20%


Column
width60%
Image slider
Panel
borderStylenone

White Balance is white (255, 255, 255) 

Panel
borderStylenone

White Balance is blueish (196, 226, 255) 

Panel
borderStylenone

White Balance is warmer (240, 200, 114) 

Column
width20%


Anchor
vignetting
vignetting


Example: Vignetting


Section
Column
width20%


Column
width60%
Before after
afterLabelOn
darktrue
beforeLabelOff
Panel
borderStylenone

Panel
borderStylenone

Column
width20%


Anchor
DOF
DOF


Example: Depth Of Field (DOF)


Enable DoF effect from the the Depth of Field tab tab of the physical camera. The effect is most strongly seen when the camera is close to an object, for example when doing a macro photo. For a strong DoF effect, the camera aperture must be open wide (i.e. small F-Number value). That may lead to a very burnt and bright image, so to preserve the same illuminosity over the whole image, the the Shutter Speed must must be shortened. Last but not least the Focus Distance determines which part of the scene will be actually on focus. To get the focus near, you would need a small value and reverse - higher value for far focus.

For the images in this example, the following constant settings were used for some parameters: Exposure is on is set to Exposure ValueF-Number is 1.0, Shutter speed is 4000Exposure Value is 7.0, Film speed (ISO) is 100.0Shutter Speed is 125Vignetting is off.


Section
Column
width20%


Column
width60%
Image slider
Panel
borderStylenone

Image AddedImage Removed
  Depth of Field is off

Panel
borderStylenone

Image AddedImage Removed
 Depth of Field is on,  Focus Distance is 4.34  is 3 m 

Panel
borderStylenone

Image AddedImage Removed
Depth of Field is on,  Focus Distance is 7.30  is 5 m 

Column
width20%


Anchor
motionBlur
motionBlur


Anchor
ExampleMotionBlur
ExampleMotionBlur

Example: Motion Blur (MB)


Enable the Motion Blur effect from the the Motion Blur tab tab of the physical camera. The amount of motion blur is determined by the speed of the moving object itself as well as the Shutter Speed setting of the camera. Long shutter speeds will produce more motion blur, as the movement of the object is tracked over a longer time. In reverse, short shutter speeds will produce less motion blur. Keep in mind that to preserve the same brightness over the whole image, the F-Number value has to be corrected as well.

UI Text Box
typeinfo

In this example, the falling roof tiles are moving faster than the flower pot, which causes the difference in the motion blur effect. 

For the images in this example, the following constant settings were used for some parameters: Exposure is on, Film speed (ISO) is 200.0, and is set to Exposure ValueExposure Value is set to 7 and Vignetting is on.


Section
Column
width20%


Column
width60%
Image slider
Panel
borderStylenone
Image Removed

Image Added
Motion Blur
 is off

Panel
borderStylenone
Image Removed

Image Added
Motion Blur
 is on, F-Number

 is 16

 is 8.0, Shutter Speed is 20.0


Panel
borderStylenone
Image Removed

Image Added
Motion Blur
 is on, F-Number is 8.0, Shutter Speed

 is 80

 is 40.0

Column
width20%