![]()
Page History
This page introduces the settings found in the VRay tab of the Render Settings.
| Floatingpagetoc |
|---|
Overview
...
| Section | |||||||||||||||||
|---|---|---|---|---|---|---|---|---|---|---|---|---|---|---|---|---|---|
|

...
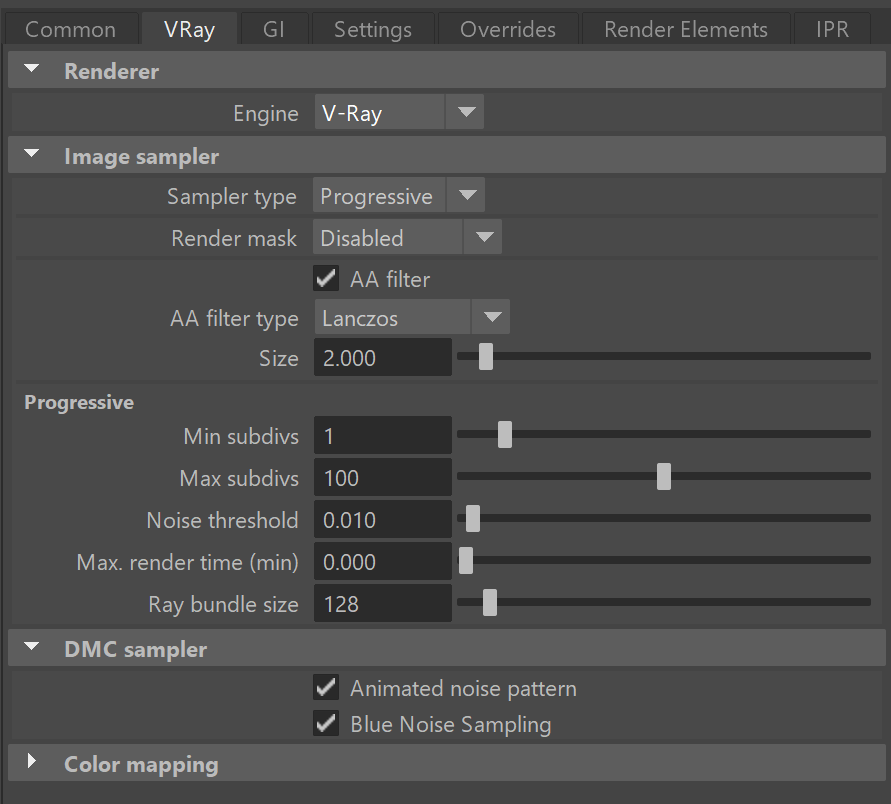
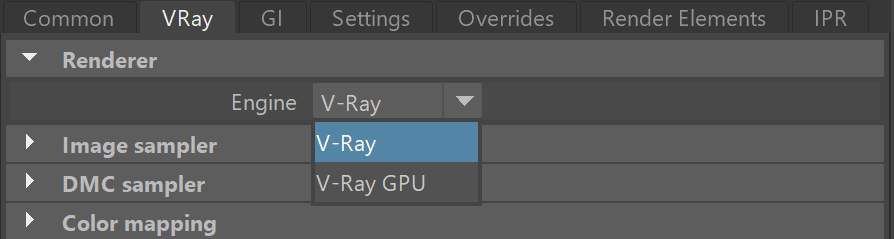
Renderer Rollout
||Render Settings window|| > VRay tab
Production Renderer Rollout
V-Ray allows you to use both CPU and GPU hardware for production renders through the Production Renderer rollout. GPU rendering this way is different than using V-Ray IPR.
Note: When CUDA/RTX is selected as the Production engine, the following GI engines are supported for calculating secondary bounces: Light Cache and Brute Force. The primary bounces are always calculated with Brute Force.
GPU Engines Parameters
...
| Section | |||||||||||||||
|---|---|---|---|---|---|---|---|---|---|---|---|---|---|---|---|
|
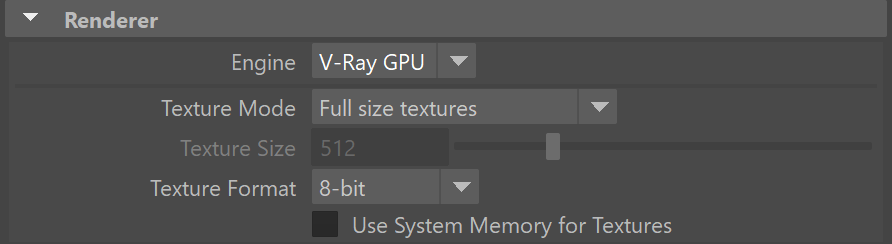
GPU Engine Parameters
...
| Section |
|---|
When using the V-Ray GPU engine, additional parameters become available from this rollout to help adjust the way your GPU will render the given scene. |
...
|
...
|
|
...
|
...
|
...
|
...
|
...
|
...
|
...
|
...
|
...
|
Texture Size – When GPU Resize textures is enabled, this value specifies the resolution to which the textures are resized.
...
|
...
|
...
V-Ray Render Devices Selection
...
| Section | |||||
|---|---|---|---|---|---|
|
...
|
...
|
...
|
...
|
...
|
...
|
...
|

Image Sampler
This rollout has the same functionality as the Select devices for V-Ray GPU rendering GUI tool that comes with V-Ray for Maya. For more information, including details on GPU devices and options like hybrid rendering, see the Set up for GPU Rendering page.
...
...
Overall image sampling - Raytrace renders, like V-Ray, shoot rays out from the camera to sample what is found in the scene to help determine what color each pixel will be in a rendered image. The settings used to adjust how the V-Ray render engine does this, and the relationship between pixels in the render can be found on the Image Sampler (Anti-Aliasing) page.
Blurry effects sampling - While the Image sampler rollout deals with primary rays coming from the camera, the DMC sampler rollout focuses on secondary rays that help calculate what's referred to as "blurry" effects such as anti-aliasing, depth of field, indirect illumination, area lights, glossy reflections/refractions, motion blur, etc. For more details on the settings and parameters in this rollout, please see the DMC Sampler page.
To see the settings for the V-Ray GPU render engine, please visit the V-Ray GPU Setup page.
Image samples pattern - When rendering animations, you can specify whether to lock the pattern, in which V-Ray shoots the image samples, or change it for each frame. Additionally, Blue Noise sampling optimization is used to disribute the samples in a uniform way across the image to help visually reduce noise with fewer samples. In all cases, re-rendering the same frame will produce the same pattern. These options are controlled from the DMC Sampler.
Region rendering - When V-Ray uses the bucket Region rendering - When V-Ray uses a non-progressive image sampler, the rendered image is broken up into small pieces, also known as buckets, to help calculate and complete the image faster. The settings used to adjust these buckets can be found within the Render Region Division page.
Color Mapping
...
A camera in the real world uses exposure controls to determine how it handles the brightest and darkest parts of a captured image. Similarly, V-Ray uses Color Mapping to help translate the information collected by the sample rays into usable pixels we see within our rendered image. For more details on how to control the way V-Ray maps these values, please see the Color Mapping page.