![]()
Page History
This page provides information on the Options tab of the V-Ray Renderer parameters.
Page Contents
| Table of Contents | ||||
|---|---|---|---|---|
|
Overview
...
The Options tab globally control some geometry, lighting, material, and texture aspects of the rendering. For example, these options can be used to disable all shadows in your scene, or to use probabilistic light sampling to speed up test renders.
UI Path: ||Parameters tab|| > Options tab (with the V-Ray Renderer node selected)
Geometry
Displacement – Enables or disables V-Ray displacement mapping.
Lights
Default Lights – Enables the usage of the default lights when there are no light objects in the scene or when you have disabled lighting globally with the Use Lights parameter.
Shadows – Enables shadows globally.
Light Evaluation Mode – Determines how lights are sampled in scenes with many lights.
Full Lights Evaluation – V-Ray goes through each scene light and evaluates it at each shading point. In scenes with many lights and lots of GI bounces, this leads to a lot of shadow rays being traced and rendering can become extremely slow. When GPU rendering, this will introduce probabilistic light calculations but will not allow the Number of Lights parameter to be set. Older V-Ray scenes with the Probabilistic Lights parameter disabled, will default to using this option. For more information, see the Probabilistic Lights example below.
Uniform Probabilistic Lights – V-Ray randomly chooses the specified number of lights and evaluates only those. Lower values make the rendering faster, but potentially more noisy. Higher values cause more lights to be computed at each shading point, thus producing less noise, but increasing render times. This option makes it possible to render images that would otherwise take a very long time, at the expense of possibly introducing more noise into the rendering. When GPU rendering, this will introduce probabilistic light calculations. Previous V-Ray 3 scenes that had the Probabilistic Lights parameter enabled, will default to using this option. For more information, see the Probabilistic Lights example below.
Adaptive Lights – Uses information from the Light cache to determine which lights to sample. If a Light cache is not used, uniform sampling will be used. Depending on the scene, it can be faster than the Full Lights Evaluation and Uniform Probabilistic Lights mode.
Number of Lights – Number of lights from the scene that are evaluated by V-Ray when the Light evaluation parameter is to either Adaptive or Uniform Probabilistic. To achieve a positive effect from probabilistic light sampling, this value must be lower than the actual number of lights in the scene. Lower values make the rendering go faster, but the result is potentially more noisy. Higher values cause more lights to be computed at each hit point, thus producing less noise but increasing render times. For more information, see the Probabilistic Lights example below.
Materials
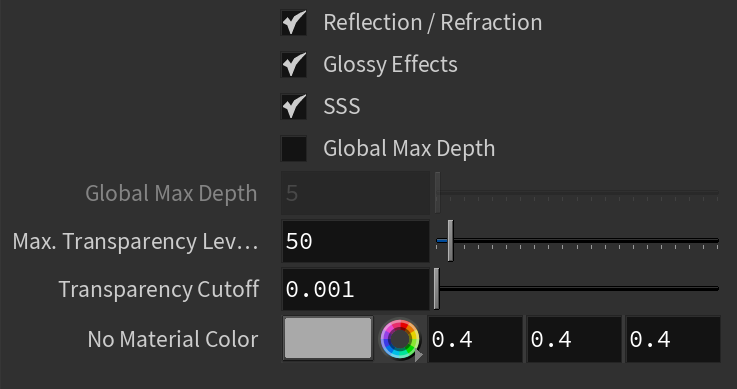
Reflection / Refraction – Enables (default) or disables the calculation of reflections and refractions in V-Ray maps and materials.
Glossy Effects – Enables (default) or disables the rendering of glossy effects.
SSS – Enables (default) or disables the rendering of sub-surface scattering effects.
...
Global Max Depth – Specifies the maximum depth when Global Max Depth is checked. To disable reflections/refractions altogether, set this value to 0.
...
Transparency Cutoff – Determines when tracing of transparent objects will be stopped. If the accumulated transparency of a ray is below this threshold, no further tracing will be performed.
Textures
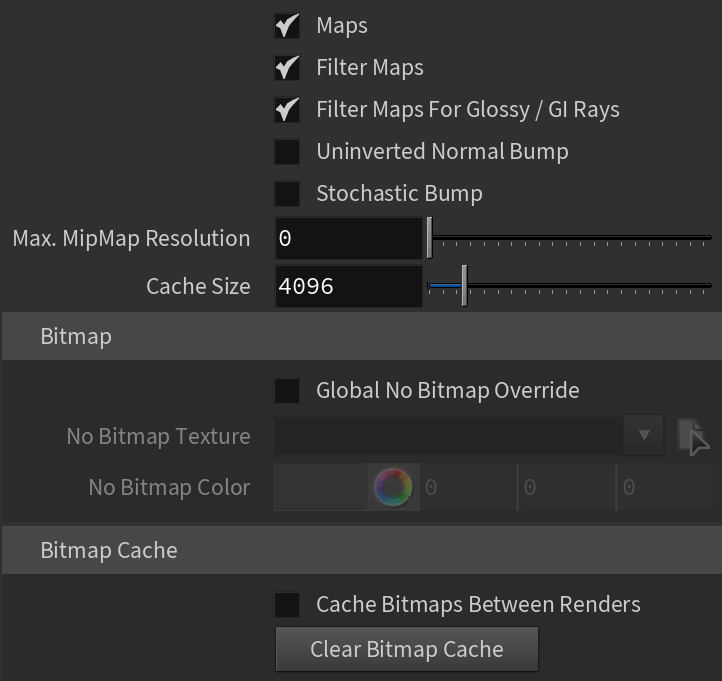
Maps – E nables (default) or disables texture maps. This option is useful for troubleshooting renderings, for example for determining the extent to which texture maps are contributing to noise or other rendering artifacts.
...
Filter Maps For Glossy/gi Rays – Enables filtering for glossy and GI rays.
Uninverted Normal Bump – When enabled, the normal bump in tangent space will not be inverted on flipped UVs.
Volumetrics
Probabilistic Volumetrics – If enabled, the volumetrics will select a few samples along each ray based on the smoke density, and evaluate the volume lighting at those points. If disabled, the volumetrics will evaluate the lighting at each step of the raymarching algorithm. The probabilistic mode is particularly useful when using the progressive sampler in V-Ray, as well as when using complex lighting on the volume. This mode only applies to the Volumetric Grid (VRayVolumeGrid) currently.
Num. Samples – The number of probabilistic samples to use when Enable Probabilistic volumetrics is enabled. For best rendering performance, use higher number of samples for transparent smoke, and lower number for dense smoke. With very high number of samples, the sampling will basically converge to a standard ray-marching.
Num. GI Samples – The number of probabilistic samples to use for GI rays. The number of samples depends on whether the volumetric has emissive component. Brighter emission requires more samples, while pure smoke can work with fewer.
Rendering
Abort Rendering On Missing Asset – When enabled, the scene will not render if an asset fails to load.
Low Thread Priority – When enabled, uses below-normal worker thread priority, giving more CPU time to other running tasks
Don't Render Final Image – When enabled, V-Ray will only calculate the relevant global illumination maps (photon maps, light maps, irradiance maps) and the final image will not be rendered. This is a useful option if for calculating maps for a fly-through animation.
Secondary Ray Bias – A small positive offset that will be applied to all secondary rays; this can be used if you have overlapping faces in the scene to avoid the black splotches that may appear. For more information, see The Secondary Rays Bias example below.
Clamp Max Ray Intensity – Uses the Max ray intensity value to s uppress the contribution of very bright rays, which can typically cause excessive noise (fireflies) in the rendered image. The Max Ray Intensity value is applied to all secondary (GI/reflection/refraction) rays as opposed to the final image samples, allowing fireflies to be effectively suppressed without losing too much HDR information in the final image.
Max Ray Intensity – The maximum ray intensity when Clamp Max Ray Intensity is enabled.
Note: The effect of using Max Ray Intensity and Clamp Max Ray Intensity is similar to the effect of using Subpixel Mapping and Clamp Output options on the Color Mapping tab. Similar to the Subpixel mapping option, Max Ray Intensity introduces bias in the rendered image, and it might turn out to be darker than the actual correct result.
GI Texture Filtering Multiplier – Controls the filtering of all the textures in the scene when Global Illumination is calculated. Greater values make textures blurrier while smaller values make them sharper.
Raycaster
...
Use Embree for Motion Blur – Enables the usage of the Embree library for motion-blurred objects.
Use Embree for Hair – When enabled, V-Ray will use the Embree library to speed up the rendering of hair.
Conserve Memory – Embree will use a more compact method for storing triangles, which is slightly slower but reduces memory usage.
Use Ray Packets – When enabled, the raycasting process traces packets (groupings) of rays instead of single rays. This is an experimental feature which might (or might not) improve rendering speed depending on the scene.
...
| UI Text Box | ||
|---|---|---|
| ||
When CUDA/RTX is chosen as a rendering engine, all unsupported options are disabled from the parameters. |
Geometry
...
| Section | ||||||||||||||||||||
|---|---|---|---|---|---|---|---|---|---|---|---|---|---|---|---|---|---|---|---|---|
|

Lights
...
| Section | |||||||||||||||||||||||||
|---|---|---|---|---|---|---|---|---|---|---|---|---|---|---|---|---|---|---|---|---|---|---|---|---|---|
|

Materials
...
| Section | |||||||||||||||
|---|---|---|---|---|---|---|---|---|---|---|---|---|---|---|---|
|
Textures
...
| Section | |||||||||||||||
|---|---|---|---|---|---|---|---|---|---|---|---|---|---|---|---|
|
Volumetrics
...
| Section | |||||||||||||||
|---|---|---|---|---|---|---|---|---|---|---|---|---|---|---|---|
|

Rendering
...
| Section | |||||||||||||||||||||||||
|---|---|---|---|---|---|---|---|---|---|---|---|---|---|---|---|---|---|---|---|---|---|---|---|---|---|
|

Raycaster
...
| Section | ||||||||||||||||||||||||||
|---|---|---|---|---|---|---|---|---|---|---|---|---|---|---|---|---|---|---|---|---|---|---|---|---|---|---|
|

Units
...
| Section | |||||||||||||||
|---|---|---|---|---|---|---|---|---|---|---|---|---|---|---|---|
|
VFB
...
| Section | |||||||||||||||
|---|---|---|---|---|---|---|---|---|---|---|---|---|---|---|---|
|

UI
...
| Section | |||||||||||||||
|---|---|---|---|---|---|---|---|---|---|---|---|---|---|---|---|
|

Example and Workflows
...
| Anchor | ||||
|---|---|---|---|---|
|
Example: Secondary Rays Bias
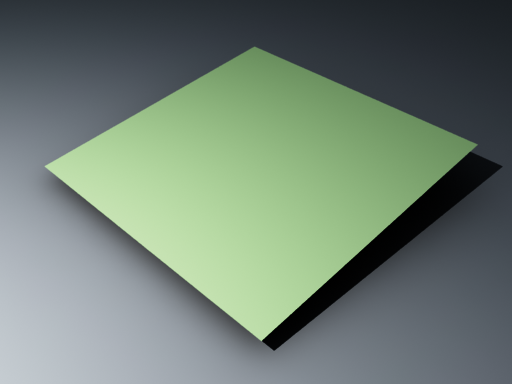
This example shows the effect of the Secondary rays bias parameter. The scene below has a box object with a height of 0.0, which the top and bottom of the box occupy exactly the same region in space. Due to this, V-Ray cannot resolve unambiguously intersections of rays with these surfaces.
The first image shows what happens when you try to render the scene with the default settings. You can see the splotches in the GI solution, caused by the fact that rays randomly intersect one or the other surface:
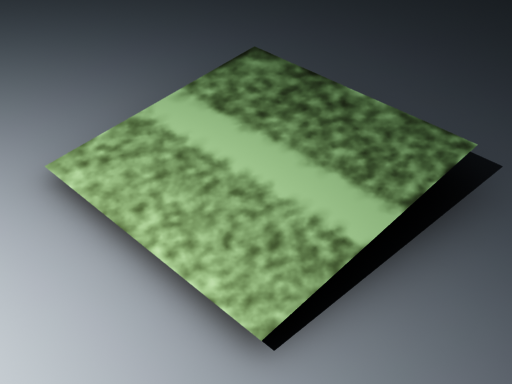
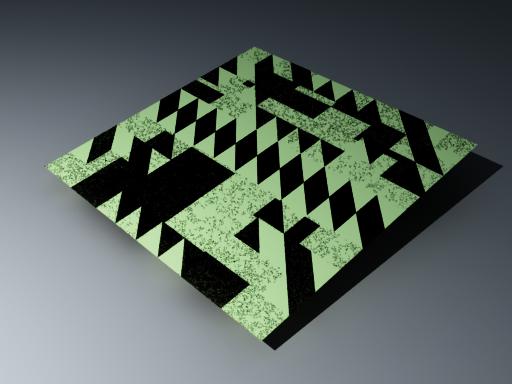
In the second image below, the Secondary rays bias is set to 0.001, which offsets the start of each ray a little bit along its direction. In effect, this makes V-Ray skip the problematic surface overlaps and render the scene correctly:
Note that the Secondary rays bias affects only things like GI, reflections, etc. In order to render the scene properly, the material assigned to the box has its 2-sided option checked. This is so that the object looks in the same way regardless of whether the camera rays hit the top or the bottom of the box. If the material did not have this option checked, it would appear "noisy" even though the Secondary rays bias is greater than 0.0:
| Anchor | ||||
|---|---|---|---|---|
|
...
Example: Adaptive Lights
Below is an example rendering of a scene with the default Bucket Image Sampler settings, using Brute Force/Light Cache GI engines. Only the Threshold parameter was set to 0.001. Notice how the render time is reduced significantly in favor of the Adaptive Lights in comparison to Full Evaluation.
| Section | |||||||||||||||||||||||||||||||
|---|---|---|---|---|---|---|---|---|---|---|---|---|---|---|---|---|---|---|---|---|---|---|---|---|---|---|---|---|---|---|---|
|


| UI Text Box | ||
|---|---|---|
| ||
Note that the Embree raycaster derives its speed partly from the usage of single-precision floating point numbers, whereas the standard V-Ray raycaster selectively uses double precision. This lower precision of Embree might sometimes result in artifacts in scenes with very large extents. |
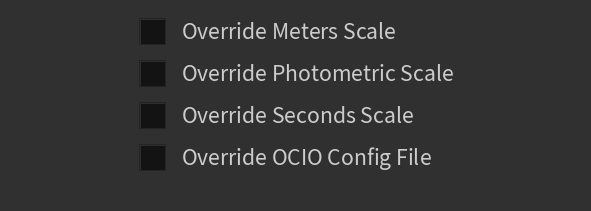
Units
Override Meters Scale – ![]()
Override Photometric Scale – ![]()
Override Seconds Scale – ![]()
...
Example: Secondary Rays Bias
This example shows the effect of the Secondary rays bias parameter. The scene below has a box object with a height of 0.0, which the top and bottom of the box occupy exactly the same region in space. Due to this, V-Ray cannot resolve unambiguously intersections of rays with these surfaces.
The first image shows what happens when you try to render the scene with the default settings. You can see the splotches in the GI solution, caused by the fact that rays randomly intersect one or the other surface:
In the second image below, the Secondary rays bias is set to 0.001, which offsets the start of each ray a little bit along its direction. In effect, this makes V-Ray skip the problematic surface overlaps and render the scene correctly :
Note that the Secondary rays bias affects only things like GI, reflections, etc. In order to render the scene properly, the material assigned to the box has its 2-sided option checked. This is so that the object looks in the same way regardless of whether the camera rays hit the top or the bottom of the box. If the material did not have this option checked, it would appear "noisy" even though the Secondary rays bias is greater than 0.0:
...
Example: Probabilistic Lights
Below is an example rendering of a scene with 1089 sphere lights with the Cutoff threshold set to 0.0. Both images were rendered with the Progressive image sampler and ran for the same amount of time. When probabilistic lights are enabled, the image is much cleaner as V-Ray manages to compute more GI rays (which are the main source of noise in this scene).
| Section | ||||||||||||||||||||
|---|---|---|---|---|---|---|---|---|---|---|---|---|---|---|---|---|---|---|---|---|
|
...
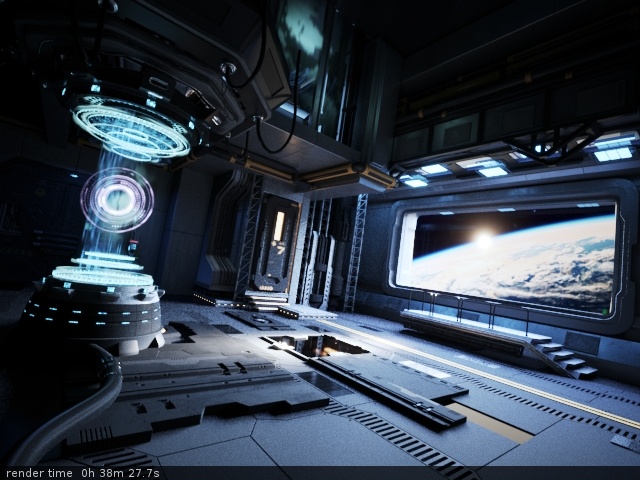
Example: Use Embree
The Embree raycaster process dynamically builds algorithms that best match the instruction set of the CPU, thus speeding up the raycasting process overall. Currently in V-Ray, the Embree process accelerates only the calculation of rays for static geometry (as opposed to dynamic or render-time geometry).
VRayProxy objects, VRayFur and all hair geometry are not currently accelerated with Embree, although support for VRayProxy objects is planned for a future release.
The following images were rendered with the Progressive image sampler over a set period of time. Using Intel® Embree allowed the progressive sampler to compute almost twice as many passes within the rendering time, thus producing a smoother image.
| Section | ||||||||||||||||||||
|---|---|---|---|---|---|---|---|---|---|---|---|---|---|---|---|---|---|---|---|---|
|
...