This page provides information on the Options tab of the V-Ray Renderer parameters.
Overview
The Options tab globally control some geometry, lighting, material, and texture aspects of the rendering. For example, these options can be used to disable all shadows in your scene, or to use probabilistic light sampling to speed up test renders.
When CUDA/RTX is chosen as a rendering engine, all unsupported options are disabled from the parameters.
Geometry
This tab controls subdivision and displacement quality for all objects in the scene. These options are overridden for objects which have the additional displacement attributes added.
Hair – Enables or disables rendering of hair geometries.
Particles – Enables or disables rendering of particles.
Proxy – Enables or disables rendering of V-Ray proxy.
Load Meshes from Proxy – Enables or disables rendering of meshes loaded from proxy.
Subdivision – Enables or disables rendering subdivision in meshes.
Displacement – Enables or disables V-Ray displacement mapping.
Displacement
Override Settings Globally – When enabled, globally overrides other displacement settings.
Amount – A scaling parameter for the default displacement. Values larger than 1.0 increase the displacement amount, while values lower than 1.0 reduce it.
Edge Length – The maximum length of a subtriangle edge after subdivision. This affects the degree of subdivision before displacement, which in turn affects the quality of the displacement itself. Each triangle of the original mesh is subdivided into a number of subtriangles. More subtriangles mean more detail in the displacement, slower rendering times and more memory usage. Less subtriangles mean less detail, faster rendering and less memory used. Units used for this parameter depend on the View Dependent parameter.
In GPU mode where Cache Normals is always enabled, lowering the Edge Length or increasing the Max Subdivs will help to achieve results more closely in line to CPU mode.
Max Subdivs – Controls the maximum number of subtriangles generated from any one triangle of the original mesh. The square of this value is used. For example, a value of 256 means that at most 256 x 256 = 65536 subtriangles will be generated for any given original triangle. It is recommended that this value not be increased a great deal over the default value of 256. If you need to use higher values, it is better to first tessellate the original mesh itself into smaller triangles before starting the displacement process.
View Dependent – Specifies whether Edge Length is expressed in pixels or world units. When this option is enabled, the Edge Length value determines the maximum length of a subtriangle edge in pixels, and a value of 1.0 means that the longest edge of each subtriangle is about one pixel long when projected on the screen. When this option is disabled, Edge Length is the maximum subtriangle edge length in world units.
Tight Bounds – When enabled, V-Ray tries to compute the exact bounding volume of the displaced triangles from the original mesh. This requires presampling of the displacement texture, but the rendering is faster if the texture has large black or white areas. However, if the displacement texture is slow to evaluate and varies a lot between full black and white, if might be faster to disable this option. When it is disabled, V-Ray assumes worst-case bounding volumes and does not presample the texture.
Lights
Default Lights – Enables the usage of the default lights when there are no light objects in the scene or when you have disabled lighting globally with the Use Lights parameter.
Shadows – Enables shadows globally.
Disable Light Materials Illumination – When enabled, all self-illuminated materials used in the scene do not render.
Force Lights Invisibility – Forcefully enables the invisible parameter of the lights from the Invisible Lights list. Affects V-Ray Dome, V-Ray Sun, V-Ray Rectangle, V-Ray Sphere, V-Ray Mesh lights, as well as Mesh lights from Light Material with Direct Illumination enabled.
Invisible Lights – A list of objects that have their invisible parameter enabled when Force Lights Invisibility option is on.
Light Evaluation Mode – Determines how lights are sampled in scenes with many lights. For more information, see the Adaptive Lights example below.
Full Lights Evaluation – V-Ray goes through each scene light and evaluates it at each shading point. In scenes with many lights and lots of GI bounces, this leads to a lot of shadow rays being traced and rendering can become extremely slow. When GPU rendering, this introduces probabilistic light calculations but does not allow the Number of Lights parameter to be set. Older V-Ray scenes with the Probabilistic Lights parameter disabled, will default to using this option.
Light Tree – V-Ray selects a variable number of suitable finite light sources based on proximity and evaluates only those. This mode may speed up the Light Cache and Brute Force calculations for scenes with lots of lights. It can also reduce flickering due to missed light sources.
Adaptive Lights – Uses information from the Light cache to determine which lights to sample. If a Light cache is not used, light tree sampling is used. Depending on the scene, it can be faster than the Full lights evaluation mode. For more information, see the Adaptive Lights example below.
Number of Lights – Number of lights from the scene that are evaluated by V-Ray when the Light evaluation parameter is to either Adaptive or Uniform Probabilistic. To achieve a positive effect from probabilistic light sampling, this value must be lower than the actual number of lights in the scene. Lower values make the rendering go faster, but the result is potentially more noisy. Higher values cause more lights to be computed at each hit point, thus producing less noise but increasing render times.
Consistent Lighting Elements – When enabled, provides more accurate, artifact-free lighting render elements not dependent on light sampling. It also provides better support for Adaptive dome light.
Since V-Ray Next, some of the render elements are rendered differently than before. The Lighting render element now contains all direct diffuse illumination and the GI element contains all indirect diffuse illumination. Similarly, all direct reflections of lights now go to the Specular element and all indirect reflections go to the Reflection element.
LightSelect Metadata – When enabled, writes LlightSelect RE metadata to image headers if supported by the file format.
Min. Pixel Size – Minimum pixel size for spherical and rectangle/disc lights to prevent flicker with small distant lights.
Materials
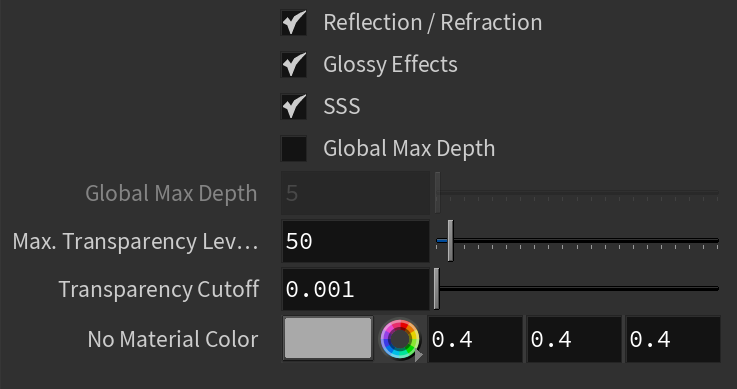
Reflection / Refraction – Enables (default) or disables the calculation of reflections and refractions in V-Ray maps and materials.
Glossy Effects – Enables (default) or disables the rendering of glossy effects.
SSS – Enables (default) or disables the rendering of sub-surface scattering effects.
Global Max Depth – Enables global limiting of the reflection/refraction depth. When this is disabled, the depth is controlled locally by materials. When this option is enabled, all materials use the Max depth specified in this rollout.
Global Max Depth – Specifies the maximum depth when Global Max Depth is checked. To disable reflections/refractions altogether, set this value to 0.
Max. Transparency Levels – The depth to which transparent objects are traced.
Transparency Cutoff – Determines when tracing of transparent objects is stopped. If the accumulated transparency of a ray is below this threshold, no further tracing is performed.
No Material Color – Specifies a default material color when no material is assigned.
Textures
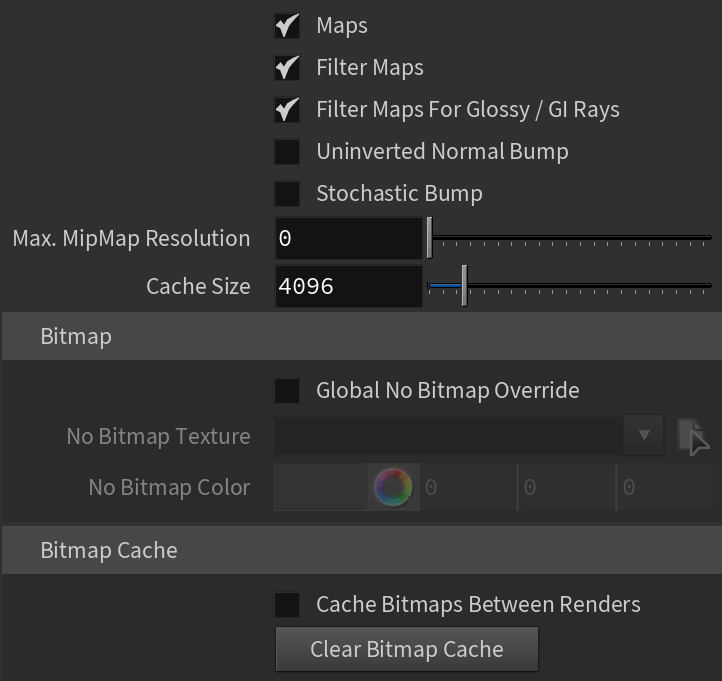
Maps – Enables (default) or disables texture maps. This option is useful for troubleshooting renderings, for example for determining the extent to which texture maps are contributing to noise or other rendering artifacts.
Filter Maps – Enables (default) or disables texture map filtering. When enabled, the depth is controlled locally by the settings of the texture maps. When disabled, no filtering is performed.
Filter Maps For Glossy/GI Rays – Enables filtering for glossy and GI rays.
Uninverted Normal Bump – When enabled, the normal bump in tangent space is not inverted on flipped UVs.
Stochastic Bump – Enables the use of stochastic bumps.
Max. MipMap Resolution – Sets the maximum resolution used while render for mipmaped files. If set to 0, the original file resolution is used.
Cache Size – Specifies the size (in megabytes) of the cache for tiled OpenEXR files. When the texture cache is full, part of the tiles are flushed to make space for loading new tiles as needed.
Bitmap
Global No Bitmap Override – When enabled, uses global override for "no bitmap color" for all bitmap textures.
No Bitmap Texture – Specifies a texture to be used if bitmap is not resolved.
No Bitmap Color – Specifies a color to return if bitmap is not resolved.
Bitmap Cache
Cache Bitmaps Between Renders – Keeps all loaded textures in the memory after the rendering is complete. Thus, they don't need to be reloaded and the next render can start faster.
Clear Bitmap Cache – Manually clears the bitmap cache from the previous render, enabled with the Cache Bitmap Between Renders option.
Volumetrics
Probabilistic Volumetrics – When Probabilistic Volumetrics is enabled, the volumetrics will select a only few samples (based on the smoke density) along each camera ray, and evaluate the volume lighting at those points. When disabled, the volumetrics will evaluate the lighting at regular intervals using many steps along each camera ray, and thus each pixel will take longer to render, but when it's finished, it will have no noise at all. Enabling Probabilistic Volumetrics is particularly useful when using the Progressive Image Sampler in V-Ray, as well as when using complex lighting on the volume. The Probabilistic Volumetrics option makes the shading much faster, but also it can result in noisier renders with low sample counts. This mode only applies to the Volumetric Grid (VRayVolumeGrid) currently. When using V-Ray GPU renderer, this option is not available in the UI, but is turned on and the Num. Samples and Num. GI Samples are set to 1.
Num. Samples – Specifies the number of probabilistic samples to use when Probabilistic Volumetrics is enabled. For the best rendering performance, use a higher number of samples for transparent smoke, and lower number for dense smoke. A very high number of samples will converge to standard ray-marching.
Num. GI Samples – Specifies the number of probabilistic samples to use for GI rays when Probabilistic Volumetrics is enabled. This should be kept as a relatively small number in order to speed up GI calculations.
Rendering
Render Thread Priority – Specifies a thread priority for the rendering process. When set to Lower or Lowest, the rendering process has a lower thread priority to allow other processes to run faster. This option works on Windows OS only.
Render Threads – Determines the number of threads used for rendering. When this value is set to 0, V-Ray uses all the CPU cores available on the machine.
Don't Render Final Image – When enabled, V-Ray only calculates the relevant global illumination maps (photon maps, light maps, irradiance maps) and the final image is not rendered. This is a useful option if for calculating maps for a fly-through animation.
Abort Rendering On Missing Asset – When enabled, the scene does not render if an asset fails to load.
Clamp Max Ray Intensity – Uses the Max ray intensity value to suppress the contribution of very bright rays, which can typically cause excessive noise (fireflies) in the rendered image. The Max Ray Intensity value is applied to all secondary (GI/reflection/refraction) rays as opposed to the final image samples, allowing fireflies to be effectively suppressed without losing too much HDR information in the final image.
Max Ray Intensity – The maximum ray intensity when Clamp Max Ray Intensity is enabled.
Note: The effect of using Max Ray Intensity and Clamp Max Ray Intensity is similar to the effect of using Subpixel Mapping and Clamp Output options on the Color Mapping tab. Similar to the Subpixel mapping option, Max Ray Intensity introduces bias in the rendered image, and it might turn out to be darker than the actual correct result.
Secondary Ray Bias – A small positive offset that is applied to all secondary rays; this can be used if you have overlapping faces in the scene to avoid the black splotches that may appear. For more information, see The Secondary Rays Bias example below.
GI Texture Filtering Multiplier – Controls the filtering of all the textures in the scene when Global Illumination is calculated. Greater values make textures blurrier while smaller values make them sharper.
GPU
Use System Memory for Textures – When enabled, V-Ray GPU allocates textures in CPU memory while making them accessible to all rendering devices.
Profiler
Mode – Determines the mode in which V-Ray Profiler works.
Off – V-Ray Profiler is disabled.
Simple – Reports the time spent on rendering different calculations per each shader such as GI, Reflection, Refraction etc. This mode is good for diagnosis on most scenes.
The Simple mode requires resources to run and may slow down your rendering by up to 4%.
Full – Provides an in-depth report. It includes detailed information such as time of calculation per shader e.g. how much time is spent calculating the reflection of a shader, as well as what shaders are reflected in it and how long it took sampling them. This mode is suitable for scenes that include views through glass window or in a mirror reflection. This mode can slow down the render by up to 20%.
Max Depth – Determines the amount of bounces the rays make after coming into contact with an object. Keep in mind that this option depends on the materials' Reflection and Refraction Max depth parameters. If the GI is set to Brute Force, its Depth parameter influences the value of the V-Ray Profiler's Max depth. This is reflected in the resulting profile.
If there is only layered materials in the scene (e.g. VRayBlendMtl) and the Max Depth parameter of the Profiler is set to 8, no more than 5 ray bounces are displayed in the profile. Make sure to lower the Max Depth for an accurate reading of such a scene.
Output Directory – Specifies a location where the profiler reports are created.
File Suffix – Specifies a suffix that is appended at the end of the profiler report files.
For more information, see the V-Ray Profiler page.
Memory Tracking
Enable Memory Tracking – Enables tracking of how much memory is used by V-Ray for different categories of objects like textures, geometry, GI, image sampling, etc. Enabling this option generates .html reports with detailed information on memory usage.
Output Directory – Specifies the location to save the memory reports after the rendering is finished.
File Suffix – Specifies a text that is appended to the Memory Tracking result file names.
Raycaster
Dynamic Memory Limit (mbs) – The total RAM limit for the dynamic raycasters, which store dynamic geometry, such as displacement and VRayProxy objects. Set this to 0 to remove any limit (V-Ray takes as much memory as needed) The memory pool is shared between the different rendering threads. Therefore, if geometry needs to be unloaded and loaded too often, the threads must wait for each other and the rendering performance suffers.
Note that the Embree raycaster derives its speed partly from the usage of single-precision floating point numbers, whereas the standard V-Ray raycaster selectively uses double precision. This lower precision of Embree might sometimes result in artifacts in scenes with very large extents.
Default Geometry – Determines the type of geometry for polygonal data. You can choose between Auto, Static and Dynamic.
Auto – Some objects are compiled as static geometry, while others as dynamic. V-Ray makes the decision on which type to use based on the face count for an object and the number of its instances in the scene.
Static – All geometry is precompiled into an acceleration structure at the beginning of the rendering and remains there until the end of the frame. The static raycasters are not limited in any way and consume as much memory as necessary.
Dynamic – Geometry is loaded and unloaded on the fly depending on which part of the scene is being rendered. The total memory taken up by the dynamic raycasters can be controlled by the Dynamic memory limit parameter.
Conserve Memory – Embree uses a more compact method for storing triangles, which is slightly slower but reduces memory usage.
Units
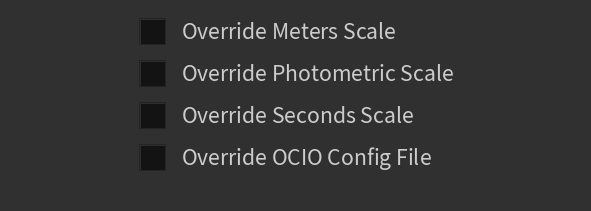
Override Meters Scale – Overrides the systemic meters scale.
Meters Scale – Sets the number by which a 3D distance must be multiplied to convert it into meters.
Override Photometric Scale – Overrides the systemic photometric scale.
Photometric Scale – Sets the number by which the power of photometric lights should be scaled when rendering.
Override Seconds Scale – Overrides the systemic seconds scale.
Seconds Scale – Sets the number by which a scene time unit must be multiplied to convert it to seconds.
Override OCIO Config File – Overrides the system OCIO configuration file and uses the one loaded from the V-Ray render settigns.
VFB
Store VFB History Settings on ROP – When enabled, stores the VFB history on ROP.
Animation Frame to Auto Save – Specifies which animation frame to be saved when Auto Save is on.
UI
Reset Log Window Position – Resets the position of V-Ray Log Window.
Example and Workflows
Example: Secondary Rays Bias
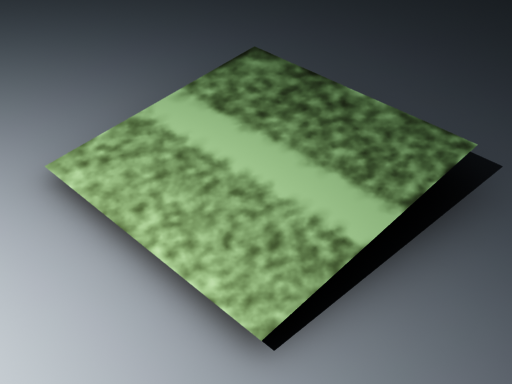
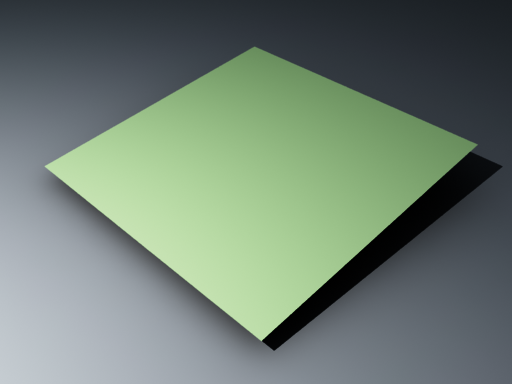
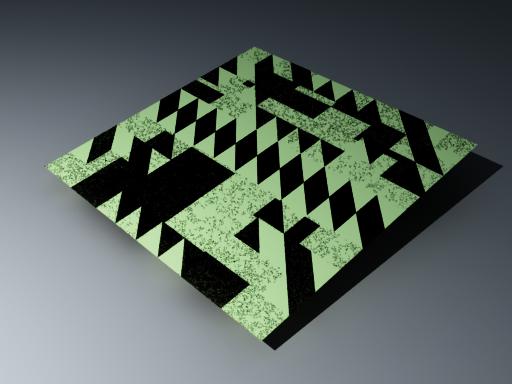
This example shows the effect of the Secondary rays bias parameter. The scene below has a box object with a height of 0.0, which the top and bottom of the box occupy exactly the same region in space. Due to this, V-Ray cannot resolve unambiguously intersections of rays with these surfaces.
The first image shows what happens when you try to render the scene with the default settings. You can see the splotches in the GI solution, caused by the fact that rays randomly intersect one or the other surface:
In the second image below, the Secondary rays bias is set to 0.001, which offsets the start of each ray a little bit along its direction. In effect, this makes V-Ray skip the problematic surface overlaps and render the scene correctly:
Note that the Secondary rays bias affects only things like GI, reflections, etc. In order to render the scene properly, the material assigned to the box has its 2-sided option checked. This is so that the object looks in the same way regardless of whether the camera rays hit the top or the bottom of the box. If the material did not have this option checked, it would appear "noisy" even though the Secondary rays bias is greater than 0.0:
Example: Adaptive Lights
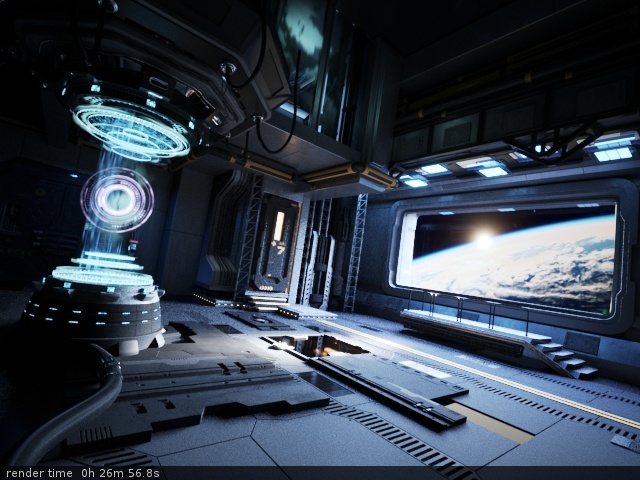
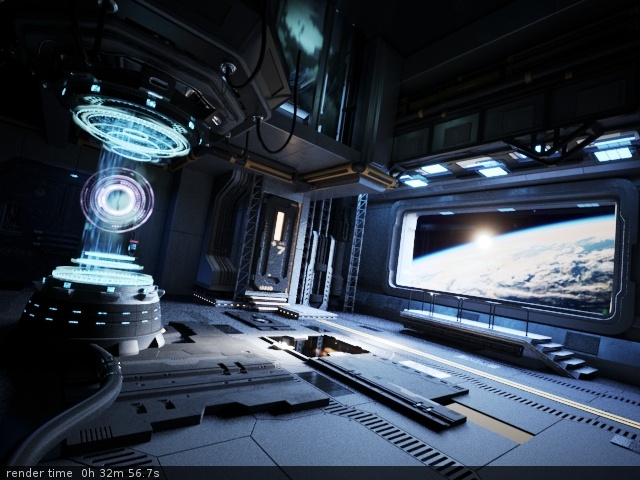
Below is an example rendering of a scene with the default Bucket Image Sampler settings, using Brute Force/Light Cache GI engines. Only the Threshold parameter was set to 0.001. Notice how the render time is reduced significantly in favor of the Adaptive Lights in comparison to Full Evaluation.


