![]()
Page History
...
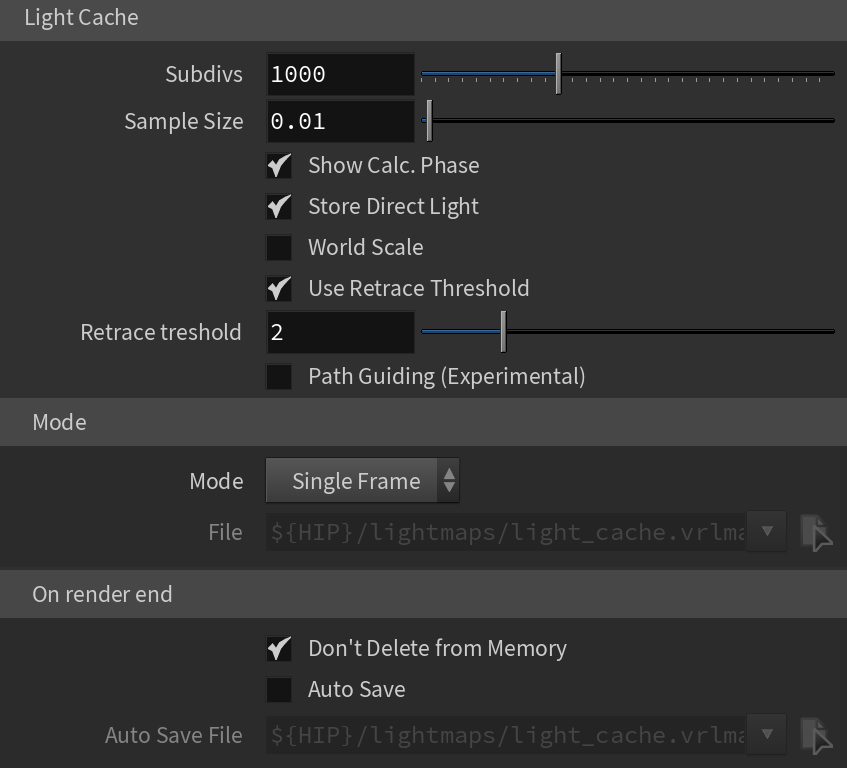
These options control the Light cache settings when it is selected as the Primary Engine or Secondary Engine Cache settings for the secondary diffuse bounces in the GI rollout.
UI Path
||Renderer tab|| > Global Illumination tab
(with the V-Ray Renderer node selected)
Light Cache Parameters
Light Cache Parameters
...
| Section | |||||
|---|---|---|---|---|---|
|
...
...
|
...
...
|
...
|
...
|
...
...
|
...
|
...
|
...
|
...
|
...
|
...
|
...
|
...
|
Filter Type – Determines the type of render-time filter for the light cache. The filter determines how irradiance is interpolated from the samples in the light cache.
None – No filtering is performed. The nearest sample to the shaded point is taken as the irradiance value. This is the fastest option, but it may produce artifacts near corners, if the light cache is noisy. You can use pre-filtering (see below) to decrease the noise. This option works best if the light cache is used for secondary bounces only or for testing purposes.
Nearest – This filter looks up the nearest samples to the shading point and averages their values. This filter is not suitable for direct visualization of the light cache, but is useful if you use the light cache for secondary bounces. A property of this filter is that is adapts to the sample density of the light cache and is computed for a nearly constant time. The Filter samples parameter determines how many of the nearest samples to look up from the light cache.
Fixed – This filter looks up and averages all samples from the light cache that fall within a certain distance from the shaded point. This filter produces smooth results and is suitable for direct visualization of the light cache (when it is used as the primary GI engine). The size of the filter is determined by the Filter size parameter. Larger values blur the light cache and smooth out noise. Typical values for Filter size are 2-6 times larger than Sample size. Note that Filter size uses the same scale as the Sample size and its meaning depends on the World Scale check box.
Prefilter – When enabled, the samples in the light cache are filtered before rendering. Note that this is different from the normal light cache filtering which happens during rendering. Prefiltering is performed by examining each sample in turn, and modifying it so that it represents the average of the given number of nearby samples. More prefilter samples mean a more blurry and less noisy light cache. Prefiltering is computed once after a new light cache is computed or loaded from disk.
Prefilter Samples – Controls the number of samples taken during prefiltering.
Depth – Determines the length of the light paths to be traced. It is important to note that even though in Light cache the depth is limited, due to the recursive nature of this method, there are longer paths in the end result.
Filter Samples – When Filter Type is set to Nearest, this parameter determines how many of the nearest samples to look up from the light cache.
...
|
| Anchor | ||||
|---|---|---|---|---|
|
Leak Prevention – Enables additional calculations to prevent light leaks and reduce flickering with the light cache. 0.0 disables the leak prevention. The default value of 0.8 should be enough for all cases.
Retrace Threshold – Specifies the threshold amount relative to the light cache sample size.
Anchor
...
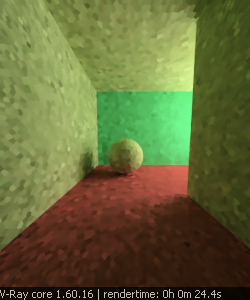
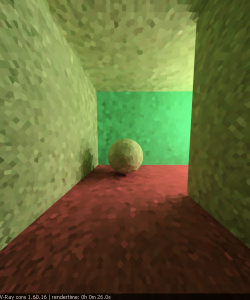
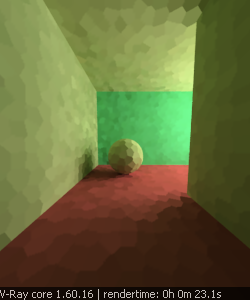
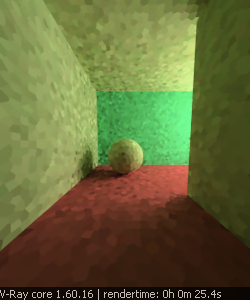
Example: The Subdivs Parameter
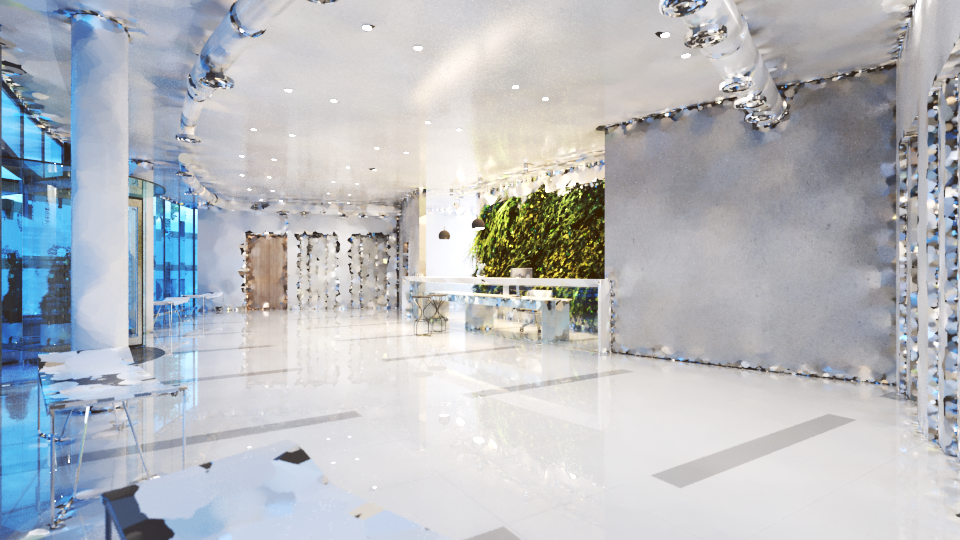
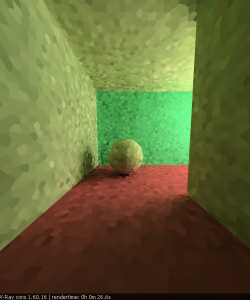
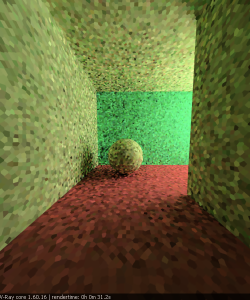
The Subdivs parameter Subdivs parameter controls the number of rays that are shot into the scene, and the "noise" quality of the light cache samples.
Here is a scene rendered with different settings for the Subdivs parameterthe Subdivs parameter, all other settings are the same.
As we add more samples, the noise is reduced, but the render times increase.
| Section | |||||||||||||||||||||||||||||||||||||||||||
|---|---|---|---|---|---|---|---|---|---|---|---|---|---|---|---|---|---|---|---|---|---|---|---|---|---|---|---|---|---|---|---|---|---|---|---|---|---|---|---|---|---|---|---|
|

| Anchor | ||||
|---|---|---|---|---|
|
...
Example: The Sample Size Parameter
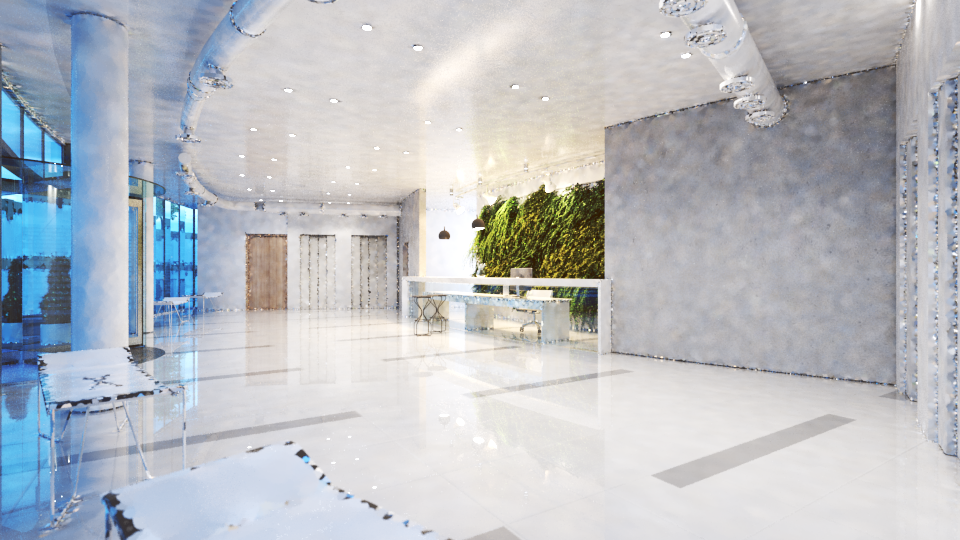
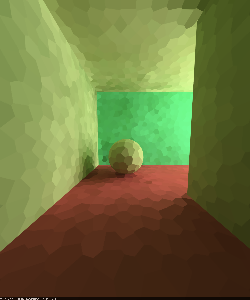
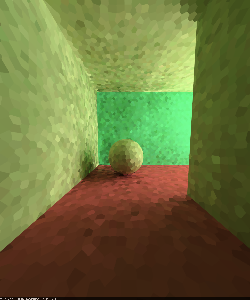
The Sample Size parameter The Sample size parameter controls the size of the individual light cache samples. Smaller values produce a more detailed lighting solution, but are noisier and take more RAM. Larger values produce less detail, but take less RAM and may be faster to calculate.
Here is a scene rendered with different values for the Sample size parameterthe Sample size parameter. All other values are the same.
Note the difference in the noise level between the samples.
| Section | |||||||||||||||||||||||||||||||||||||||||||
|---|---|---|---|---|---|---|---|---|---|---|---|---|---|---|---|---|---|---|---|---|---|---|---|---|---|---|---|---|---|---|---|---|---|---|---|---|---|---|---|---|---|---|---|
|


| Anchor | ||||
|---|---|---|---|---|
|
...
Example: The Scale Parameter
...
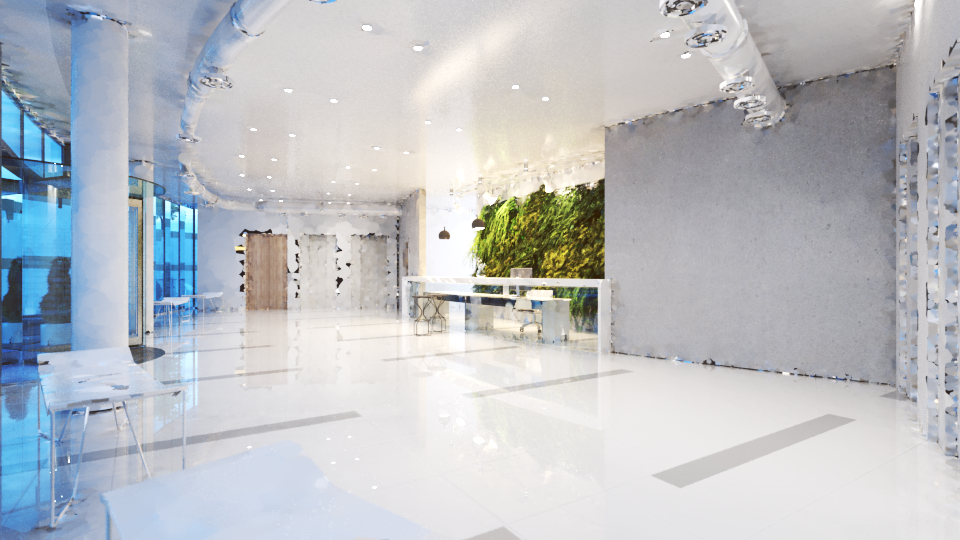
The World Scale option determines whether the Sample sizeSize and Filter sizeSize parameters are in screen space, or world space.
In the table below the World Scale checkbox is not enabled, meaning that the Screen scale is used, and the scene was rendered with different image and world sizes. The Sample sizeSize was constant (the default value of 0.02) for all images.
As you can see, we always get the same number of light cache samples for all cases, regardless of resolution or scene size - in fact, when scaled to the same size, the images look identical. This is why the Screen Scale is applicable to a large variety of scenes.
...
| Section | ||||||||||||||||||||||
|---|---|---|---|---|---|---|---|---|---|---|---|---|---|---|---|---|---|---|---|---|---|---|
| ||||||||||||||||||||||
|
| Section | ||||||||||||||||||||||
|---|---|---|---|---|---|---|---|---|---|---|---|---|---|---|---|---|---|---|---|---|---|---|
|


| Section | ||||||||||||||||||||
|---|---|---|---|---|---|---|---|---|---|---|---|---|---|---|---|---|---|---|---|---|
|


| Section | ||||||||||||||||||||
|---|---|---|---|---|---|---|---|---|---|---|---|---|---|---|---|---|---|---|---|---|
|


...
In the table below, the World Scale mode was used. Again, the scene is rendered at three different resolutions and scales, but with the same light cache parameters. The sample size was set to be 1/6th of the sphere radius in the scene at normal scale.
You can notice that the number of samples again does not depend on the image resolution, but it does depend on the scene size.
Also notice how the samples near the camera appear larger because of the perspective - in difference from the Screen scale mode which compensates for this effect and tries to make the samples with more or less equal size on the image.
| Section | |||||||||||||||||||||
|---|---|---|---|---|---|---|---|---|---|---|---|---|---|---|---|---|---|---|---|---|---|
|
| Section | ||||||||||||||||||||||
|---|---|---|---|---|---|---|---|---|---|---|---|---|---|---|---|---|---|---|---|---|---|---|
|

| Section | ||||||||||||||||||||||
|---|---|---|---|---|---|---|---|---|---|---|---|---|---|---|---|---|---|---|---|---|---|---|
|

| Section | ||||||||||||||||||||
|---|---|---|---|---|---|---|---|---|---|---|---|---|---|---|---|---|---|---|---|---|
|

...
...
Notes
...
| Fancy Bullets | ||
|---|---|---|
| ||
|