These are small and simple tech demos showing different techniques. They are more complicated than the toolbar Quick Setup presets but are simpler than the big Example Scenes.
Honey Bubbles
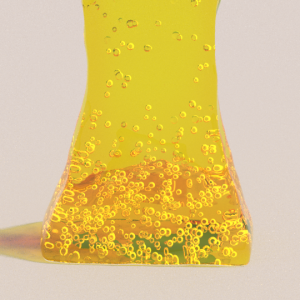 The liquid particles from the honey simulation are used in a Phoenix Particle Shader. The Count Multiplier is set to a value of 0.005 so that just only a few particles will be rendered. The render mode for the Particle Shader is set to Bubbles.
Make sure to simulate the liquid with ID channel exported from the Output rollout so that the Count multiplier would always remove the same particles during animation.
Droplets on a windshield
 The box is used as an emitter and for the Source's Outgoing Velocity there are two noise textures used as a mask to randomize the emission and create small and big droplets.
In the Dynamics rollout the Surface Tension to 1 so that the liquid can be accumulated in a bigger drops while travelling downwards and a Droplet breakup of 0.4 is set so that droplets can be formed. The Wetting is turned on and some Sticky liquid is added in order for the drops to stick to the surface.
As we want some drops to stay stationary and some to fall dawn there is a Phoenix Mapper node added which sets the Viscosity for the Grid to 0.2 using an Output map. As this works on the whole grid a noise texture is added as a mask so only some parts will be affected by the Mapper and the rest will not.
Droplet Splash
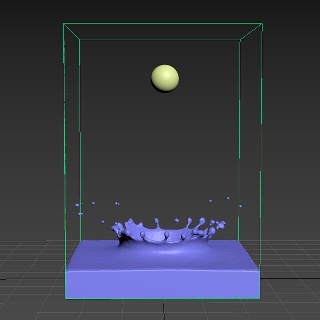 The scene shows how to make a droplet splash. The liquid is emitted from a sphere with Initial Liquid Fill turned on from the Phoenix FD Properties.The Initial Fillup is set to 10 so that there will be some liquid at the bottom when the simulation is started. The Surface Tension Strength is set to 0.4 and the Droplet Breakup is set to 1 so the liquid will break up into separate droplets.
Body Force Text Fill up
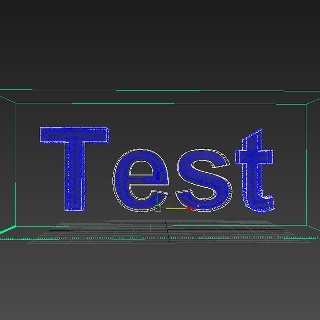 The scene shows an initially filled up text mesh that spills out and gradually fills up back again. The liquid is emitted from the text and the Body Force Strength and Internal Damp are animated so they start really low and increase over time. The Gravity option in the Dynamics rollout is animated from 1 to 0 over time as well so the liquid can fall down at the start and be pulled from the Body Force after that.
Liquid Cascade simulation
 The scene shows cascading setup between two liquid simulators. You have to simulate first the source simulator and afterwards start the recipient simulator. The recipient simulator must link to the source simulator through the Cascade Simulator parameter in the Grid rollout of the Simulator.
Fire/Smoke Cascade Simulation
 The scene shows cascading setup between two simulators. The Phoenix Source clamps the texture values between 0-1 so smoke and fuel will naturally transition fine, but temperature which goes above 1 - up to several thousand Kelvin - will need to be remapped before being plugged into the source. This is why an Output map is added after the grid texture reading the Temperature channel. The temperatures for the source for sim 1 and for the brush source are set to 2000K, and the Output Amount of the Output map to 1/2000 = 0.0005.
- You need to enable Motion Velocity on the Brush source so that the velocities will be transferred as well and of course you need to have velocity exported from the first sim.
- The area which overlaps will be rendered twice, unless you put a box as a render cutter for the first sim.
- Grid-based self-shadowing won't work between the cascade grids - you need to switch to the slower but more robust Ray-Traced self-shadowing.
Wind Tunnel
Smoke color by age
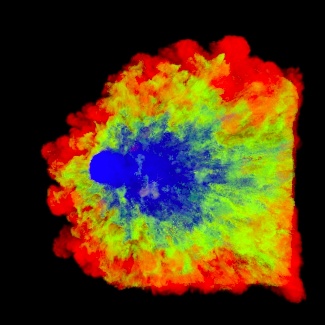 Unlike particles which have an Age channel, the voxel grid does not have such a channel, but it can easily be achieved by using the RGB color grid channel. In this scene, we emit white smoke from a Source, and a Phoenix Mapper using a Black texture Map and a long Buildup Time gradually modifies the RGB channel of the Simulator and darkens the white color over time. This way the oldest smoke has black RGB channel and the newly emitted is white.
The scene uses a cylinder emitting smoke. The Smoke Source has the Temperature set to 10 Kelvins so the smoke will fall down and the RGB channel is enabled with a white color set. The Mapper's Buildup Time is set to 2 seconds.
For the rendering the Smoke color is set to be based on Texture and an Output map is used. The Output map uses a Phoenix Grid Texture which reads the RGB channel as an input, representing the age, and then the color is remapped to create a ramp from blue for the youngest Smoke which has RGB of 1, through green, to red for the oldest smoke which has RGB of 0.
Gas stove flames
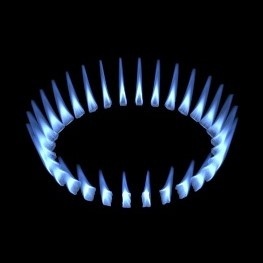 This scene consists of a very simple setup: a Simulator, emitting geometry and a Fire Source. The emissive geometry is an extruded star spline that emits through polygons with the same ID. This ID is used as an input of the Polygon ID option in the Fire Source. Of course, there are plenty of other methods to achieve this result (radial array of smaller geometries for example).
Tweaking of the following options has a significant impact on the final simulation’s result:
- Outgoing Velocity value in the source
- Grid resolution - for this kind of a scene it's pretty low
- Cooling - more cooling leads to shorter flames
- Steps per Frame - high values produce smoother flames
- Volumetric Options - tune the fire color, light emission, shape and a lot more from here
Hot steam
Smoke Inside of Text
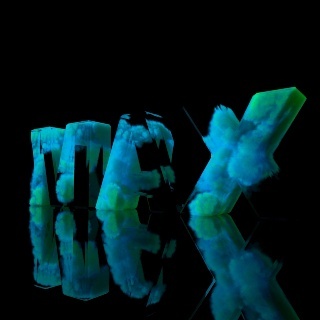 The scene uses a few spheres as emitters placed inside of the text. The text is used as Confine geometry so that the simulation is happening only inside its volume. For rendering the Smoke color is set to use the Smoke channel with a blue-green gradient. The text is used as a Cutter Geometry so that only the parts of the smoke that are inside of the text will be rendered.