This page provides information about the Lens Effects in V-Ray for Nuke.
Overview
V-Ray Lens Effects simulates real-world camera lens effects such as bloom and glare. The plug-in uses a fast multi-threaded technique to compute the result and provide immediate update.
V-Ray Lens Effects are applied in the RGB channel together with other post effects. When either a Denoiser render element is used or Source LightMix or Composite mode, then the lens effects are applied to the effectsResult channel.
The Lens Effects layer is accessible from the V-Ray menu > Renderer > VRayLensEffect.
Lens Effects Control
Size – Specifies the size of the filter as percentage of the image's diagonal. See the Size example below.
Bloom – Controls the blend between bloom and glare. A value of 1 forces bloom to be applied to full extent and without any glare. A value of 0 removes the bloom completely and applies only glare. Values in-between blend the two effects proportionally. See the Bloom/Glare example below.
Intensity – Multiplier for the bloom/glare source bright pixels. Increasing the value can boost the effect by simulating up to 20 times brighter source. Values lower than 1 can be used to produce subtle bloom/glare from overbright sources. See the Intensity example below.
Threshold – Sets a minimum value for the rendered pixels to be considered as lens effects source. The Bloom/Glare effect will be generated only regarding pixels with larger value than the specified threshold.
Effect Rotation – Rotates the final result effect, regardless of this is a filter image or a procedurally created one.
Cold/Warm – When enabled, the Bloom/Glare effect will be toned to cold hues. When disabled, the effects will receive warm hue. The hue shift requires Saturation values larger than 0. See the Cold/Warm & Saturation examples below.
Saturation – When the value is set 0, the effects use the original hue of the bright pixels to create bloom and glare. Larger values intensify the hue set with the Cold/Warm option. See the Cold/Warm & Saturation examples below.
Hardware Accelerated – Enable to calculate lens effects on the GPU. When multiple devices are present, V-Ray will prioritize the best one available.
Effect only –
Verbosity –
Clip to format –

Example: Size

Size = 1
Intensity (constant) = 1.00

Size = 10
Intensity (constant) = 1.00

Size = 20
Intensity (constant) = 1.00

Size = 30
Intensity (constant) = 1.00

Size = 40
Intensity (constant) = 1.00

Size = 50
Intensity (constant) = 1.00

Size = 60
Intensity (constant) = 1.00

Size = 70
Intensity (constant) = 1.00

Size = 80
Intensity (constant) = 1.00

Size = 90
Intensity (constant) = 1.00

Size = 100
Intensity (constant) = 1.00
Example: Bloom / Glare

Bloom = 0.0
Streak blur (constant) = 0.20

Bloom = 0.1
Streak blur (constant) = 0.20

Bloom = 0.2
Streak blur (constant) = 0.20

Bloom = 0.3
Streak blur (constant) = 0.20

Bloom = 0.4
Streak blur (constant) = 0.20

Bloom = 0.5
Streak blur (constant) = 0.20

Bloom = 0.6
Streak blur (constant) = 0.20

Bloom = 0.7
Streak blur (constant) = 0.20

Bloom = 0.8
Streak blur (constant) = 0.20

Bloom = 0.9
Streak blur (constant) = 0.20

Bloom = 1.0
Streak blur (constant) = 0.20
Example: Intensity

Intensity = 0
Size (constant) = 50

Intensity = 1
Size (constant) = 50

Intensity = 2
Size (constant) = 50

Intensity = 3
Size (constant) = 50

Intensity = 4
Size (constant) = 50

Intensity = 5
Size (constant) = 50

Intensity = 6
Size (constant) = 50

Intensity = 7
Size (constant) = 50

Intensity = 8
Size (constant) = 50

Intensity = 9
Size (constant) = 50
Intensity = 10
Size (constant) = 50
Example: Cold/Warm

Saturation = 1.5
Cold/Warm On
Lights shaded with pure white color

Saturation = 1.0
Cold/Warm On
Lights shaded with pure white color

Saturation = 0.5
Cold/Warm On
Lights shaded with pure white color

Saturation = 0.0
Cold/Warm On
Lights shaded with pure white color

Saturation = 0.5
Cold/Warm Off
Lights shaded with pure white color

Saturation = 1.0
Cold/Warm Off
Lights shaded with pure white color

Saturation = 1.5
Cold/Warm Off
Lights shaded with pure white color
Aperture shape
Blades – Enables the Blades effect.
Number – Sets custom camera aperture blades number to be considered for the lens effects. This parameter directly controls the number of "rays" of the glare.
Rotation – Controls the rotation of the camera aperture and blades.
Streak blur – Determines the width of the angle at which glare rays spread. The larger the value, the wider the spread. If set to 0, rays are directional; if set to 1, glare rays spread out and completely blend together. Observe in the Streak blur example below how values in-between change the glare rays appearance.
Peripheral grating – Enables grating along the sides of the aperture shape.
Length – Controls the length of the grate lines.
Density – Controls the density of the grating effect in percent, where 100 is fully black.
Zoom – Controls the size of the halo around the lights.
Slope – Controls the direction of the lines.
Strength – Controls the strength of the blades effects.
Occlusion – When enabled it controls the aperture shape by occluding part of it.
Symmetric – Enables symmetric occlusion of the shape. When disabled, the occlusion appears only on one side of the shape.
Percent – Controls how much of the shape is occluded.
Rotation – Determines the position of the occlusion over the shape by rotation.
Arc – Controls the arc of the occlusion. A value of 0 sets a straight line, while a value of 100 makes an arc.

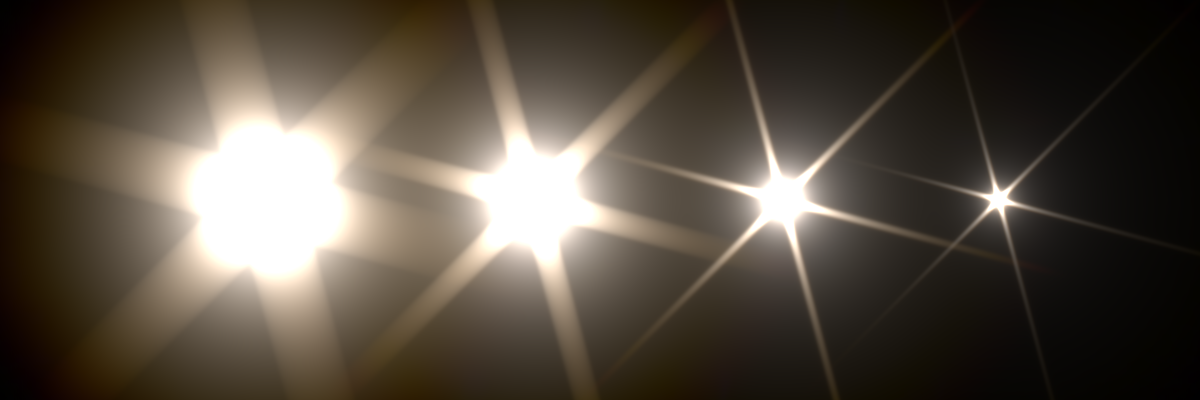
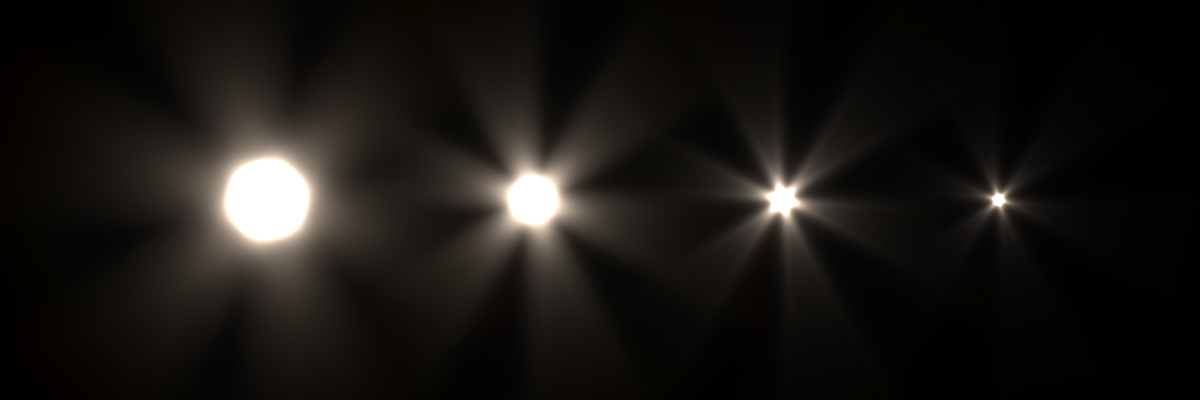
Example: Streak blur

Streak blur = 0.0
Bloom (constant) = 0

Streak blur = 0.1
Bloom (constant) = 0

Streak blur = 0.2
Bloom (constant) = 0

Streak blur = 0.3
Bloom (constant) = 0

Streak blur = 0.4
Bloom (constant) = 0

Streak blur = 0.5
Bloom (constant) = 0
Streak blur = 0.6
Bloom (constant) = 0

Streak blur = 0.7
Bloom (constant) = 0

Streak blur = 0.8
Bloom (constant) = 0

Streak blur = 0.9
Bloom (constant) = 0

Streak blur = 1.0
Bloom (constant) = 0
Lens scratches
Lens scratches – Enables the lens scratches effect.
Symmetric – When enabled creates symmetric pattern of the scratches. This option is available only when Pattern is Random.
Pattern – Specifies Random, Stripes, Square or Hexagonal type of pattern for the scratches.
Streaks – Specifies the number of streaks that are clustered together. If Symmetric is enabled, the streaks are stemming from one point with equal angles. If Symmetric is disabled, the streaks are scattered from random angles.
Density – Controls the density of the scratches effect in percent, where 100 is fully black.
Length – Controls the length of the scratches.
Seed – Specifies a seed parameter to introduce variance in the randomization.
Slope variance – Randomizes the direction of the scratches.
Width variance – Randomizes the width of the scratches.
Zoom – Controls the size of the pattern.
Rotation – Determines the position of the scratches by rotation.
Strength – Controls the strength of the effect.

Lens Dust
Lens dust – Enables the lens dust effect.
Pattern – Specifies the Random, Square or Hexagonal type of pattern for the dust.
Density – Controls the density of the dust effect in percent, where 100 is fully black.
Radius variance – Specifies a variance in the radii of the dust dots. A value of 0 makes the dust dots uniform.
Jitter – Controls randomization of the position of the dots.
Zoom – Controls the size of the dust dots.
Rotation – Determines the position of the dust dots by rotation.
Strength – Controls the strength of the effect.

Obstacle image
Obstacle image – When enabled an obstacle image can be specified. You can use it to simulate various effects on the camera lens. See how this changes the lens effects in the Obstacle Image example below.
Zoom – Controls the size of the obstacle image.
Rotation – Rotates the obstacle image.
Strength – Controls the strength of the effect.

Example: Obstacle Images
Obstacle images used


Size (constant) = 50
Bloom (constant) = 0.5
Filter image
Enabling this rollout disables the controls for the generated filter:
Filter image – Enables a filter image from the Filter generator tool to be used.
Path – Specifies the path to a filter kernel.

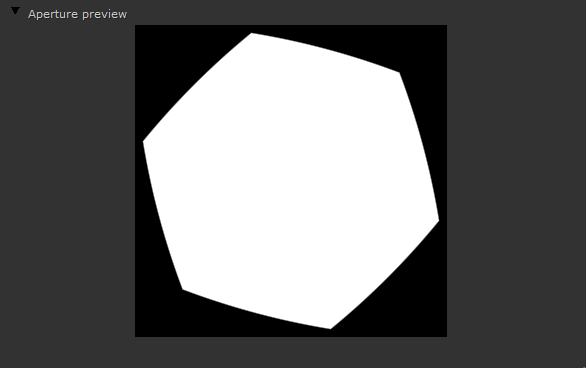
Aperture Preview
The Aperture Preview panel is loaded by default, but can be minimized like the other Aperture groups. The aperture shape shows the result of the applied lens effects.