This page has information about simulators, the building blocks of a Chaos Phoenix simulation.
Overview
A simulator is a Phoenix object that controls the simulation, and enables you to create fluids like liquids and gasses that interact with the surrounding environment.
You can think of a Phoenix Simulator as a 3D box, inside which simulations of fluids and Rigid Body Dynamics are performed. The box is divided into small cells, called voxels, which is why the box is referred to as a Simulation Grid. The voxels inside the grid can be filled with just about any type of gas or liquid.
For each frame in your simulation, Phoenix looks at each voxel and calculates whether there is any fluid there, based on the settings you give the Phoenix sim. The simulator will also account for obstacles, such as geometry, as well as participating forces in the scene, and so forth.
Phoenix Simulators are divided into two types:
- Fire/Smoke Simulators, which can produce gaseous effects like fire, smoke and explosions, as well as sparks or embers and so forth.
- Liquid Simulators, which can create pouring or flowing liquids, or any simulation that needs foam or mist, such as coffee or waterfalls.
To actually create a simulation, three different components must be combined:
- A Fire/Smoke or Liquid Simulator node
- A Source helper node
- An Emitter
Note that the workflow for Phoenix fluids and Active Bodies is split into two main parts – simulating and rendering.
When rendering, the Phoenix Simulator offers multiple render modes. The mesh render mode is typically used for rendering Liquids, and the volumetric render modes are typically used for rendering Fire/Smoke simulations. Phoenix offers a lot of flexibility though, so there is the option to render Fire/Smoke sims as meshes and Liquids as volumes, in order to achieve even more diverse effects.
When rendering other particle types besides Phoenix Liquid Particles, Phoenix also has a separate Particle Shader geometry type, which is used to shade particles.
The Particle Shader component is most often used in conjunction with the Liquid Simulator to shade particles such as Splash, Mist and Foam. However, it can also shade particles created from the Fire/Smoke Simulator, as well as standard particle systems such as Particle Flow, or particles from plugins like tyFlow, thinkingParticles, Krakatoa, etc. Note that while it is a geometry type in 3ds Max, the Particle Shader is not a simulator.
Creating a Simulator
Both Fire/Smoke and Liquid simulators are created from the Create panel → Geometry → Phoenix FD dropdown.
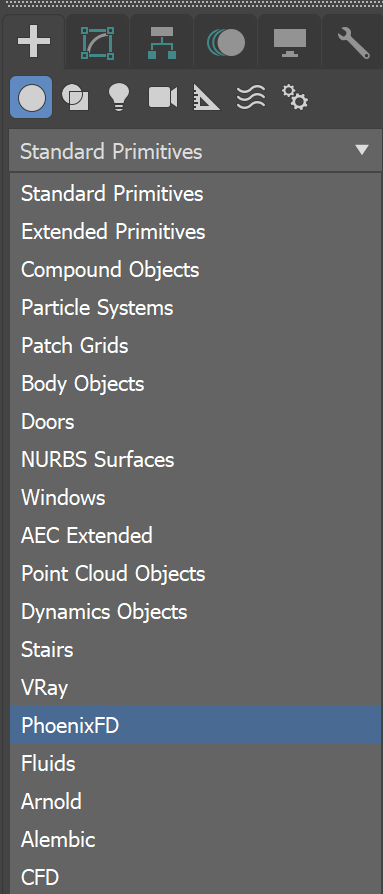
To create a simulator, click the FireSmokeSim or LiquidSim button, then draw on screen as if you are creating a 3ds Max Box. The length, width, and height of the grid are set by the size of the simulator. The grid size can be changed afterward, in the simulator object's Modify panel.

Simulator placed to include both the object and fire effect

Simulation contained in simulator
The simulator should contain the object which will emit the fire or liquid, and the area into which the fire or liquid will flow. The simulation will be contained completely inside the grid.
Note that there are other steps you must take beyond creating the simulator in order for the simulation to occur. These steps are described in the Quick Start Guides.