

This page provides information about the panorama and cardboard options in Enscape.
Overview
Enscape allows you to generate 360° panoramas in both stereo and mono. Stereo exports can be used with Google Cardboard. Panoramas exported from Enscape can be saved locally as a file or uploaded into the cloud where mono panoramas from the same CAD project can be combined to make a Gallery or a Tour that can help to showcase a project.
Individual panoramas are assigned a QR code which can be scanned to open the panorama on a mobile device, for example. Once a panorama has been uploaded to the cloud, whether single panoramas or sets of panoramas that are created as either a Gallery or Tour, they can be shared via a link, a QR code, or direct via email. These can then be viewed with a web browser on both desktop computers or mobile devices.
If you render a stereo panorama for Google Cardboard you can enable the cardboard mode on your mobile device by clicking on the cardboard ‘glasses’ symbol on the device when the panorama is open.
How to Export a Panorama
Load a project into your CAD, start Enscape and open the Visual Settings window and set the Projection to Perspective. Optionally, you can adjust the Panorama Resolution in the Visual Settings’ Output tab. Higher panorama resolutions will take longer to export.
Navigate to a position in the Enscape Viewport where you want the panorama to be captured from. You can click the Render Panorama button directly (which will export a Mono Panorama by default) or click the small arrow next to the Render Panorama button to choose Stereo Panorama if you want to view the panorama in Google Cardboard.

Enscape's Render Panorama buttons
The panorama will now be generated and exported, indicated by a progress bar.
Once exported, by opening Enscape’s Upload Management dialog via the associated Upload Management button ![]() located back in Enscape’s CAD specific toolbar, you will be able to manage your exported panoramas further.
located back in Enscape’s CAD specific toolbar, you will be able to manage your exported panoramas further.

Panorama Export Progress Bar
Workflow
With the release of Enscape 4.1.1, all uploaded panoramas will be available on your Chaos Cloud Account. Once the Upload Management dialog is open in your CAD, it will display the Panorama tab by default. If no panorama has yet been exported from a project the dialog will reflect this fact:
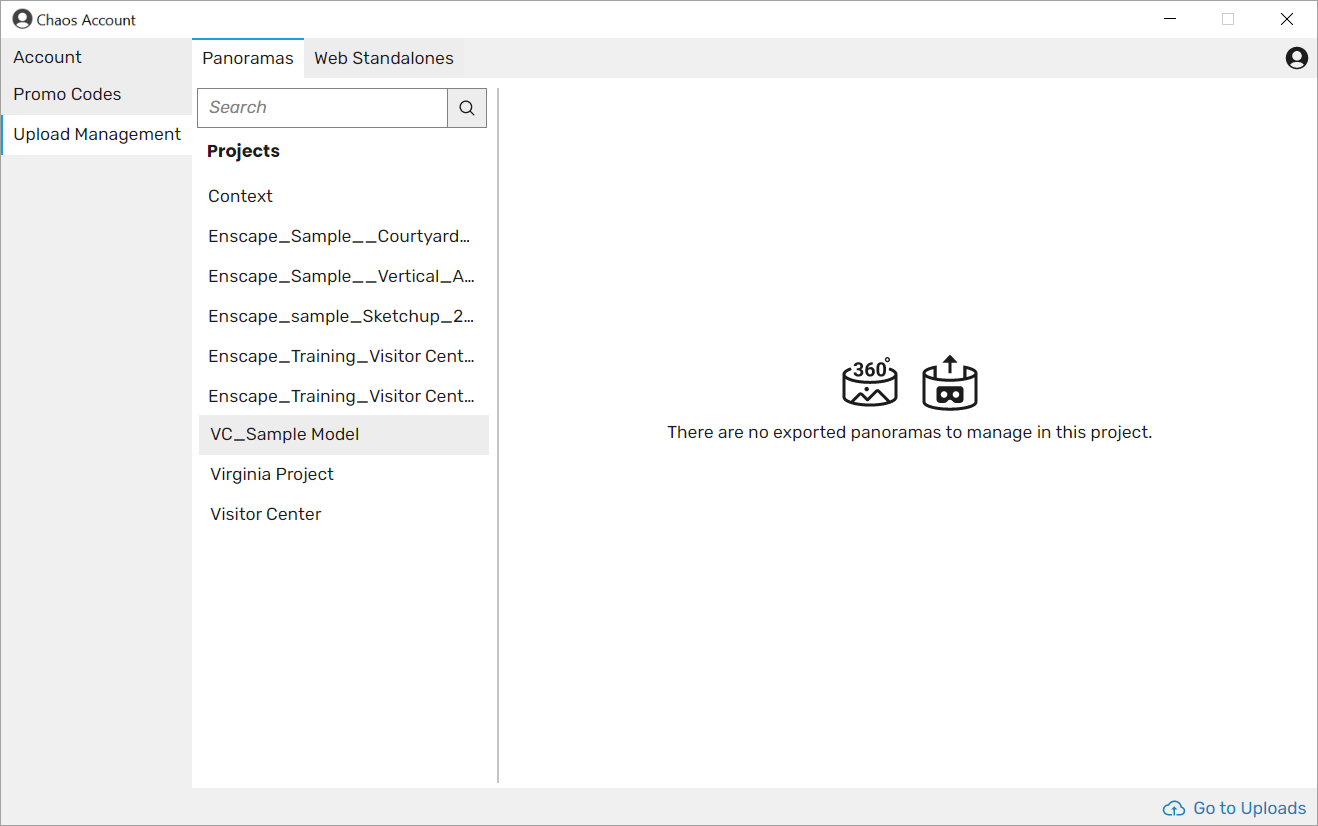
Upload Management dialog if no panoramas have been created
If you haven’t done so already, go ahead and create a panorama as outlined above. Come back to the Upload Management dialog, select the project listed under the Projects section of the dialog and any associated panoramas for that project will be shown in the dialog window.
It’s possible to manage and edit panoramas that have been created in another project whilst having another unrelated project open in the CAD.
Additionally, please make sure to refer to this article regarding upload management on the Cloud.
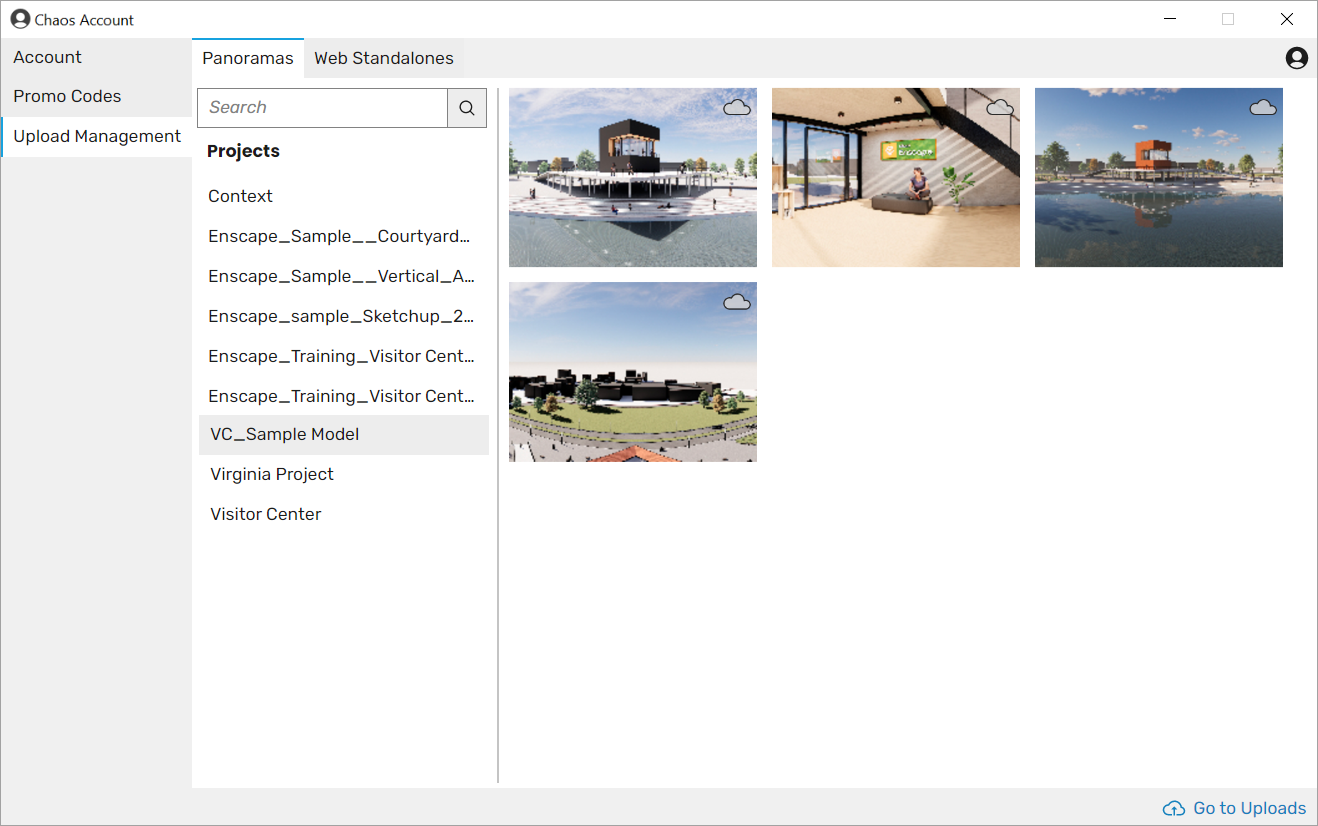
A set of exported mono panoramas
Hovering your mouse over any of the panorama thumbnails in the Upload Management dialog will display a set of buttons, as well as some information about which project the panorama is associated with, when it was created, its resolution, and if it is a mono or stereo panorama.

Default buttons available on exported panorama
Thumbnails for stereo panoramas will additionally display a ‘glasses’ icon, as well as indicating the Type of panorama when mousing over it.
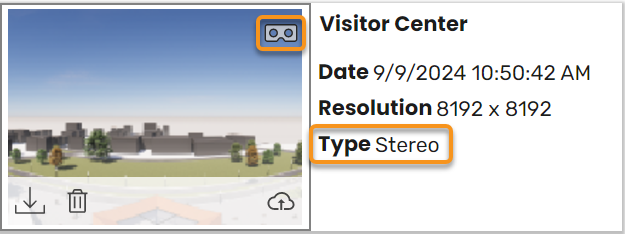
Stereo Panorama
The three buttons along the bottom of the thumbnail allow the following functions:
Save panorama as file… – will prompt you to save the file locally. You will be able to choose from a JPEG Image (*.jpg, *.jpeg), Portable Network Graphics (*.png), or Windows Bitmap (*.bmp).
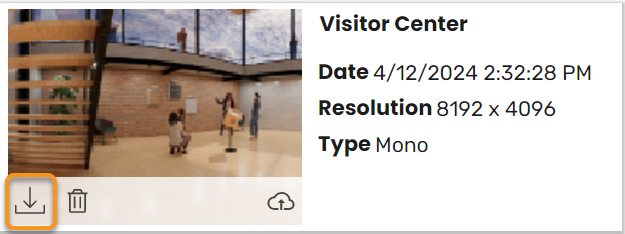
Save panorama as a file button
Delete panorama – file (only available when the panorama is not uploaded to the cloud.

Delete panorama button
Upload panorama to cloud – This will result in the selected panorama being uploaded to the cloud so it can be shared and be used in the Gallery / Tour feature.

Upload panorama to cloud button
Once a panorama has been uploaded to the cloud, the thumbnail will display a small cloud symbol at the top right of the thumbnail image to indicate that image is now also stored in the cloud. If you hover your mouse over panorama thumbnails you will notice the above three buttons have changed slightly to reflect some more functions that become available to a panorama that is stored in the cloud.
You can still download the panorama as a file locally, but deleting it is disabled, and a new button appears.

Functions available for panoramas uploaded to the cloud
Clicking on the 3 vertical dots will reveal the following menu which, as well as providing an option to view the panorama in your web browser, also provides a QR code which can be directly scanned or which can be saved as a file locally, or which can be directly copied and then pasted into a document. The Copy link option will copy the panoramas URL.
For Enscape 4.1.1 onwards, the replace feature is currently not available for Panoramas and Web Standalones.
If you have issues uploading a panorama to the cloud, it may be due to your Firewall. You may need to add some URL exceptions to your Firewall and the information you need to do this can be found here.

Menu for QR code, copy link, and open panorama in browser
Tune the Parameters
In the Enscape settings, you can modify the overall rendering quality of panorama files, and this can be found in the Visual Settings‘ Output tab. This also affects the panorama rendering time and quality. Medium generally produces great results at a high speed, Ultra provides the highest quality but takes the longest time.
The resolution can be specified in the Output tab from the Panorama – Resolution drop down menu. Be aware that only the height is taken into account. The width is adjusted accordingly.
Resolution | Mono | Stereo |
Low | 2048×4096 | 4096×4096 |
Normal | 4096×8192 | 8192x 8192 |
High | 8192×16384 | 16384×16384 |
If you are not happy with the exposure brightness in your final panorama, disable Automatic Exposure in the Visual Settings’ Main tab and set a manual exposure that works for you. If Auto Exposure is enabled, Enscape measures a good exposure when starting the panorama capture that might not be ideal for the overall panorama.
Where issues arise exporting ultra high resolution / stereo panoramas, Enscape’s Rendering options should be used.

Panorama Resolution menu
Preview Panorama
Navigate in the panorama by holding the left mouse button and moving the mouse. Try it:
Migration to Chaos Cloud
If you already have items uploaded to your Enscape Cloud, and you want to migrate them to Chaos Cloud using Enscape 4.1.1, click on the migrate button inside your upload management window. The Migrate Uploads window will open and give you an overview of items waiting for migration. This will include the number of Panoramas, Web Standalones and Panorama Galleries available to migrate. Once you are ready to migrate, click Migrate All Items.

Migrate Uploads Window
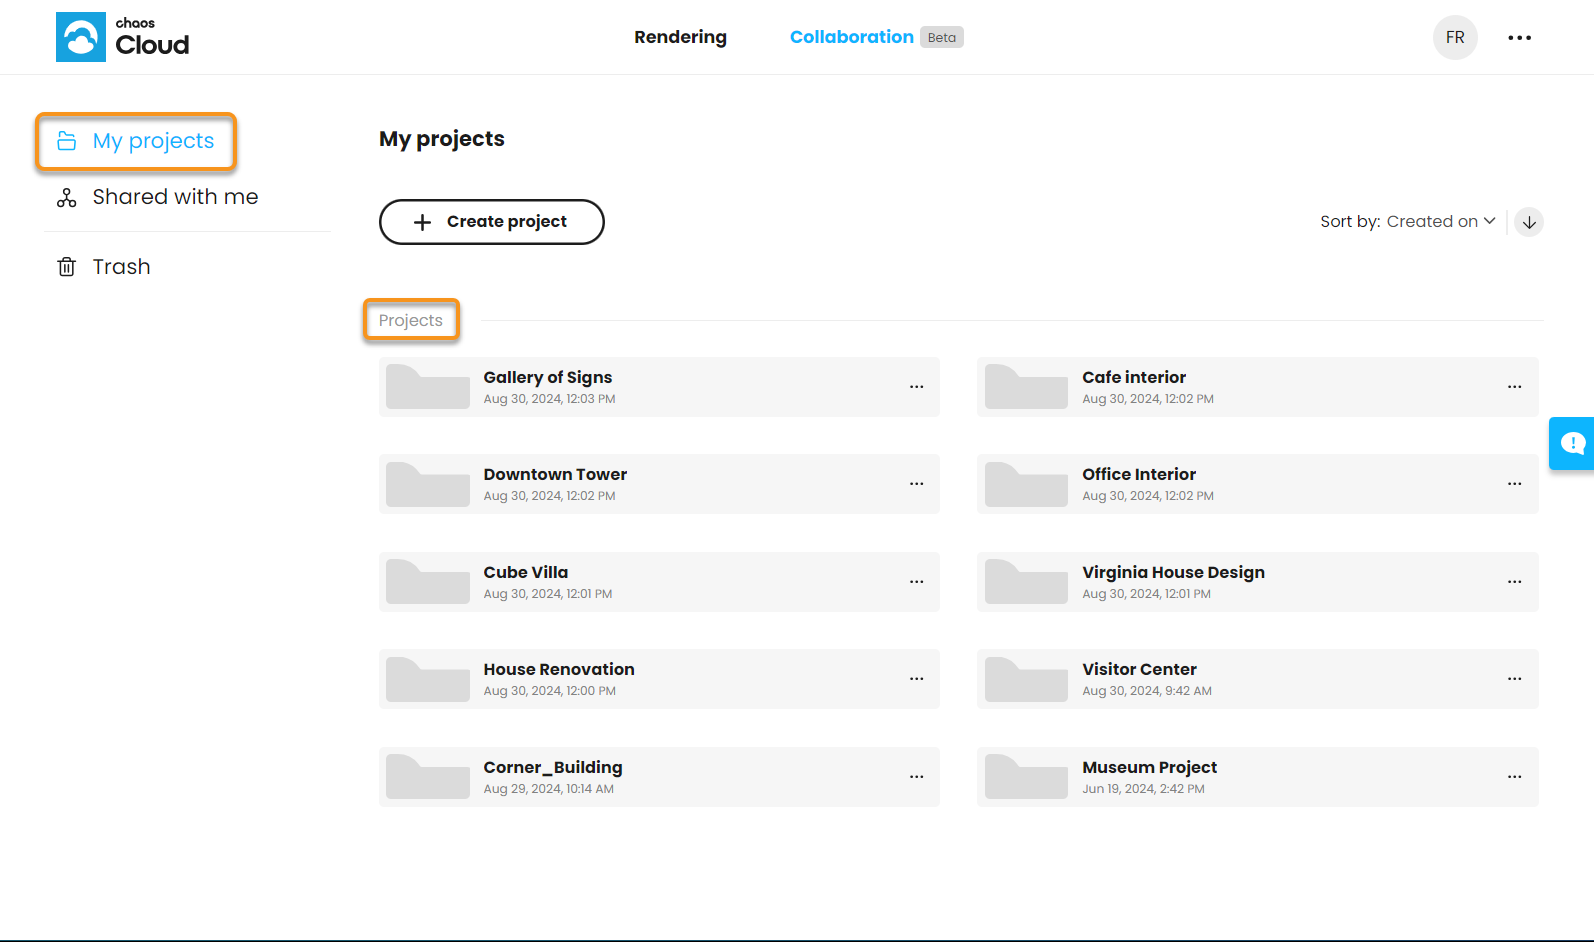
Once the migration is complete, you can review your uploads in the relevant project folders on Chaos Cloud.
Project Folder in Chaos Cloud
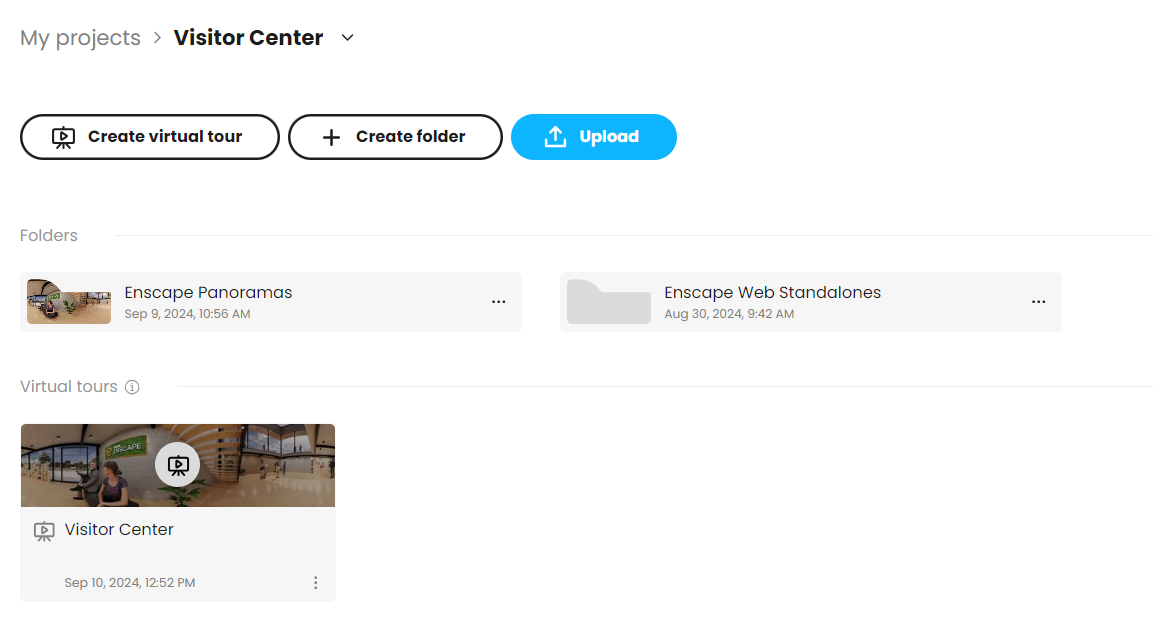
Virtual Tours
When you are logged in to your Chaos Cloud account, open any project folder to access a feature that allows you to Create Virtual Tour made up of multiple panoramas or images. Make sure to refer to this Manage Uploads article to understand how having an account will allow you to log in and access this feature.
Once you have uploaded a panorama to the cloud, a project will be automatically created using the same name as the CAD Project the panorama has been exported from.
Any panoramas that are uploaded to the cloud will use the name, date, and time as their file name by default. These files can be renamed in your Cloud Account if required.
Renaming, moving, copying, deleting, and sharing, as well as uploading newer file versions, can be achieved via the 3 dots menu next to each file in the cloud. You can now add or copy existing files or panoramas to the newly created virtual tour project, or you can upload new files to it. All files added to the virtual tour folder will be included in the tour.
Uploaded Projects in Chaos Cloud
File Info
From the three dot menu, you can access the File info option, which opens the Information panel. This panel contains information about the date of creation, size, format and creator of the file.
Panorama mode – When in this mode, panorama images are displayed like such. When switched off, the panorama image appears flat.
Premultiplied alpha – Marks the uploaded image as an image with premultiplied alpha and visualizes it as such.

File Information Panel
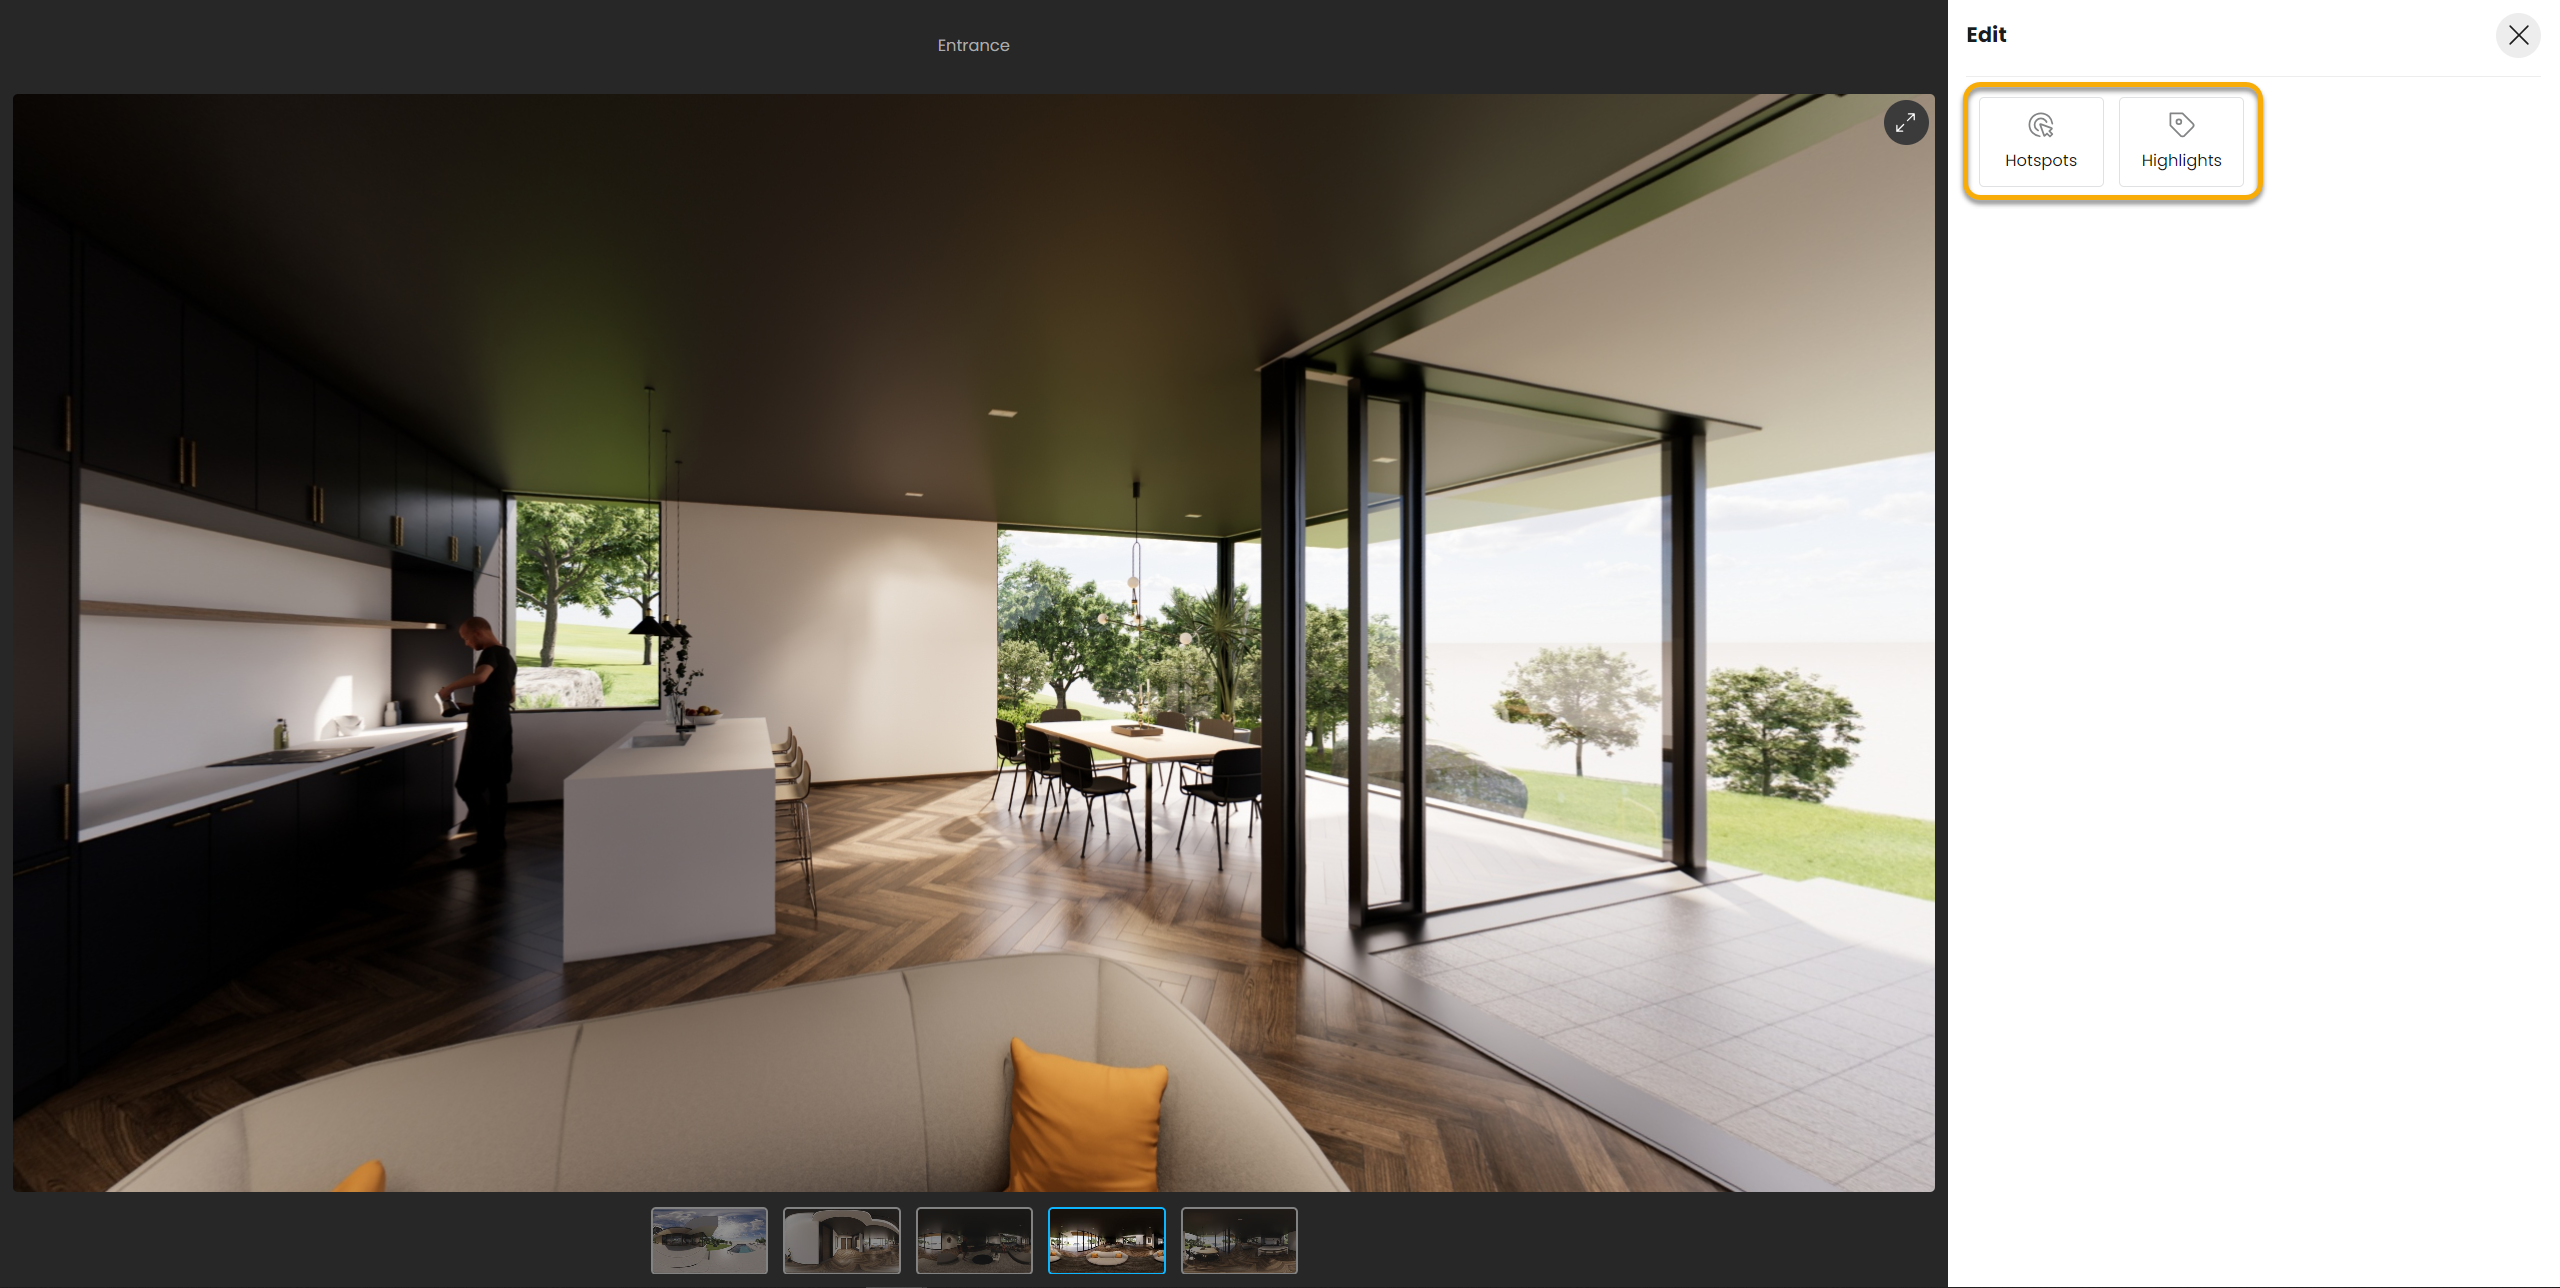
Edit the Virtual Tour
From the Edit button, you can start editing all of the files added to the virtual tour project. The files will load in the editor, and two options will become available to choose from – Hotspots and Highlights.
Hotspots
Hotspots are navigational elements placed inside the image that help the viewer “move” between the images.
To add a hotspot, you can drag an image from the gallery onto the opened image; click on the opened image or use the Add button. You can change the:
Target image from the drop-down.
Title – Add a title for the hotspot. You can adjust its visibility later.
Title Visibility – Select a visibility option: On hover, Always or Not visible.
Hotspots and Highlights
You can choose from a range of icon and color options and adjust the size of the hotspot. Save the hotspot from the Save button or the check icon on the image.
To automatically adjust the orientation when moving from one panorama to another using a hotspot, make two hotspots in the two panoramas that are cross linked. This way the movement will seem as if the viewer is moving forward through the space. If there is no two-way link between panoramas or you are using the gallery to move to a new panorama, it will be opened with its default orientation.
Highlights
Highlights allow you to add contextual detail and design options for your virtual tour. You can fill them with a textual description, image attachments, and links to express your design ideas. You can use the Add button to create a new highlight or click anywhere in the image with the tag pointer.
The title, description, and any image attachments will be shown in the highlight bubble. You can choose from a range of icon and color options and adjust the size of the highlight.
Adding a Floor Plan or Minimap
You can set any flat image as a floor plan. Use the three dot menu on the file card (in Folder view) and find the option Set as floor plan.
Once you do that, a Floor plan tag will appear on the image file.
You can remove the setting from the same place – Unset floor plan.
To make the floor plan interactive and add a mini map to your virtual tour, link the panorama files to the correct place in the floor plan by using hotspots. Once you link the panoramas, a mini-map will appear at the bottom right. Moving between the spaces will make the mini map indicate where you are located on the floor plan.
You can also open the Floor plan at any time and move through spaces by using the hotspots there. Use the map icon to open the Floor plan.
Viewing Files
Markers Visibility toggle – Temporarily hide any existing comment/hotspot/highlight markers from the viewport, so you can enjoy an unobstructed view of the current file.
Sharing
To share a Virtual Tour with someone, all you have to do is to click the three dots on the bottom right of the tour folder. From the dropdown menu click Share. A window will pop up and you will be able to choose from various sharing options.
You can either use the Copy button to copy the URL which can then be pasted into an email or document. Or, you can invite collaborators directly to an email address by adding the recipient’s email address and clicking the Send Invitation button. You can set the person as a Viewer or Editor.
The link access can have one of the following access levels:
Same as parent – The item inherits the same setting as the folder or project has.
Invited only – Only invited people are able to access the item.
Anyone can view – Anyone who has the link can view the item.
Anyone can comment – Anyone who has the link can view and comment on the item.
The Lock comments option can be set to either lock or unlock the comments to collaborators for this item. This will prevent new comments from being added, but the comment section will still be seen. It can also be set to Same as parent, which is the same as the parent folder or project setting. View the full list of user permissions here.

Embed into Webpage
You can then use the full URL and embed a single Panorama, Panorama Gallery, or Panorama Tour into a web page by adapting the following html snippet into the <body> of your markup:
<script defer type="text/javascript"
            src="data:text/javascript,document.getElementById('collab-frame').addEventListener('mouseover',function(e){e.target.focus()});"
        ></script>
        <iframe
            id="collab-frame"
            width="850" height="550" style="border: 0;" scrolling="no" loading="lazy"
            src="<your panorama / gallery / tour URL placed here>"
            allow="fullscreen; xr-spatial-tracking;" referrerpolicy="strict-origin"
        ></iframe>
If you are using links generated from the Chaos Cloud , please make sure that the Link access has been changed to Anyone can view in the Share options, before embedding the links in your web pages.
View it in Cardboard
Use a QR code scanner on your mobile phone to open the panorama. We recommend using Google Chrome or Safari to view it properly.
Click on the cardboard icon in the lower right corner to enable the stereo mode. You will then be asked to put your phone into a cardboard device.
In your Documents folder you will find an Enscape folder which contains the Panorama folder where Enscape stores the files associated with panoramas. These files are stored as .xml files and if you delete these files you will remove the panoramas from your My Panoramas as well as any connection to the files in the Cloud.

Panorama in Cardboard in Mono mode
Insert Links to Navigate
Enscape gives you the panorama in mono and stereo via a normal image file or uploads it to the web. If you want to go further, you can connect the panoramas with clickable arrow links to make it more interactive. A variety of tools exist to do that, for example krpano.
For Software Developers
If you want to host the panorama on your own webspace, follow these guidelines. This is for users with software development background only – usually, our one-click cloud upload is a great solution to host your panorama reliably and fast.
A couple of points to consider when trying to view Panoramas on iOS devices:
- As of iOS 12.2, Apple decided to limit accelerometer and gyroscope access in browsers for “privacy reasons”.
You should be able to re-activate the access through the following settings:
Settings > Safari > Privacy & Security > Motion & Orientation Access.
Since iOS 13, Apple have disabled access to this option altogether, and as this is now on a per request basis, a prompt will appear each time on opening a panorama. - If a Panorama has been rendered out from Enscape with the Panorama Resolution set to High, the Panorama will not work on iOS. Instead, render out the Panorama with the Panorama Resolution set to Normal.
Security & Privacy Policy for Cloud Service
For our Security and Privacy policy for Cloud Services, please refer to our EULA’s.