This page provides information about the V-Ray Object Properties in V-Ray for Cinema 4D.
Overview
In addition to the options in the Render Settings, which are global for the scene, you can set different render settings on a per-object basis. Some of those properties (primary and secondary visibility, visibility to camera etc.) are accessible through the Object Properties tag.
If you wish to learn how to create a Shadow Catcher object using VRayObjectProperties, see the How to Use Matte Objects tutorial.
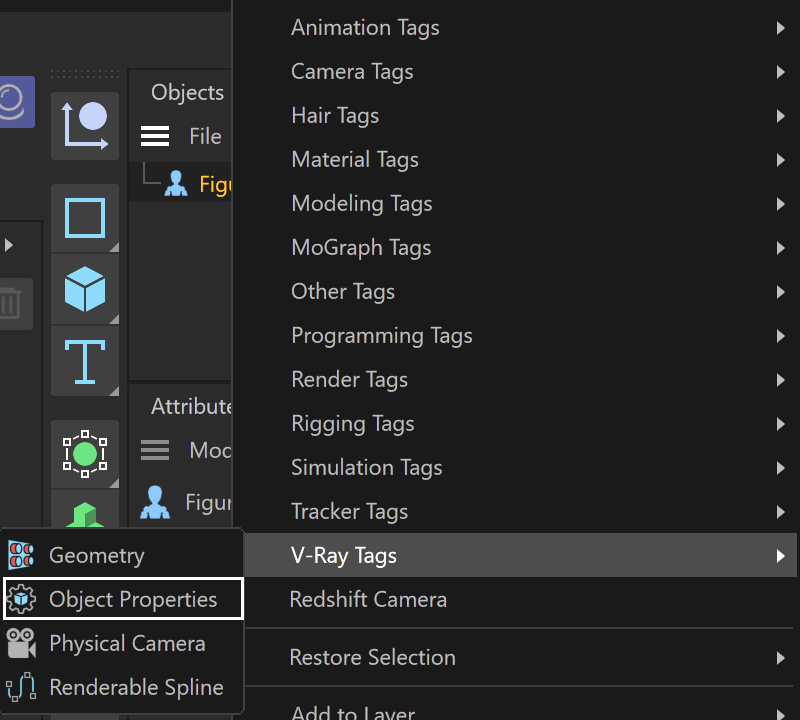
For Cinema 4D 2023.1 and newer versions, the Object Properties tag resides in Extensions > V-Ray tags.
UI Paths
UI Path: (Object Selected) Objects tab > Tags > V-Ray Tags > Object Properties
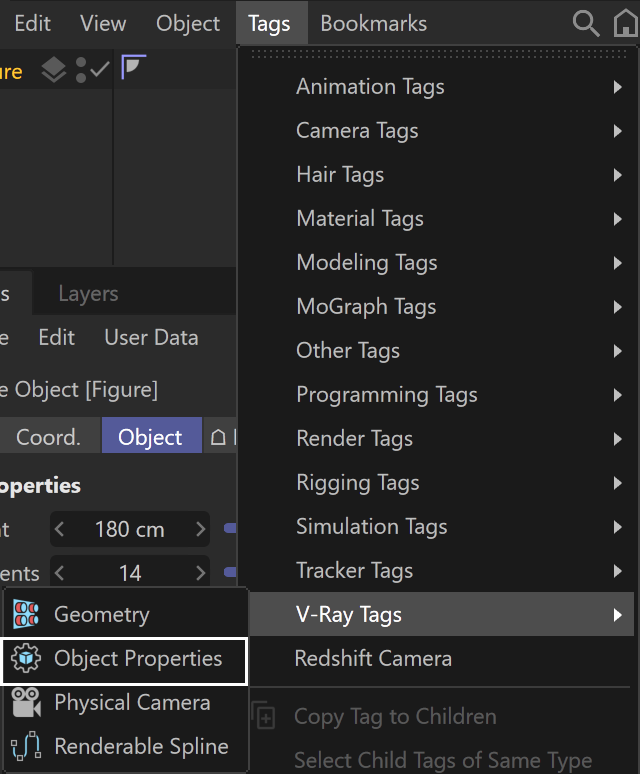
UI Paths: (Object Selected) Objects tab > right-click on object > V-Ray Tags > Object Properties
General
Enabled – Enables the Object Properties.
OBJECT ID
Object ID – Specifies an ID for the object. This is used by V-Ray for the Multi Matte Render Element. Note that when used with a Cloner - the object ID of the original geometry is always considered over the Cloner Object ID.
A value of 0 does not create an Object ID. Values of 99 or higher render correctly but are not displayed in the tag.
MOTION BLUR
Override Motion Blur Samples – When enabled, overrides the default number of samples that are used to sample the current object for motion blur.
Motion Blur Samples – When Override Motion Blur Samples is enabled, this value is used when sampling the motion blur created by the current object.
Use Velocity Map – When enabled, allows a velocity map to determine the motion blur for the current object. Only applicable for mesh objects.
Compensate FPS – Automatically compensates the project frame rate with the velocity. This is particularly useful for generated vertex map for a Liquid Mesh. Such vertex maps' velocity is in Scene Units per Second and V-Ray works with Scene Units per Frame velocity. So, the motion blur effect might be unrealistic if the velocity is not reduced.
Velocity Map – Allows the velocity map to be specified by name, similar to polygon selection.
Velocity Map Multiplier – Additional multiplier for the velocity map. This allows the motion blur effect to be increased / decreased to achieve the desired effect. Note that negative values are possible, but unrealistic.
SCALE UV
Type – Allows additional scaling of the object's UVs, separate from the UV scaling of its material.
None – No additional UV scaling is applied.
Inherit – The geometry inherits the additional UV scaling from its parent object, if any. For this mode, both the parent and child objects need to have a V-Ray Object Properties tag. When the child's Scale UV Type is set to Inherit, all its additional UV scaling will be determined by the parent's Scale UV settings.
Override – Overrides the UV scaling of the object with the values determined by the Scale U/V/W parameters.
Multiply – The values of the Scale U/V/W parameters are used as multipliers for the object's UV scale.
Scale U/V/W – Determines the amount of scaling in the U, V, and W axes. If the Type is set to Override, these values override the material's values. If the Type is set to Multiply, these values serve as a multiplier for the UVW scales of the material applied to the geometry.

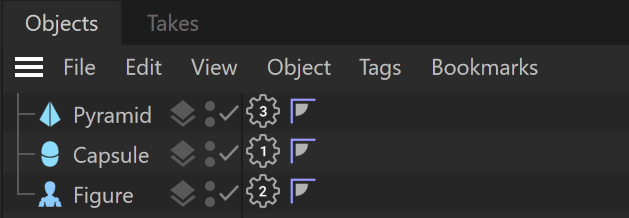
When specifying an Object ID, the number of the ID is displayed in the V-Ray Object Properties tag in the Objects tab.
Matte Properties
Matte Surface – Enabling this option turns the object into a matte object. This means that the object is not directly visible in the scene; instead, the background color is shown in its place. However, the object appears normally in reflections/refractions and generates indirect illumination based on its actual material.
Alpha contribution – Controls how the object appears in the alpha channel. Note that an object doesn't have to be a matte object for this setting to work - the alpha contribution can be changed regardless of whether the object is matte or not. A value of 1.0 means that the object appears normally in the alpha channel. E.g. if the object is opaque, the alpha is white; if the object is fully transparent, it does not influence the alpha channel at all. A value of 0.0 means that the object, regardless of its actual opacity, is not present in the alpha channel, although it is present, as usual, in the RGB channel. A value of -1.0 means that the object's alpha is cut out from the alpha of the objects behind it. E.g. if the object is fully opaque, its alpha is black and it blocks the alpha of the objects behind it, whereas if the object is fully transparent, it does not influence the alpha of the other objects at all. Note that turning an object into a matte object does not change its appearance in the alpha channel. You need to explicitly change its alpha contribution. This option can also be mapped by a texture.
Shadows – When enabled, the matte object receives shadows.
Affect alpha – When enabled, makes the shadows affect the alpha contribution of the matte surface. Areas in perfect shadow produce white alpha, while completely unoccluded areas produce black alpha. Note that GI shadows (from skylight) are also computed. However, GI shadows on matte objects are not supported by the Light Cache GI engine, when used as primary engine. You can safely use Light Cache with matte surfaces as a secondary engines.
Shadow Tint Color – Specifies the color of the shadows.
Shadow Brightness – An optional brightness parameter for the shadows on the matte surface. A value of 0.0 makes the shadows completely invisible, while a value of 1.0 shows the full shadows.
Reflection Amount – If the material of the object is a reflective V-Ray material, this controls how much of the reflection is visible on the matte object.
Refraction Amount – If the material of the object is a refractive V-Ray material, this controls how much of the refraction is visible on the matte object.
GI Amount – Controls how much of the indirect illumination received by the object is visible on the matte.
No GI on Other Mattes – When enabled, the object appears as a matte object in reflections, refractions, GI, etc. for other matte objects. Note that if this is enabled, refractions for the matte object might not be calculated. (The object appears as a matte object to itself and is not able to "see" the refractions on the other side.)
Matte for Secondary Rays – Normally the base material is used when an object with a V-Ray Override Material is seen through reflections/refractions. Enable this option, if you want the Override Material to show the environment when seen through reflections/refractions. V-Ray can also do projection mapping to increase the realism.

Surface Properties
Generate GI – Controls whether the object generates indirect illumination. A Multiplier can be specified for the generated indirect illumination. The Multiplier has a soft limit of 1 and a hard limit of 1000.
Receive GI – Controls whether the object receives indirect illumination. A Multiplier can be specified for the received indirect illumination. The Multiplier has a soft limit of 1 and a hard limit of 1000.
Subdivs Multiplier – Specifies a multiplier for the subdivisions of all secondary ray tracing done for the particular surface. The Multiplier has a soft limit of 2 and a hard limit of 1000.
Generate Caustics – When enabled, the selected object refracts the light coming from light sources that are caustics generators, so that caustics are produced. Note that in order to generate caustics, an object must have a reflective or refractive material.
Receive Caustics – When enabled, the object becomes a caustic receiver. When light is refracted by objects that generate caustics, the resulting caustics are only visible when they are projected on caustics receivers.
Caustics Multiplier – Specifies a multiplier for the caustics generated by the selected object. Note that this value has no effect unless Generate caustics is enabled. The Multiplier has a soft limit of 1 and a hard limit of 1000.
GI Surface ID – This number can be used to prevent the blending of Light Cache samples across different surfaces. If two objects have different GI surface IDs, the light cache samples of the two objects are not blended. This can be useful for preventing light leaks between objects of vastly different illumination.
Sss Surface Id – Used to tell Fast SSS2 classic materials and node materials that objects with the same ID need to share the same illumination samples when using raytraced multiple scattering. This avoids illumination seams between those objects. Set identical Ids for objects with applied Fast SSS2 to blend them seamlessly.
Generate Render Elements – This option can include or exclude the selected objects from certain Render Elements on a per-object basis. When disabled, the selected objects' information is excluded from the following Render Elements, when they are added to the scene from the Render Elements tab:
Extra Texture
Light Select
Lighting
Shadow
Total Lighting
Velocity
Z-Depth

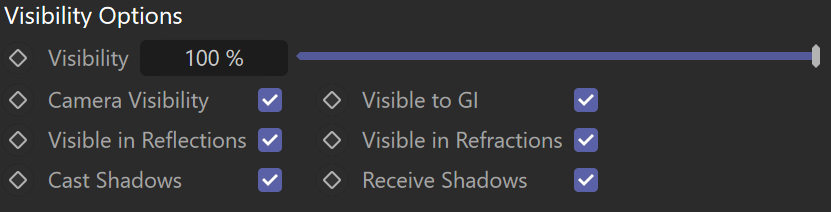
Visibility Options
Visibility options can be animated.
Visibility – Determines the opacity of the entire object.
Camera Visibility – When disabled, the object appears perfectly transparent to camera rays.
Visible to GI – When disabled, the object is considered perfectly transparent to GI rays.
Visible in Reflections – When disabled, the object appears perfectly transparent to reflection rays.
Visible in Refractions – When disabled, the object appears perfectly transparent to refraction rays.
Cast Shadows – When disabled, the object appears perfectly transparent to shadow rays.
Receive Shadows – When disabled, the object does not receive shadows.
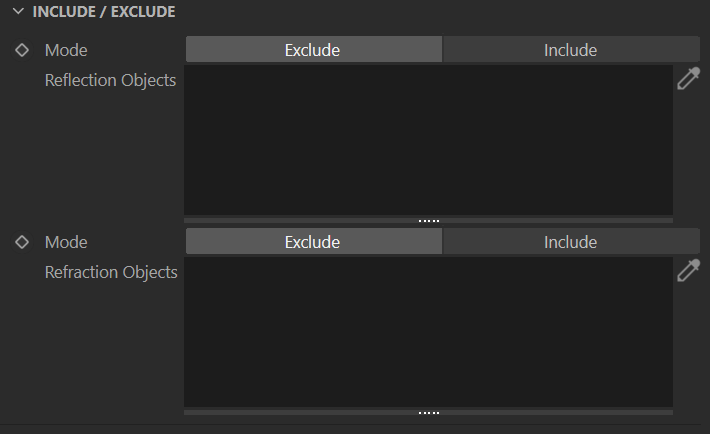
Include/Exclude
Mode – Specifies how the list items are considered. You can include or exclude an object from the reflection and refraction visibility lists.
Reflection Objects – Specifies a list of objects with reflective properties that are excluded/included from the render.
Refraction Objects – Specifies a list of objects with refractive properties that are excluded/included from the render.