This page provides some details on the settings available for the Light Material in V-Ray.
Overview
The VRayLightMtl is a special material provided with the V-Ray renderer. This material is generally used for producing self-illuminated surfaces. This material's light emission can be used as indirect as well as direct illumination in the scene.
This allows for light sources of any shape, and may even be assigned at the object level and at the face level for self-illuminating only portions of a mesh.

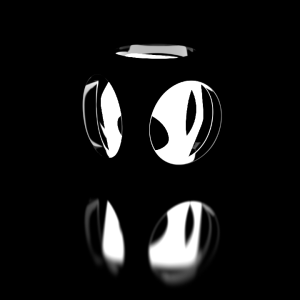
Image courtesy of Jeremy Kool
||Right-click on the geometry|| > Assign New Material... > VRay section > VRay Light Mtl

||V-Ray Shelf|| > Right-click to Create V-Ray Materials button > VRay Light Mtl

||Hypershade|| > Window tab > Create... > VRay section > VRay Light Mtl

Parameters
Color Mode – Allows the user to choose the mode in which the color of the light material is specified.
Color – When the Color Mode is set to Color, this parameter controls the color of the light material.
Temperature – When the Color Mode is set to Temperature, this parameter controls the color of the light material.
Color Multiplier – A multiplier for the Light Color. For more information, see the Default Color and Multiplier Values example and the Textures example below.
Opacity – A texture to use as opacity for the material. Note that making the material less opaque does not affect the intensity of the self-illumination color. This is so that you can create perfectly transparent materials that nevertheless still emit light.
Emit on Back Side – When enabled, makes the object emit light from its back side as well. If this is off, the material is rendered as black on the back sides. For more information, see the Emit On Back Side example below.
Compensate Camera Exposure –Used when rendering with the V-Ray Physical Camera. When enabled the intensity of the material is adjusted to compensate for the camera exposure. Note that this option is disabled when the Direct illumination is enabled.
Multiply Color By Opacity – When enabled, the color of the light material is multiplied by the opacity texture. Otherwise, the color and opacity act independently (so-called additive transparency).

Example: Default Color and Multiplier Values
For the examples below, the interior cube is the default VRayLightMtl. The exterior cube and ground plane have the default VRayMtl with Reflection. The rest of the scene is shaded with a basic diffuse VRayMtl.
This scene is rendered without any direct light sources.

Color Multiplier: 1.0
Compensate Camera Exposure: off
GI: off
The image is dark except the inner cube (self-illuminated) and faint reflection on the ground. Notice there is no GI and no lights at all, so the darkness of the scene is expected.
 Color Multiplier: 1.0
Compensate Camera Exposure: on
GI: off
Notice the inner cube and reflections appear brighter due to the exposure compensation. The rest of the image is still black because GI is disabled.

Color Multiplier: 1.0
Compensate Camera Exposure: off
GI: on
With GI enabled, the outer cube and inner sphere become slightly visible. However, the image remains very dark.

Color Multiplier: 50.0
Compensate Camera Exposure: off
GI: off
The inner cube and reflections are noticeably brighter. With GI disabled, the image remains in darkness.
Color Multiplier: 50.0
Compensate Camera Exposure: on
GI: off
By enabling Compensate Camera Exposure, the reflections become brighter with the current Color Multiplier value.

Color Multiplier: 50.0
Compensate Camera Exposure: off
GI: on
With GI enabled, the scene receives more illumination with the current Color Multiplier value.
Example: Textures
This example shows using the VRayLightMtl with a texture in the Color slot. In order to control the strength of the light we will need to adjust the value of the Color Multiplier.
For the following examples, Emit on Back Side and GI are enabled.

Color Multiplier: 3.0
A texture is connected to the Color slot. The Color Multiplier is quite low, so only the plane and the reflection on the cube are visible.

Color Multiplier: 30.0
Increasing the Color Multiplier leads to a much brighter look in the scene. Notice that now the texture approaches a white color due to multiplying the (R,G,B) values of the texture.

Color Multiplier: 3.0
Here, another texture is connected to the Color slot. Notice the VRayMtls for the surrounding walls is unchanged, but the scene looks different due to the new texture.

Color Multiplier: 30.0
Increasing the Color Multiplier leads to a much lighter look to the scene. Notice now that the texture approaches a white color due to multiplying the (R,G,B) values of the texture.
Example: Emit On Back Side
In the examples below, the VRayLightMtl is applied to the curved plane.

Color Multiplier: 1.0
GI: on
Emit on Back Side: off
Increasing the multiplier visibly influences the scene. Shadows appear.

Color Multiplier: 1.0
GI: on
Emit on Back Side: on
The scene starts to gather more light with Emit on Back Side enabled.

Color Multiplier: 15.0
GI: on
Emit on Back Side: off
The back is still dark, but notice the blue wall receives some GI due to higher Color Multiplier value. Shadows appear more defined.

Color Multiplier: 15.0
GI: on
Emit on Back Side: on
The scene gathers more light with Emit on Back Side enabled. Be aware of resulting burnt areas when using the Linear type of Color mapping.
Direct Illumination Settings
The controls in this section allow you to turn the objects which have the VRayLightMtl material applied into actual direct mesh light sources. The effect is equivalent to creating a VRayLightMesh for the same object. The controls in this section are intentionally simple; if you need more control over the light source (exclude objects from illumination etc), it is better to use a VRayLightMesh instead.
There are currently some restrictions on using these options. For more details, please see the Notes section below.
Direct Illum – When checked, all objects that have the particular V-Ray light material applied to them, will be considered mesh lights and will emit direct light.
Light cut-off threshold – This parameter specifies a threshold for the light intensity, below which the light will not be computed. This can be useful in scenes with many lights, where you want to limit the effect of the lights to some distance around them. Larger values cut out more light; lower values make the light range larger. If you specify 0.0, the light is calculated for all surfaces. This parameter is not available when the renderer is set to CUDA.

Notes
- You can use the VRayLightMtl as a light source assigned to an object. Increasing the Value of the color affects the GI solution and produces more light. Note that overbright colors may look the same as pure white but the GI results are different.
- If you know the photometric power of a self-illuminated object in lumens (e.g. 1700 lm for a 100-watt bulb) you can calculate the multiplier for VRayLightMtl if you divide the lumens by the surface area of the object in meters, provided that the self-illuminated color is pure white.
- The direct illumination option will only work properly if VRayLightMtl is the only material applied to the object. It will not work if the material is part of a complex material like VRayBlendMtl. This restriction will probably be removed in a future release.
- Enabling direct illumination effectively turns the object with VRayLightMtl into a mesh light. All lights have their camera and refraction visibility linked, i.e. if primary (camera) visibility is disabled, this also disables visibility in refractions, although reflection visibility will be unaffected. If you need more control over the visibility for primary and secondary rays, please consider using a light object instead.