This page provides details on how to use the transportable V-Ray Material in Maya.
Overview
Useful for working across multiple platforms, the VRayVRmatMtl loads a V-Ray shader from a file (.vrmat, .vismat, .vrscene) and makes the materials in these files available for use in the scene. These files can be exported from Maya or 3ds Max and used on any platform. You can use the shader directly or change its settings by clicking on the Show VRmat Editor button to open the VRmat Editor.
The VRMat workflow for sharing materials cross-platform is straightforward: An existing V-Ray material is converted through the VRMat Converter, the output of which can then be read into a scene using the VRMat Material (VRayVRmatMtl) in the material editor of the destination platform, such as using a material originally created in 3ds Max, in a Maya scene.
Note. If you load a shader from a .vrscene file you can only use it directly; you will not be able to edit it. The options for exporting a .vrscene file in Maya can be found in the Translator Options.

||Right-click on the geometry|| > Assign New Material... > VRay section > VRay VRmat Mtl

||V-Ray Shelf|| > Right-click to Create V-Ray Materials button > VRay VRmat Mtl

||Hypershade|| > Window tab > Create... > VRay section > VRay VRmat Mtl

Parameters
Material file – Selects the .vrmat, .vismat, or .vrscene file to open.
Material list – Displays the list of materials found in the Material file.
For Maya versions 2014 and prior, the Parameters rollout also includes a Show VRmat Editor button (not shown in the image above). For information on this feature, see the V-Ray Material Editor section of this page.

Transferring Materials from 3ds Max to Maya
The following examples illustrate workflows for transferring one or more materials created in 3ds Max to then be used in Maya.
Example: Transferring a Single Material
This example shows how to transfer a V-Ray material created in 3ds Max for use in Maya. Although this example will show the process of going from 3ds Max to Maya, it is also possible to both export and import a VRayVRmatMtl to and from other applications supported by V-Ray.
In this case, we will be exporting the Black Metallic material from an object in 3ds Max and applying it to a shader ball in Maya.
Using the VRmat Converter in 3ds Max
- Launch the VRmat Converter from the 3ds Max menu option Tools > V-Ray vrmat converter., and choose the Pick & Convert Material... option.

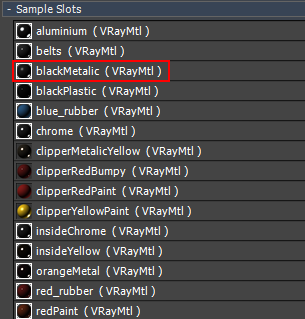
- Select the scene's material to be exported, here named blackMetalic.
- The VRmat Convertor will ask for a location to put the exported file, and will create a file using the name of the selected material with the extension .vrmat in the location specified.
Setting Up Materials in Maya
- Open Maya and load the scene in which you want the .vrmat file to be used.
- From the Hypershade, create a V-Ray VRmat material and apply it to the desired objects(s) in the scene. In the Attribute Editor for the VRmat material, browse for the .vrmat file previously created in 3ds Max.

The original 3ds Max Engine scene.

The part of the original 3ds Max Engine scene that has the material to export (isolated for clarity purposes).

The Maya ShaderBall with the VRayVRmatMtl loading the blackMetalic .vrmat exported from 3ds Max.
Any textures that a V-Ray VRmat material uses will be affected by the UV mapping on the object or objects that it is applied to.
Example: Transferring Multiple Materials
This example shows how to transfer all the V-Ray materials within a 3ds Max scene for use in Maya. Although this example will show the process of going from 3ds Max to Maya, it is also possible to both export and import a VRayVRmatMtl to and from other applications supported by V-Ray.
Using the VRmat Converter in 3ds Max
- Launch the VRmat Converter from the 3ds Max menu option Tools > V-Ray vrmat converter, and choose Convert Scene Materials to .vrmat.
- The VRmat Converter will ask for a location to put the .vrmat files. You will notice it creates folders each containing a file with the name of the material, each with the extension .vrmat.

Setting Up Materials in Maya
- Open Maya and the scene in which you want the vrmat file to be used.
- From the Hypershade, create as many V-Ray VRmat materials as needed, and apply them to the desired item(s) within the scene. Browse for the exported .vrmat files previously created in 3ds Max as needed for each respective material.

The Maya ShaderBall with VRayVRmatMtl's loading the belts.vrmat, blackPlastic.vrmat, chrome.vrmat & red_rubber.vrmat exported from 3ds Max

The Maya ShaderBall with VRayVRmatMtl's loading the blue_rubber.vrmat, aluminium.vrmat, clipperRedBumpy.vrmat & orangeMetal.vrmat exported from 3ds Max
V-Ray Material Editor (Deprecated Feature)
For Maya versions 2014 and prior, the Parameters rollout includes a Show VRmat Editor button for opening the V-Ray Material Editor, a basic material editor for incoming materials.
This feature is not available in Maya versions 2015 and later.


A: Materials List – A list of all materials in the current .vismat or .vrmat file. Users can create new materials, import materials from file, rename and delete materials here.
B: Material options – Options for the currently selected material. Parameters correspond to various V-Ray materials and features.
C: Material preview – Displays the appearance of the adjusted material. The preview image is cached for later use.
Preview – Updates the material preview.
Live update – When enabled, the material preview will update automatically every time one of the material properties is changed.
Save – Saves the current material(s) to a .vismat file overwriting previously existing files.
Save As – Opens a dialog for specifying where material(s) will be saved.
Save on close – Automatically saves the changes made to the materials to a .vismat file when the editor is closed.
Right-Click Submenus
In the Material List section of the V-Ray material editor is a tree structure of all the materials contained in the current .vismat file. The menus in this area can create new materials, rename and delete them, and also create layers on materials. These options are available through right-click submenus.
Right-clicking the root displays the Create Material submenu. The available materials to create are Angle Blend, Multi Material, Skp Two Sided, Standard, Toon, Two Sided, V-Ray Material and Wrapper Material.
Right-clicking a material displays the following options:
Create Layer – Displays the Create Layer submenu. The available layers are Emissive, Reflection, Diffuse, VRayBRDF and Refraction.
Duplicate Material – Creates a copy of the current material.
Rename Material – Allows you to specify a name for the current material.
Remove Material – Deletes the specified material from the .vismat library.
Import Material – Opens a dialog to import a .vismat library.