Overview
Render Parameters rollout of the Settings tab exposes several options that control the Progressive or Bucket image samplers. You can also select an Antialiasing Filter and find a number of Optimization settings here. Note that the exposed controls vary depending on the combination of selections between CPU/GPU, Interactive/Production and Progressive/Bucket options. Changing the Quality preset from the Render rollout sets a number of options with appropriate values for the selected preset. Generally, the Quality presets will work for a wide variety of scenes and you do not need to adjust the settings any further.
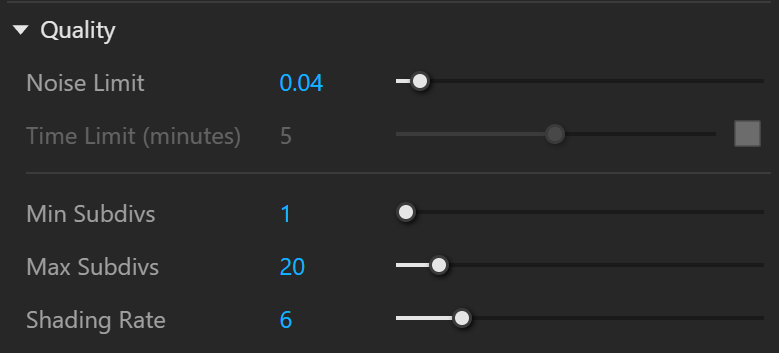
Quality
The Quality settings are only available when the Interactive Renderer is turned off. The Shading Rate option is not available when using the GPU engine.
Noise Limit – Specifies the acceptable level of noise/grain in the rendered image. The smaller the number, the higher the quality (less noisy) the image is.
Bucket Size – Determines the bucket (render region division) size measured in pixels. Buckets rendered by NVidia GPU devices are always produced with a minimum size of 32 pixels.
Time Limit (minutes) – Specifies the maximum render time in minutes. When this number of minutes is reached, the renderer stops. This is the render time for the whole frame; it includes any GI prepasses like light cache, irradiance map, etc. If this is 0.0, the render is not limited in time.
Min Subdivs – Determines the initial (minimum) number of samples taken for each pixel. This value rarely needs to be higher than 1, except in the case of very thin lines or fast moving objects combined with motion blur. The actual number of samples taken is the square of this number. For instance, a value of 4 subdivisions produces 16 samples per pixel.
Max Subdivs – Determines the maximum number of samples taken for a pixel. The actual maximum number of samples is the square of this number (i.e. 4 subdivs produces a maximum of 16 samples). Note that V-Ray may take less than the maximum number of samples, if the difference in intensity of the neighboring pixels is small enough.
Shading Rate – Controls how many rays are used for calculating shading effects (e.g. glossy reflections, GI, area shadows, etc) instead of anti-aliasing. Higher values mean that less time is spent on anti-aliasing, and more effort is put in the sampling of shading effects.
Interactive Off and Progressive On Advanced UI

Interactive Off and Progressive Off Advanced UI
Interactive Parameters
Interactivity – Controls the number of rays that are traced for each pixel during one image pass. The smaller the value, the smoother the picture from the very beginning of the rendering with GI, but interactivity can be significantly diminished. This option has no effect when Light Cache is selected as a secondary GI engine.

Antialiasing Filter
Antialiasing Filter – Enables or disables anti-aliasing.
Size / Type – Determines the size of the filter in pixels. Higher values yield blurrier results. See the Antialiasing Filter example below.
Only Lanczos, Area and Box Antialiasing Filter Types are supported for V-Ray GPU.

Example: Antialiasing Filter
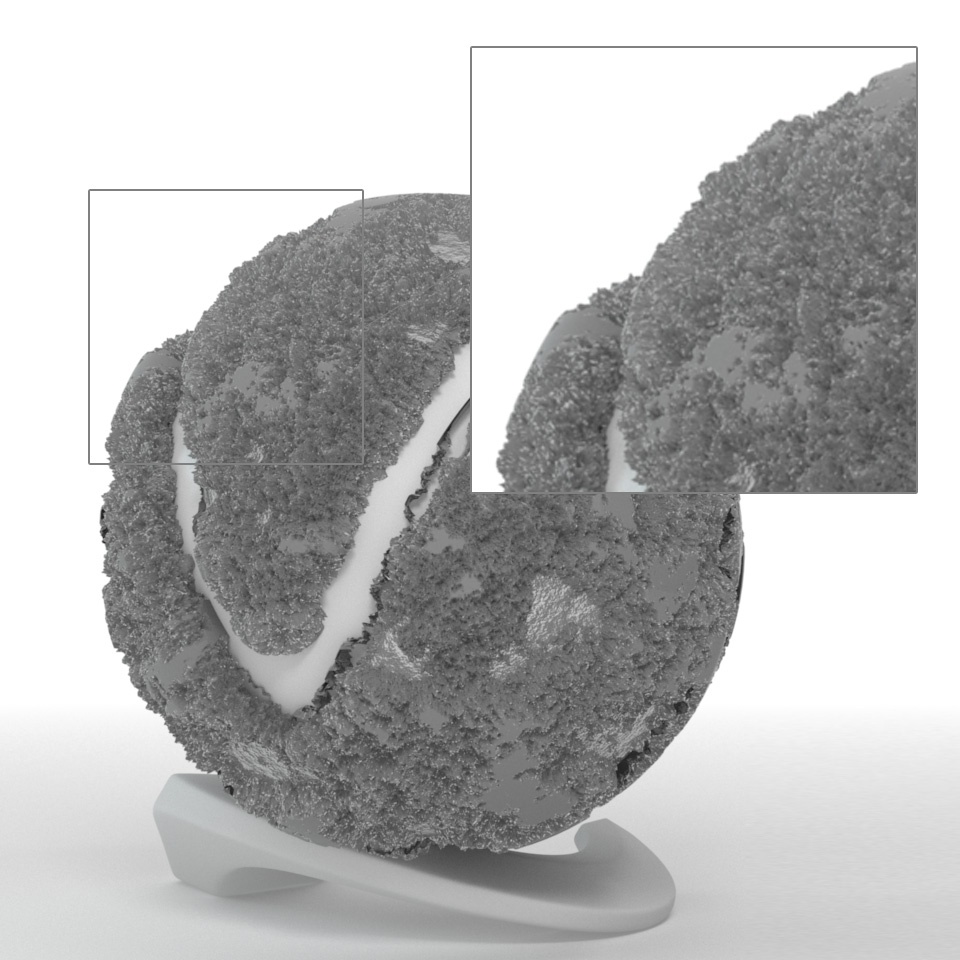
Here is an example briefly demonstrating the effect of different anti-aliasing filters on the final result.
Note that rendering with a particular filter is not the same as rendering without a filter and then blurring the image in a post-processing program like Adobe Photoshop. Filters are applied on a sub-pixel level, over the individual sub-pixel samples. Therefore, applying the filter at render time produces a much more accurate and subtle result than applying it as a post effect. The zoomed in images below have been zoomed in and cropped 300%.

Filtering is off.
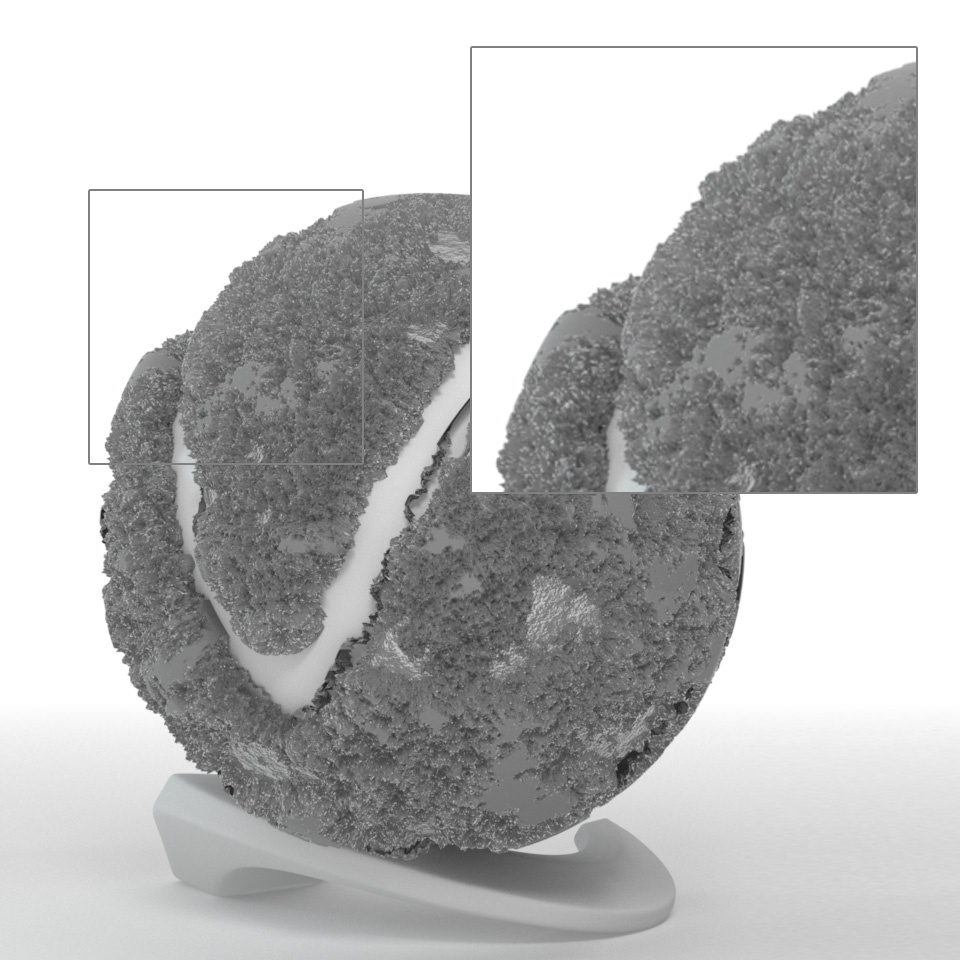
Lanczos filter, size 2.5

Triangle filter

Sinc Filter, size 2.5

Box Filter, size 2.5

Area filter, size 2.5

Catmull-Rom
Cook Variable, size 2.5

Gaussian, size 2.5
Color Management
The Color Management rollout allows you to switch between sRGB and ACEScg workflow.
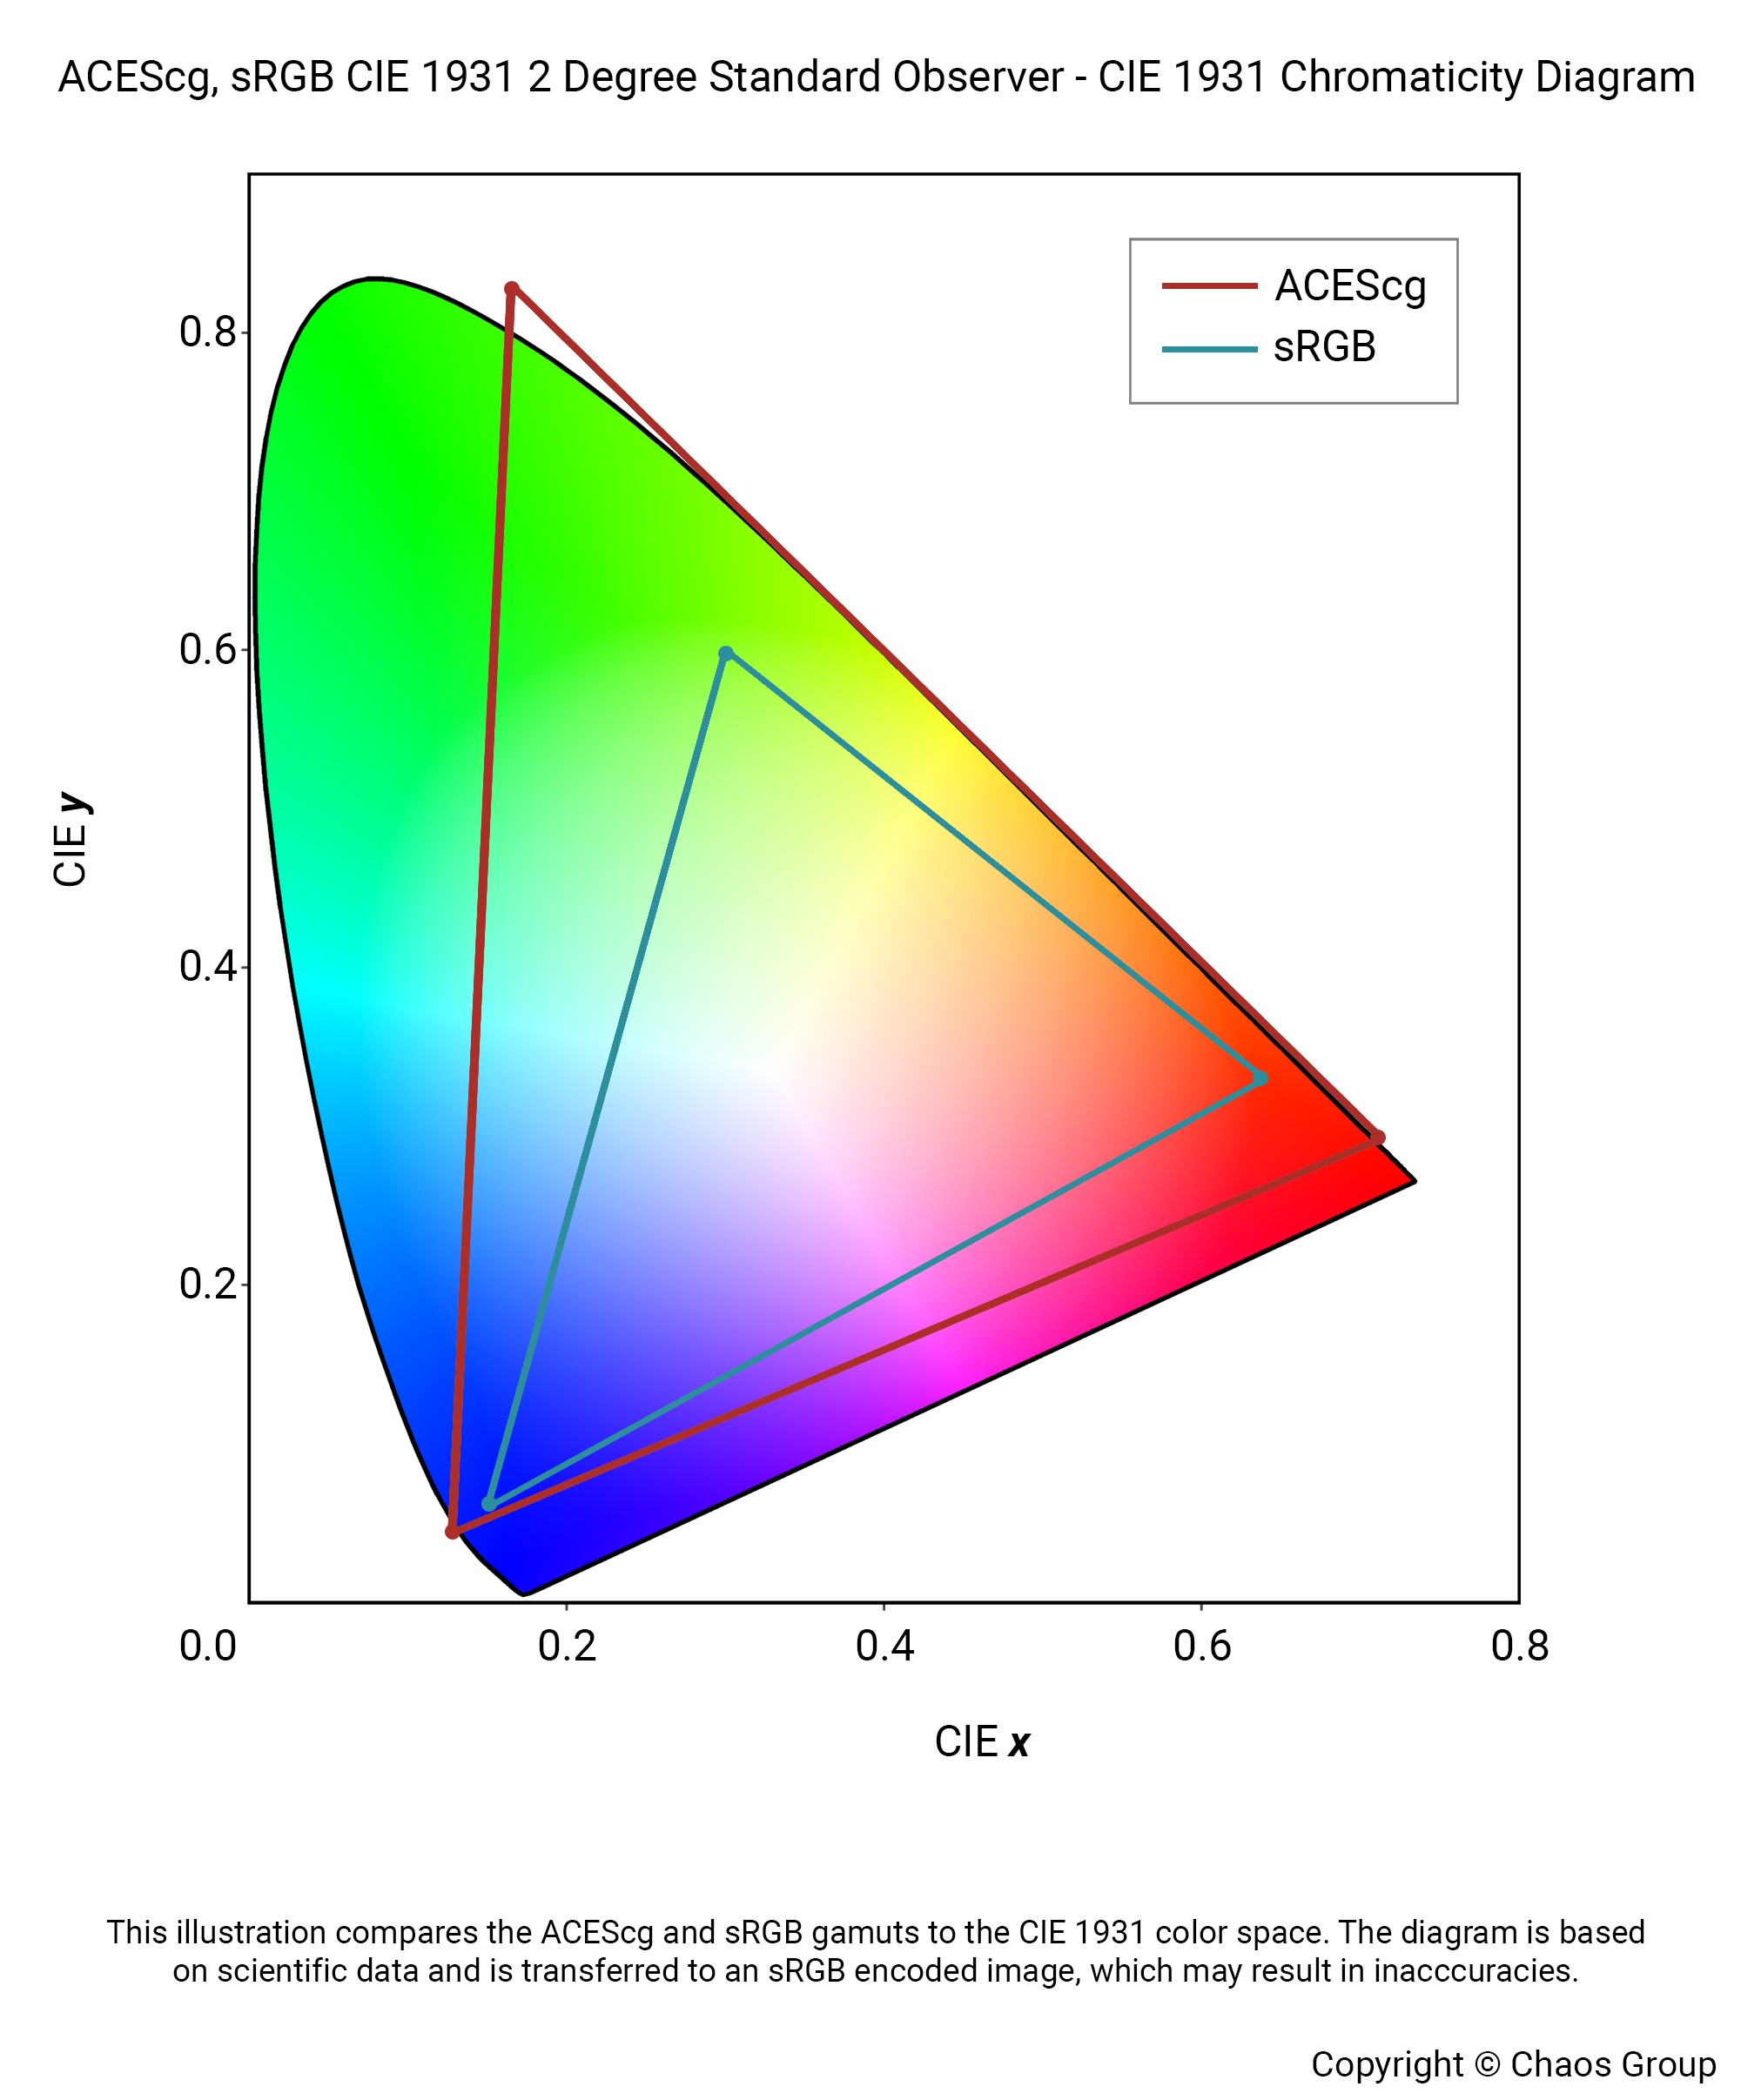
The ACEScg is a linear color working space that specifies a wider gamut of colors than the sRGB linear gamut. It allows for a greater range of colors transformations in post as its gamut envelopes not only sRGB, but also P3, Rec709, and Rec2020. Archived assets in ACEScg do not need to be remastered in case the displays standards are improved in future.
RGB primaries – Selects a display color space for the rendered image. The selected mode is saved as metadata to vrimg. The color space used in the render also affects how the rendered image is displayed in VFB when the default Display correction sRGB is set in VFB.
sRGB – Image is rendered in sRGB color space. This is the color space for most monitors and computer displays.
ACEScg – Image is rendered in ACEScg color space. This color space allows for greater range of color transformations in post. It has a wider gamut of colors than the sRGB linear gamut and should be encoded into a 16 bit floating exr.
Highlight Burn – Selectively applies exposure corrections to highlights in the image. The Highlight Burn parameter in the VFB can be used for non-destructive color edits instead.
Note that changing the value leads to render elements that can't be composited together to produce the RGB/Beauty image. This is the reason why we recommend that the parameter is set to 1.

ACES is the Academy Color Encoding System and developed by the Academy of Motion Picture Arts and Sciences. ACEScg is the version of the ACES encoding system for computer graphics, widely adopted in the industry. It has become the industry standard, because compared to sRGB, ACEScg works with a lot more color information, illustrated in this gamut graph.
To see ACEScg setup in V-Ray for Rhino, expand below.
The V-Ray ACEScg workflow does not require an active OCIO configuration. The relevant ACEScg transformations are part of V-Ray. However, if you do decide to use an OCIO configuration, the OCIO environment variable needs to be set and pointing to a suitable OCIO configuration. See the Using OCIO configuration section below for more information.
To start working in ACEScg color space, change the Color Management RGB Primaries option to ACEScg. Any 8-bit texture map should be renamed according to the color space that they are in, using “_lin_srgb”, “_srgb” or “_acescg” suffix. If neither is present, the map is assumed to be in the renderer color space as specified in the Color management rollout (in this setup, ACEScg).
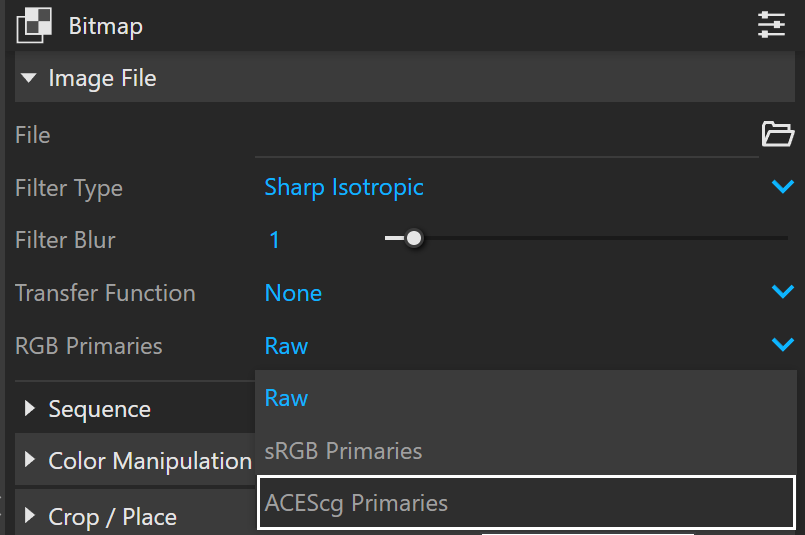
Bitmap Setup
Alternatively, set the RGB color space manually for each Bitmap texture. This can also be done if there are files that are exception to the rule-based file naming system - the settings in the Bitmap texture overrides the automatic algorithm.
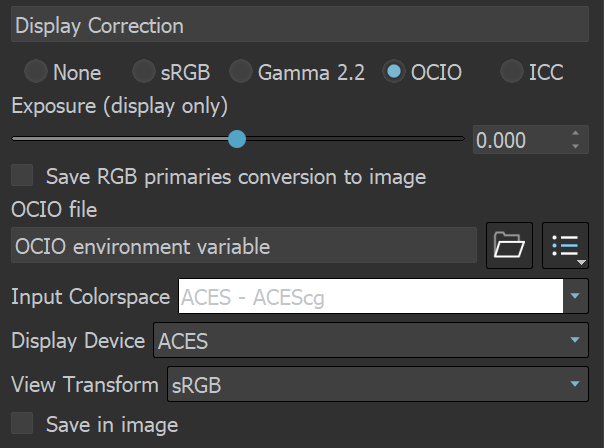
Using OCIO Configuration with VFB
An automated OCIO configuration can be set with the OCIO environment variable. The OCIO configuration can be specified in the V-Ray Frame Buffer.
There are а few steps you need to follow to set this up:
Download the Open Color IO configuration package from GitHub: https://github.com/colour-science/OpenColorIO-Configs
Set the OCIO environment variable and point it to the config.ocio file.
For example, to set up the OCIO configuration with aces_1.2:
set OCIO=C:\OpenColorIO-Configs\aces_1.2\config.ocio
When the VFB Display Correction is switched to OCIO, V-Ray reads the OCIO variable and loads the configuration there as well. Choose ACES - ACEScg for your Input Colorspace and sRGB for your View Transform. Leave the Display Device at ACES.
Optimizations
Some of the options are different when the Render Engine is set to GPU.
Adaptive Lights – Number of lights from the scene that are evaluated by V-Ray when the Adaptive Lights option is enabled. Lower values make the rendering go faster, but the result is potentially more noisy. Higher values cause more lights to be computed at each hit point, thus producing less noise but increasing render times.
When enabled, V-Ray chooses at random the specified number of lights and evaluates only those for the rendering, thus speeding up render time. This option can introduce a visible degree of additional noise, but it makes it possible to render images that would otherwise take a very long time.
Max Trace Depth – Overrides globally the reflection and refraction depth (number of ray bounces/refractions). When this is disabled, the depth is controlled locally by the materials/maps. When enabled, all materials and maps use the depth specified here. If GPU is the render engine, it limits the reflection and refraction trace depth.
Opacity Depth – Controls to what depth transparent objects are traced.
Max Ray Intensity – Specifies the level to which all secondary rays are clamped.
Secondary Ray Bias – A small positive offset that is applied to all secondary rays; this can be used if you have overlapping faces in the scene to avoid the black splotches that may appear.
Adaptivity Clamp – Specifies an intensity limit for the adaptive bucket and progressive samplers to avoid excessive sampling of overexposed areas. Lower values mean a lower limit and potentially noisy overexposed areas. Higher values produce more samples in overexposed areas.
Firefly Removal – Removes firefly artifacts from the rendered image. The default value of 0.05 is ideal in most projects. Lower values are less aggressive at removing fireflies, while higher values are more effective but may start removing legitimate features of the image (i.e. small bright highlights). 0 disables the effect completely.
Firefly Removal is only available for Bucket Sampler with V-Ray CPU.
Embree – Enables the Intel Embree raycaster. This option is enabled by default. We suggest it not be disabled, as the Embree raycaster is ideal for almost all scenarios.
Conserve Memory – Embree uses a more compact method for storing triangles, which might be slightly slower but reduces memory usage.

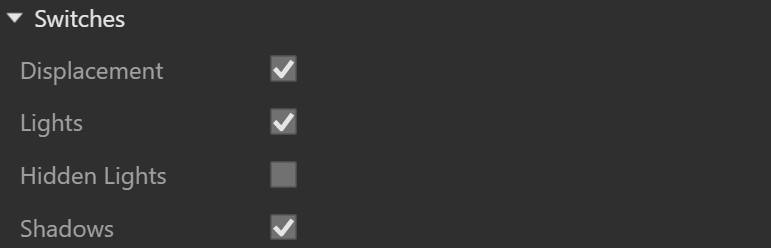
Switches
The Switches in this rollout have global effect over the whole scene.
Displacement – Enables (default) or disables V-Ray's displacement for all scene materials. Note that Rhino's displacement feature is supported.
Lights – Enables or disables lights globally. Note that if disabled, V-Ray only uses Global Illumination to light the scene.
Hidden Lights – Enables or disables the usage of hidden lights. When this is enabled, lights are rendered regardless of whether they are hidden or not. When this option is off, any lights that are hidden for any reason (either explicitly or by type) are not included in the rendering.
Shadows – Enables or disables shadows globally.
V-Ray GPU
This rollout is available only when the Render Engine is set to GPU.
GPU Engine – Determines the specific engine used when the general GPU engine option is selected in the main render settings. You can choose between CUDA and RTX.
CUDA – V-Ray GPU rendering can be performed on CPUs and NVIDIA GPUs at the same time.
RTX – Choosing RTX GPU engine mode works with NVIDIA RTX cards and cannot be combined with CPUs for hybrid rendering.
System Memory for Textures – Utilizes the CPU memory (RAM) when working with textures bigger than 1 MB, from where they are distributed on demand to all GPU rendering devices. This option effectively increases the memory capacity for textures at the cost of a small performance drawback. The legacy Out of core option is still available for CUDA for older versions.
Texture Mode – Determines how textures size is handled offering several options to optimize their memory load.
Full-size textures – Textures are loaded at their original size.
Resize textures – Limits the size of textures to a specified resolution reducing only those above the limit.
Compressed textures – All textures are loaded with the compression to decrease their consumption without decreasing in size.
Texture Size – Specifies the resolution to which textures are resized when Resize is set to Resize textures.
Bit Depth – Specifies the resolution and bit depth to which the texture is resized.
The GPU Textures mode does not affect textures attached to the V-Ray Dome Light and Environment Background and Overrides.
