This page provides information about Chaos Vantage's Animation Editor.
Overview
The Animation Editor allows for a easy way to create animations inside Chaos Vantage. It enables you to do:
- Place stored cameras in the animation track timeline to make animation clips
- Set the unit for controlling the animation to seconds or frames
- Control FPS of the animation
- Manipulate animation clips:
- Reorder and delete clips
- Set duration or make it transient(single frame length)
- Add transition items between clips with different interpolation curves
- Add pause items between clips
- View imported animation from .vrscene in scene animation track
- View imported animation from .vrscene from chosen camera
- Toggle animation and scene tracks on/off
[Home] Original Camera cannot be added to the timeline in the Animation Editor.
UI
The Animation editor can be accessed by clicking on the Editor button in the bottom toolbar
Parameters
Time – When enabled, sets the animation timeline to seconds, minutes and hours.
Frames – When enabled, sets the animation timeline to frames.
Snap at – Specifies the number of frames/seconds the camera clip automatically snaps to when moved or extended/shortened. The unit can be either frames or seconds depending on whether Frames or Time is enabled.
Def. duration – Specifies the default duration of added camera clips. The unit can be either frames or seconds depending on whether Frames or Time is enabled.
FPS – Specifies the frames per second for the animation.
Playback speed – Sets the playback speed.
Play once – Plays once the animation.
Timeline
Enable track button – Enables or disables the Cameras Animation and Scene Animation tracks.
Camera Animation track – A track where you can place your saved cameras from the Camera tab.
Scene animation track – A track where imported animation from .vrscene is placed. It is automatically populated when a .vrscene animation is present.
Slider – Helps navigating through the animation.
If the timeline is zoomed in blue triangles (,
)will appear on the side where it is clipped.
The following shortcut keys are available in the Animation editor:
Mouse wheel up/down – scrolls through the timeline if it does not fit the screen
Alt+Mouse wheel up/down – zooms in and out of the timeline.
Ctrl+LMB drag – pans the timeline.
Context Menus
Additional parameters of the clips can be accessed by right-clicking on an item to display a context menu. In the camera animation track, you can have the following items with context menu options:
Right-click on camera clip:
Add Transition Before – Adds a transition item before the selected camera clip.
Add Transition After – Adds a transition item after the selected camera clip.
Add Pause Before – Adds a pause item before the selected camera clip.
Add Pause After – Adds a pause item after the selected camera clip.
Make Transient – Makes the selected camera 1 frame in length.
Set Duration – Sets how long the selected camera clip should be. This option does not apply to recorded camera using the Record Camera Movement functionality.
Go To Start – Moves the slider to the start of the selected camera clip.
Go To End – Moves the slider to the end of the selected camera clip.
Delete – Deletes the selected camera clip.

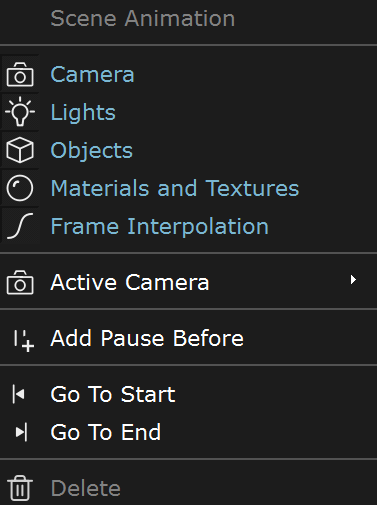
Right-click on Scene animation:
Camera – Enables transform animation for the imported camera specified in Active Camera.
Lights – Enables transform animation for the imported lights.
Objects – Enables transform animation for the imported geometry.
Frame interpolation – When enabled, interpolates values between imported frame times. When disabled, animation preview will match the .vrscene frames.
Active Camera – Specifies the camera from which the imported scene animation is viewed. Only imported cameras from .vrscene file are available for selection. Will be ignored if there is a camera or camera transition in the Camera Animation track.
Add Pause Before – Adds a pause item before the scene animation track.
Go To Start – Moves the slider to the start of the scene animation track.
Go To End – Moves the slider to the end of the scene animation track.
Delete – Deletes the scene animation track.
Right-click on transition item:
Different interpolations between camera clips:
Linear – Creates a uniform transition between camera clips.
In/Out Quad – Creates a smooth transition between camera clips. Creates a transition rate that is slow at the beginning and end, but fast in the middle.
In Quad – Creates a transition rate that is slow at the beginning and accelerates in the end.
Out Quad – Creates an accelerated transition rate at the beginning that gradually slows down.
Set Duration – Determines how long the transition item should be.
Go To Start – Moves the slider to the starting point of the transition item.
Go To End – Moves the slider at the end of the transition item.
Delete – Deletes the transition item.
![]()
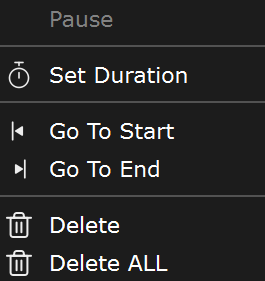
Right click on pause item:
Set Duration – Determines how long the pause item should be.
Go To Start – Moves the slider at the start of the pause item.
Go To End – Moves the slider at the end of the pause item.
Delete – Deletes the pause item.