This tutorial outlines how to add a global material override for all objects in the scene with V-Ray for Maya.
Overview
An override material, or a global material override, applies the same material to all scene objects. This can be useful for evaluating the scene lighting by creating a uniformly shaded rendering.
The override is applied to a render layer that includes all scene objects.
The Render Setup layer system, in Maya 2016.5 and later, provides flexibility for excluding some objects from the override or adding a different override to them, as needed.
This tutorial covers the setup for both the new Render Setup layers and the Legacy render layers in Maya.
Want to follow along but don’t have a license?
Render Setup Layers Workflow
To override the materials of objects in your scene, you need to create a render layer and apply an override to it. Here is a breakdown of all the steps.
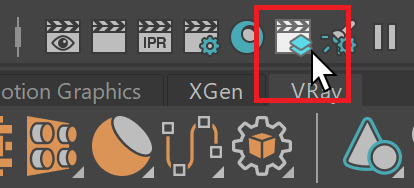
Open the Render Setup window. You can do so by clicking on the ![]() button in the Maya toolbar.
button in the Maya toolbar.
Alternatively, The render setup window can also be accessed through Windows > Rendering Editors > Render Setup
Create a new render layer by clicking on the ![]() button. In this case, we are naming the layer OverrideMaterial but feel free to name it however you like.
button. In this case, we are naming the layer OverrideMaterial but feel free to name it however you like.

Right click on the render layer and select Create Collection. Name the collection however you like.
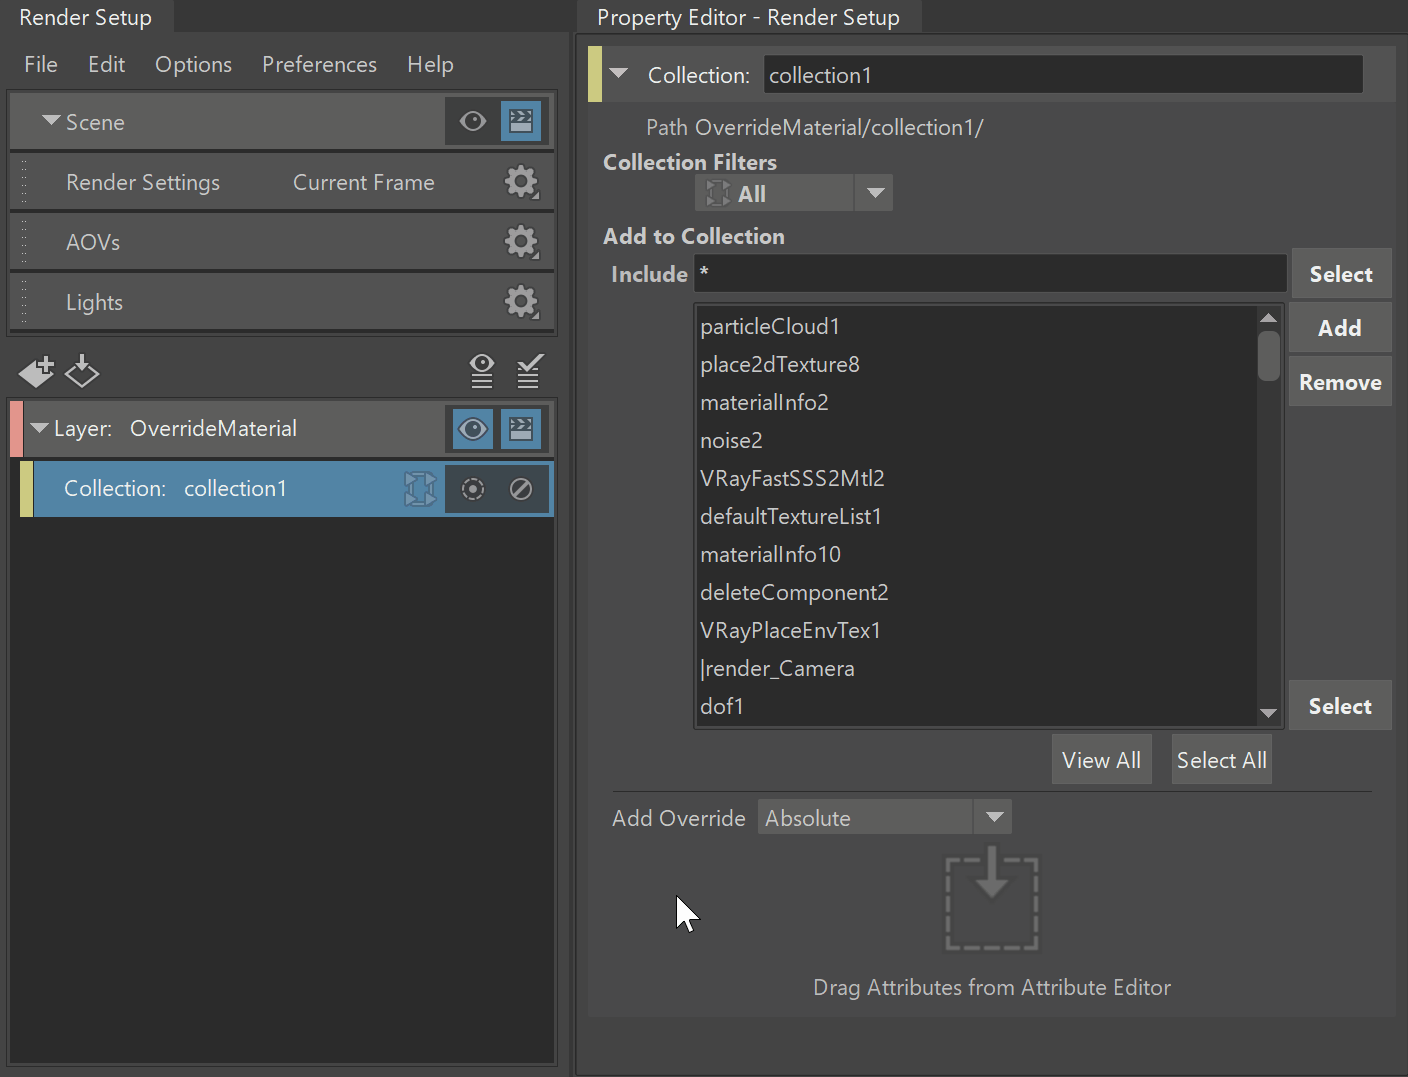
You can add whichever objects you want to the collection. The easiest way to include all objects into a collection is through pattern matching. The Include field matches patterns.
1. Set the Collection Filters to All
2. Type * (asterisk) as a wildcard in the Include field. This matches absolutely everything in the scene.
3. Click on Select to apply the selection
4. Click on Add to add the selected items to the collection
The combination of using the Collection Filters and wildcards can be used to quickly match all shape nodes, all transform nodes, etc, in case you don’t need absolutely all node types. For more information, visit the Autodesk Knowledge Network.
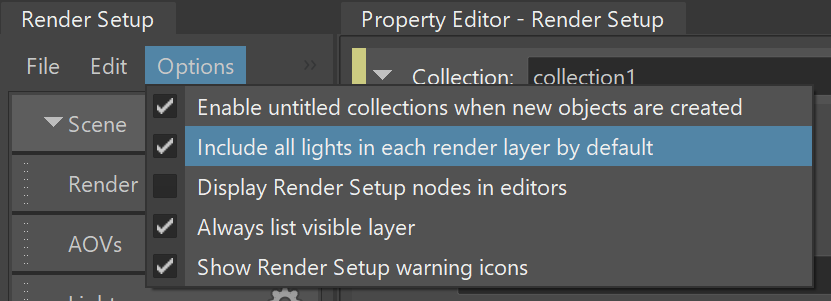
TIP: By default, Render Setup adds all scene lights to each new layer. If you need to add just some of the lights - make sure the Include all lights in each render layer by default option is disabled. It is located under the Render Setup Options tab.
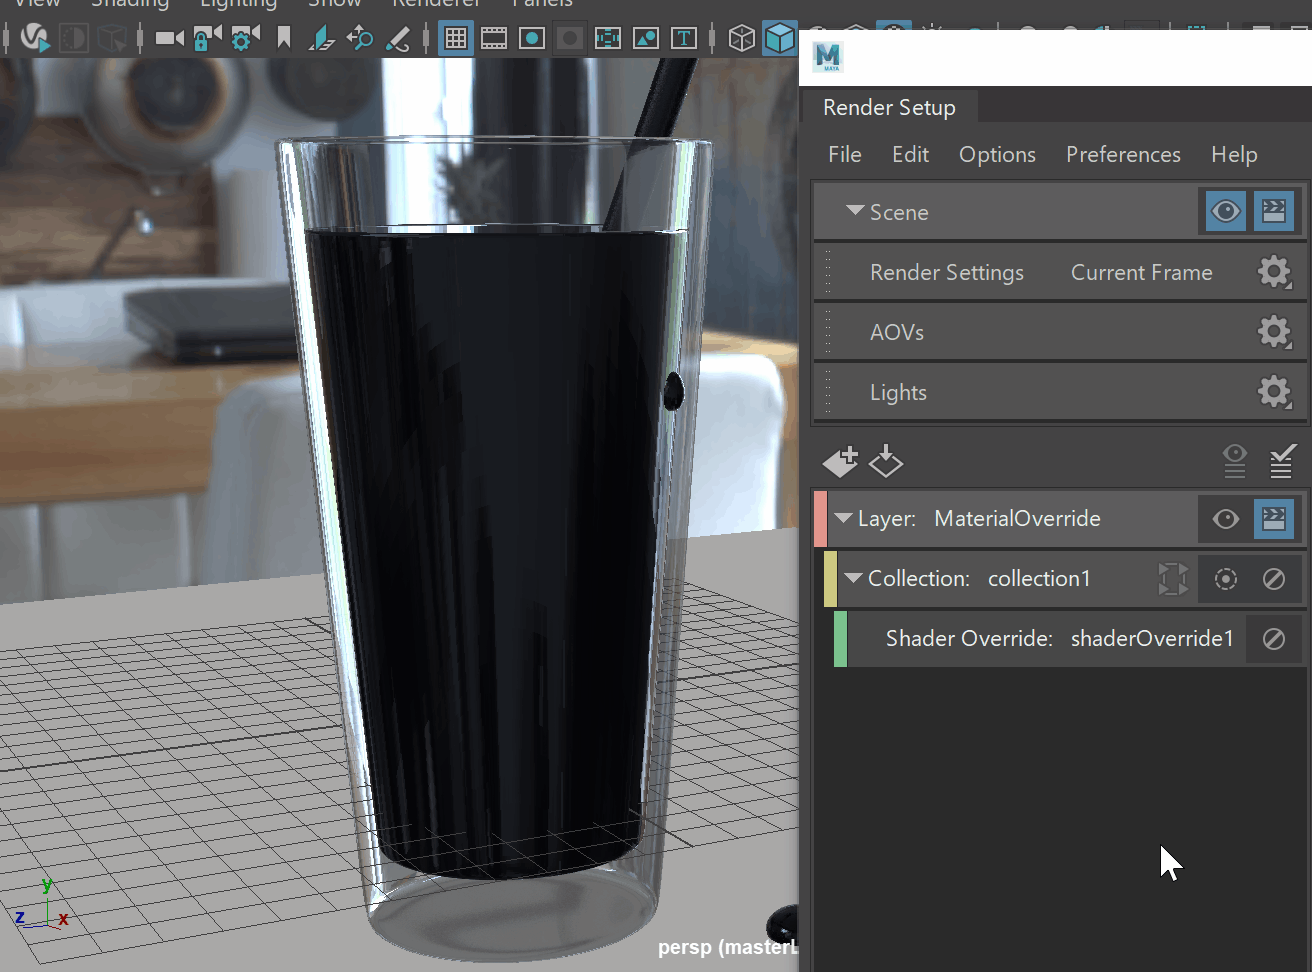
There is a difference between using a Material and a Shader Override. In this tutorial, we need a Shader Override.
The Shader Override uses a Surface Shader (i.e. without the Shading Group node that it’s attached to). The Shading Group can have surface, volume and displacement shaders. Using a Shader Override overrides the surface shader for all objects without any volumetric or displacement effects.
The Material Override uses a Shading Group (i.e. with everything attached to the Shading Group node - surface, volume and displacement). Use this only when you want your override material to have displacement and volume shaders, in addition to a surface shader.
For more information, please visit the Autodesk Knowledge Network.

Right click on the Collection and select Create Shader Override. If you want to override the surface, volume and displacement shaders for a render layer, create a Material override.
Then, by clicking on the ![]() icon, you can create a new V-Ray material as the Override Shader. Alternatively, if you have already prepared a material, you can middle mouse drag it onto the field's label to connect it.
icon, you can create a new V-Ray material as the Override Shader. Alternatively, if you have already prepared a material, you can middle mouse drag it onto the field's label to connect it.
In this tutorial, we are using a default V-Ray Material.
Once you've added the shader overridde, you can switch to the new layer by settings it as visible from the ![]() button.
button.
For batch rendering, make sure the render layer is set “renderable”, i.e. the ![]() icon is highlighted in blue.
icon is highlighted in blue.
Legacy Render Layers Workflow
To override the materials of objects in your scene, you need to create a render layer and apply an override to it. Here is a breakdown of all the steps.
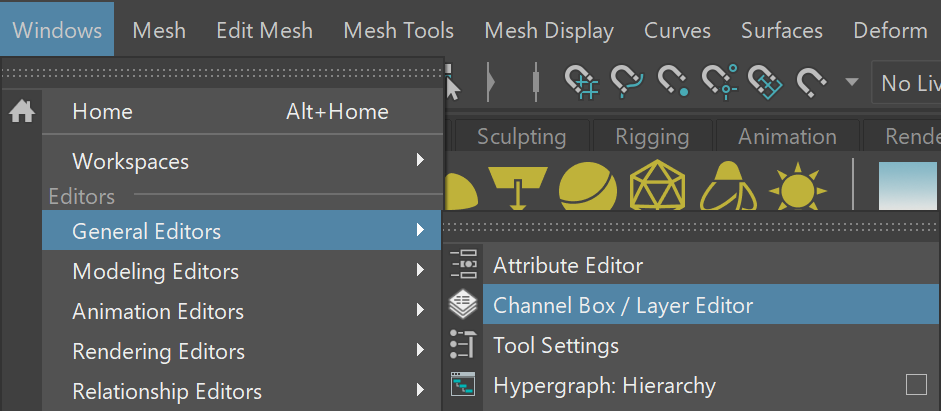
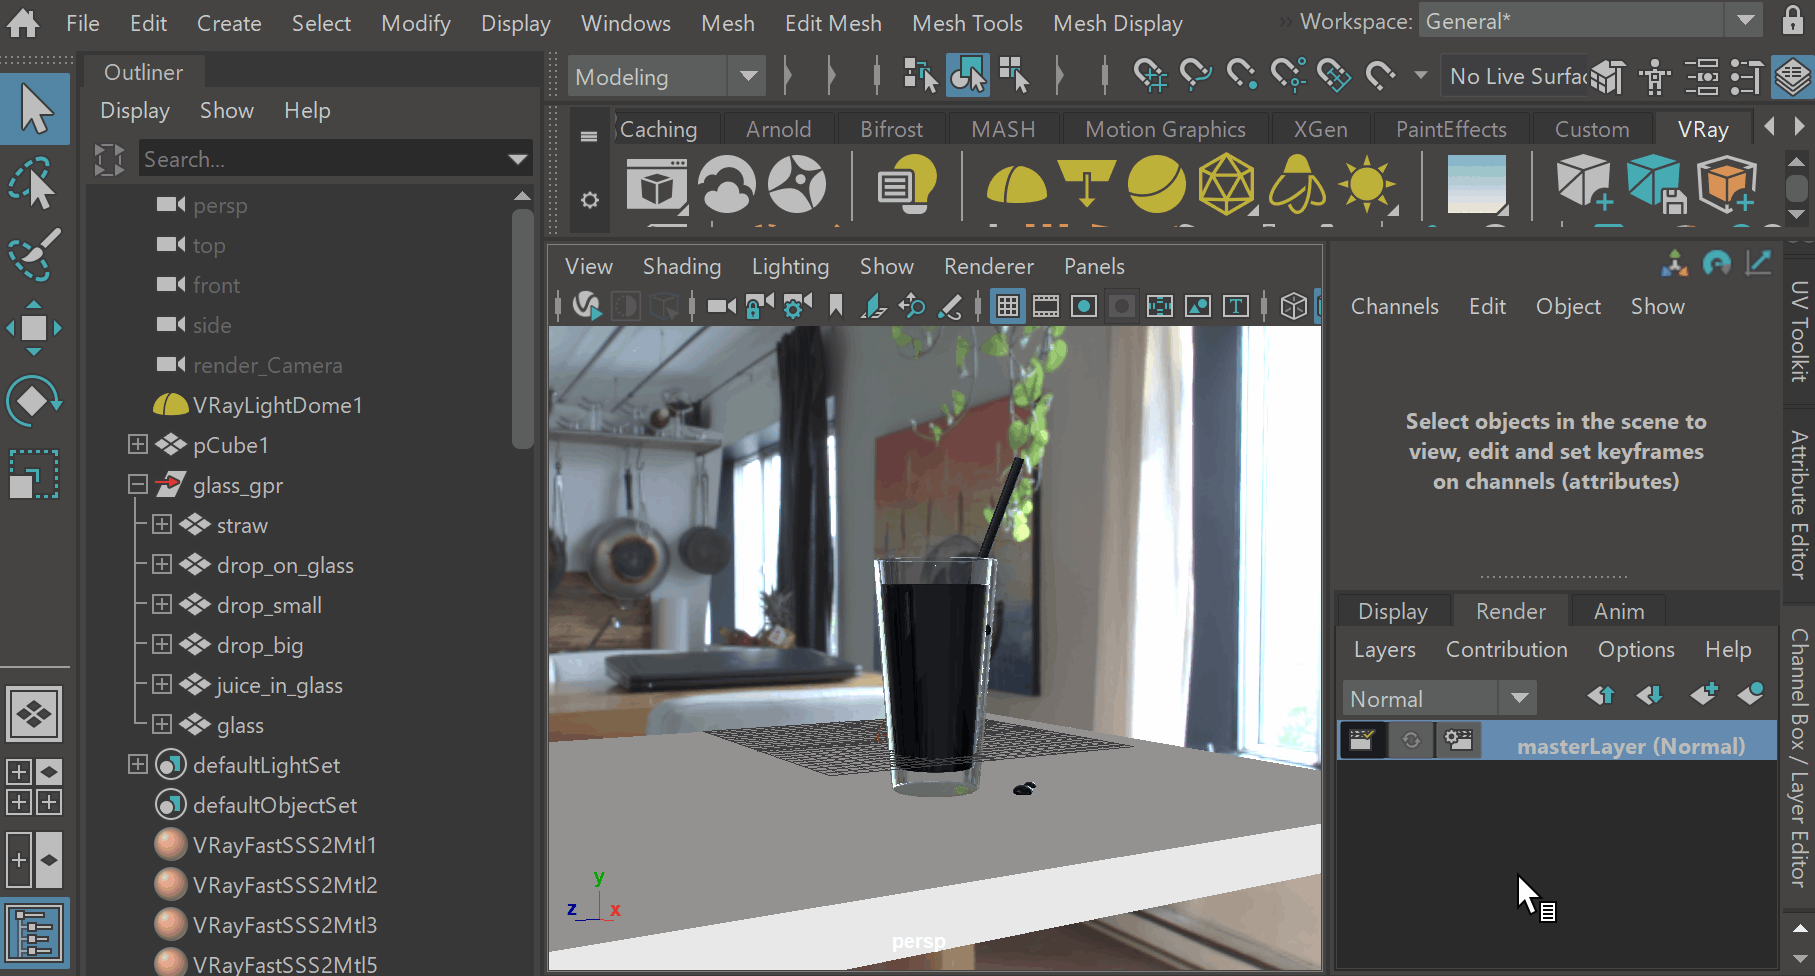
Open the Channel Box. It is generally located on the right side of the Maya interface. Otherwise, it can be accessed from Windows > General Editors > Channel Box/ Layer Editor.
In the Layer Editor, create a new layer with all objects in the scene included in it. There are a few different ways to do this.
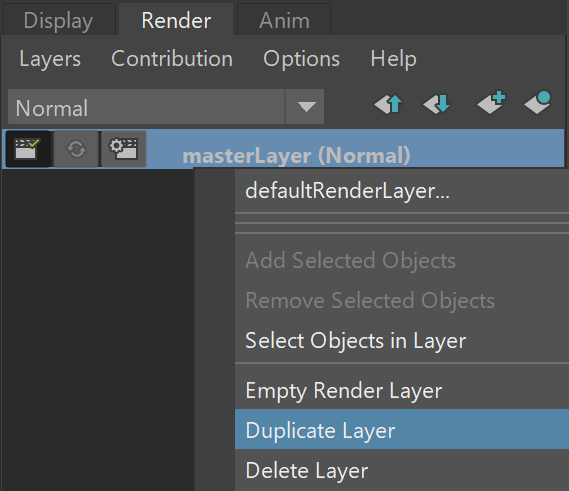
The easiest way is to duplicate the masterLayer or any other layer that already contains all the objects you want to override. Right click on the layer and select Duplicate Layer.
Another way is to select all the objects you want to include from the scene from the Outliner and create a new layer from them. In this case, we want to select all the objects in the scene. Go to the Select menu and click on All or use Ctrl + Shift + A. To create a layer from the selection, go to the Layers menu and select Create Layer from Selected or click on the ![]() quick access button.
quick access button.
Alternatively, you can create a new empty layer from the ![]() quick access button or by going to Layers > Create Empty Layer. Select the objects you want to include. Right click on the new layer and select Add Selected Objects.
quick access button or by going to Layers > Create Empty Layer. Select the objects you want to include. Right click on the new layer and select Add Selected Objects.

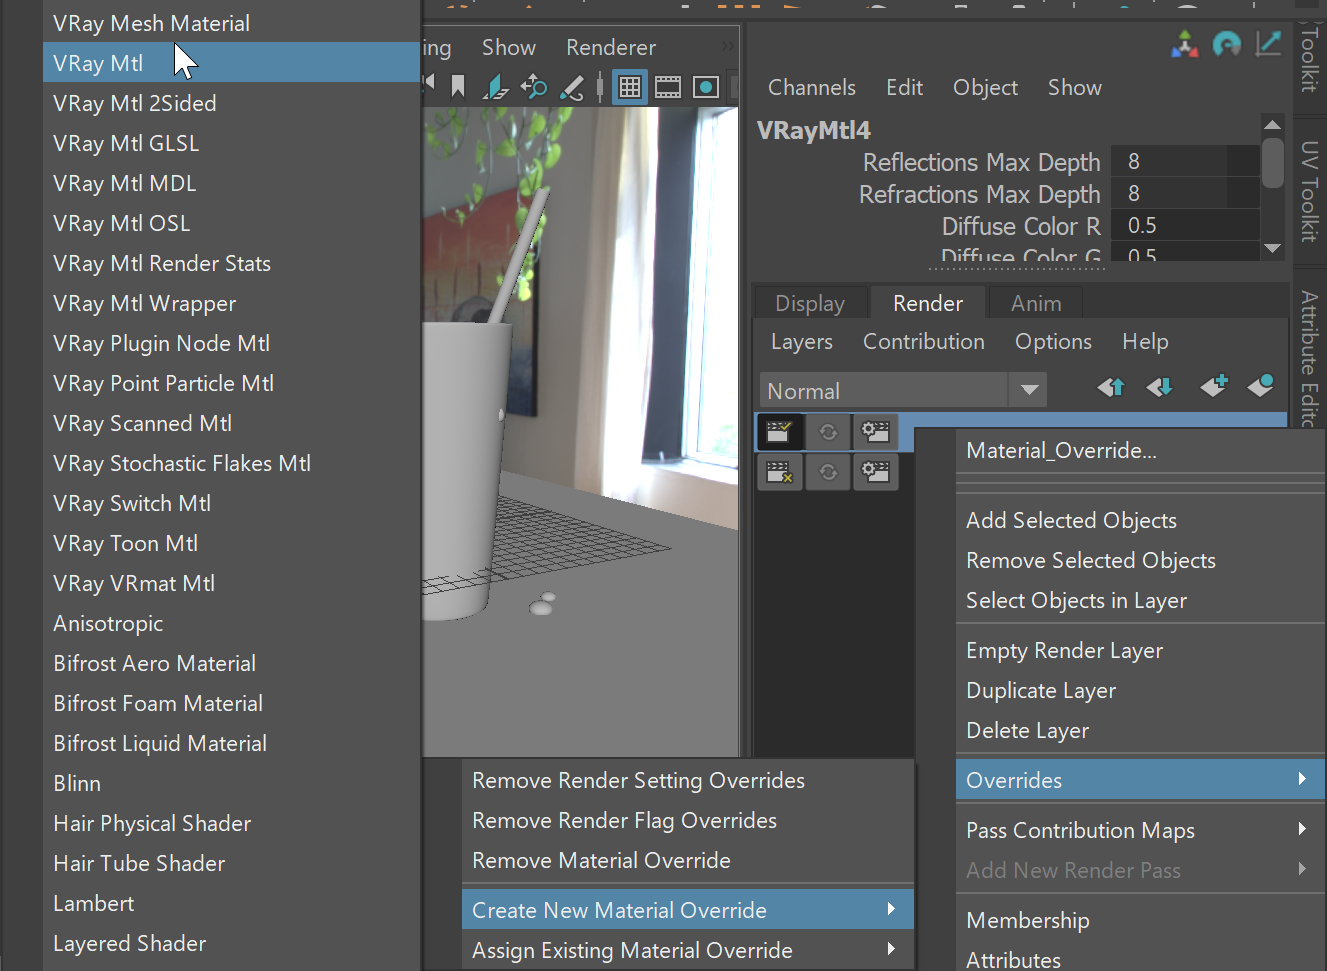
To assign a material override, go to the new layer you created, right click and select Overrides > Create New Material Override and choose a material. For this tutorial, we use a default V-Ray Material. Alternatively, you can choose an existing scene material from Overrides > Assign Existing Material Override.
Switch to the new render layer by selecting it in the Layer Editor. You can render the layer with the override by starting a new render. If you need to render it in batch, make sure the render layer is set to “renderable” i.e. the ![]() icon has a check mark on it.
icon has a check mark on it.
For more information on the Legacy Render Layer Editor, please visit the Autodesk Knowledge Network.
