This page provides an overview of the V-Ray rendering nodes.
Section Contents
Page Contents
Overview
Rendering with V-Ray in NUKE is accomplished through the VRayRenderer node. To set up a render with V-Ray, simply replace the NUKE ScanlineRender node in any render setup with the VRayRenderer. The node organizes settings for the V-Ray rendering quality and process into several tabs.
In addition to the main rendering node, V-Ray provides additional nodes to assist in the rendering process. These include a render mask, per-object render settings, and environment overrides. Within the V-Ray Menu's Render category, you can also create nodes for V-Ray Cameras and Render Elements.
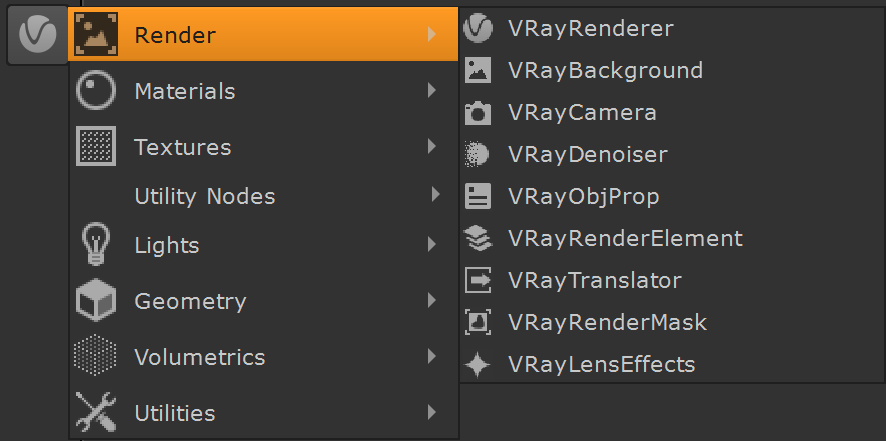
UI Path: ||Toolbar|| > V-Ray menu icon > Render
Nodes
The following nodes can be created from the V-Ray Render category:
- VRayRenderer - Contains the main settings for V-Ray and the rendering process. An additional Post Translate tab allows users to modify the scene with Python before rendering
- VRayBackground - Sets up a background image for a rendering. Additionally, separate environment overrides can be specified for GI, Reflection, Refraction.
- VRayCamera - See the Cameras section for more information.
- VRayDenoiser - See the Render Elements section for more information.
- VRayObjProp - Sets different render settings on a per-object basis. Also includes properties such as primary and secondary visibility, visibility to camera, etc.
- VRayRenderElement - See the Render Elements section for more information.
- VRayTranslator - An advanced exporter for single frame or animated .vrscene files.
- VRayRenderMask - Selects part of the image to render. It is more exact than Render Region and offers more control.