This page provides general guidelines for using V-Ray Decal with V-Ray Displacement.
Overview
With V-Ray Decal you can easily project one material on top of another regardless of the target UV set. The Displacement mapping adds further detail on the V-Ray Decal and its geometry without having to model it first.
This tutorial covers the steps for adding and controlling V-Ray Decal as well as adding V-Ray Displacement on the decal.
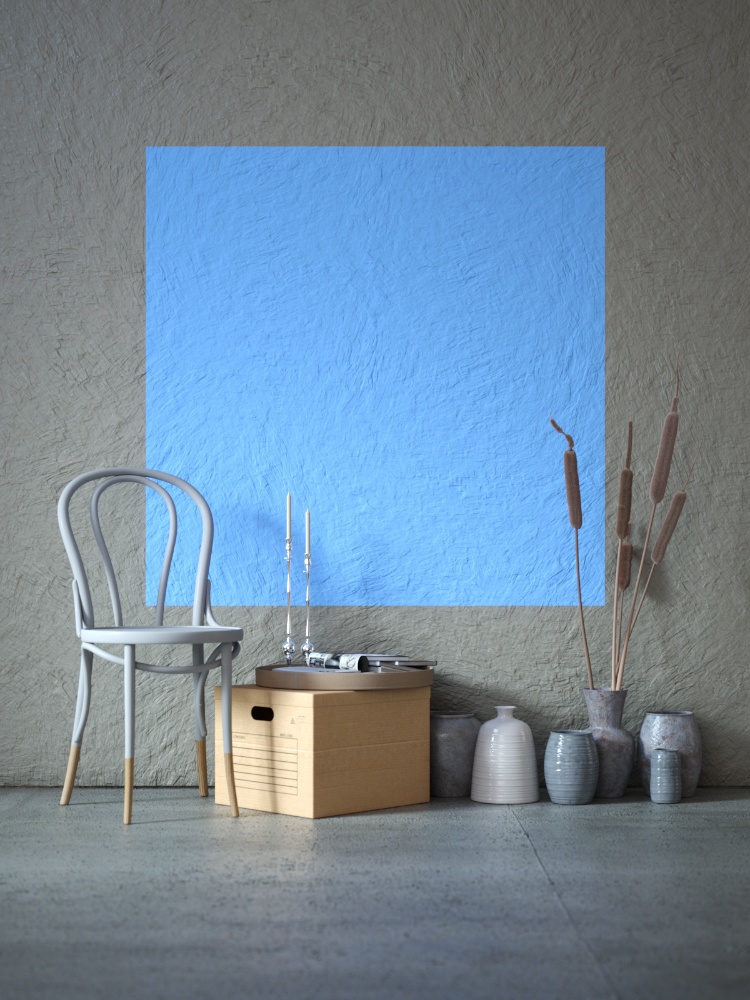
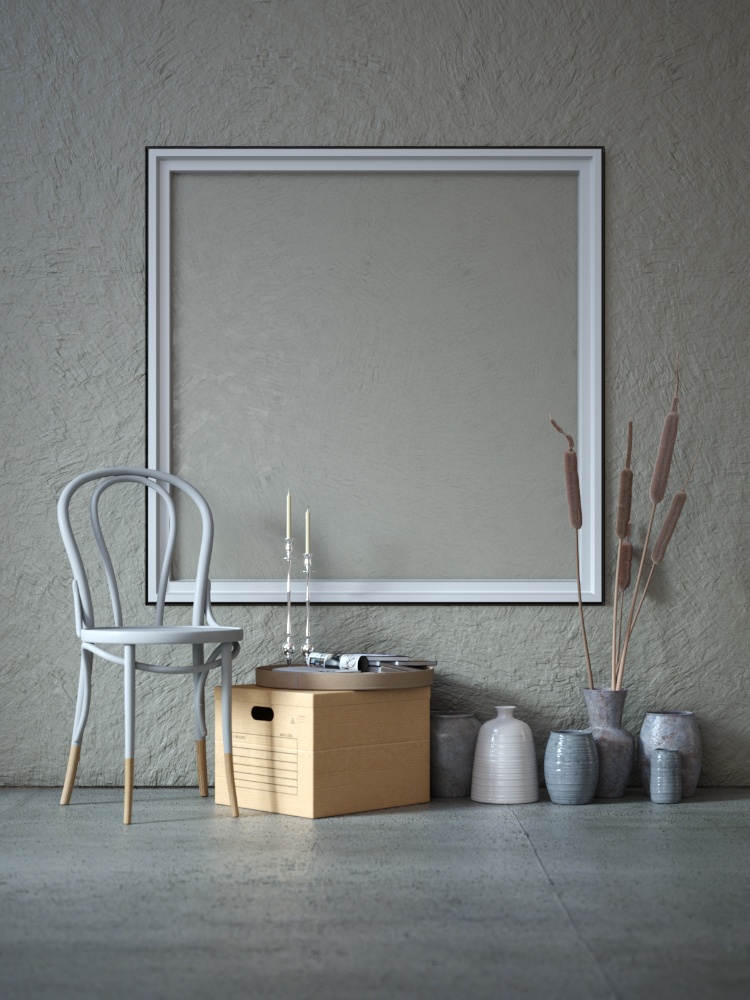
The scene used in this tutorial contains a simple room setting and the V-Ray Decal helps to create a procedural wall painting.
The scene objects are taken from the extensive Chaos Cosmos 3D library.
To download scene files: Download Scene Files
Want to follow along but don’t have a license?: Download Free Trial

Preparation
Open the Interior_Decal_start.max scene and render the Camera_01 to get a scene overview.
Note that there are some pre-applied materials in the scene: the wall geometry has a Stucco-01 material with a map linked to the Displace slot and set to 6 to give the wall some fine details.
Keep in mind that for a high precision displacement, you have to use 16-bit or 32-bit maps, especially for closeup renders. However, in this particular case an 8-bit map works just fine.
Also to avoid artifacts, you have to subdivide the underlying geometry.
You can find an Interior_Decal.vfbl file, prepared for this particular scene, in the archive. You can apply the .vfbl file through the Load layer tree preset button in the VFB or you can make your own color adjustments.

Create VRayDecal
Let’s build a painting on the wall behind the scene objects.
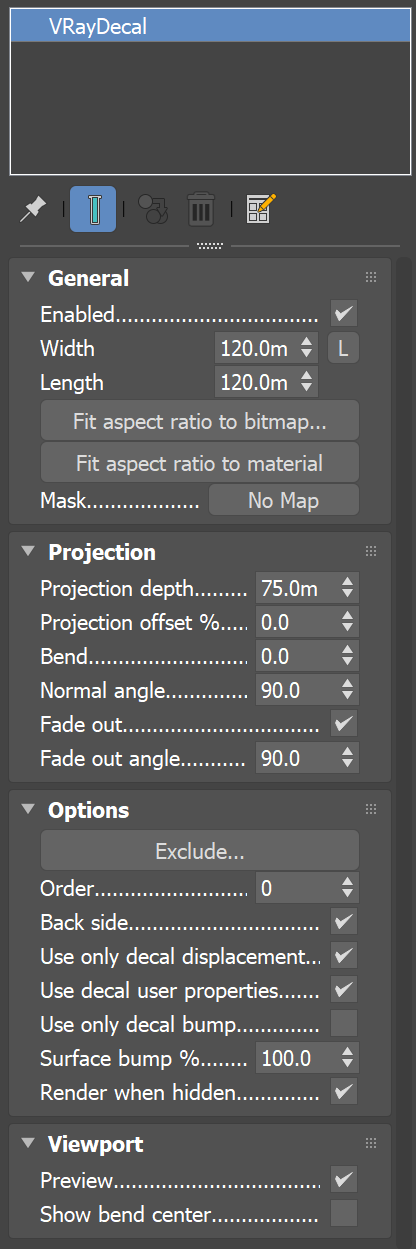
- Go to the V-Ray menu > Create > Geometry and select V-Ray Decal.
Alternatively, you can use the V-Ray Decal icon from the V-Ray Toolbar, the Create menu option, or the VRayDecal button from the Command panel.
- Enable the AutoGrid option from Command panel > Create tab, and then draw the V-Ray Decal gizmo on the wall.
- In the Modify tab of the Command panel, set the decal’s Width and Length parameters to 120 each to give the painting dimensions, and position the gizmo in the middle of the wall just above the chair seat.
- Make sure the Projection depth is large enough to give the V-Ray Decal an intersection with the wall geometry. Otherwise, it won’t project itself. In this particular case, let’s set it to 75 and move the V-Ray Decal by the X axis in front of all objects while it intersects the wall a bit.

Let’s render two example images for comparison - one with intersection and one without intersection.
Note that the V-Ray Decal projection uses the underlying wall displacement.
As the V-Ray Decal has no material assigned yet, it renders with a default material whose Diffuse color is set by the V-Ray Decal wireframe color.


Exclude Objects from VRayDecal
Move the V-Ray Decal projection again so that it intersects the wall.
Now let’s see how to exclude the objects in front of the wall from the decal’s projection.
There are two approaches: either by moving the decal behind the objects (between them and the wall), or by using the Exclude option in the V-Ray Decal parameters.
Let’s try the second approach.
- Open the Exclude/Include dialog from the Exclude button, and select all the objects in the scene that you don’t want to be affected by the decal, i.e. the Chair, the Candle_Holders, and the Cattails.

Let’s render to see the result.
Add Materials to VRayDecal
The base for the painting is ready, so let’s proceed with the creation of the painting material.
- Create a new VRayMtl and name it Painting_Mtl.
- Set the Reflection color to HSV (0, 0, 200).
- Set the Reflection Glossiness to 0.65 to simulate a soft sheen interior paint.
- Leave the Diffuse color as it is, you’ll tweak it later.
- Select the V-Ray Decal gizmo in the viewport and assign the Painting material to it.
The V-Ray Decal in the viewport now displays the assigned material and it is no more transparent. You can hide the applied material by disabling the Preview checkbox in the V-Ray Decal parameters.

Now, let’s create the painting frame.
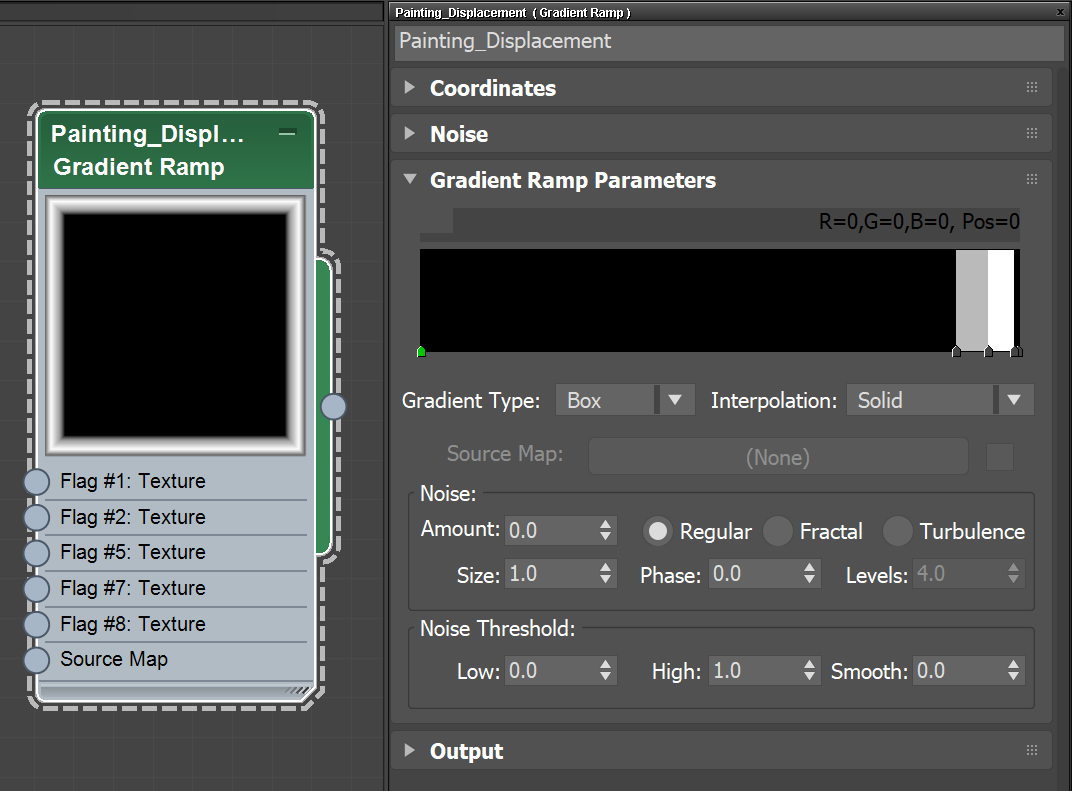
- Create a general Gradient Ramp map and name it Painting_Displacement.
- Set the Gradient Ramp type to Box and change the Interpolation to Solid.
- Create new Flags by clicking on the Ramp color diagram, position them, and then change their colors as shown in the image.
- Set the Blur value to 3 to make the frame profile sloping a bit and to soften the corners.
Add Displacement to VRayDecal
Plug the Painting_Displacement map in the Displace slot of the Painting_Mtl.
In the Maps rollout, set the Displace amount to 8.
Keep in mind that when using a Displace on a low-poly geometry, artifacts often appear in the displaced geometry, especially if the camera is close to the object.

Let’s render to see the result.

Now let's remove the displacement detail from the painting and make it smooth.
- Select the V-Ray Decal in the viewport.
- In the decal’s parameters, enable the Use only decal displacement option.
Thus, the V-Ray Decal renders only with the displacement assigned to its material, making the painting surface smooth, while the frame is displaced.
Render the scene to see the result.
Notice the thin gap around the painting frame. It's a design decision and it's intentionally produced by the last black strip in the Painting_Frame’s Gradient Ramp map.
There is no value for the displacement (since the color is black) which combined with the wall displacement creates this gap detail.

VRayDecal Masks
Now, let’s make the painting frame more interesting by adding a real painting image to it.
First, explore the Mask option in the V-Ray Decal. It allows for masking the projected material applied to the decal.
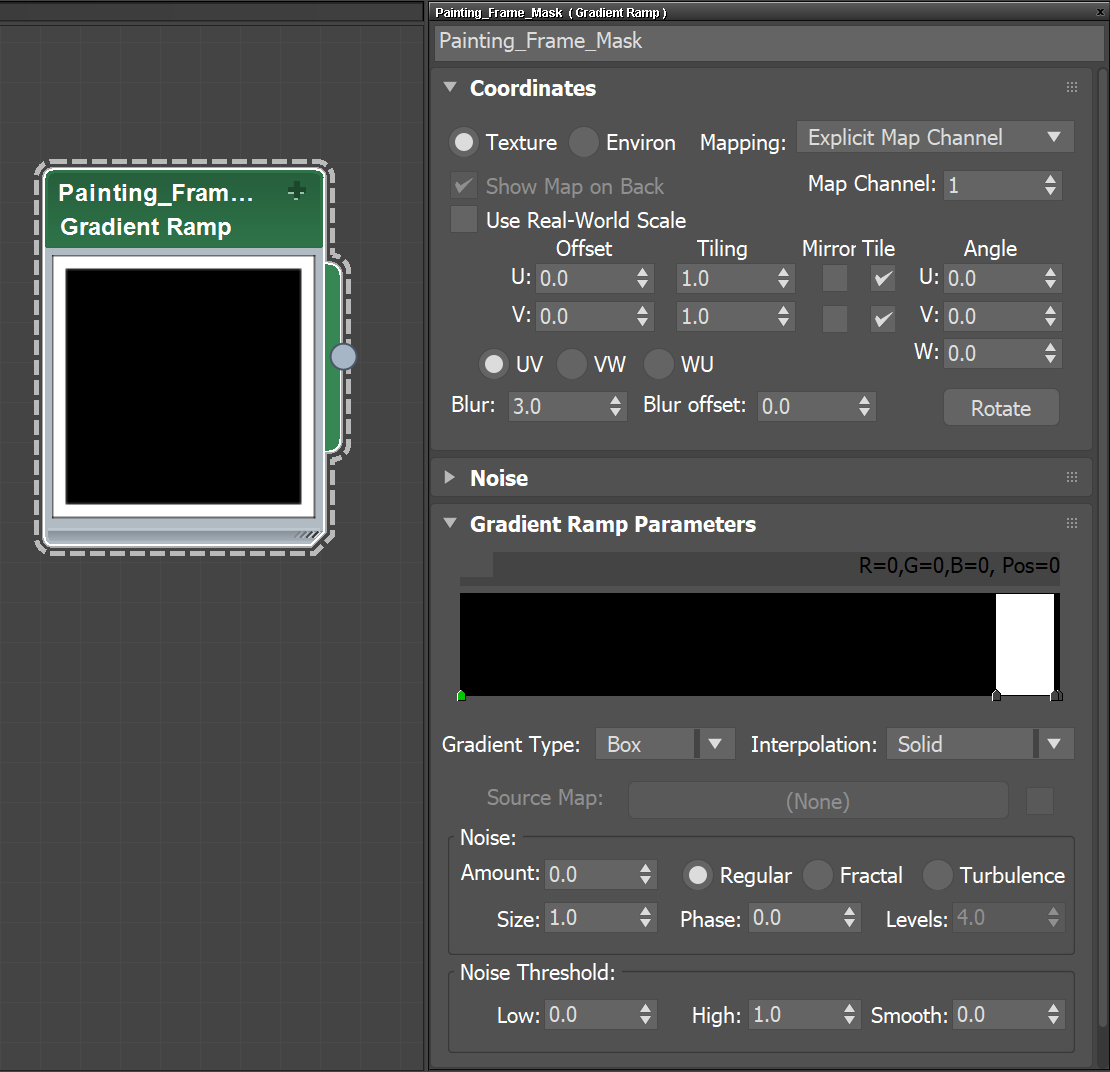
Create a general black-white Gradient Ramp map and name it Painting_Frame_Mask.
Use a black color to cut out the painting as well as to expose the underlying wall material, while the white color preserves the V-Ray Decal material on the painting frame.
Set the Gradient Ramp Flags as shown in the image.
Select the V-Ray Decal in the viewport and plug the Painting_Frame_Mask map to the Mask slot in the decal parameters.
Render.
The next example shows a more complex masking by using a 3dsMax Composite node. The setup of the Composite is shown in the image and the textures needed can be found in the Assets folder (check the downloadable scene files).
Plug the Painting_Flowers texture into the Mask slot of the Decal parameters.
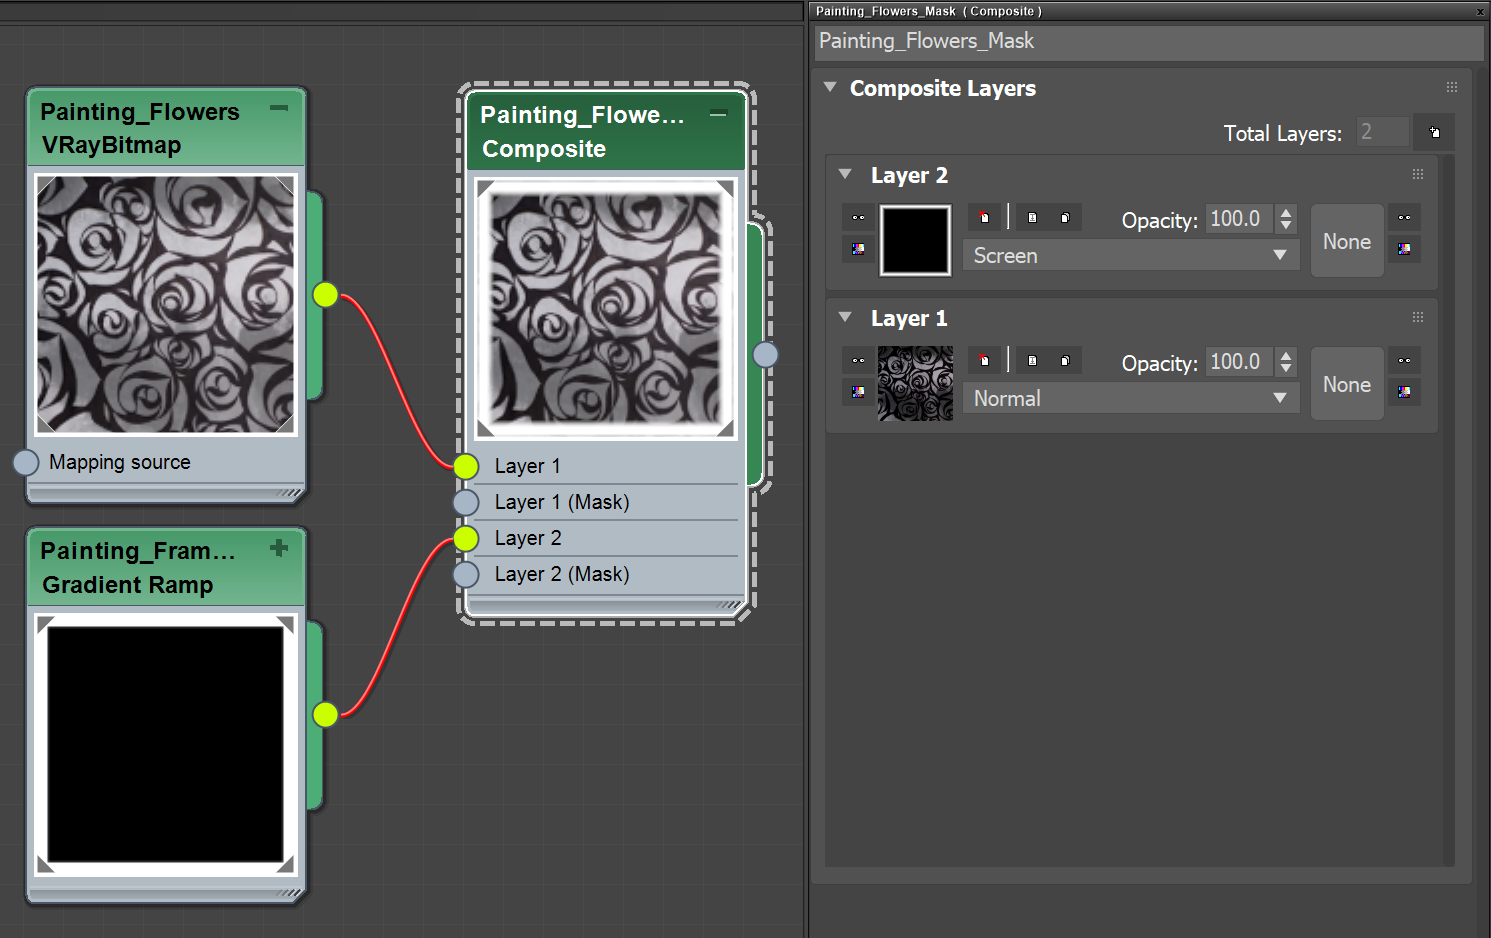
And here is the result.
Let’s render from a different angle, using the Render_Camera_02, to see the side view of the scene.

Final Result