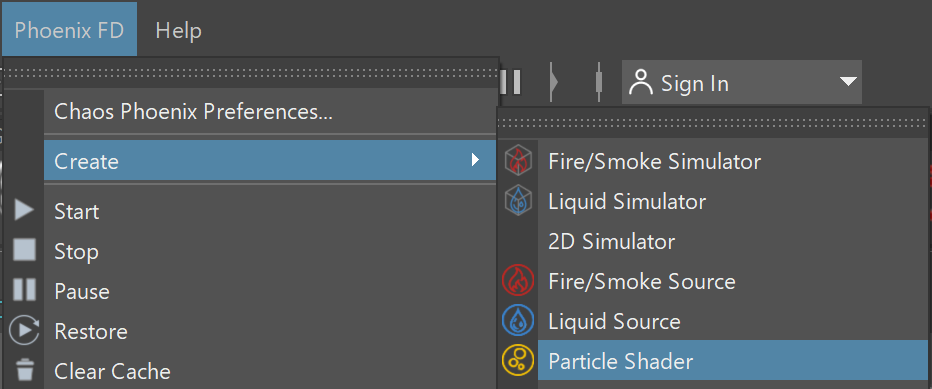
This page provides information on the Particle Shader (PhoenixFDFoam) component.
Overview
The Particle Shader component is intended to shade particles, such as Splash, Mist and Foam.
It has been optimized to render very fast in comparison to a traditional material shader, while still being capable of achieving a large variety of different effects, such as sparks, embers, sand, or even thin cigarette smoke.
Simply create a Particle Shader node, and add a Particle Group, such as Mist particles, to the Particle Shader's Particle Set. The Particle Shader will then shade the Particle Group, using the cache data from the sim. Since the Particle Shader is a separate node, you can use multiple Particle Shaders with different settings, in order to shade multiple particle systems within the same simulation.
The Particle Shader also provides several different shading modes for more sophisticated control, enabling you to quickly achieve a large variety of different effects for different scenarios. It can draw particles as Points, a variety of different Bubbles, or even voxelize particles into a grid using the Fog mode.
These Particle Shader modes are designed with specific particle types in mind; for example, the Splashes mode is typically used to shade Splash particles.
However, Phoenix also offers the flexibility to use any mode to shade any particle type, so that you can create fine-tuned appearances for different particle types when rendering.
Note that there are three different bubble-style modes available that are intended for different scenarios: Bubbles, Cellular, and Splashes. Bubbles and Splashes are typically used for shading Foam and Splash particles respectively. Meanwhile, the Cellular mode renders polyhedron-like cells, that look very similar to real foam. Consequently, this mode can be used to shade Foam particles that are close-up to the camera, and have the results look convincing.
Note that the Points mode shades particles as flat discs, and it renders faster than the Bubbles, Cellular, and Splashes modes. It can be useful for shading large scale foam and splashes over a large surface, such as an ocean surface, as well as for rendering non-foamy fluids, such as smoke or ink.
Meanwhile, the Fog mode voxelizes the content into a grid and uses the volumetric shader to render it. It can be a useful option for shading Mist particles, for example.
For a list of supported Render Elements, please check the V-Ray Render Elements Support page.
Particles rendered with the Particle Shader need external light to become visible.
Particle Systems Parameters
Particle Systems | part_systems – Displays which particle system is affected by the Particle Shader.
Edit Particle Systems – Specifies the particle systems that will be shaded by this Particle Shader.
When using the Phoenix Particle Shader to render Maya's nParticles, add Per-Particle Attribute Export and Point Size exports from the Attributes → VRay menu of the nParticles Shape node. The Point Size and Age attributes of the nParticles are not exported by default which will cause the Particle Shader's Size controls to function incorrectly.
Rendering
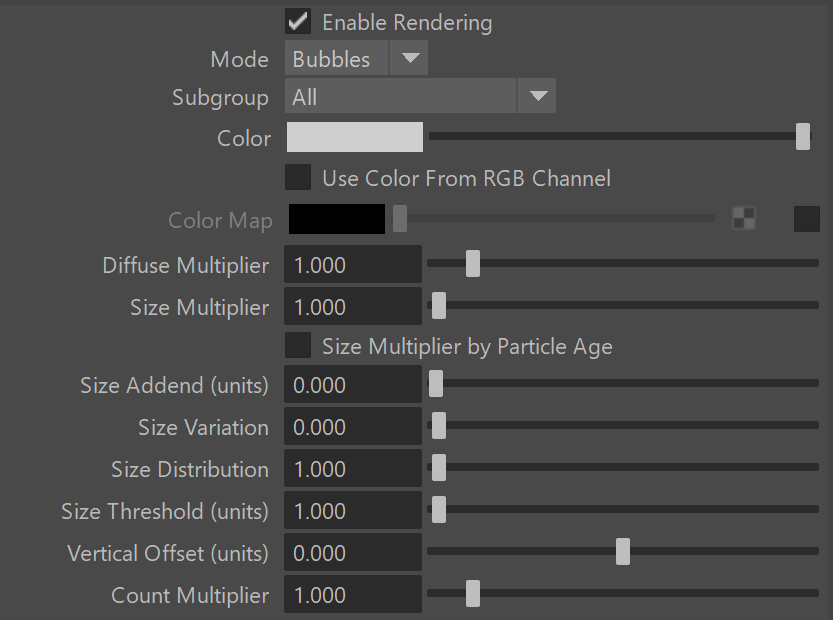
Enable Rendering | enabled – Enables Rendering of Particles in V-Ray.
Mode | mode – Sets the shading mode. For more information, see the Mode Example below.
Bubbles – Each particle is shaded as a spherical, transparent, reflective foam bubble. Surfaces of bubbles that intersect one another are visible inside the bubbles. If you get flickering or noisy renders of tightly packed masses of foam such as beer heads, you should switch to Cellular mode. Otherwise, in animation, pairs of bubbles would appear with one bubble completely in front of another in one frame, and completely behind on the next frame, once the bubble's center goes behind the other bubble's center. This would cause abrupt changes in the overall look of the foam mass in animation.
Cellular – Similar to Bubble mode, but replaces intersecting walls between bubbles with a curved wall. The degree of curvature is determined by the Pressure variation parameter. This mode is about twice as slow as simple Bubbles but is suitable for close-up foam.
Splashes – Each particle is shaded as a spherical, opaque, reflective droplet. Surfaces of droplets that intersect one another are not visible. Note that when a Liquid Simulator is connected, particles will not render as Splashes when they are inside the liquid volume of the Liquid Simulator. This is because Splashes represents small liquid droplets used to add more detail to the Liquid mesh, so it does not make sense to render them underwater.
Points – Particles are shaded as flat discs, each the size of one pixel by default. This mode is faster than Bubbles, Cellular, and Splashes and thus is suitable for large scale foam and splashes over a large surface such as an ocean surface. This mode is also suitable for rendering non-foamy fluids such as smoke or ink. Because the points are pixel sized, moving the camera away or decreasing the render resolution will make them appear denser, while moving the camera in closer or increasing the render resolution will make the particles look more scattered. Note that Point mode does not do reflections or refractions like the Bubbles, Cellular, and Splashes, so the particles will look diffuse and sometimes darker if you render them next to strongly reflective materials.
Fog – Each particle is put into a grid and the smoke shader is used to visualize the grid's content. This mode is an alternative to Point mode.
Subgroup | subgroup – The Particle Shader can skip rendering some particles depending on the selected condition:
All – All the particles are rendered.
Under Water – Only particles inside the mesh volume of the connected Liquid Simulator are shaded. Note that when Mode is set to Splashes, particles will not render with the Under Water subgroup as it would produce no effect to render liquid drops submerged in the liquid surface. This is because splash particles would die when they merge back into the liquid volume - see FLIP Particles Life Cycle.
Above Water – Only particles outside the mesh volume of the connected Liquid Simulator are shaded.
Below Size Threshold – Only particles smaller than the Size Threshold value are rendered.
Above Size Threshold – Only particles larger than the Size Threshold value are rendered.
Color | color – Specifies the particle color.
Use Color From RGB Channel | colorFromPartChan - Allows you to shade the particles based on the simulated RGB Channel. This option will extract the color information and use that as the color for the particles. This will produce a natural looking result, as each particle carries its own RGB data that is read directly. This option is also faster than the alternative approach, which would be using a Particle Texture in the Color Map slot below.
Color Map | colorMapEnbl, colorMap - Allows you to connect a texture to shade the particles based on a selected Particle Channel. Works both with regular Maya textures and the Phoenix FD Grid Texture and Particle Texture. If you are simulating the RGB channel, you can use the Grid Texture or Particle Texture to extract the color information and use that as the Color Map for the particles. This will produce a natural looking result, as each particle carries its own RGB data that is read directly. If using a regular Maya texture (e.g. a Checker map), editing the placement node of the texture may be necessary. Furthermore, when using a static Maya texture, the particles may 'swim' through the color values of the texture, producing an unnatural result.
If using a Phoenix Texture with Auto Mapping enabled, make sure that the Use Liquid Simulator option is enabled and the Liquid Simulator field points to the Phoenix container used by the Phoenix Texture.
For more information on texture mapping in Phoenix, please check the Texture mapping, moving textures with fire/smoke/liquid, and TexUVW page.
Diffuse Multiplier | diffuseMult – Provides an additional option to multiply the color brightness.
Size Multiplier | sizeMult – Acts as an additional parameter for controlling the bubbles/splashes size, independent of their particle system. This parameter can be animated to reduce the size of the rendered particles over time. If the Size Multiplier by Particle Age option is enabled, the animation is applied on a per-particle basis rather than acting simultaneously over the entire particle group. The value for this parameter is not set as a constant but instead is affected by the Size variation and Size distribution parameters. This introduces randomness in a particle system where all particles have the same size.
Size Multiplier by Particle Age | sizeMultPA – When enabled, animation of the Size Multiplier parameter is evaluated individually for each particle. The Age channel of individual particles is treated as if it is the Timeline itself, and animation applied to the Size Multiplier is evaluated over it. Therefore, the Size Multiplier animation is applied to each particle, starting at its time of birth. For example, animating the Size Multiplier to go from 1 to 0 over Timeline frames 0 to 30 will individually scale down each particle during the first 30 frames of its birth. Conversely, when this option is disabled, the Size Multiplier animation will treat the particles as a collection of points, and will scale them simultaneously, regardless of their current age. For example, animating the Size Multiplier to go from 1 to 0 over Timeline frames 0 to 30 will simultaneously scale all particles in the simulation over the first 30 Timeline frames, and none will be visible on frame 31. Note that the particle Age Channel export must be enabled from the Output rollout of the Phoenix Simulator.
When rendering nParticles, enable the V-Ray → Per Particle Attribute Export → Age option from the Attributes → V-Ray menu under the nParticle Shape node in the Attribute Editor.
Size Addend | sizeAddendUnits – Add this to the size of the particles in order to make them larger, or smaller if a negative value is used. Unlike Size Multiplier which would scale all particles proportionally, Size Addend adds a fixed number to all particle sizes. If both Size Multiplier and Size Addend are used, the Size Multiplier scales the sizes first, and then the Size Addend is added.
Size Variation | sizeVar – Adds randomization to the Size Multiplier so that different particles are scaled differently. The higher the variation, the larger the difference between the smaller and the larger sizes will be.
Size Distribution | sizeDistr – Controls the number of bubbles that change size as a result of the Size Multiplier. When this value is set to 0, all particle sizes will simply be multiplied by the Size multiplier. When this value is greater than 0, some particles will be multiplied by a higher value, and some will be multiplied by with a lower value. Setting this value to 1 ensures that an equal amount of particles will be made larger as those that remain smaller. Increasing this parameter will produce many smaller particles and fewer big particles.
Size Threshold | sizeLimitUnits – If the particle count is very high and most particles are indiscernible from the camera position, using separate shading techniques for large and small particles will give better results. This parameter works in combination with the Subgroup parameter for this purpose. When the Subgroup parameter is set to Above Size Threshold or Below Size Threshold, the shader only renders particles that satisfy the condition. Use a second Particle Shader object to render the rest of the particles by setting the opposite condition. This makes it possible to have different shading for big and small bubbles or droplets.
Vertical Offset | vertOffset – Shifts the particles along the up axis. Can be used in fish tank simulations for custom alignment of the particles floating on the liquid surface. This can be helpful when the camera is close to the water and there is a visible particle offset from the water surface.
Count Multiplier | reduction – Increases or decreases the number of particles for rendering. When the value is below 1, the particle count decreases, skipping the particles randomly. When the value is above 1, new particles are created and placed randomly among the original ones in a way that attempts to preserve the group's overall shape. Note that you have to export the particle ID channel if you want to render animation, otherwise the particles would start appearing and disappearing in different places during the animation.
Example: Mode
Mode: Bubbles (close-up)
Mode: Cellular (close-up)
Mode: Splashes (close-up)
Mode: Bubbles/Cellular
Mode: Splashes
Mode: Point
Liquid Simulator
Use Liquid Simulator | useLiq – Changes the shading of the bubbles under the water. Currently, only Phoenix Simulators can be set as the Liquid Simulator.
Liquid Simulator | liquid – Allows a link to the simulator that produced the shaded particles. Currently, only Phoenix objects Fire Smoke Simulator and Liquid Simulator can be set as the Liquid Simulator. When set, the shading of the particles changes when they are inside the liquid volume, as if they are underwater, allowing the use of the Subgroup option. Also, if the simulator uses Displacement, connecting it to the Particle Shader will displace the particles as well.
displ_fade_from_liq – Script parameter that enables suppression of the the Particle Shader's displacement, using the liquid mesh of a Phoenix Simulator. The option is disabled by default.
displ_fade_from_liq_dist – Script parameter which controls how far from the liquid surface the displacement is completely suppressed. The distance is in voxels.
Disable Liquid Shadows | noLiqShadows – When enabled, the fog color of any mesh surrounding underwater particles will not contribute to their lighting. The particles will still be tinted by the fog color when looked at from the camera, but the shadows they receive will be bright and unaffected by the fog color of the liquid mesh.
Use Ocean Border Fade | flatatoceanbord - When enabled, in Ocean Mesh mode, particle height will fade towards the ocean level like the ocean vertices do.
Note that the viewport preview does not reflect the Use Ocean Border Fade option currently.
Render Cutter
Use Cutter | useGizmo – Enables the Render cutter. Use the Cutter Geometry to use a mesh as a mask.
Invert Cutter | invertGizmo – When enabled, shading is applied outside the Cutter Geometry. This is not the same as a Cutter with inverted geometry because any rays that do not intersect the Cutter will be shaded as well.
Cutter Geometry | gizmo – When enabled, only the volume inside the provided geometry is shaded. If the normals are inverted, the volume outside the geometry is shaded. Note that the Cutter Geometry will not work when Render as Geometry is enabled.
Geometry
Render as Geometry | geomMode – This method may be needed when rendering using V-Ray. Produces procedural geometry that contains multiple transparent layers.
- When Render as Geometry is enabled, the Approximate and Approximate + Shadows settings for the Scattering parameter are not supported.
- When Render as Geometry is disabled, the Particle Shader is rendered as a volumetric, which is faster, but does not export deep images and many V-Ray render elements such as velocity, multi matte, zdepth, etc. For a complete list of the supported Render Elements in both Volumetric and Volumetric Geometry mode, please check the V-Ray Render Elements Support page.
- When Render as Geometry is disabled, overlapping Particle Shaders would blend correctly, but would not be able to blend together with other volumetric effects such as VRayEnvironmentFog, VRayAerialPerspective, etc.
Note that if Render as Geometry is disabled and you render particles below an ocean surface, you might also need to place a geometry that would serve as a bottom for the ocean. This would be needed only when rendering the ocean with a material that uses fog color. Since the particles and the fog of the material are both volumetric effects and are handled differently than meshed geometry, the volume of the ocean liquid must be closed off with another geometry, such as geometry for the bottom. Otherwise the renderer would not be able to determine if the particles are inside of the fog, or entirely behind it and they might render very dark and cause flickering or other undesirable effects in animation. When Render as Geometry is enabled, the renderer would be able to correctly render the particles with respect to the fog even without a closing geometry.
Motion Blur | moBlur – Controls the motion blur effect.
From Renderer – The current renderer's motion blur setting is used.
Force on – The content is rendered with motion blur regardless of the global setting.
Force off – The content is rendered without motion blur regardless of the global setting.
Motion Blur Multiplier | velMult – Can be used to make the motion blur effect stronger or weaker. This value can also be negative and would change the motion blur direction. It would also affect the V-Ray Velocity Render Element, even if motion blur is disabled.
To render particles simulated by Phoenix with Motion Blur, you need to enable the Particle Velocity channel export for each particle system (Foam, Splashes, Mist, Drag, etc.) from the Output → Output Particles rollout of your Simulator. Otherwise, if rendering particles from other plugins or software packages with Motion Blur, they must have a velocity channel.
Scattering | scattering – Controls how the light rays are scattered inside the particle volume.
Ray-traced (GI only) – Enables physically accurate scattering of light rays. This mode produces the most realistic results but it's the slowest to render. It requires V-Ray with enabled Global Illumination, otherwise the rendered result would be the same as if the option is Disabled. The Diffuse Multiplier does not affect the rendering in this mode.
Disabled – Disables scattering. The Diffuse Multiplier value can be used to correct the brightness because without light scattering the particles would generally render darker.
Approximate – Uses an approximate formula which is faster than Ray-Traced scattering and produces good-looking results. This option is not supported when Render as Geometry is enabled.
Approximate + Shadows – Same as Approximate, but also affects the strength of shadows over the scene geometry. This option is not supported when Render as Geometry is enabled.
Volume Light Cache | fogLightCache – Enables light caching, which can speed up bucket rendering considerably.
- This option refers to the internal Phoenix Light Cache, which is unrelated to the V-Ray Light Cache.
- This option is ignored when using V-Ray GPU or Corona. It works with V-Ray CPU.
- When using V-Ray Progressive Rendering, the Volume Light Cache option might slow down rendering startup or the overall render speed.
- This option might produce artifacts when the particles are very dense.
- This option might produce artifacts when objects cast shadows through the particles.
- This option will consume additional memory, so beware of high RAM usage when rendering many particles.
- Some V-Ray render elements might not work when Volume Light Cache is enabled. Please consult this table.
Light Cache Speedup | partLightCacheSpeedup – [Valid only when Volume Light cache is enabled] Reduces the quality of the Volume Light Cache and increases the rendering speed. You can increase this and gain render speed as long as you don't start getting artifacts and excessive flickering in animation. Note that when using complex lighting with many light sources or dome lights with HDRI maps, combined with Bubbles, Cellular or Splashes mode rendering with Highlights enabled, increasing this option will cause the highlights to jitter over the surfaces of bubbles and this might cause flickering or noise in animation.
Render Elements
Volumetric Material ID | materialID – Material ID color for the Material ID Render Element when rendering in volumetric mode (with Render as Geometry disabled)
Volumetric ZDepth | volZDepth – Used to generate a z-depth render element in volumetric mode (with Render as Geometry disabled)
Disable – Disables generating the render element.
Standard Element - The z-depth of the particles will be written to the V-Ray zDepth render element.
Phoenix Element - The z-depth of the particles will be written to a new Phoenix "zDepth" render element.
Particle Age | partAge – Used to generate a Particle Age render element, regardless of whether Render as Geometry is enabled or not.
Disable – Disables generating the render element.
Phoenix Element – The particle age will be written to a new "PhoenixFD_age" render element. Note that this will not work if Mode is set to Fog.
Bubbles|Cellular|Splashes
This rollout is accessible when Mode is set to Bubbles, Cellular, or Splashes.
Refractive Index | refrIndex – The IOR of the bubble material. Higher refractive indices produce more pronounced reflection and refraction. For more information, see the Refractive Index example below.
Bounces | bounces – Specifies the maximum depth of reflection/refraction branches. When the limit is reached, the color of the Environment texture will be used instead of starting new rays. Using more bounces slows down the rendering considerably, but reduces any flickering that may appear with a higher Refractive index.
Reflection Cut Off | reflCutOff – Starting a reflection ray is an expensive operation because it produces an avalanche of rays that can consume resources very quickly. Because of this, a reflection ray is only started if its result is very visible. This parameter is used to determine the critical visibility at which new reflection rays will start. If the visibility is less than the specified value, the Environment map will be used instead of tracing a new ray. This option has no effect if the Bounces are 0.
Highlights Width | highlightsWidth – Specifies the width of the specular highlights.
Highlights Strength | highlightsMult – Specifies a multiplier to control the brightness of the highlights.
When using complex lighting with many light sources or dome lights with HDRI maps, increasing the Light Cache Speedup option will cause the highlights to jitter over the surfaces of bubbles and this might cause flickering or noise in animation.
Pressure Variation | pressureVar – This parameter is used when Mode is set to Cellular, which produces a wall between each two bubbles in contact. In nature, no two bubbles in contact have exactly the same internal pressure, and the bubble with the higher pressure pushes against the lower-pressure bubble to produce a curved wall between the two. In the simulation, a random pressure difference is assigned to bubbles in contact, with the Pressure Variation value as the maximum. Larger values result in a more pronounced curve between the bubbles.
Optimize Congestion | optimize – When the particles overlap significantly in tight bunches such as beer head simulations, the render speed may drop significantly. With this option, an optimization pre-process is performed that deletes the bubbles that are fully inside other bubbles, and decreases the sizes of significantly overlapped bubbles. This reduces render times with a minimal impact on quality. Enabling this option is highly recommended.
If you get noise and flickering during animation rendering, try disabling Optimize Congestion as it will help bubbles to not disappear and re-appear in animation.
Reflection Coloring | reflMapEnbl, reflMap – Used to represent the coloring of the bubble reflection due to interference. The texture is sampled using the direction instead of the explicit coordinates.
Environment | envMapEnbl, envMap – This map is used when the visibility is less than the Reflection cut off value or when the renderer's reflection depth is reached. (For example, when using V-Ray's VRayMtl, reflection depth is determined by the Cutoff and Reflection Max Depth parameters.) The texture is sampled using the direction instead of the explicit coordinates.
Use Glass Geometry | useGlass – Used to introduce some corrections in the way bubbles interact with glass. Note that the bubbles should touch the glass geometry, otherwise this option has no effect.
Glass Geometry | glass – Allows a link to the geometry object to help correct the bubble interactions with that particular item in the scene. For more information, see the Glass Geometry example below.
Example: Refractive Index
The image below shows the render differences between Refractive Index values of 1.2, 1.6, and 3.0.
Example: Glass Geometry
Foam rendered with Glass correction disabled.
Foam rendered with Glass correction enabled.
Points
This rollout is accessible when Mode is set to Points. When rendering in Point mode, changing the Image Output resolution from the Render Settings will affect the appearance of the particles rendered as points. This is due to the fact that points are treated as pixel-sized. If you double the resolution, make sure to double the Point Alpha and Point Radius settings as well.
Ignore Particle Size | ignoreSize – If the particle sizes of the rendered particle system vary, the Point shader varies the opacity of the rendered points. This option allows to turn off this variation of the alpha, for example in case the particle system contains particles that are too large and leave hard tracks with motion blur.
Point Alpha | ptAlpha – Specifies a multiplier for the opacity of the points.
Point Radius (pixels) | ptSize – Specifies a multiplier for the size of the point disc. By default, points are the size of one pixel. Increasing the point size speeds up rendering.
Shadow Strength | ptShadStren – Specifies a multiplier for the shadow strength. Increasing this value creates darker shadows but slows down rendering.
Motion Blur Step (units) | moBlurStepUnits – Unlike the Bubbles, Cellular, and Splashes modes, motion blur in Point mode is calculated by cloning the particle several times and placing the copies along the trajectory. This parameter controls the distance between the copies. The smaller the step, the higher the quality, though at the cost of render time.
Motion Blur Limit | moBlurLimit – The maximum number of particles per motion blurred streak. If the particle system contains very fast particles, or if the motion blur step is too small, there is a possibility of rendering overload due to a huge number of particle copies. This parameter sets a limit on the number of clones to keep a reasonable rendering time.
ptSizeExtra – Script parameter that is 0 by default and can be increased to suppress grid artifacts. Increasing the value too much might slow down the rendering considerably.
Example: Point Radius
The image below shows the render differences between two images rendered at 960x540 vs 1920x1080. The 1080p image is scaled down to 540p to show the difference in the apparent Point Alpha and Point Radius.
Fog
This rollout is accessible when Mode is set to Fog.
Decreasing Fog Voxel Size by 2x will increase memory usage by 8x.
Fog Voxel Size | fogResUnits – Specifies the cell size of the smoke grid.
Fog Density | fogMult – Specifies a multiplier for the fog density.
Render Step (%) | fogStep – Ray marching step as % of the cell size. Smaller step gives better quality and longer render times.
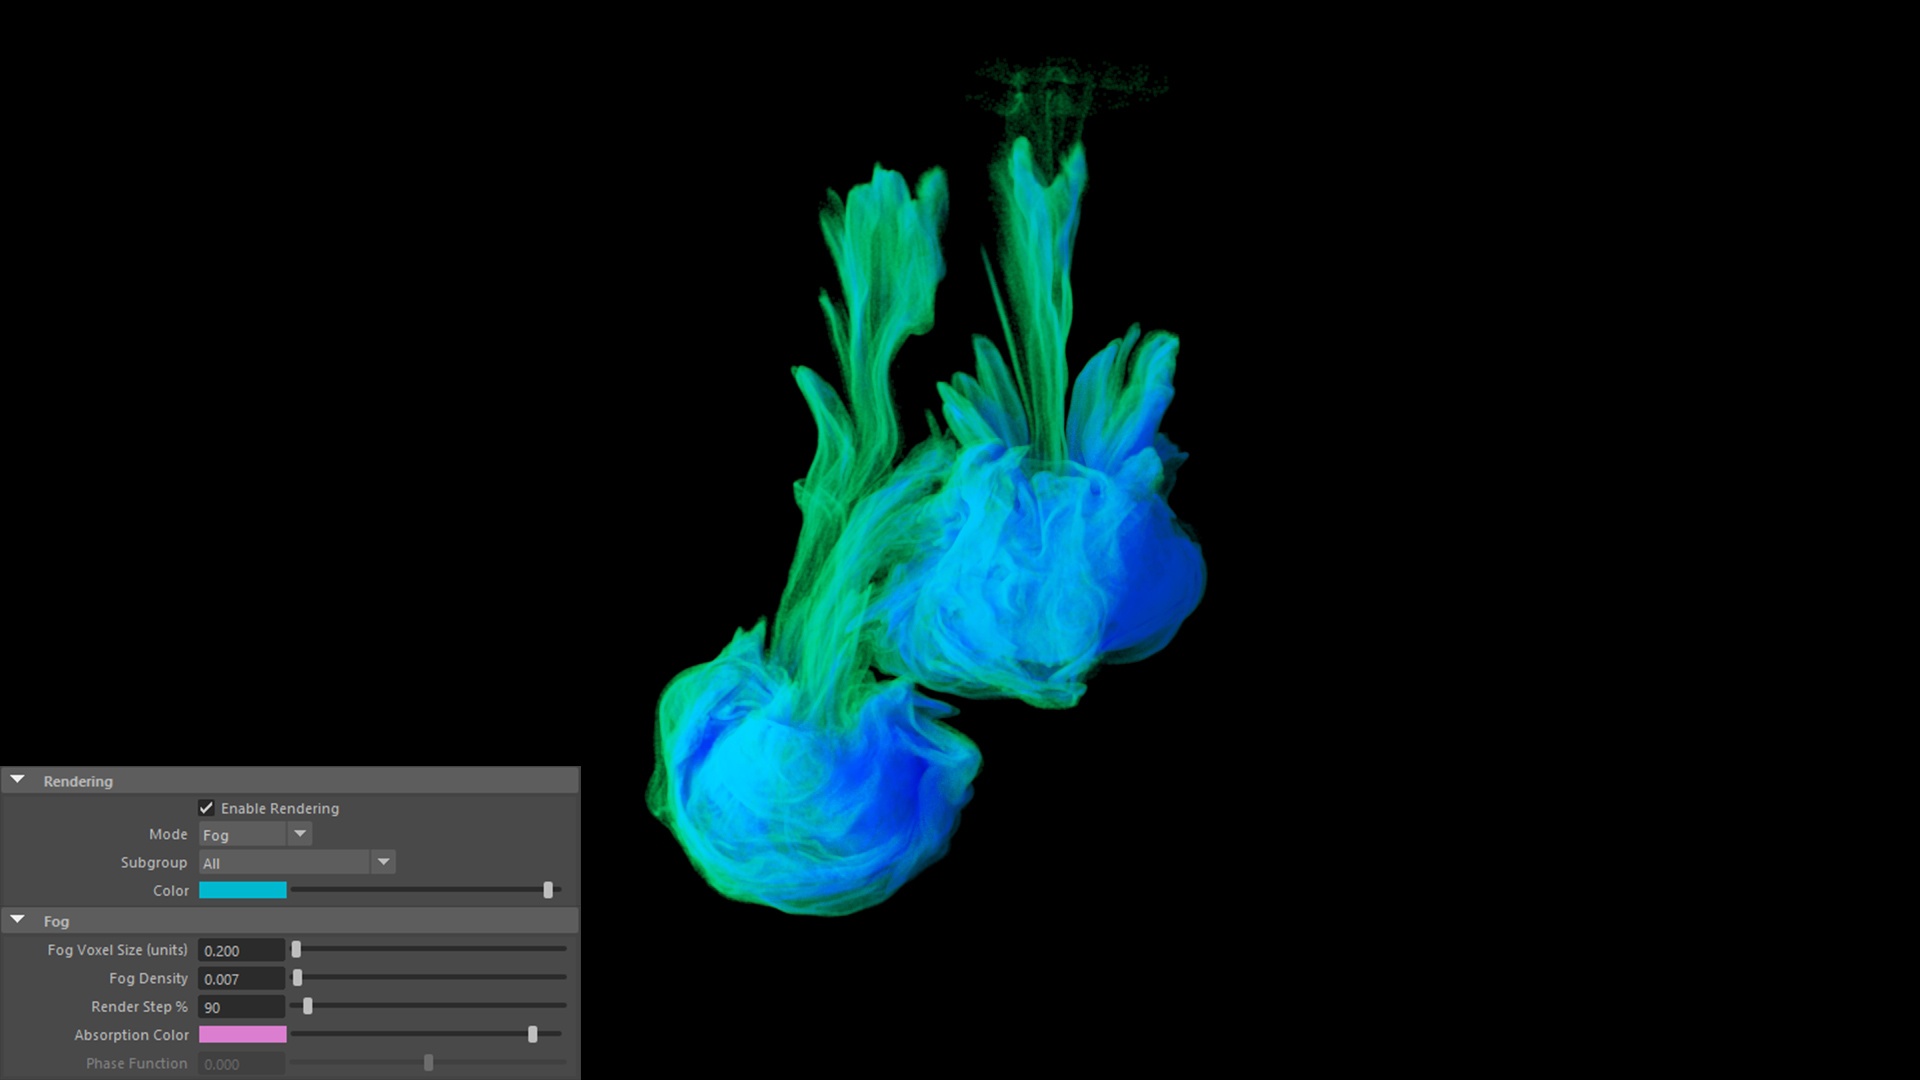
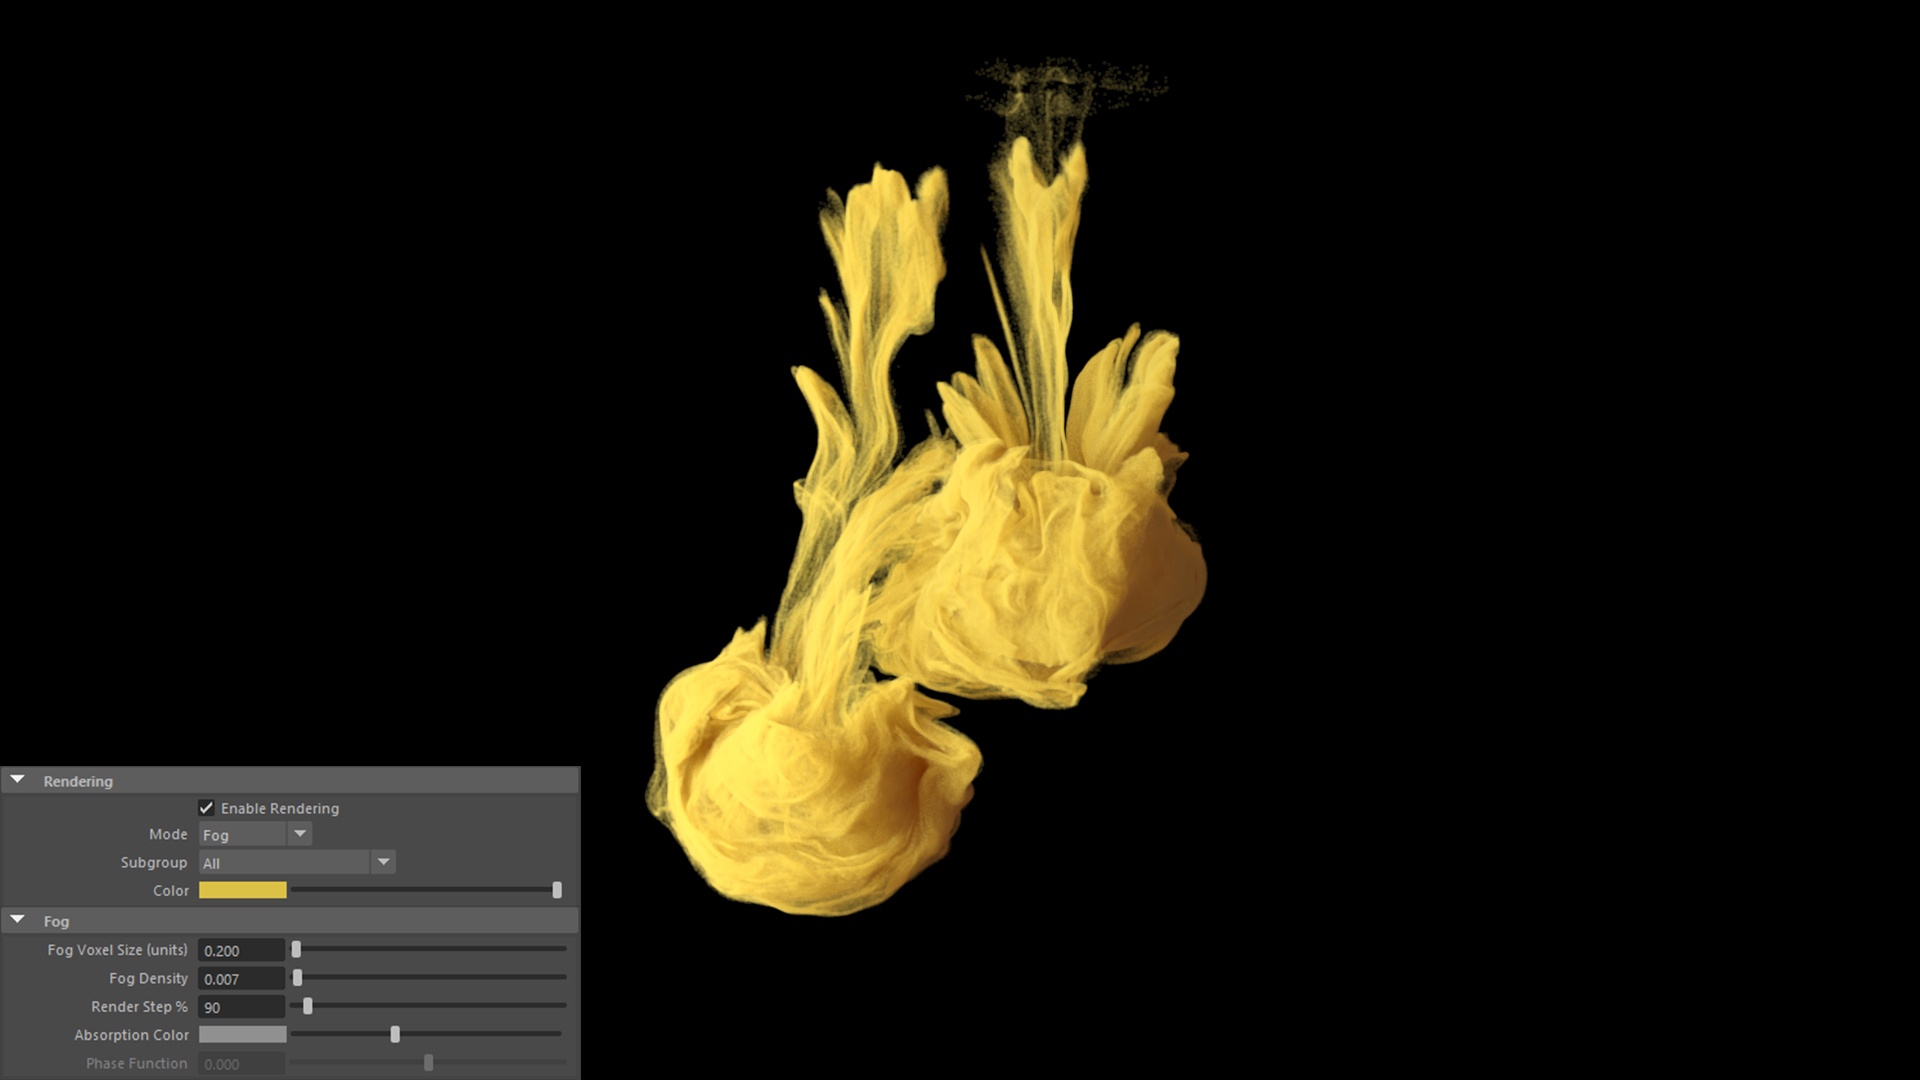
Absorption Color | fogAbsorptionColor – Controls the color of the volumetric shadows and the tint for the objects seen through the volume. Brighter colors make the volume more transparent, while darker colors make it more opaque (denser).
Phase Function | phase_function – Controls the direction in which the light will scatter inside the volume. Negative values correspond to backward scattering, which mimics a volume made up of solid particles and will produce denser and more detailed looks. Negative values are more suitable for smoke or dust effects. Positive values correspond to forward scattering, which mimics a volume made up of water droplets where light will scatter more. Positive values are suitable for highly scattering volumes such as clouds. The default value of 0 will scatter the light in all directions and create an even and diffuse look. The option is ignored when Scattering is set to Approximate or Approximate+Shadows.
Example: Fog Absorption Color
To make the Fog Mode's Absorption Color more pronounced when combined with a grey Color for the Fog, you’ll generally need to introduce saturation for the absorption, and increase its color HSV brightness value a bit.
The Absorption Color can affect the opacity of the fog as well, depending on how bright or dark its color is. Brighter colors make the volume more transparent, while darker colors make it more opaque (denser).
Using bright and highly saturated absorption can produce very prominent colors. Introducing color into the Fog's Color can create even more striking results.
Here are some examples showing different Absorption Color and Color combinations.

