This page provides a quick guide to some basic techniques in Chaos Player.
Overview
Chaos Player is designed for fast and effective digital review workflows. All it takes to preview a sequence is to drag a single file from it over an open Chaos Player window and press play.
Launching Chaos Player
Under the different operating systems, Chaos Player can be launched from these default locations:
- Windows: The desktop shortcut or C:\Program Files\Chaos Group\Chaos Player\chaosplayer_qt5.exe . Alternatively, you can launch it from Start > Chaos Player;
Linux: /usr/ChaosGroup/ChaosPlayer/ChaosPlayer.sh . Alternatively, you can launch it by typing chaosplayer in a terminal, which calls the startup script from /usr/bin/chaosplayer.
- macOS: /Applications/ChaosGroup/ChaosPlayer/chaosplayer_hw.app
OpenGL support
Chaos Player hotfix 1 (version 2.00.22) introduced OpenGL support for Windows and Linux to provide faster and smoother playback.
Chaos Player can still be started in pure CPU mode by using the --enable_cpu_render startup flag.
To use the flag:
- Windows: C:\Program Files\Chaos Group\Chaos Player\chaosplayer_qt5.exe --enable_cpu_render. Alternatively, right-click the Desktop shortcut for Chaos Player, select Properties and add the flag at the end of the "Target" field in the "Shortcut" tab.
- Linux: /usr/ChaosGroup/ChaosPlayer/ChaosPlayer.sh --enable_cpu_render. Alternatively, the chaosplayer shortcut link can be called from any directory in a terminal, followed by the CPU startup flag: chaosplayer --enable_cpu_render.
Loading sequences
To add a sequence as a layer in Chaos Player, you can do any of the following:
- Drag and drop a file over an open Chaos Player window. Note that if you want to add an image that is a part of a sequence as a Still Image Layer, you should hold the Ctrl key while dragging and dropping it. Holding the Shift key while dragging will place the layer current one in the timeline. You can also drag and drop an entire folder that contain an image sequence.
- Use the Add Layer icon (
 ) on the toolbar.
 - Go to File > Add Layer or press Ctrl + L to open the Add Layer dialog. Here you can select an image file and click Open to add it as a layer. Chaos Player automatically detects if it is a part of a sequence, a single file, or part of a stereoscopic sequence, and creates the appropriate layer type.
- Double-click on a file in Windows Explorer (if it is associated with Chaos Player already).
- Copy/paste a file from Windows Explorer. Note: If it is an image file, it will be added as a Still Image Layer.
- Right-click in Windows Explorer and choose Open With > Chaos Player.
Working with Layers
One of the most powerful features of Chaos Player is its layered timeline workflow. Every sequence or still image you will ever work with in Chaos Player, will be placed on a layer.
Working with layers is extremely easy. You can select a layer by clicking it. Shift + Click and Ctrl + Click are also supported to select multiple layers.
The layers can also be selected by Group ID. This can either be done by double-clicking on the layer number (the number on the left-hand side of every layer), or by selecting a layer and going to Edit > Select Group. Layers can be grouped together by selecting them and pressing Ctrl + Shift + G or by going to Edit > Assign New Group to Selection.
When you add files that have an alpha channel to your composition, Chaos Player will, by default, set the alpha mode for their layers to Premultiplied Alpha. If you want to change this value, you can right-click on the blending and alpha mode icon on the right of the layer in the Layer Stack and choose a mode from the menu. You can also have more advanced control over the blending and alpha modes through the Blending Panel in the Property Panel.
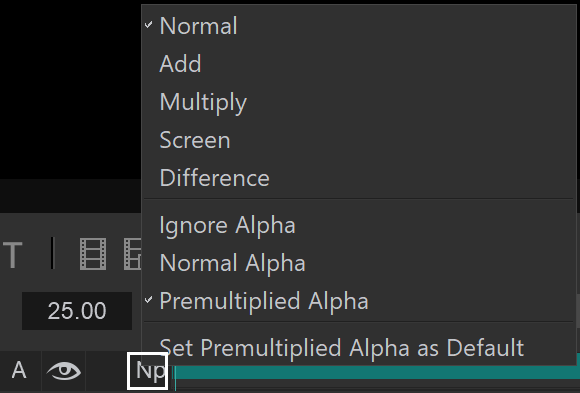 Blending and Alpha Mode icon options
 Blending Panel advanced options
Once you have added layers to your composition, you may want to arrange them. You can change how different layers stack over each other by dragging them in the layer stack. You can move the layers in the workspace by holding the Shift key and dragging with the left mouse button.
In Chaos Player, to play only a part of a layer, go to the start or to the end of a layer until the mouse becomes a two-sided arrow, and drag. This places a Layer In Point and a Layer Out Point. When the player starts playing the composition, it will only show the frames between those two points of the layer. When you drag the Out Point beyond the end of the layer, Chaos Player will add a loop. Double clicking on the In Point of a layer will move it to the first frame of the sequence, resetting it to 0. Double clicking on an Out Point will move it to the closest end of a loop.
 Setting the Layer In Point
Timeline and Work Area
The Timeline and Work Area determine the composition length in frames. You can change the length of the timeline by double clicking on the value to the right of it and entering a number, or by dragging the handles on its sides. You can also choose to make the timeline fit the length of the layers in the scene, or trim it to the length of the work area. Double clicking on the side handles of the timeline fits it to the length of the layers. The work area is a part of the timeline that serves as an indicator which parts of the different layers will be played. Anything outside of it will not be played. You can change the length of the work area by left clicking on the sides of it and dragging to scale it. When the work area is shorter than the timeline, you can shift it by dragging it with the middle mouse button. Double clicking on either edge of the timeline area will move it to the closest In or Out point of a layer.
While you are arranging the different parts of the composition, you might want to see how they fit together. You can preview your work with the Playback buttons. Chaos Player allows you to play the composition both forwards and backwards or go through it frame by frame.
Upon installation, the default frame rate at which Chaos Player works is 24 frames per second. You can see the current frame rate in the box to the left of the Timeline. There are several ways to change this value: First, right-click on the box and choose from a list of common values, or second, left-click on the box and drag, or finally, double click on the box and enter a different value.
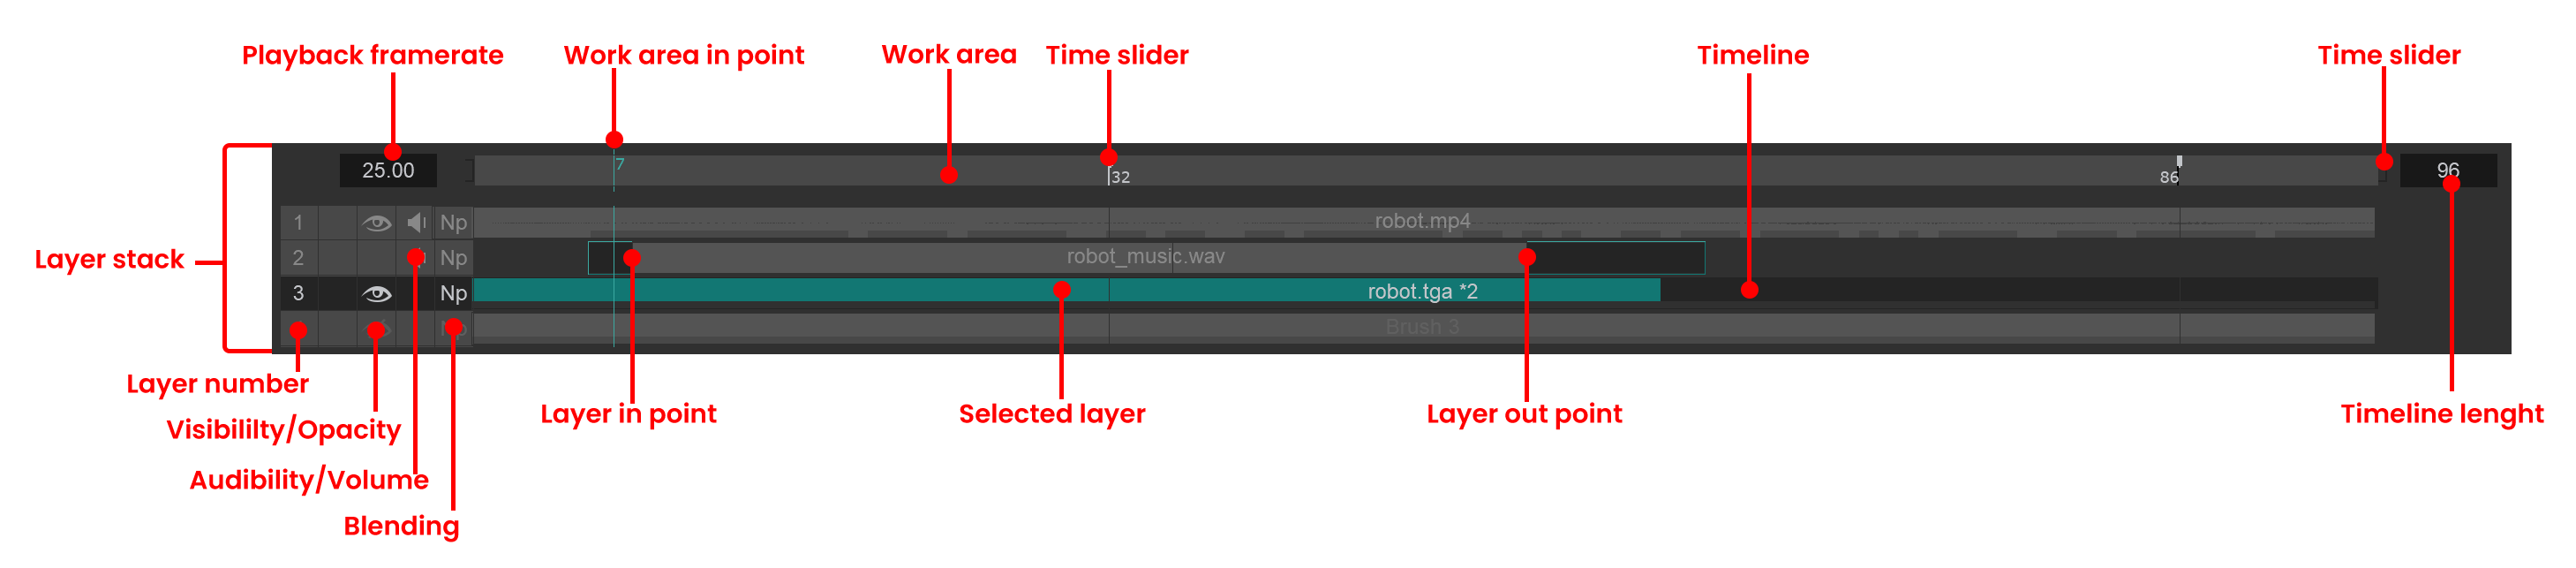
The layer stack holds all the layers in the composition and allows you to arrange them in the timeline. They are stacked vertically: when you play the composition, the top layers will be in front of the bottom ones. To arrange the layers, drag them with the left mouse button as desired.
Saving with Chaos Player
Chaos Player allows you to save your work in several different ways. You can save individual layers, as well as the result in the Mask Area as either a sequence of one of the five supported image files (.exr, .sgi, .tga, .png, .jpg or .tiff) or as one of the two supported video file formats (for example .mp4). Chaos Player also has its own file format in which you can save your whole composition.
- File > Save Compositions As… – Saves the whole composition as a .chpcomp file.
- File > Save Screen As… – Saves Chaos Player’s window as an image file.
- File > Save Frame As… – Saves the current frame of the current layer as an image file.
- File > Save Mask As Image... – Saves just the result in the mask area as an image file.
- File > Save Layer As… – Chaos Player saves the current layer as either a sequence or a video file. If the user is saving into MOV files and layer has audio it will be saved in the video.
- File > Save Mask As Sequence... – Chaos Player will save just the result in the mask area as either a sequence or a video file. If the user is saving in MOV file and there are layers containing audio in the composition the audio will also be saved.
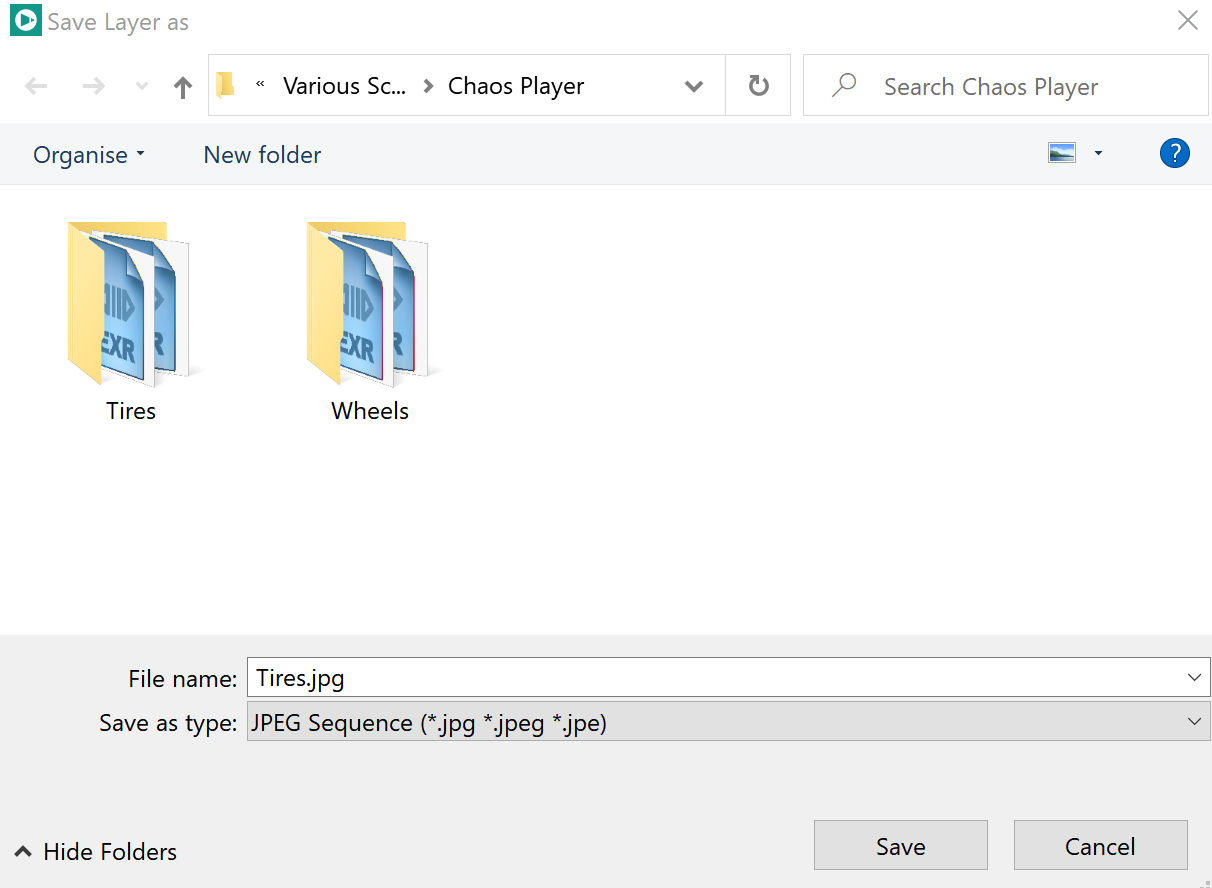
Save as JPEG Sequence
Export from Chaos Player
With the current version of Chaos Player you can export your composition to an After Effects script, a Nuke script and Chaos Player’s specific Chaos Player Command File (.chpcmd). This is done by going to File > Export Composition As which will bring up the Export Composition as dialog.

Export Composition dialog
The following three pictures show a composition in Chaos Player which has been exported to both After Effects and Nuke.
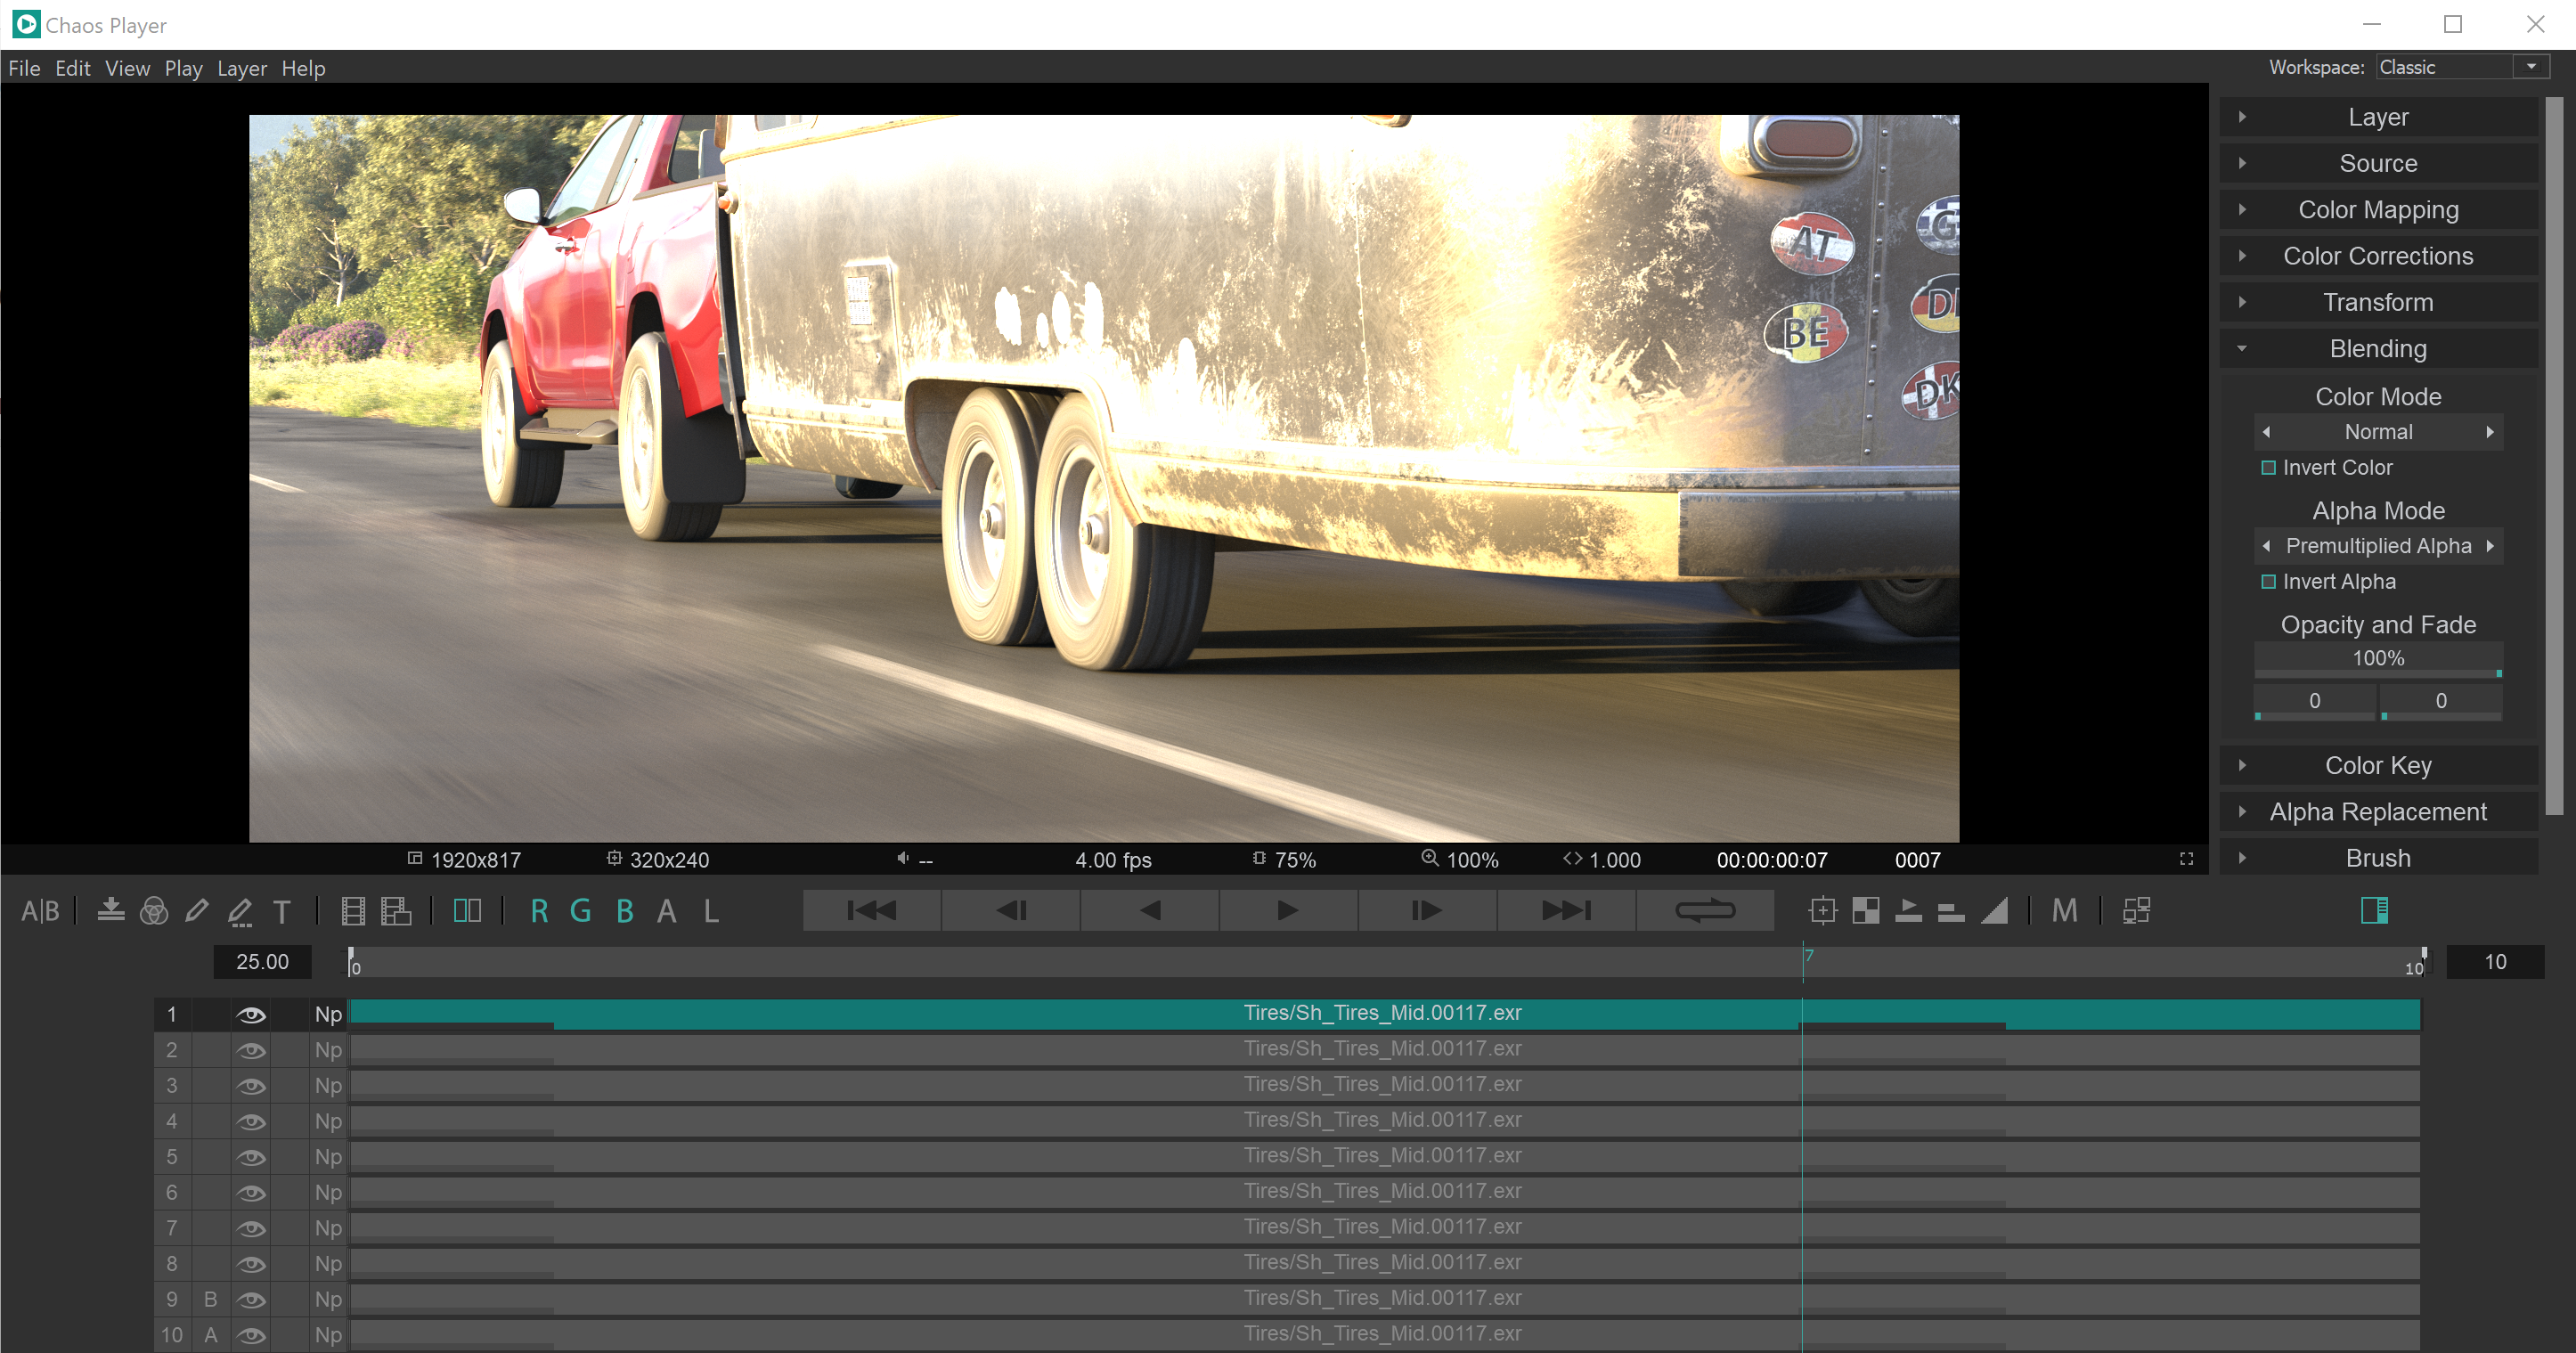
Composition in Chaos Player

Composition in After Effects
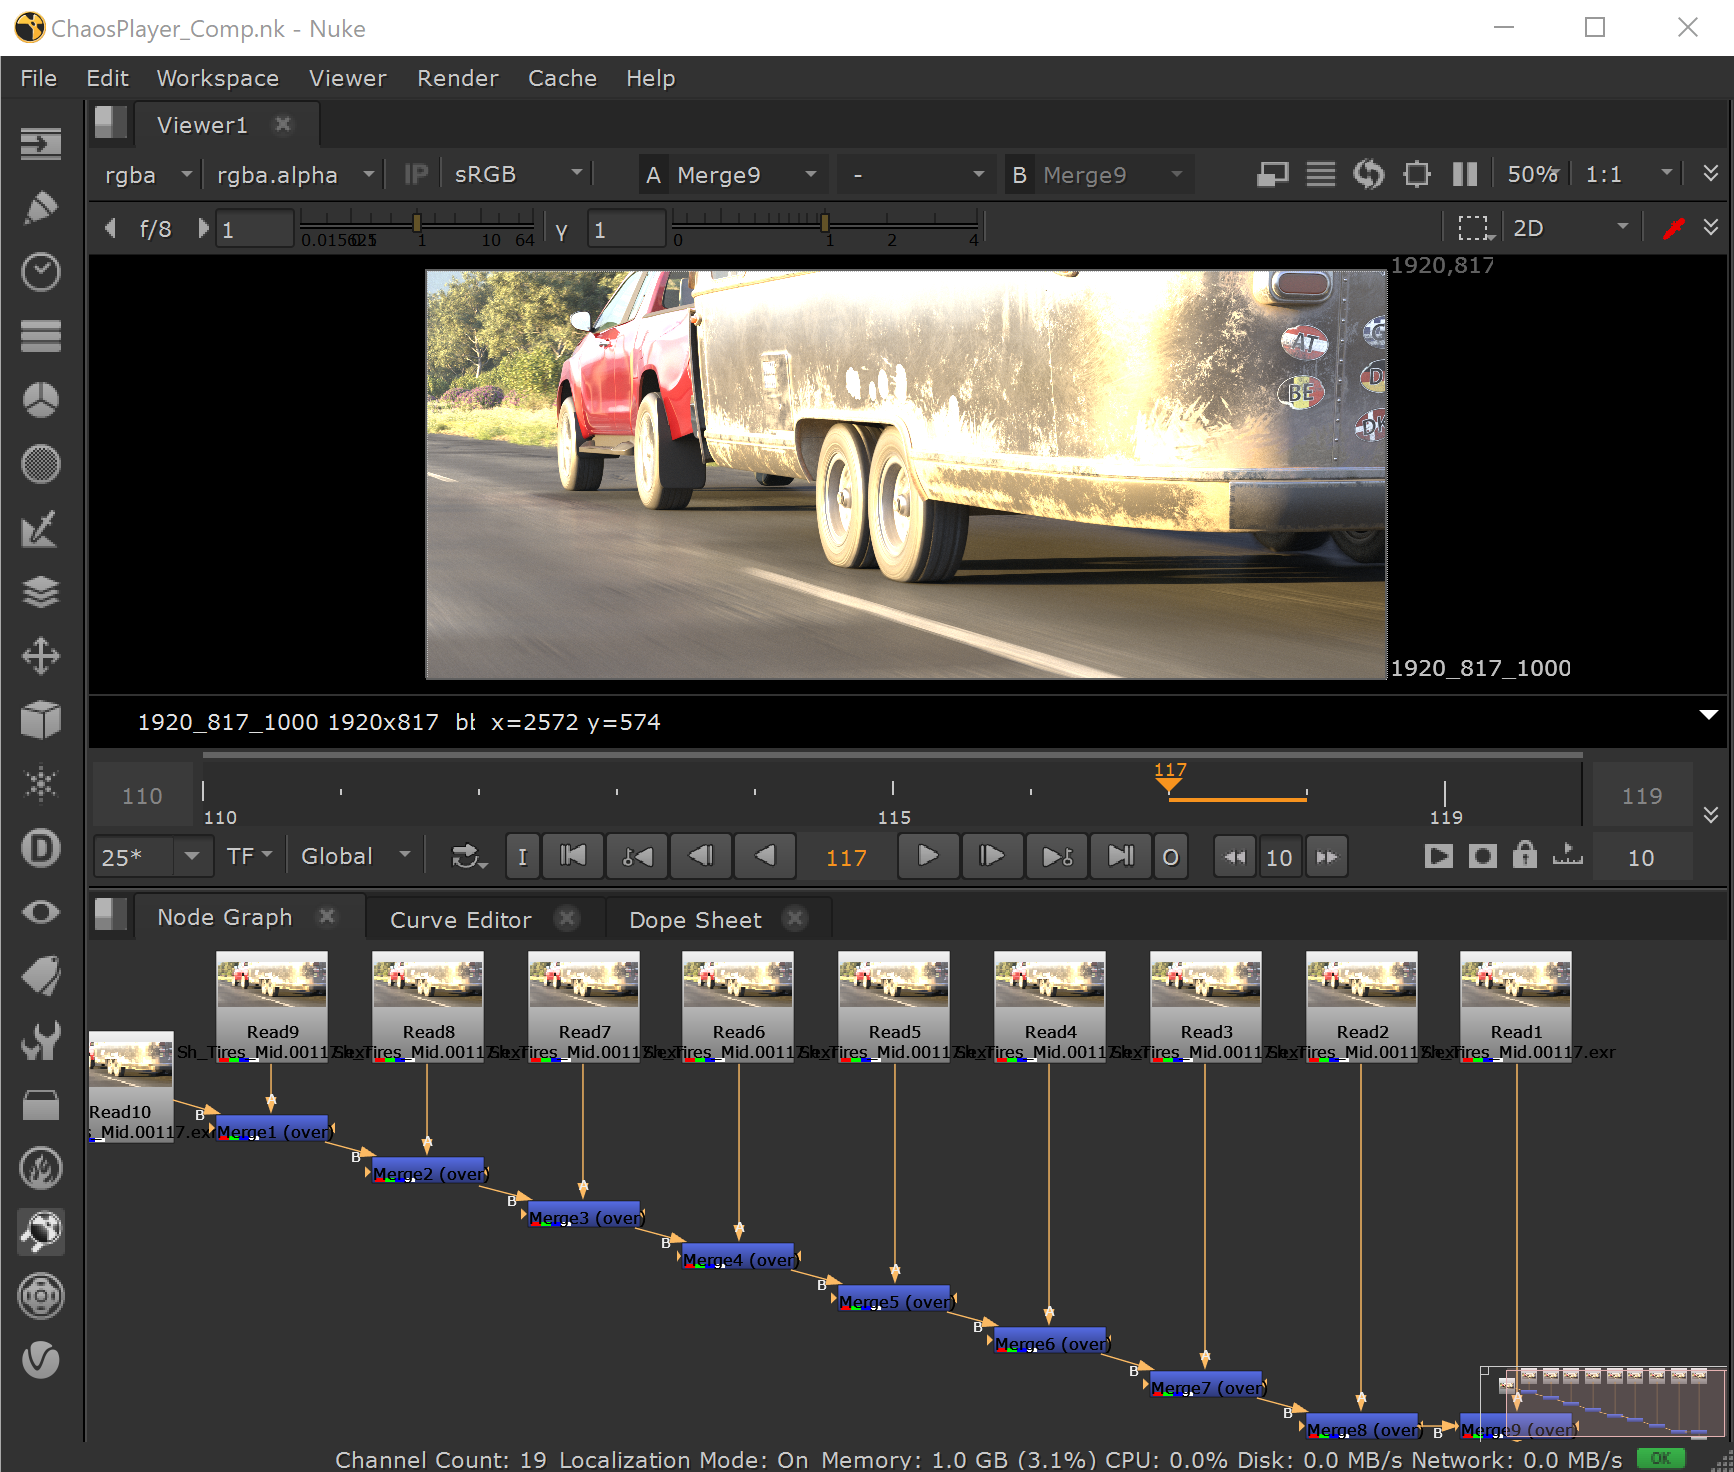
Composition in Nuke