
This page provides information on the Corona Lister in 3ds Max and how to use it.
Overview
The Corona Lister offers an easy way to manage Corona Lights, Corona Cameras, Corona Displacement, and Corona Proxies in your 3D scene. This feature saves your valuable time by optimizing your workflow efficiency.
Tutorial: Optimize your workflow with the Corona Listers in 3ds Max
Accessing the Corona Lister
To access the Corona Lister, go to the Chaos Corona toolbar and click on the Open Unified Corona Lister button.
||Chaos Corona toolbar|| > Open unified Corona Lister button


Corona Lister Interface
Key Features
When managing a scene with numerous lights, cameras, or proxies, you can hide columns that are not currently in use to declutter the display. Any hidden columns can be revealed from the context menu by selection of Unhide all option. Additionally, you can select which columns are visible by using the Column Visibility button.
- Columns that are hidden in the lister remain hidden even after closing and reopening 3ds Max.
- You have the ability to increase/decrease the scrolling speed in the Corona lister parameter spinbox with Ctrl/Alt. Specifically, holding Ctrl and dragging your mouse to make the spinbox parameter value change quickly. If you hold Alt and drag, the value changes slowly.
- The Toggle All row offers options that control the whole list.
- Selection toggle buttons are available for individual listed objects and also for the whole list to provide quick and easy selection as per user need.
- You can also choose to make any instance unique by right-clicking and selecting the "Make unique" option for Cameras, Lights, and Proxies.
- From Corona 12 onwards, you can reorder Corona Lister tabs by dragging them with the mouse, providing a customizable user experience.

The Interface Tabs
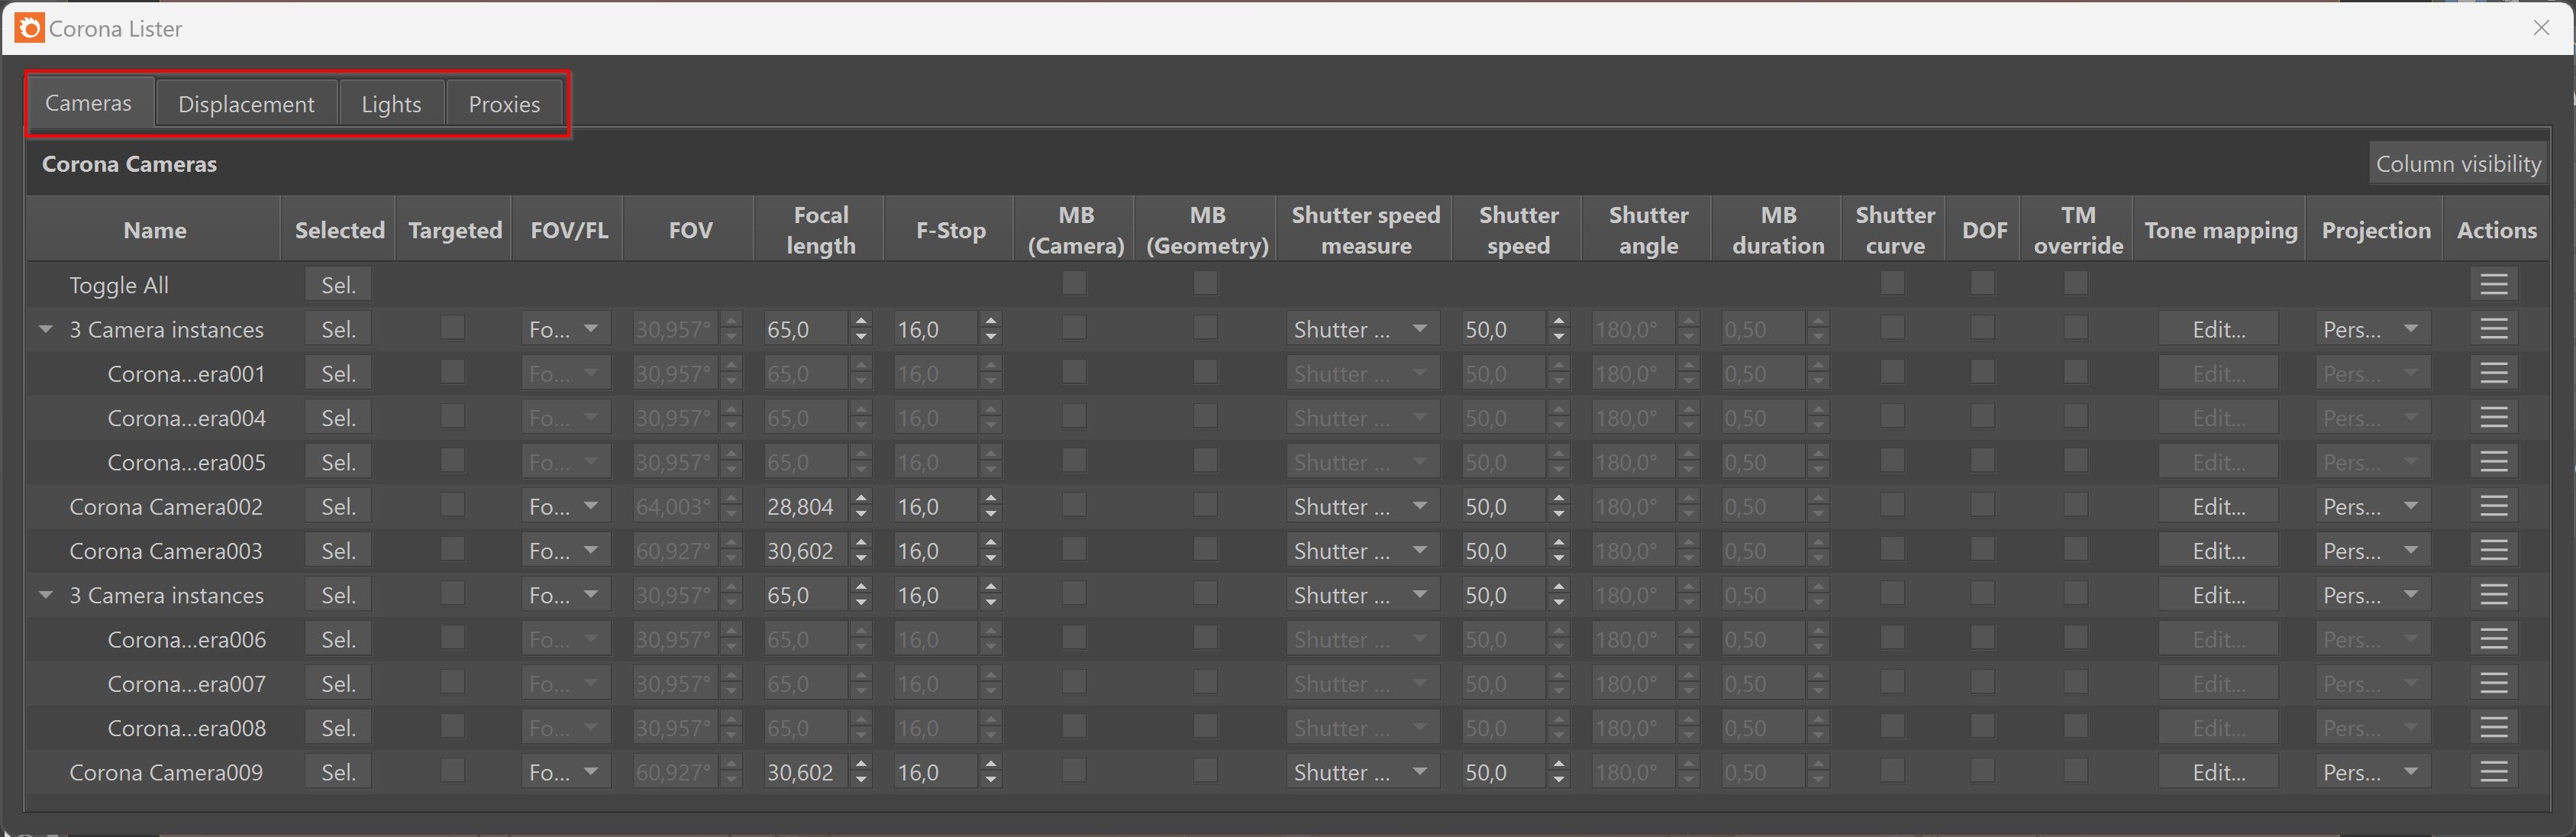
Corona Lister consists of four main tabs: Cameras, Displacement, Lights, and Proxies.
Streamlined Control with "Toggle All"
The Toggle All row offers buttons and checkboxes that make quick changes to all items visible in each list. Buttons and checkboxes vary depending on the active tab in the Corona Lister. For example, in the Lights tab, there is an additional On checkbox to enable or disable all Corona lights, and in the Proxies tab, there is an additional dropdown “Previz type” button to change the display for all proxies visible in the Corona lister. Similarly, you can use the button in the Actions column to apply changes to all visible items in the Corona lister.
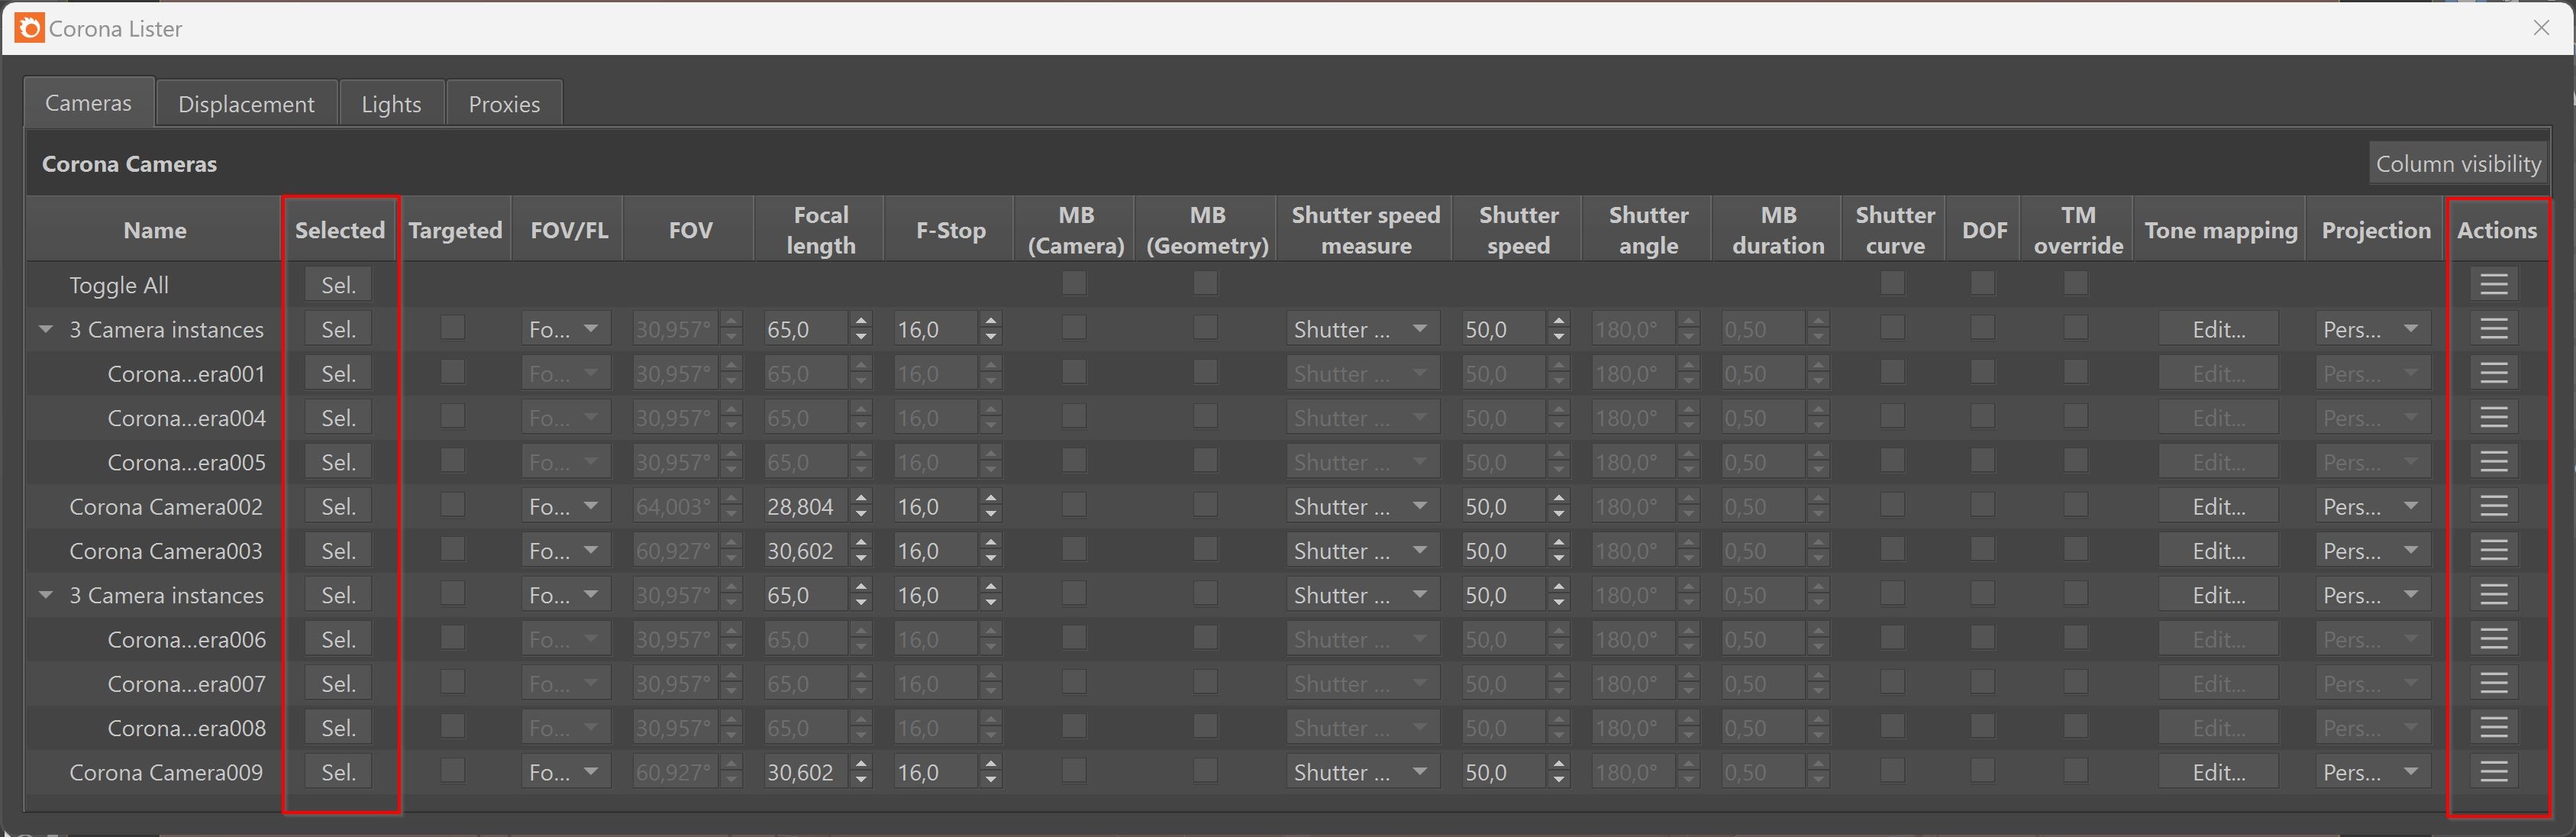
Selected and Actions Columns
The Selected column allows you to quickly select each item listed. The Actions column provides quick access to make changes to the items, with the options varying depending on the active tab.
Cameras Tab
Cameras Tab provides a list of all Corona Cameras available in the scene. Here, you can easily access and adjust various camera settings, including tone mapping and projection for each Corona Camera. The Instanced Corona Cameras are organized in a dropdown menu for easy selection. Any modifications made to a specific Corona Camera are automatically applied to all its instances. You can also choose to make any instance unique by right-clicking and selecting Make unique option.

Actions
Delete – This removes the selected camera.
- Make unique – To make the selected instanced Camera unique.
Use in current viewport – This sets the current viewport to the selected camera.
Render – This starts an interactive render from the selected camera.

Displacement Tab
The Displacement tab provides a list of and the ability to access and modify all the Corona Displacement settings from Corona Physical Material, Corona Legacy Material, and Corona Displacement Modifier present in the scene.
The Instanced Corona Displacement modifiers are grouped. Any changes you make to a particular Corona Displacement modifier are automatically applied to all its instances. You can select the assigned objects by right-clicking on a particular material or Corona Displacement modifier.

Actions
- Select all assigned – Selects all objects with the selected Corona displacement mod or material.
- Delete (only for Corona Displacement Mod) – Removes the selected Corona displacement mod.

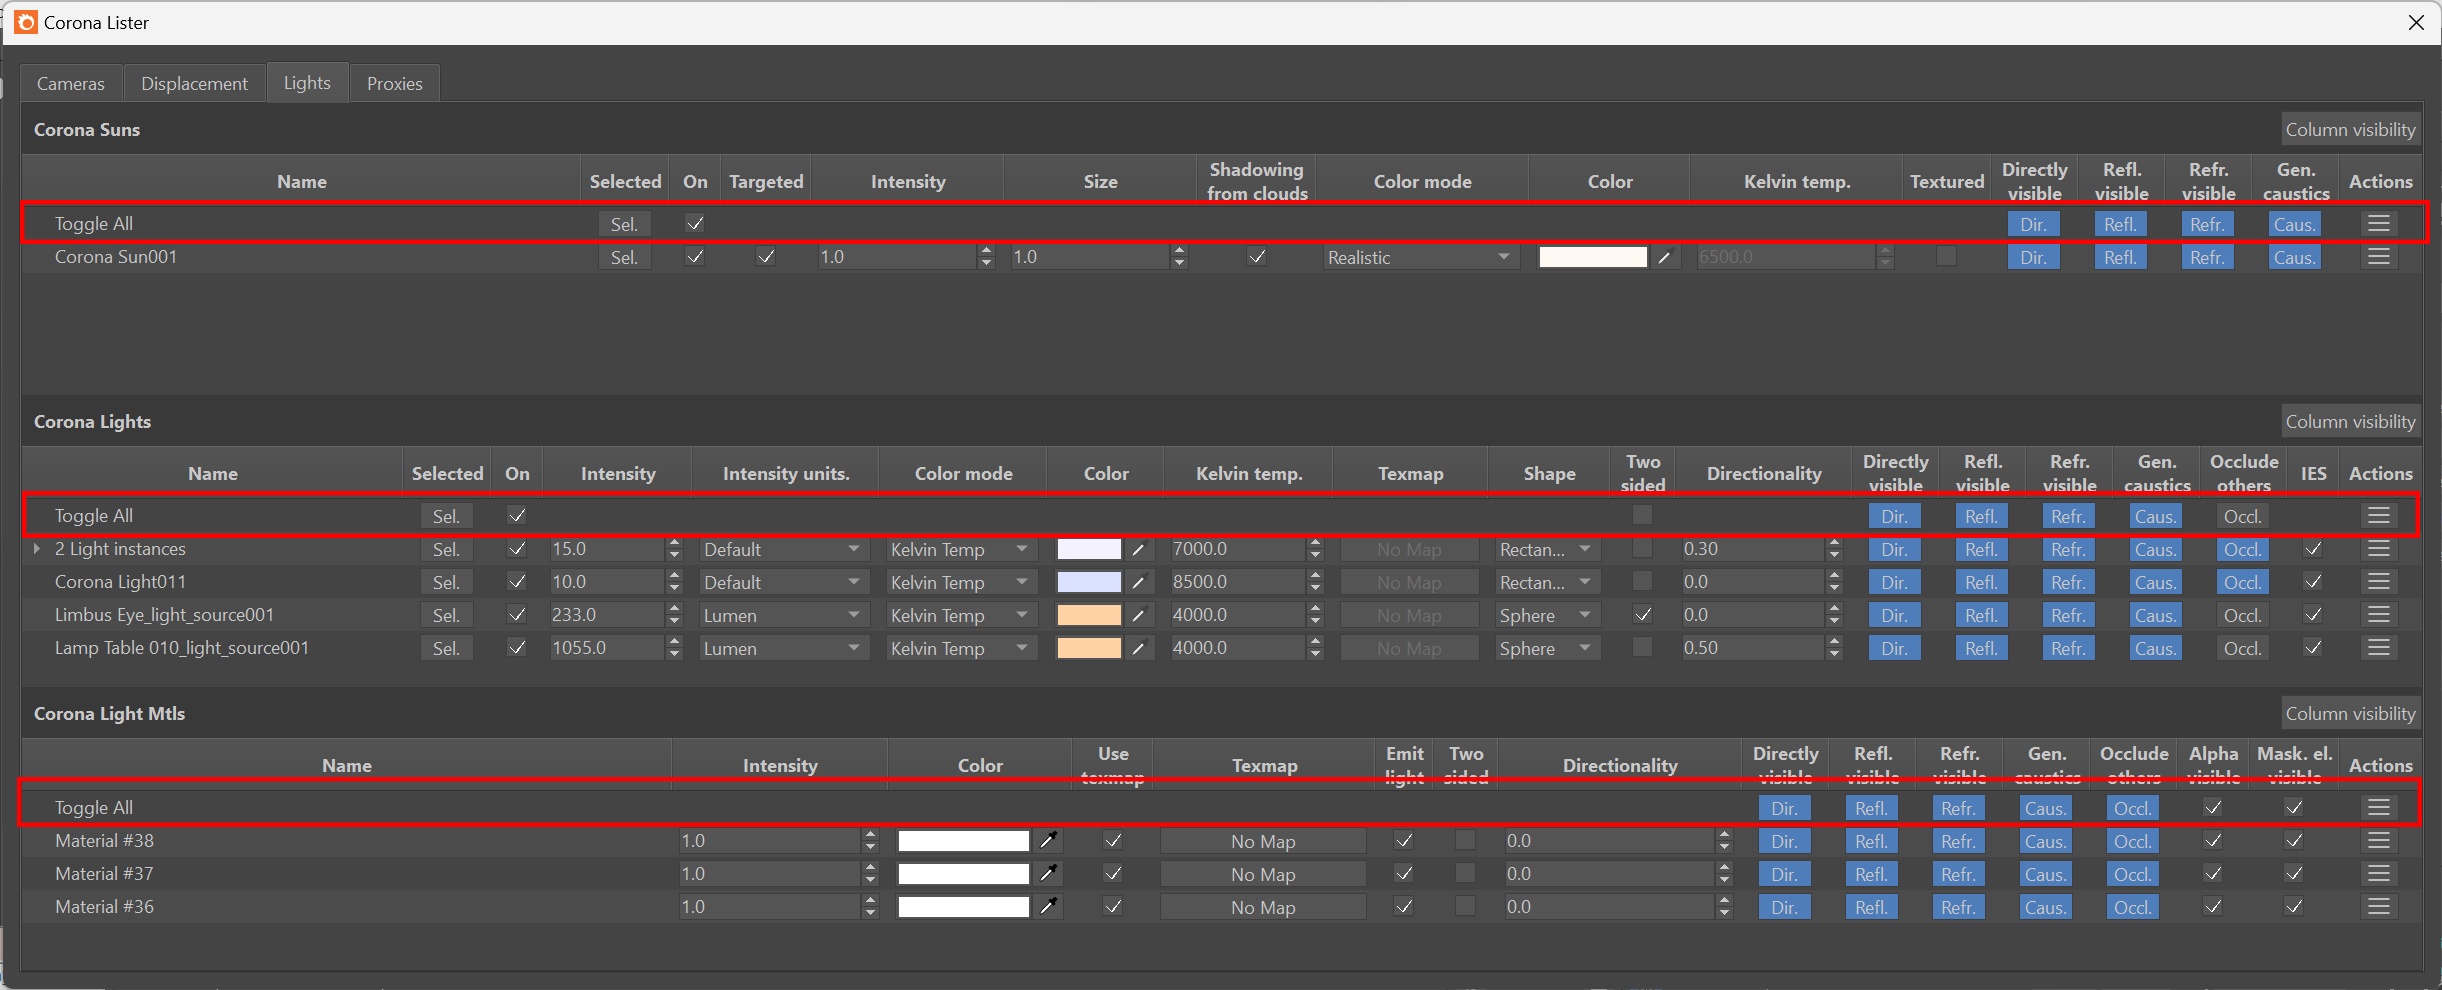
Lights Tab
The lights tab provides a list of all Corona Sun , Corona Lights, and Corona Light Materials present in the scene. The Instanced Corona Lights are easily organized and can be selected from a dropdown menu. Any modifications made to a specific Corona Light are automatically reflected across all its instances. With Corona 11 release, the Lister also allows you to add maps to Corona Lights, and Corona Light Materials.

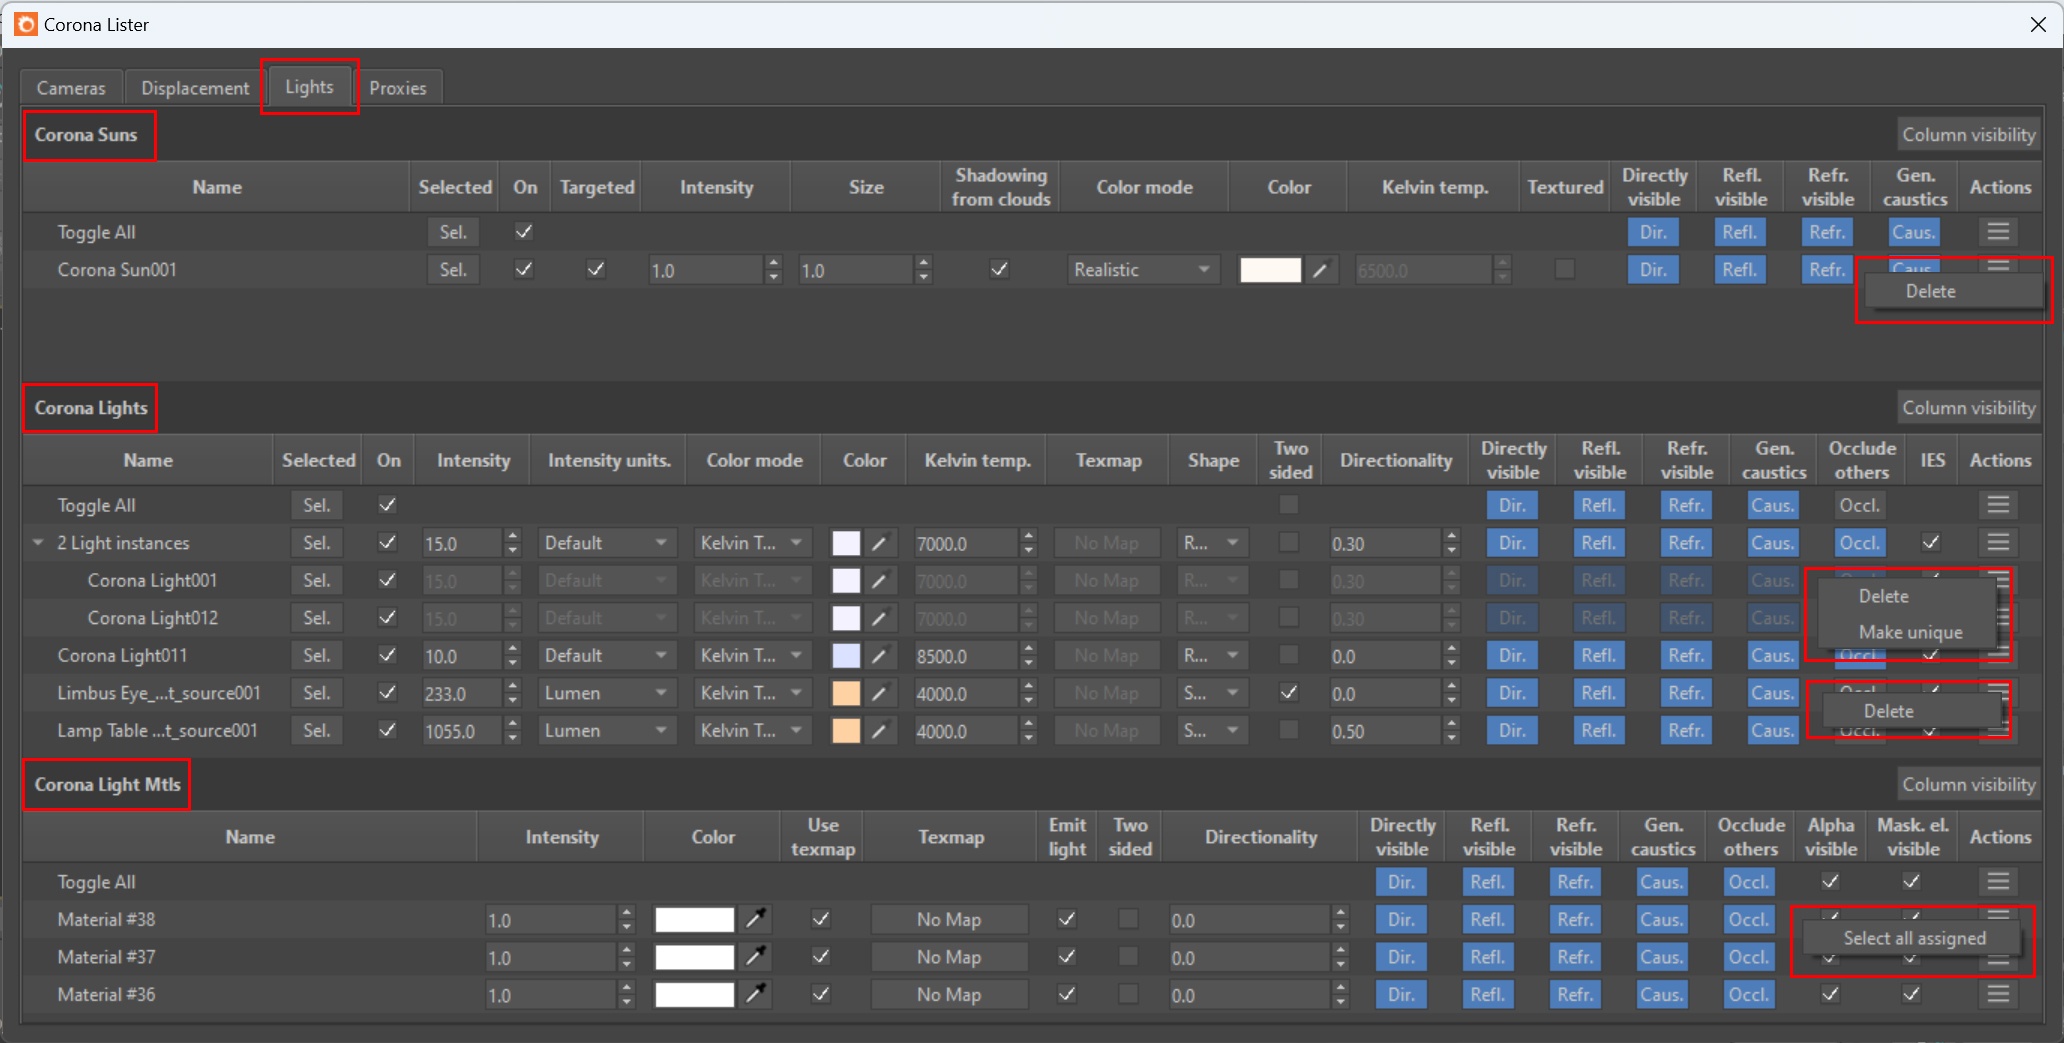
Actions
- Delete – Removes the selected Corona Sun or Light.
- Select all assigned (only for Corona Light Mtls) – Selects all objects with the selected Corona Light material.
- Make unique – To make the selected instanced light unique.
- Select all assigned (only for Corona Light Mtls) – Selects all objects on which the selected Corona Light material is applied.
Proxies Tab
The proxies tab provides a list of all Corona Proxies available in the scene. From here, you can access and adjust the major settings for each Corona Proxy. The Instanced Corona Proxies are easily grouped and can be selected from a dropdown menu. Any modifications made to a specific Corona Proxy will be automatically applied to all instances of that proxy.

Actions
- Delete – This removes the selected Corona proxy.
- Reload from disk – This updates the proxy from the proxy file in the scene.
- Batch convert – Converts all proxies in a chosen directory and its subdirectories to the latest Corona format (.cgeo). Original proxy files are preserved.
- Clone mesh – This will copy the mesh from the proxy file to a new object in the same location.
- Make unique – To make the selected instanced proxy unique.

Example Scene
In this example, we are using a simple interior scene with several Corona lights. The ceiling lights have been instanced and grouped together in the Corona Lister. To change and affect all the values of instanced lights, simply change the parameter of a single light. The side rectangle lights and floor lamp lights are listed separately in the Corona Lister because they are unique and must be adjusted individually to achieve the desired lighting effect. Also, there are multiple Corona Cameras in the scene which are listed in the Corona Lister. All settings can be quickly changed and managed using the Corona Lister.
Scene Setup

A scene with multiple Corona Lights.
Corona Lister - Lights Tab
The Corona Lister can be used to manage multiple Corona Lights in the scene.
Scene Setup

A scene with multiple Corona Cameras.

Corona Lister - Cameras Tab
The Corona Lister can be used to manage multiple Corona Cameras in the scene.