This page provides information on V-Ray Scene Files (.vrscene) and how to use them in workflows.
Overview
The .vrscene file format is a text file that can be exported from Maya and other platforms that use V-Ray. It contains all the information about the scene such as geometry, lights and shaders, and can be rendered with the V-Ray Standalone. Additionally, .vrscene files from any V-Ray platform can be imported into V-Ray for Maya. This functionality can transfer lights and entire assets with their textures and materials between V-Ray platforms, while animation is also included.
Note that exporting .vrscene files is not supported by V-Ray PLE for Maya.
V-Ray supports .vrscenes containing files with long names on Windows when the corresponding option is enabled in the system settings. Refer to the official Windows documentation for instructions on how to enable long file name support.
Want to follow along but don’t have a license?
Exporting V-Ray Scene Files
Exporting .vrscene files with Maya Batch
Export to a .vrscene file can also be made with Maya batch without the need to start Maya in a GUI session.
To do this, you will need to call Maya's Render executable with its full path, then passing the -r vray argument, which sets the renderer to V-Ray, the -exportFileName <filename> argument, which specifies where the resulting .vrscene file will be written and optionally the -noRender flag, which forces V-Ray to only to export to .vrscene without actually rendering.
Here's an example command line for Maya 2024 on Windows that loads a Maya scene file called myScene.ma located in C:\scenes and exports it to myVRScene.vrscene in the same directory without rendering.
Note that to call Render.exe always requires the full path to the executable. The same command line can be used on Linux or macOS by using the appropriate OS syntax and folder structure.
"C:\Program Files\Autodesk\Maya2024\bin\Render.exe" -r vray -exportFileName "C:\scenes\myVRScene.vrscene" -noRender "C:\scenes\myScene.ma"
To learn more about using V-Ray with Maya Batch, please visit the Batch Rendering page.
Exporting .vrscene files with Maya Export
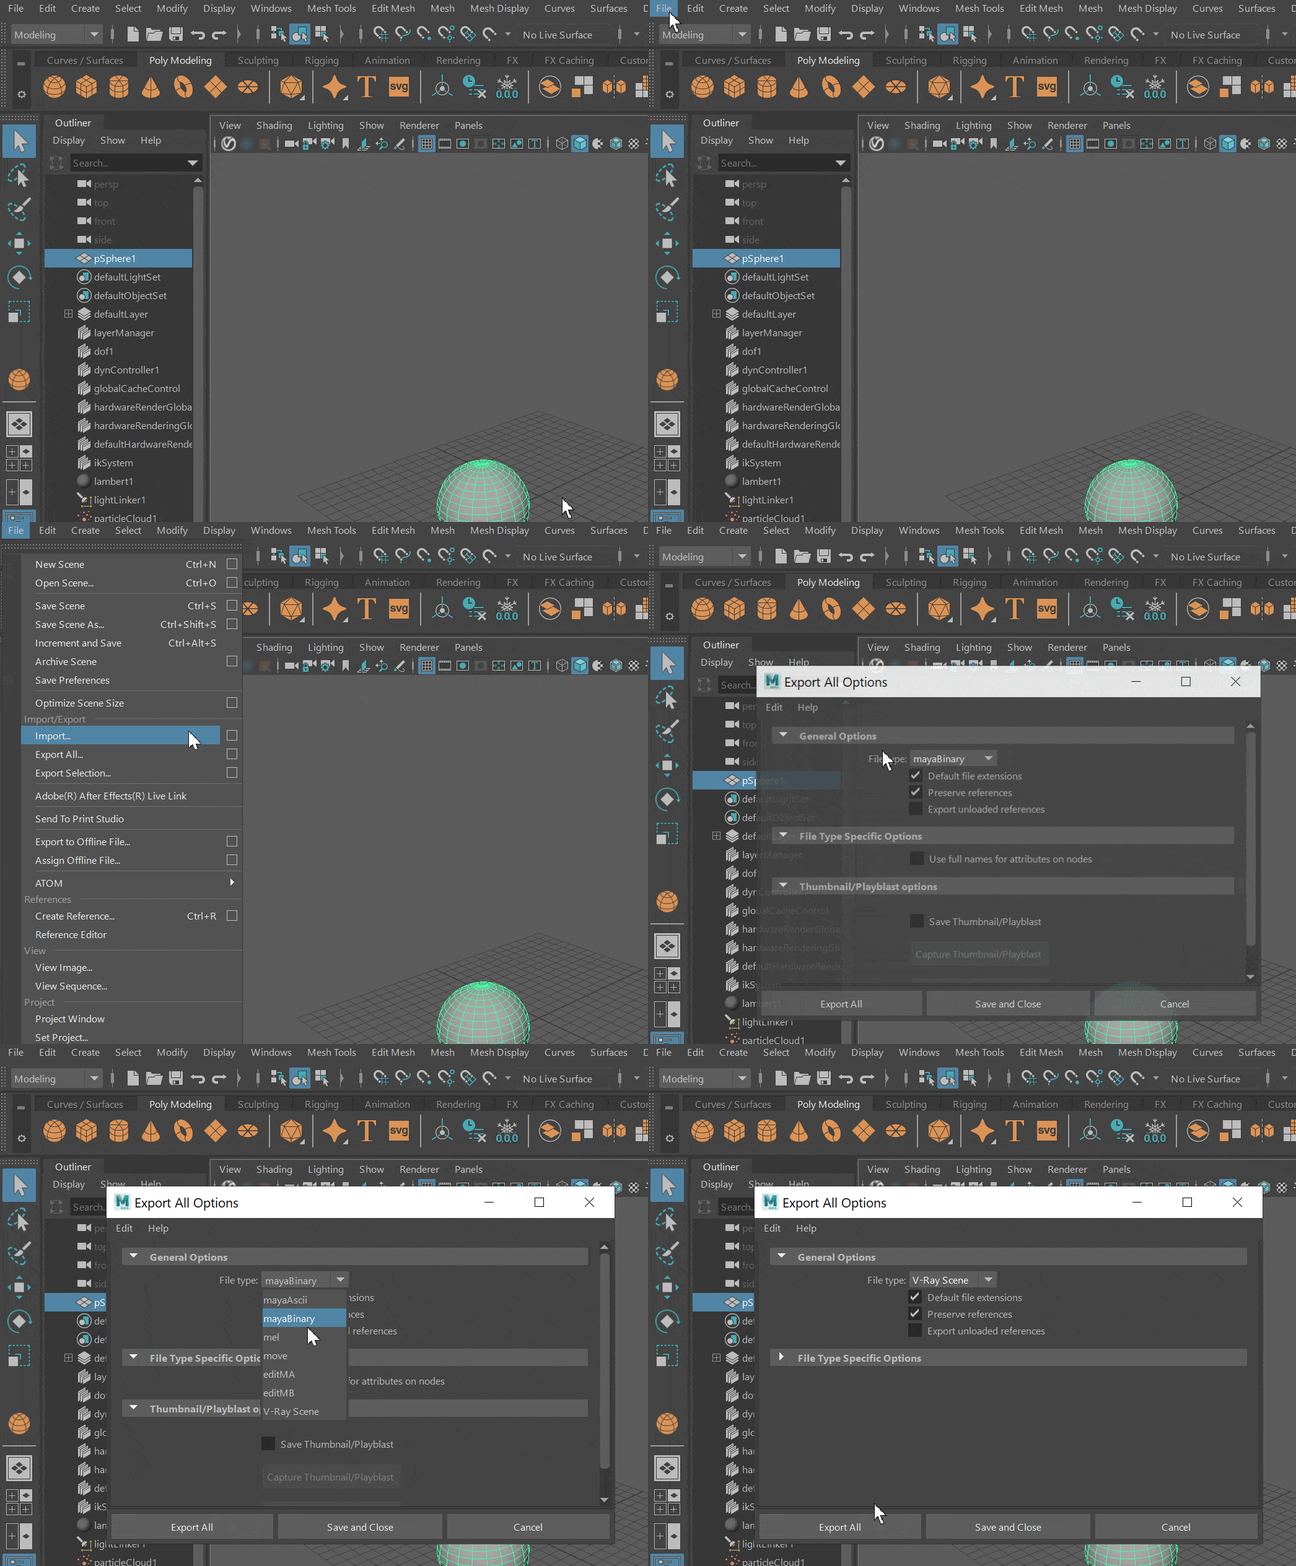
Alternatively, you can use Maya Export menu to export a .vrscene file. See the full UI path below. Export All/Export Selection buttons prompt you to specify file name and location.
The Export All option exports the entire scene as a .vrscene file. Export Selection option allows you to choose only geometry objects to export as a V-Ray Secene.
Importing and Managing V-Ray Scene Files
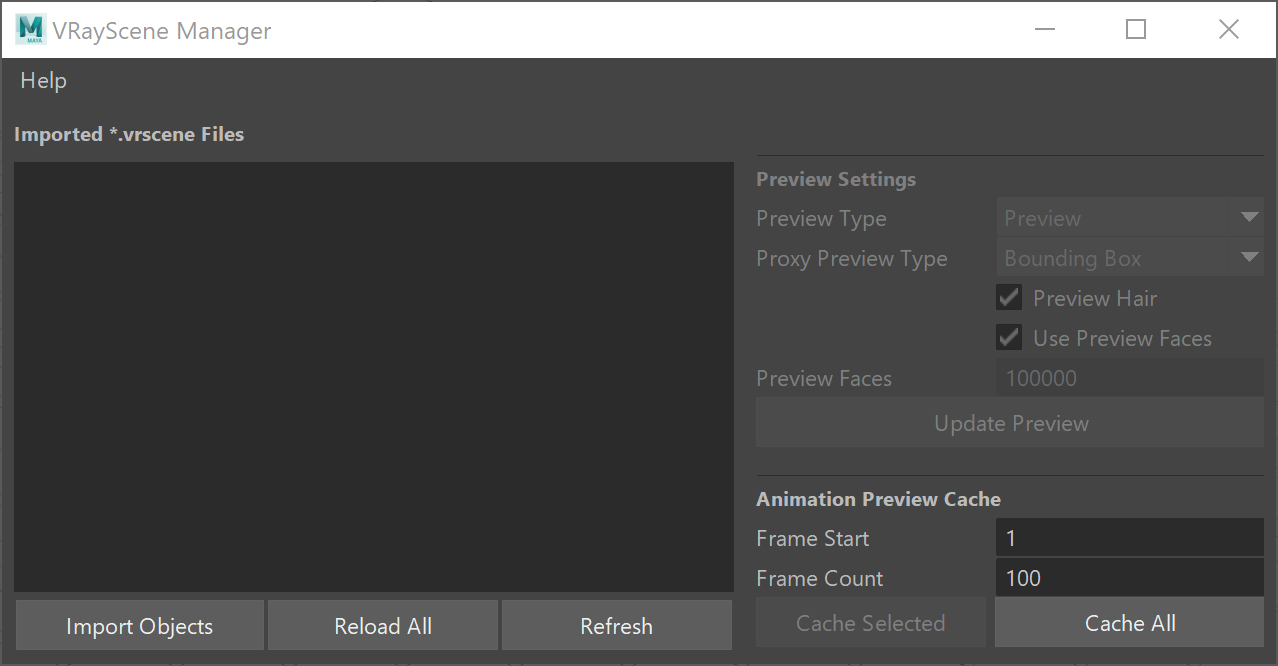
V-Ray Scene Files can be imported into Maya using the V-Ray Scene Manager. It can be launched from the V-Ray Shelf or by navigating to Create > V-Ray > VRayScene Manager.
The Scene Manager window allows users to easily import, preview, and instance .vrscene files in the current scene.
Note that cameras and render settings will not be imported from .vrscene files even if their data is present within the file itself.
V-Ray Scene Manager
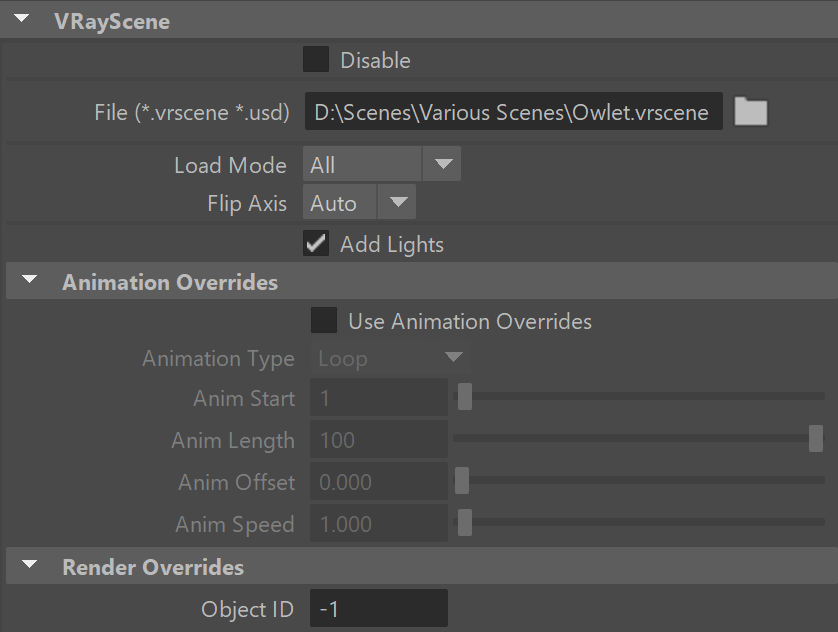
When the Scene Manager imports a .vrscene file, additional options and overrides become available in a V-Ray Scene Node. For additional information and a workflow example, see the Scene Manager and V-Ray Scene Node pages.
Importing Materials Only
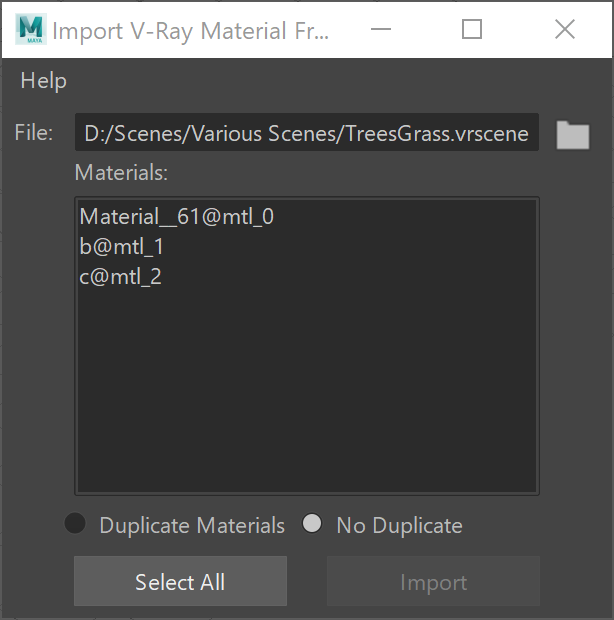
V-Ray for Maya provides a Import V-Ray Material from File for situations where only the materials in a .vrscene file need to be imported. This window can be launched from the V-Ray Shelf or navigating to Create > V-Ray > Import V-Ray material from file.
The V-Ray Material Importer window allows shows a list of materials within a loaded .vrscene file that can be imported into Maya. The materials will be reconstructed and their parameters can be changed after import. See the Import V-Ray Material from File page for details on importing materials from .vrscene files.
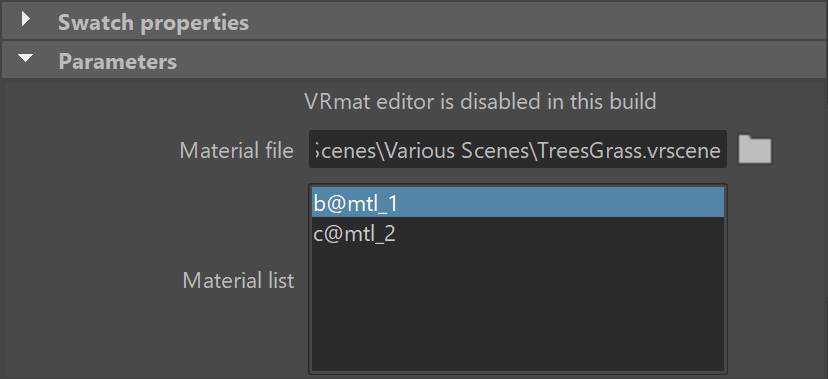
Additionally, the VRmat Material can be used to import materials from .vrscene files. This method doesn't allow for reconstructing and editing the materials. Instead, loading a .vrscene file to a VRmat material will display a selectable list of the materials contained in the file. For more information on workflows involving the transfer of V-Ray materials across multiple platforms, see the VRmat Material page.
Rendering with V-Ray Standalone
Another way to use .vrscene files is to render them with V-Ray Standalone, which is included with the installation of V-Ray for Maya.
Open a V-Ray Standalone command prompt from Start menu > All programs > Chaos > V-Ray Adv for Maya NNNN > V-Ray Standalone command prompt. This will run V-Ray Standalone and will display all the available options. For example, to render an already exported .vrscene file from frames 0 to 10, use this command:
vray -sceneFile="c:\temp\my_file.vrscene" -imgFile="c:\temp\render.png" -frames=1-10
Converting into Proxy Objects
V-Ray Scene Files are one of the many file types that can be converted into .vrmesh files for rendering through V-Ray Proxy Objects. This is achieved through the Convert Poly to V-Ray Proxy command-line tool that comes with V-Ray for Maya. This tool has several features specific to .vrscene files. For more information, see the Convert Poly to V-Ray Proxy page.
You can use the tool to see a list of the geometry objects (nodes) in the vrscene file by using the -vrsceneList flag ( ply2vrmesh <inputFile> -vrsceneList ). Here's an example:
ply2vrmesh C:\scenes\myScene.vrscene -vrsceneList
Choose the object to convert by copying its name and pasting it as an argument to the -vrsceneNodeName flag as shown in the example below:
ply2vrmesh C:\scenes\myScene.vrscene -vrsceneNodeName object001@node_2
This converts the selected object to a .vrmesh file that you can then load with a VRayProxy back into Maya or any other V-Ray platform.


