This page provides information about the Contact Sheet feature.
Overview
The Contact Sheet allows different versions of the same shot, or different image layers (render elements) to be organized in a sheet for review and evaluation. This is useful when doing color corrections to one or multiple layers.
Enable from the Toolbar.
Selection
- If one or no layers are selected, Contact Sheet displays all of the layers.
- The selection and the order of the tracks in the timeline determines their order in the sheet. You can move the layers to instantly see a change in their order in the sheet.
- Brush and Text layers are not added.

Settings
These options are accessed through right clicking on the ![]() button.
button.
Columns/Rows – Allows specifying the sheet size. Auto suggests a number of columns and rows that fits all layers currently in the sheet.
Resolution – Specifies the resolution of the sheet in pixels. Auto suggests a resolution based on layer scaling (if specified in the Transform properties) and if Margins are used. This is useful for putting a few versions of a shot side by side and exporting them in a sheet in full resolution.
Margin – Specifies the margins around each cell in pixels.
Show labels – When enabled each cell of the sheet is labeled. The label is the layer or channel name.
Label background – When enabled, adds a solid background behind the Label. Useful for white images, as the label is in a white font.
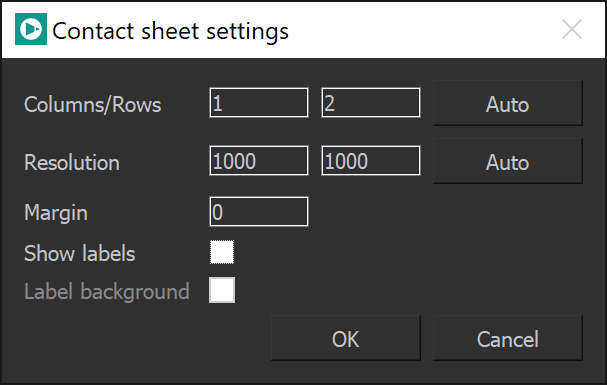
Image Channels Workflow
- Import your .vrimg or .exr file. In this tutorial we are using an .exr image with render elements in it.
- Open the Layer menu and select Expand into Layers to expand all the layers contained in the file.

3. Select the layers you wish to preview. In this case all layers are selected using Ctlr + A.
4. Right click on the ![]() button. This opens the Contact Sheet settings.
button. This opens the Contact Sheet settings.
5. Select Auto for both the Columns/Rows and Resolution options. This way Chaos Player automatically calculates these values for an optimal result. Feel free to set your own values, if necessary.
6. Enable Labels and Label background. The labels are not mandatory for the sheet to display, they are for ease of use.
You can now view the Contact Sheet with all the render elements from the image.

Bonus TIP: Moving layers instantly reflects in the Contact Sheet.

Command Flags
Тhe commands in this section can be used from the command line. However, their primary purpose is to be bound to keys using Chaos Player.keydefs.txt (where they are not preceded by --.). These and more commands you can find on the Command Reference page.
| Command | Description |
|---|---|
| --set_sheet_enabled=0 / 1 | Disables or enables the Contact Sheet |
| --toggle_sheet | Toggles the Contact Sheet |
--sheet_options=2,1,1920,1080,0,1,1 | Creates a Contact Sheet with 2 columns and 1 row (i.e. two layers side by side), with a 1920x1080 resolution, without margins and with labels with background |